How to Enable NTFS Write on Mac: A Comprehensive Guide
![]() Ricky Lin updated on September 10, 2024
Ricky Lin updated on September 10, 2024
Quick Navigation:
- About NTFS and macOS Limitations
- How to Enable Write for NTFS Drives on Mac?
- Method 1: Using Apple's Experimental NTFS Write Support [Not Recommended]
- Method 2: Using Third-Party NTFS Drivers [Safe and 100% Working]
- Method 3: Formatting the Drive to exFAT
- Method 4: Using a Virtual Machine or Dual Boot
- Conclusion
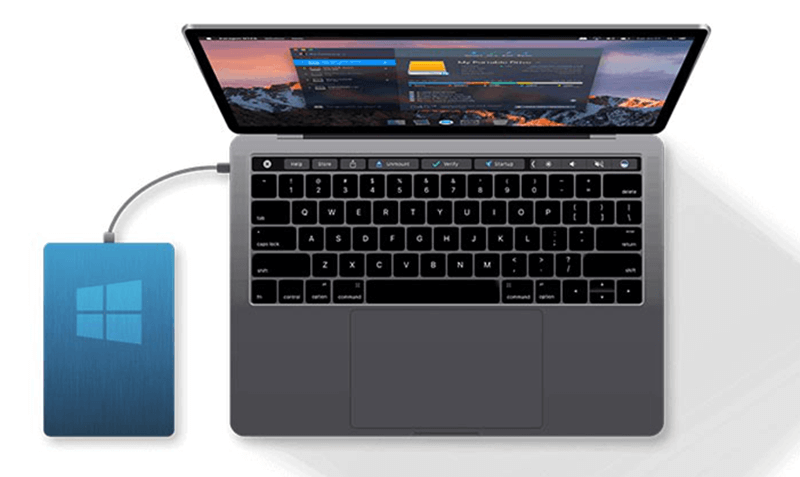
When it comes to file system compatibility, macOS and Windows have long been at odds, particularly with NTFS (New Technology File System), the default file system for Windows. While macOS provides full read support for NTFS drives, it does not offer native write support, which can be frustrating for users who frequently switch between operating systems.
This limitation means that while you can read files from an NTFS-formatted drive on a Mac, you cannot edit, delete, or create new files on that drive without additional steps. Fortunately, there are several ways to enable NTFS write on a Mac, ranging from built-in macOS tools to third-party software solutions. This article will explore these methods, providing a step-by-step guide to help you gain full access to your NTFS drives on macOS.
About NTFS and macOS Limitations
It is important to comprehend the reasons behind macOS's inherent inability to enable writing to NTFS disks before moving into the remedies. NTFS is a proprietary file system developed by Microsoft, primarily for use on Windows operating systems. While Microsoft has not provided native write support for NTFS on macOS, Apple has implemented read-only support. This decision likely stems from a combination of licensing issues, technical challenges, and the fact that Apple promotes its own file systems, such as HFS+ (Mac OS Extended) and APFS (Apple File System).
Despite these limitations, many users need to interact with NTFS drives, especially in environments where both macOS and Windows are used. This necessity has led to the development of several methods to enable NTFS write support on Macs.
How to Enable Write for NTFS Drives on Mac?
Method 1: Using Apple's Experimental NTFS Write Support [Not Recommended]
Step 1. Understanding the Risks.
Apple built experimental NTFS write functionality into macOS, however because of possible stability and data corruption concerns, it is turned off by default. It is not recommended to use this feature for critical data, as it is not fully supported or tested by Apple. However, if you need a quick solution and are willing to accept the risks, you can enable it through the Terminal.
Step 2. Identifying the NTFS Drive.
Attach your NTFS drive to your Mac first. Locate the Utilities folder and open the Terminal application. You can access this folder in the Applications folder. Type the following command to list all the drives connected to your Mac:
diskutil list
Locate your NTFS drive in the list, noting its identifier (e.g., disk2s1). This identifier is crucial for the next step.
Step 3. Enabling NTFS Write Support.
Now, enter the following command in the Terminal, replacing disk2s1 with your actual disk identifier:
sudo nano /etc/fstab
This command opens the fstab file, which is used to define how drives are mounted. Copy the below code:
LABEL=NAME none ntfs rw,auto,nobrowse
Replace NAME with the name of your NTFS drive. Save and exit by pressing Control + O to save the changes, then Control + X to exit the editor. Finally, unmount and remount your NTFS drive using the following command:
sudo diskutil unmount /dev/disk2s1
sudo diskutil mount /dev/disk2s1
Your NTFS drive should now have write access. Keep in mind that this method is experimental and could lead to data corruption.
Method 2: Using Third-Party NTFS Drivers [Safe and 100% Working]
For those who require a more reliable solution, third-party NTFS drivers offer full read and write support for NTFS drives on macOS. These drivers are designed to bridge the gap between macOS and NTFS, providing seamless file operations.
DoYourData NTFS for Mac is an 100% safe, powerful and easy-to-use NTFS for Mac tool. It can quickly enable NTFS write on Mac.
Step 1. Download and install DoYourData NTFS for Mac on your Mac. Make sure the NTFS drive has been connected to your Mac.
Step 2. Open DoYourData NTFS for Mac, under NTFS disk, select the NTFS drive, click on Enable Writable button. Then you can read-write any NTFS drive on Mac without any limitation.

DoYourData NTFS for Mac also can help you mount disk on Mac, fix damaged drive on Mac, format a drive to APFS, NTFS, Mac OS Extended, ExFAT, FAT32 on Mac.
More NTFS for Mac Tools:
Option 1: Paragon NTFS for Mac
Paragon NTFS for Mac is one of the most popular and widely recommended NTFS drivers. It offers fast and stable NTFS write support and is easy to install and use.
Features:
- Full read/write access to NTFS drives.
- High-speed file transfer.
- Automatic mounting of NTFS drives.
- Compatible with the latest macOS versions.
Installation Steps:
- Download the Paragon NTFS for Mac installer by going to the Paragon Software website. To finish the installation, launch the installer and adhere to the prompts displayed on the screen.
- Reboot Your Mac: After installation, reboot your Mac to enable the NTFS write functionality.
- Mount and Use: Once your Mac restarts, connect your NTFS drive. It will be automatically mounted with full read/write access. You can now transfer files to and from the drive just like you would with any other drive.
Paragon NTFS for Mac is a paid solution, but it comes with a free trial, allowing you to test its functionality before committing to a purchase.
Option 2: Tuxera NTFS for Mac
Tuxera NTFS for Mac is another reliable third-party driver that offers full NTFS write support. It is known for its stability and compatibility with various macOS versions.
Features:
- Full NTFS read/write access.
- Optimized for performance and reliability.
- Supports advanced features like NTFS compression and encryption.
- Regular updates to ensure compatibility with the latest macOS versions.
Installation Steps:
- Get the installer by going to the Tuxera website. To install the driver on your Mac, launch the installer and adhere to the instructions.
- Reboot Your Mac: Like Paragon, a reboot is required after installation to activate the NTFS write capabilities.
- Access Your NTFS Drive: After rebooting, connect your NTFS drive to your Mac. It should now be fully accessible with read/write permissions.
Tuxera NTFS for Mac also offers a free trial, so you can evaluate its performance before purchasing a license.
Option 3: Mounty for NTFS
Mounty for NTFS is a free and lightweight alternative for enabling NTFS write support on macOS. It uses Apple's built-in NTFS driver but automates the mounting process with write support.
Features:
- Free to use.
- Simple and intuitive interface.
- Lightweight and fast.
Installation Steps:
- Visit the Mounty for NTFS website and download the application. Install it by dragging the Mounty icon to your Applications folder.
- Mount the NTFS Drive: Connect your NTFS drive and open Mounty. The application will detect the drive and remount it with write support.
- Use the Drive: You can now access your NTFS drive with full write capabilities. However, since Mounty relies on Apple's NTFS implementation, it may not be as stable as paid solutions.
Mounty for NTFS is a great option for users looking for a free and easy-to-use solution, but it may not offer the same level of reliability as Paragon or Tuxera.
Method 3: Formatting the Drive to exFAT
If you frequently need to transfer files between macOS and Windows and don't want to deal with third-party software or Terminal commands, you can consider formatting the drive to exFAT. The exFAT file system is natively supported by both macOS and Windows, allowing full read and write access on both platforms.
Steps to Format a Drive to exFAT:
- Backup Your Data: Formatting a drive will erase all data on it. Ensure that you have a backup of any important files.
- Open Disk Utility:
- Go to the Applications
- Then to Utilities
- Open the Disk Utility
- Select the Drive:
- In Disk Utility, select the drive you want to format from the sidebar.
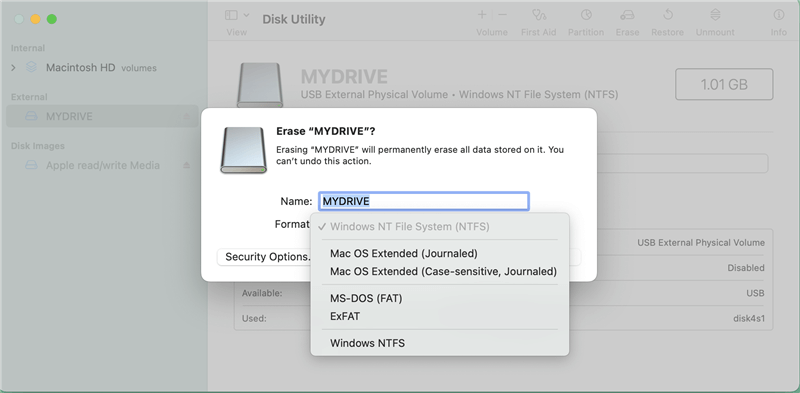
- Erase the Drive:
- Click the "Erase" button at the top of the Disk Utility window.
- Select ExFAT:
- In the format dropdown menu, select "ExFAT".
- Optionally, you can name the drive.
- Erase and Format:
- Click "Erase" to format the drive to ExFAT. Once the process is complete, you can use the drive with full read and write access on both macOS and Windows.
Pros and Cons of Formatting to ExFAT:
- Pros:
- Seamless compatibility with both macOS and Windows.
- No need for third-party software or complex commands.
- Cons:
- Formatting erases all data on the drive. (You can use data recovery software to recover lost data from a formatted drive on Mac.)
- Some advanced NTFS features, like file permissions and encryption, are not supported by exFAT.
Method 4: Using a Virtual Machine or Dual Boot
Another approach to access NTFS drives with full write support on a Mac is by using a virtual machine (VM) or setting up a dual-boot system with Boot Camp.
Option 1: Virtual Machine
A virtual machine allows you to run a Windows environment within macOS. This method requires virtualization software like Parallels Desktop, VMware Fusion, or VirtualBox.
Steps:
- Install Virtualization Software: Download and install your preferred virtualization software.
- Create a Windows VM: Set up a new virtual machine with a Windows operating system. You'll need a valid Windows license for this.
- Access NTFS Drives: Once the VM is running, connect your NTFS drive to the Mac. The VM should recognize it, and you can interact with the drive within the Windows environment as if you were using a Windows PC.
Option 2: Dual Boot with Boot Camp
With Boot Camp, you may install Windows on a different partition of your Mac's hard disk, giving you full functionality access to NTFS drives whenever you need to boot into Windows.
Steps:
- Set Up Boot Camp: Use the Boot Camp Assistant to create a Windows partition and install Windows on it.
- Boot into Windows: Mac restarted; while holding down the Option key during startup to choose the Windows partition.
- Access NTFS Drives: Once in Windows, your NTFS drives will be fully accessible with both read and write capabilities.
Both virtual machines and Boot Camp provide full NTFS write support by running Windows natively or in a virtualized environment. However, they require significant resources and may not be the most convenient solutions for everyday tasks.
Conclusion
Although writing to NTFS storage is not supported by macOS by default, there are a few ways to make this feature workable. Whether you choose to use Apple's experimental NTFS support, a third-party NTFS driver, reformatting your drive, or setting up a virtual machine, each method has its own advantages and trade-offs.
Third-party drivers like DoYourData NTFS for Mac and Tuxera offer the most reliable and user-friendly solutions, albeit at a cost. Free alternatives like Mounty for NTFS or reformatting your drive to ExFAT/FAT32 are also viable options, depending on your specific needs. For users who require frequent access to NTFS drives and prefer not to install additional software, setting up a virtual machine or dual-booting with Boot Camp may be the best solution.
Ultimately, the best method for enabling NTFS write support on your Mac will depend on your usage patterns, technical comfort level, and whether you're willing to invest in third-party software. Each approach has its place, and by understanding the pros and cons of each, you can choose the most appropriate solution for your needs.
DoYourData NTFS for Mac
DoYourData NTFS for Mac is a safe, powerful and easy-to-use NTFS for Mac tool. It allows macOS to read & write files on NTFS drives without any limitation. It is also a comprehensive disk management tool for Mac to mount/unmount disk, format disk, repair disk, read-write disk...on Mac.
Written & Updated by Ricky Lin
Ricky Lin is an senior editor of DoYourData who lives in Adelaide, Australia. He is interested in writing technology articles related with data recovery, computer issue fixes, disk clone, iPhone data recovery, video edit, Mac optimization, etc. He Joined DoYourData in 2019 and have written 500+ articles to help both Windows users and Mac users to solve data or computer problems.
Hot Articles
- Fix External Hard Drive Read-Only Issue on Mac
- How to Wipe Trash Bin on Mac?
- Recover Lost Data from WD (Western Digital) External Hard Drive on Mac
- Fix External Hard Drive Not Showing Up on Mac
- How to Wipe SD Card on Mac?
- Mount and Unmount the External Hard Drive on the Mac
- Run First Aid on Mac to Repair Disks
- Fix Can't Save Files to An External Hard Drive on Mac
- (Solved) External SSD Not Detected in Disk Utility on Mac
- Why Can't Format A Hard Drive To NTFS on Mac? Can We Fix It?