Mount and Unmount the External Hard Drive on the Mac
![]() Ricky Lin updated on February 16, 2024
Ricky Lin updated on February 16, 2024
Quick Navigation:
- Learn About External Hard Drives
- How to Mount External Hard Drives on a Mac?
- Unmounting External Hard Drives on Mac
- Mount and Unmount NTFS External Hard Drive on Mac Using NTFS for Mac
- FAQs About Using External Hard Drive on Mac
- Conclusion
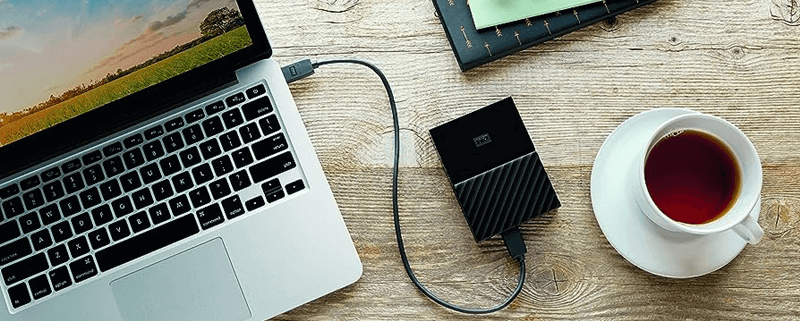
Are you tired of hiding and seeking with your Mac's portable hard drive? Do not be afraid because we will reveal the key to managing data without problems! Imagine that you have a portable hard drive that is full of important work or personal files. All you want is an easy way to connect it to your computer without knowing all the technical terms.
You're in for a treat because we will show you how to easily mount and unmount external hard drives on your Mac. No matter how much you know about technology, we've got your back. Stop being confused, and let's go on a trip to connect and disconnect your external hard drive easily with just a few clicks!
Learn About External Hard Drives:
It's important to know what external hard drives do in the Mac environment before you start mounting and unmounting them. You can take external hard drives with you and connect them to your Mac via USB, Thunderbolt, or another port. They add to your computer's internal storage, making storing and getting big amounts of data easy.
External hard drives are a useful way to store data, whether you're a creative worker working with multimedia files or a regular user whose document library is growing.
How to Mount External Hard Drives on a Mac?
Putting an external hard drive on your Mac is the first thing you must do to get to its files. The good news is that macOS makes this easy:
Connect the External Hard Drive:
First, connect your external HDD to your Mac with the right connection and port. Ensure the drive is turned up correctly and your computer can see it.
Open Finder:
Start up the Finder app on your Mac. You can use the computer shortcut Command + N or click the Finder button in the Dock to start.
Locate the External Hard Drive:
In Finder, look for the external hard drive in the "Devices" area on the left side of the window. The drive's file system may change the picture that shows up along with the drive's name.
Double-click to Mount:
Double-click on the external hard drive's icon to mount it. You can also pick out the drive and press the "Mount" button in the Finder's toolbar. You can now access the drive; its icon will appear on the desktop.
Unmounting External Hard Drives on Mac:
Before physically separating external hard drives from your Mac, you must unmount them. It makes sure that all the data is written to the drive safely and stops any data damage that might happen:
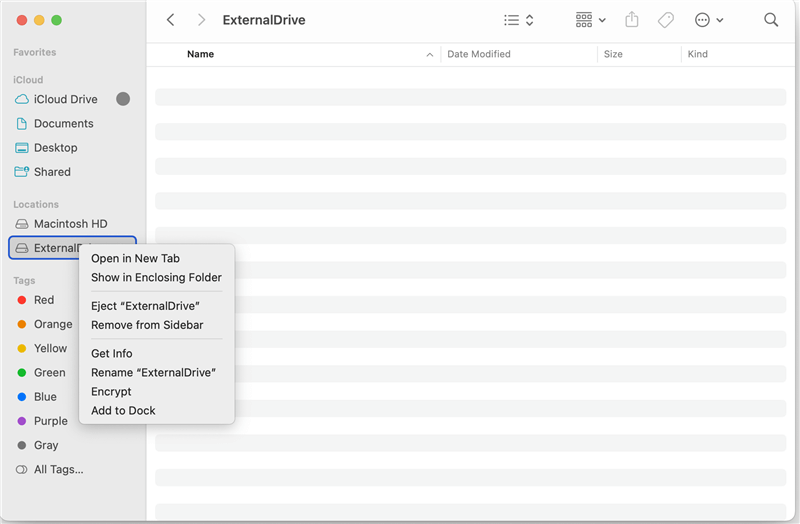
Eject from Finder:
Find the icon for the external hard drive on the desktop or the left of the Finder window. Right-click on the drive icon and choose "Eject" from the menu. You can also drag the drive icon to the trash, where it will turn into an eject image.
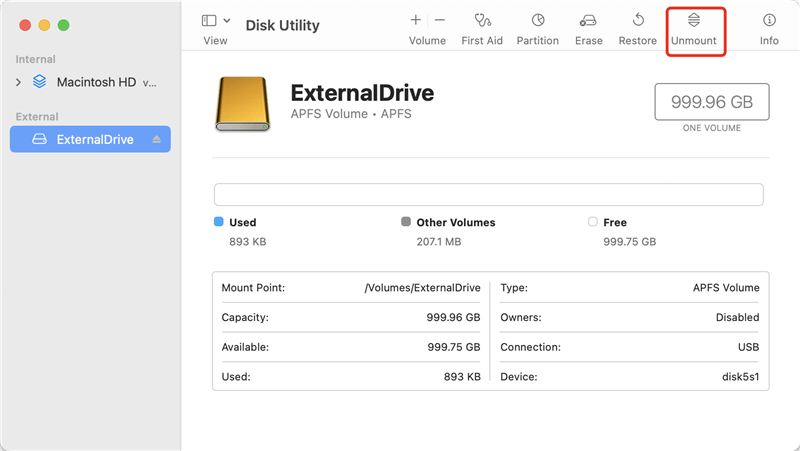
Eject from Disk Utility:
Disk Utility is another way to unmount an external hard drive. You can open Disk Utility by going to Applications > Utilities. Pick the external hard drive from the list and press the "Unmount" button. Before you go any further, ensure that no tasks are currently using the drive.
Use the Menu Bar:
There is an "eject" button on the Mac menu bar. It looks like a triangle with a line under it. A list of set-up drives will appear when you click on this button. Choose the external drive that you want to remove from the computer. The icon for the drive will disappear from the screen once it is unmounted.
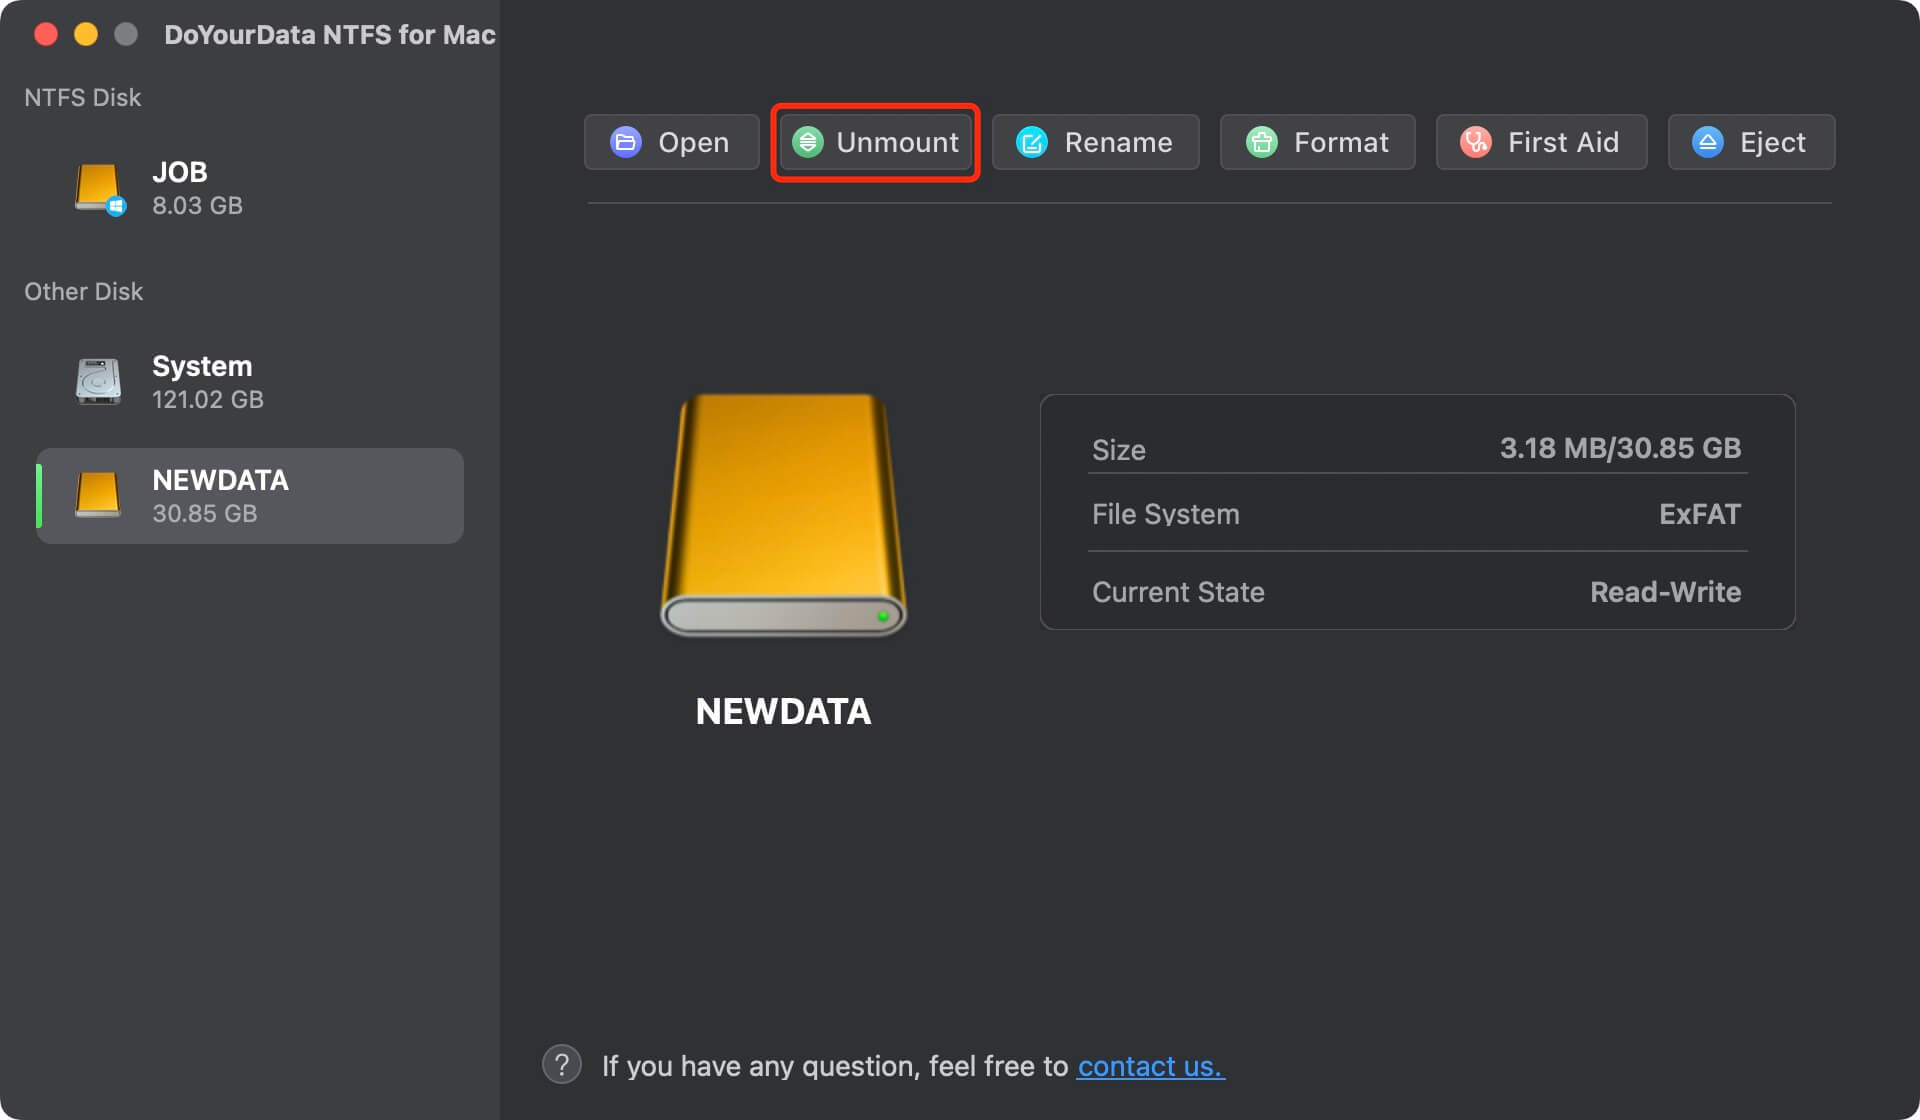
Mount and Unmount NTFS External Hard Drive on Mac Using NTFS for Mac
An external hard drive which has been formatted to NTFS may not mount on your Mac. NTFS for Mac tool can help you force mount external hard drives on Mac.
Step 1. Download and install an easy-to-use NTFS for Mac tool - DoYourData NTFS for Mac, then open this tool on your Mac.
Step 2. Find the external hard drive, if it is not mounting, click on Mount button.
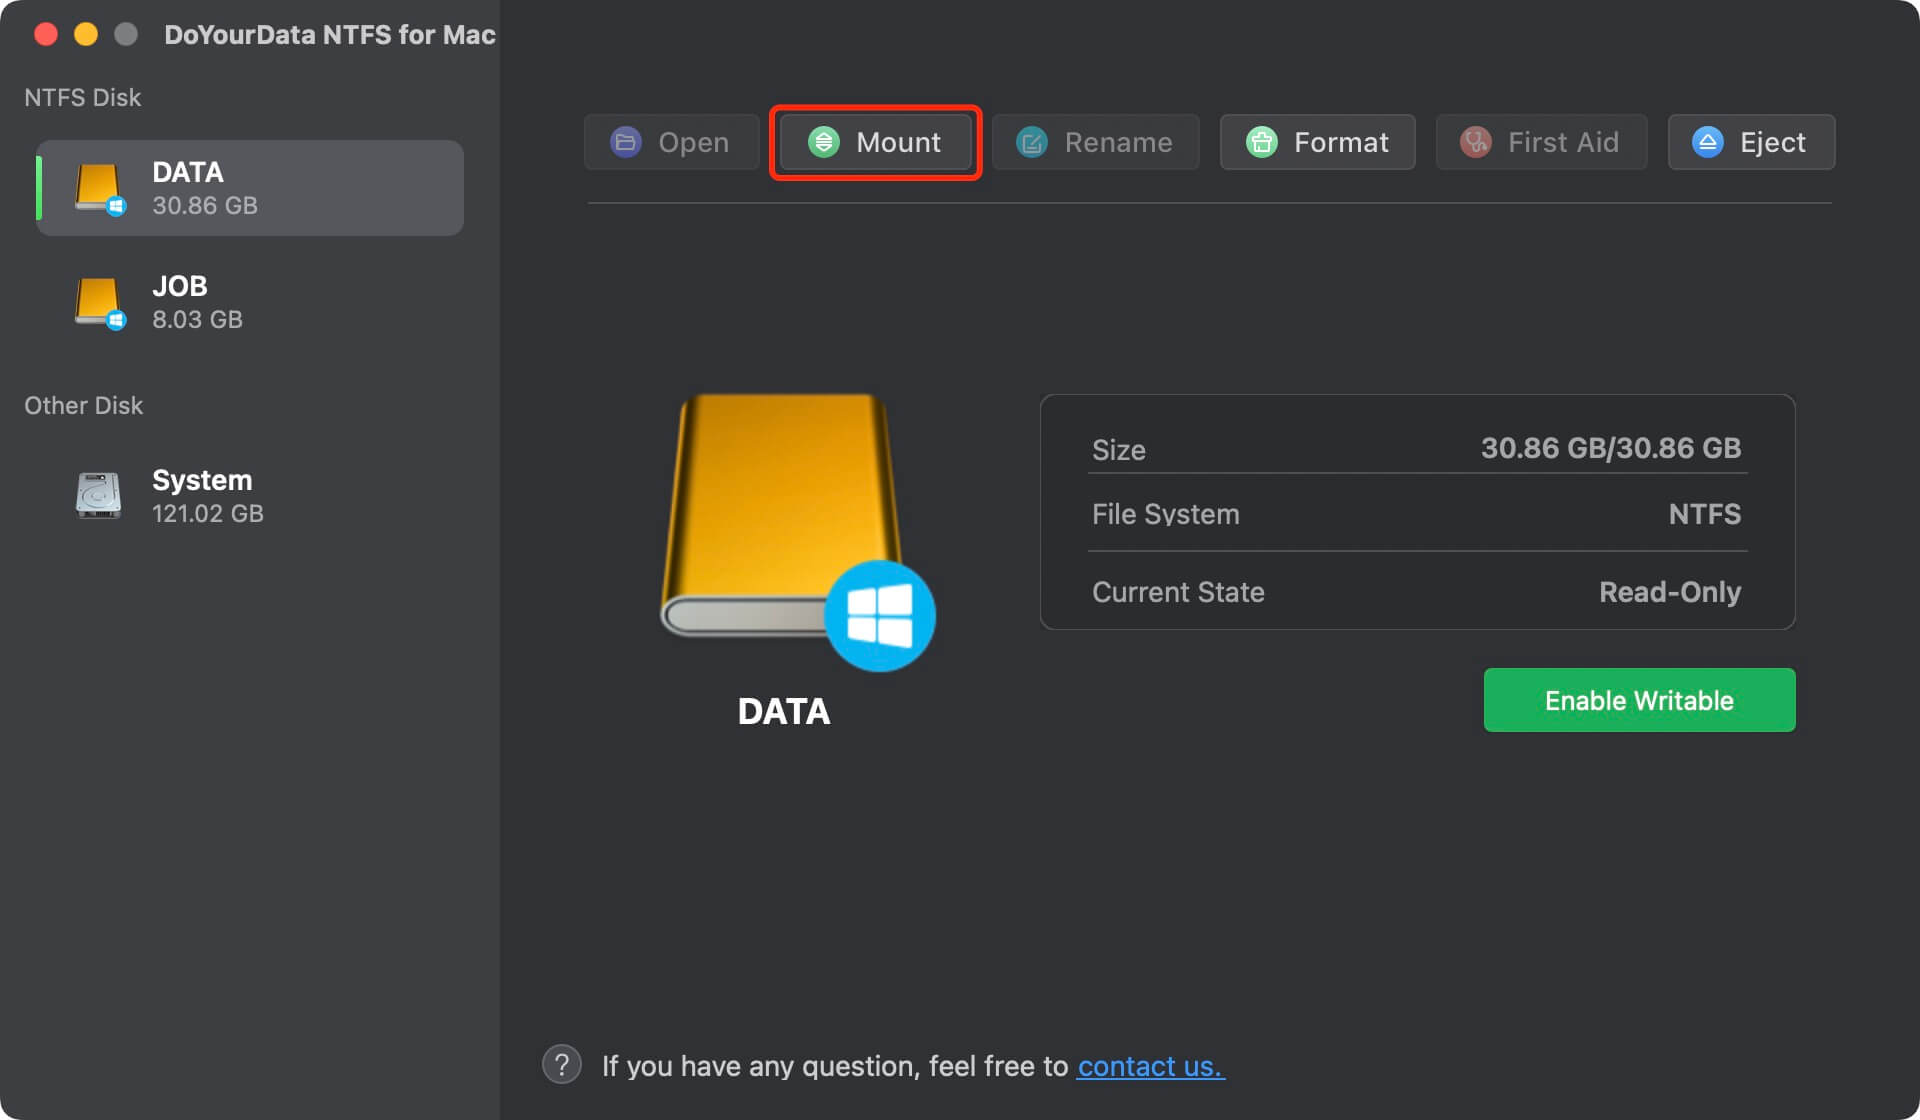
If you want to read-write the NTFS drive on Mac, just click on Enable Writable button to allow your Mac write to the NTFS drive.

Of course, you can unmount the external with NTFS for Mac, just click on Unmount button.
FAQs About Using External Hard Drive on Mac
1. What is the best way to use an external hard drive on Mac?
The following best practices and tips will help you get the most out of using portable hard drives on your Mac:
- Properly Eject Before Disconnecting: Before directly disconnecting an external hard drive, you should always eject or unmount it. It ensures that all the data is saved so it can't be lost or changed.
- Avoid Sudden Power Loss: It's bad for external hard drives when the power goes out quickly. If you're using a powered external drive, ensure it's properly powered, and don't unplug it while writing or transferring data.
- Format Compatibility: Consider the file system type when using external hard drives. macOS works with many file systems, including APFS, HFS+, and exFAT. Pick a version that works with the devices and needs you have.
- Regular Backups: Backing up data is often done with external hard drives. Set up a regular backup plan to keep your important files and data safe.
2. How to mount an external hard drive on Mac?
Just open Disk Utility, then find and select the external hard drive, click on Mount button.
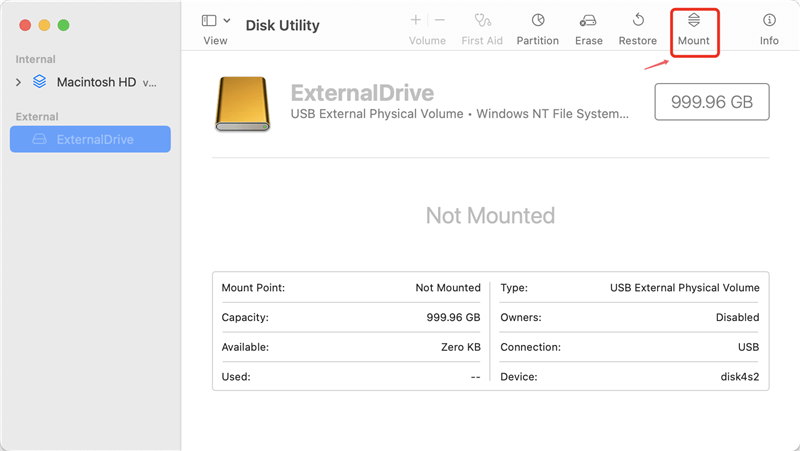
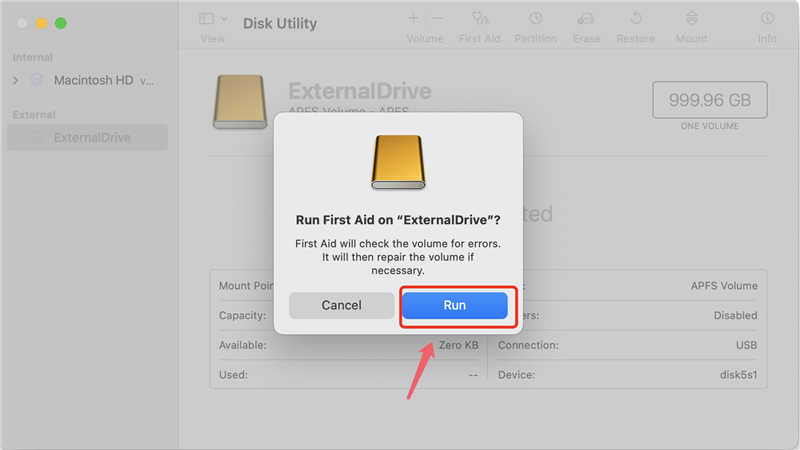
If mount button is not available, just click First Aid to repair the external hard drive.
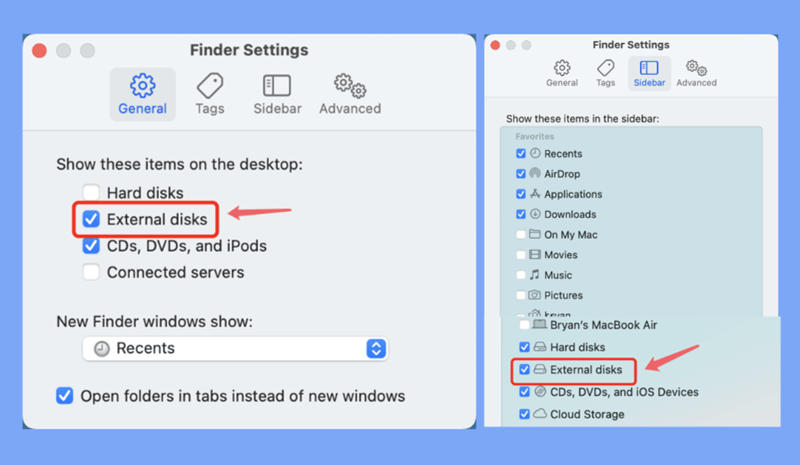
3. The external hard drive is recognized by Disk Utility, but not showing up on Mac, how to fix it?
Just open a Finder, then click Finder on Apple menu, choose Settings.
Open Finder Settings window, then click General and Sidebar, select External disks.
4. How to use an NTFS external hard drive on Mac without formatting?
You can download an NTFS for Mac tool and install it on your Mac. Then run it to mount the external hard drive on Mac, click Enable Writable button to allow you to read-write to the NTFS drive without any limitation.
Conclusion:
Managing your portable hard drives on your Mac properly is important to keep your data safe and extend the life of your devices. Understanding how to mount and unmount things by hand and looking into the automation choices in Automator can help you speed up these processes and improve your workflow. Remember to follow best practices, like ejecting drives before physically removing them, and be ready to deal with any problems that might come up during the process. Now that you know these things, you can confidently handle external files on your Mac and ensure that managing your data goes smoothly.
Written & Updated by Ricky Lin
Ricky Lin is an senior editor of DoYourData who lives in Adelaide, Australia. He is interested in writing technology articles related with data recovery, computer issue fixes, disk clone, iPhone data recovery, video edit, Mac optimization, etc. He Joined DoYourData in 2019 and have written 500+ articles to help both Windows users and Mac users to solve data or computer problems.
Hot Articles
- Fix External Hard Drive Read-Only Issue on Mac
- How to Wipe Trash Bin on Mac?
- Recover Lost Data from WD (Western Digital) External Hard Drive on Mac
- Fix External Hard Drive Not Showing Up on Mac
- How to Wipe SD Card on Mac?
- Mount and Unmount the External Hard Drive on the Mac
- Run First Aid on Mac to Repair Disks
- Fix Can't Save Files to An External Hard Drive on Mac
- (Solved) External SSD Not Detected in Disk Utility on Mac
- Why Can't Format A Hard Drive To NTFS on Mac? Can We Fix It?