How to Create A Bootable USB Installer for macOS High Sierra (macOS 10.13)?
![]() Ricky Lin updated on August 2, 2024
Ricky Lin updated on August 2, 2024
Quick Navigation:
- How to Create A Bootable USB Installer for macOS High Sierra?
- How to Use the Bootable Installer?
- How to Recover Lost Data after Installing macOS High Sierra?
- Conclusion:
- FAQs about Installing macOS High Sierra.
You can use a USB flash drive, or an external drive as a startup disk to install the Mac operating system. This article will guide you through creating a bootable USB installer for macOS High Sierra.
If you want to upgrade macOS High Sierra from the last version or reinstall the Mac operating system, you don't need to create a USB bootable installer. However, if you need to downgrade to macOS High Sierra from a newer version or perform a clean install, it's necessary to create a bootable USB installer for the system. Also, if there are multiple machines to install macOS High Sierra, you can make a bootable USB installer to avoid downloading the operating system on each machine.
How to Create A Bootable USB Installer for macOS High Sierra?
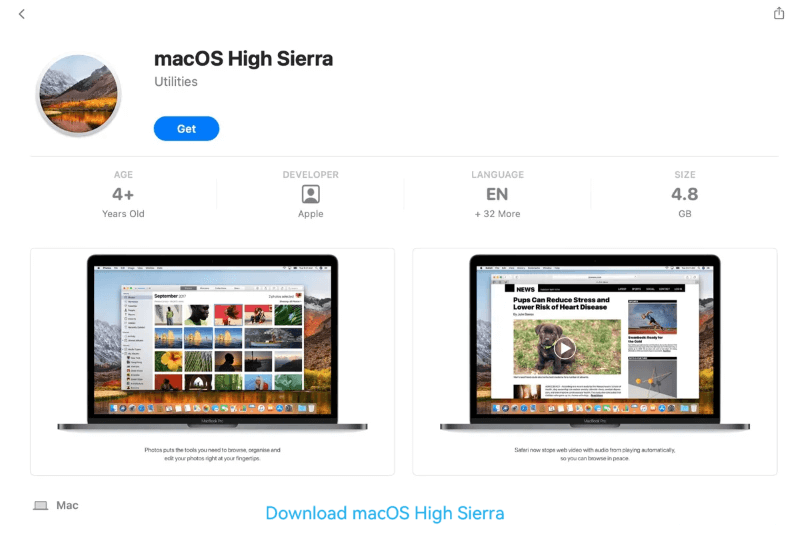
1) Download a full macOS High Sierra installer from the App Store or website.
If you download it from the App Store, the Mac may launch it, quit the installer, and check if it's still in the Applications folder. If it is elsewhere on your computer, move the installer to the Applications folder. It's highly suggested to leave the file name as the default: Install macOS High Sierra.app. Then it will be easier to follow the guide to create the USB installer in this article.
You can also download the macOS High Sierra disk image (.dmg) file from the website. After the download is completed, you will get a .dmg file. Double-click the .dmg file to mount it, then double-click the .pkg file inside to install the macOS High Sierra installer in the Applications folder.
2) Connect the USB flash drive or external drive to the Mac.
If you use a USB flash drive, ensure to prepare one with at least 8GB size. If there are files on the drive, move and back up the files to another place first. Then you need to format the USB drive, choose the Scheme as GUID Partition Map, and format it as Mac OS Extended (Journaled). Name it as you want, but you need to change the name in the following guide. In this guide, the USB drive is named "USBmedia".
3) Create the bootable installer with Terminal.
First, open Applications > Utilities > Terminal.
Second, enter the following command in Terminal (for macOS High Sierra or later).
sudo /Applications/Install\ macOS\ High\ Sierra.app/Contents/Resources/createinstallmedia --volume /Volumes/USBmedia –nointeraction
If you use a Mac running macOS Sierra or earlier, please use the following command:
sudo /Applications/Install\ macOS\ High\ Sierra.app/Contents/Resources/createinstallmedia --volume /Volumes/ USBmedia --applicationpath /Applications/Install\ macOS\ High\ Sierra.app --nointeraction
Note: If you renamed the installer and named the USB flash drive in another name, you must modify the command to reflect your chosen name to ensure it will run correctly.
When the command is running, the USB flash drive will be unmounted and disappear from the desktop. The Terminal will show the progress. Normally, it will take some time, just be patient!
Once the process is done and the USB flash drive has been made bootable, the Terminal will say that the install media is now available, and the USB flash drive will have the same name as the installer, such as Install macOS High Sierra. It means the USB installer is created successfully. You can now quit Terminal.
How to Use the Bootable Installer?
After creating the USB bootable installer, you can connect it to a Mac to install the macOS High Sierra. Please ensure to check whether the Mac is with Apple silicon. The steps will be different.
! Before we start
Before you install macOS High Sierra on the Mac, we suggest you back up your existing data on the Mac first. You can use the following software DoYourClone for Mac to back up your files or create a bootable copy of the Mac. You can even restore your Mac directly with the created bootable backup.
DoYourClone - Reliable Disk Clone Software
- Clone hard drive on macOS High Sierra or other Mac systems.
- Create bootable clone backup for Mac.
- Make disk image backup for macOS High Sierra.
After backing up the existing data on the Mac, now you can install macOS High Sierra on the computer without worrying about data loss.
Steps for Mac with Apple silicon:
1) Turn off the Mac first and connect the previously created USB bootable installer to the Mac.
Note: Ensure the Mac is compatible with the macOS High Sierra. This Mac must have internet access. A USB bootable installer needs an internet connection to get firmware and other information for this Mac machine.
2) Start the Mac and hold the power button until you see the window with startup options, including the USB bootable installer.
3) Choose the USB bootable installer, then click Continue.
4) When the macOS High Sierra installer appears, follow the onscreen instructions to install the system.
Steps for any other Mac
1) Shut down the Mac and connect the USB bootable installer to the Mac.
Note: Ensure the Mac is compatible with the macOS High Sierra. This Mac must have internet access. A USB bootable installer needs an internet connection to get firmware and other information for this Mac machine.
2) Turn on the Mac and immediately press and hold the Option (Alt) key.
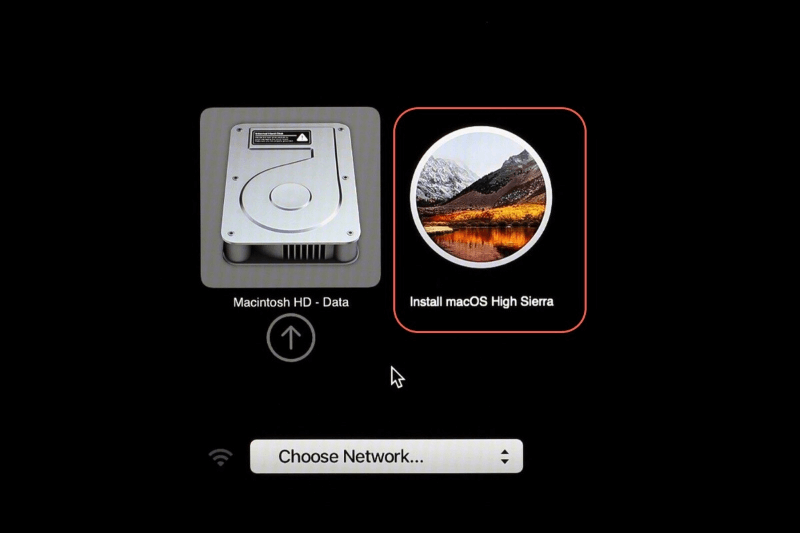
3) When you see the screen showing the bootable volumes, including the USB bootable installer, you can release the Option key.
4) Select the USB bootable installer and press Return.
Tips: If it's an Apple T2 Security Chip Mac computer and it cannot boot from the bootable installer, please go to Startup Security Utility and set it to allow booting from external or removable media.
5) Select the language, if it is prompted. Choose Install macOS High Sierra from the Utilities window, then click Continue and follow the installing instructions to finish the system installation process.
How to Recover Lost Data after Installing macOS High Sierra?
If there are issues happen which cause data loss after installing macOS High Sierra, there is still a great chance to get back the missing files. Do Your Data Recovery for Mac is highly recommended for such a data loss scenario. The software is effective in recovering deleted, formatted, and lost data. If you suffer data loss when installing macOS High Sierra, please download the software to save data.
After installing the software, start it and choose the drive where you lost files.

Click the Scan button to continue, it will start to scan the drive for lost files.

Once the scan is finished, you can see all the found files. Preview and check first, and then choose the wanted files to recover and save to another drive.

Conclusion
Creating a bootable USB installer for macOS High Sierra is useful in some situations. It helps create a clean operating system installation, saves time to install on many Mac machines without downloading multiple times, and downgrades the operating system from the newer version. Be careful to back up your data before installing the macOS High Sierra and enjoy the system.
FAQs about Installing macOS High Sierra.
1. Why does macOS High Sierra not download?
Occasionally, overloaded servers or temporary glitches on Apple's end can cause issues with the App Store Sometimes, you can reboot the Mac or wait for some time and try again. Also, internet access issues would cause such problems. You can change the WiFi or check the network and try again. Third-party applications may also affect the system download. It’s better to reboot into Recovery Mode to avoid the issue in such a case.
2. Why does macOS High Sierra won't install?
If the Mac is compatible with the system, please check if there is enough free space on the disk, free some space, and try again. Or you can boot into Recovery Mode to start the installation process. If the issue persists, maybe the downloaded installer is corrupted, you may need to redownload and try to install it.
3. Mac fails to boot after installing the High Sierra.
First, try to reset NVRAM/PRAM. If you're using an Intel chip Mac, it can solve startup issues by resetting the device's NVRAM, including boot issues caused by macOS High Sierra installation. Here's how to reset your Mac's NVRAM:
1) Start the Mac computer.
2) Immediately press the Cmd + Opt + P + R keys
3) Release the keys once you hear the startup sound again.
The second method is to try Safe mode. It will perform automatic disk maintenance during the startup process and it may fix the boot problem.
The last method is to reinstall the system in Recovery mode. A reinstallation would fix the corrupted installed system. Here are the simple steps:
1) Boot to Recovery mode..
2) Select Reinstall macOS High Sierra and click Continue.
3) Follow the instructions and complete the installation process.
4. Mac keeps logging you out of High Sierra.
The issue would be caused by some system settings or third-party applications. You can try the following methods:
1) Turn off automatic logout. Go to System Preferences > Security & Privacy. Click Advanced, and uncheck Log out after x minutes of inactivity.
2) Disable the required password after sleep. Go to System Preferences > Security & Privacy, uncheck Require password after sleep or screen saver begins.
3) Switch off Google Chrome hardware acceleration. Launch Chrome, go to Settings > System > Advanced. Disable the options Use hardware acceleration.
DoYourClone - Best Disk Clone Software
DoYourClone is a 100% safe, powerful and easy-to-use disk cloning program. It supports to clone any hard drive, clone HDD to SSD, upgrade old drive to new drive, create bootable clone backup for Windows and macOS. With this program, you can easily clone any hard drive. It supports sector by sector clone, SSD upgrade clone, etc.
Written & Updated by Ricky Lin
Ricky Lin is an senior editor of DoYourData who lives in Adelaide, Australia. He is interested in writing technology articles related with data recovery, computer issue fixes, disk clone, iPhone data recovery, video edit, Mac optimization, etc. He Joined DoYourData in 2019 and have written 500+ articles to help both Windows users and Mac users to solve data or computer problems.
Hot Articles
- Fix External Hard Drive Read-Only Issue on Mac
- How to Wipe Trash Bin on Mac?
- Recover Lost Data from WD (Western Digital) External Hard Drive on Mac
- Fix External Hard Drive Not Showing Up on Mac
- How to Wipe SD Card on Mac?
- Mount and Unmount the External Hard Drive on the Mac
- Run First Aid on Mac to Repair Disks
- Fix Can't Save Files to An External Hard Drive on Mac
- (Solved) External SSD Not Detected in Disk Utility on Mac
- Why Can't Format A Hard Drive To NTFS on Mac? Can We Fix It?