Quick Navigation:
- Understanding the Boot Drive:
- How to Change the Windows 11 Boot Drive:
- Troubleshooting Boot Issues:
- Conclusion:
You've arrived in the world of Windows 11, where technology works like magic with every click and go. Have you ever wondered how your computer works on the inside, especially when you need to change the boot drive? Don't worry!
Think of your computer as a performer and the boot drive as the main character in the story it tells when it starts up. We'll show you how to swap boot drives on Windows 11 in this easy-to-understand guide. It doesn't sound easy, but it's just moving puzzle pieces. Grab your tech-loving friends, and let's go on a digital guide to learn how to change your computer's boot drive!
Understanding the Boot Drive:
Before getting into the specifics of changing the boot drive, it's important to understand what it does for your computer in a basic sense. Think of the boot drive as the conductor of a big orchestra, in charge of all the notes during the startup show of your computer. The boot drive, usually called "C, "is where the operating system (OS) lives and ensures that all the files work together smoothly during startup.
How to Change the Windows 11 Boot Drive:
To change the Windows 11 boot drive, you first need to clone the old boot drive to a new one, then replace the drive and configure to change the boot drive. Here we will show you the whole process step by step:
Step 1. Back-Up Your Data:
Protecting your digital assets is the first step in responsible research. Before making any changes, save important files to an external drive or a reliable cloud service. It will keep your files safe during the shift.
Step 2. Clone the old boot drive to a new one
Before swapping the boot drive for Windows 11, you first need to create a clone for the old boot drive. After that, you can upgrade and use the new boot drive for your computer.
To ensure a smooth boot drive switch, it's essential using a reliable disk cloning software which can ensure to create a bootable copy for the system drive of windows 11.
DoYourClone is a professional tool that stands out. The software is effective to clone a Windows 11 system drive with all the data on the drive, which can ensure the cloned drive will boot up normally on the machine.
DoYourClone - Reliable Disk Clone Software
- Best disk copy software for Windows 11.
- Clone boot drive fully and ensure it's bootable.
- 100% safe and easy-to-use.
Follow the guide below step by step to guarantee a successful disk copy for your Windows 11 boot drive.
1. Download and install the disk clone software on your Windows 11 PC. Connect another drive to your computer to hold the cloned data.
💡 Tips: The destination drive should have enough space to hold all the data from the Windows 11 boot drive. Also, if there are data on the destination drive, ensure to move the data to another place as the cloning process will overwrite the entire disk.
2. Run the software and select the mode Disk Clone. With this mode, it will clone the entire boot disk of Windows 11 to the destination drive.
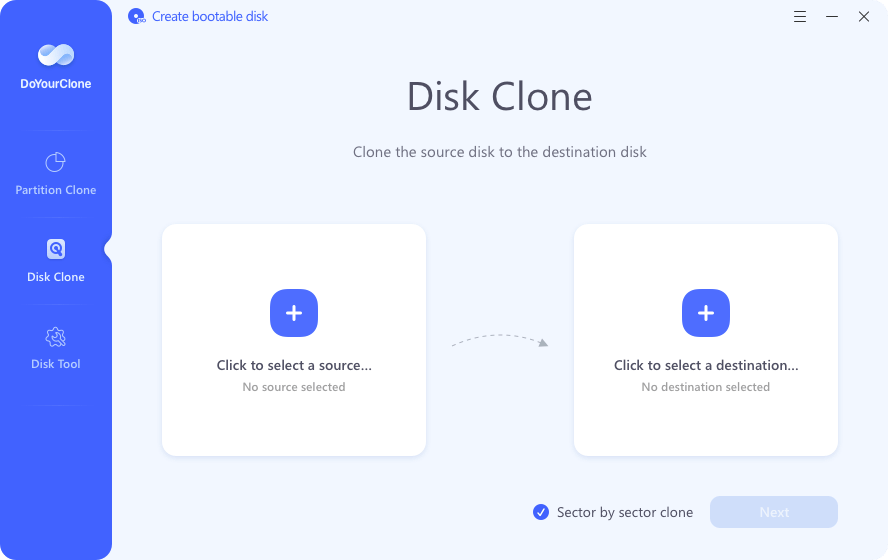
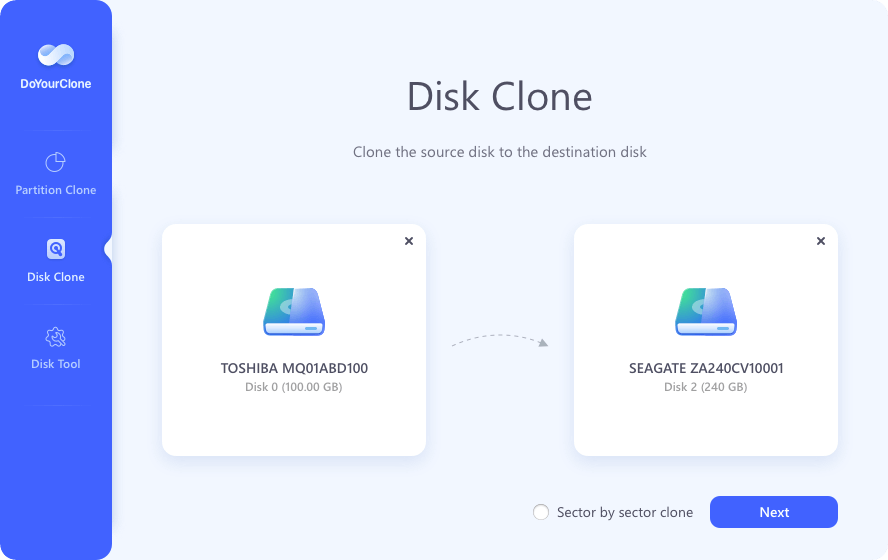
3. Select the boot drive of Windows 11 as the source, then select the other drive as destination drive. Click the Next button to continue.
4. At this step, you can modify the disk layout of the destination drive. You can set it to the same as source drive, or manually resize/move the partitions as you want.
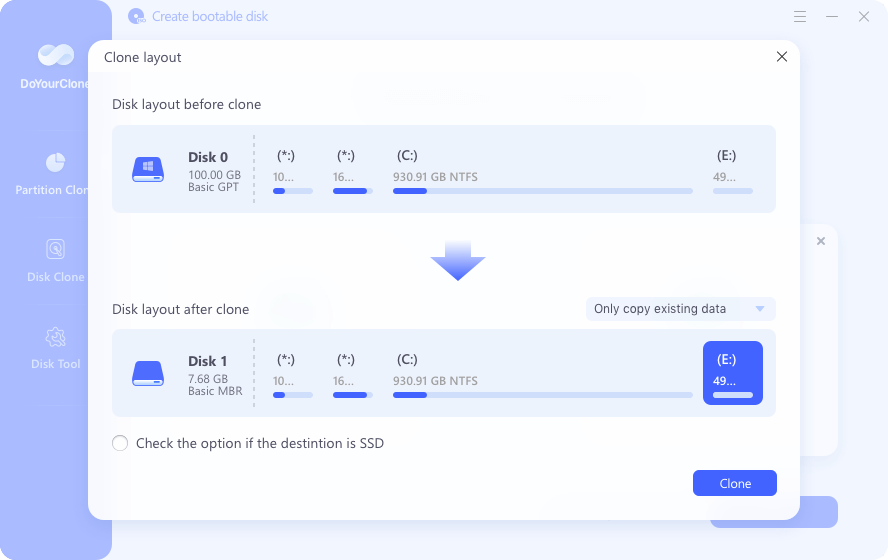
5. Once the disk layout is configured, you can click the Clone button. The software will then clone all the information from the Windows 11 boot drive to the new drive.
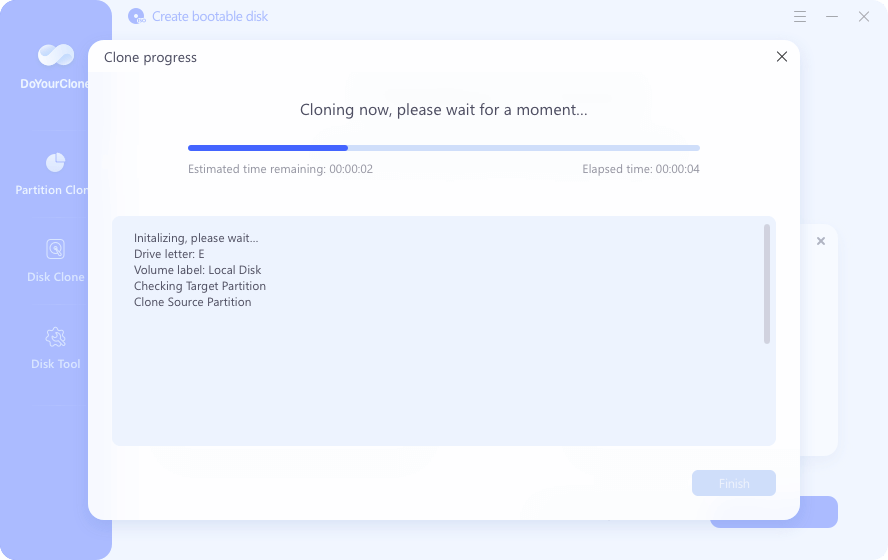
6. After the disk cloning process is done, you can click the Finish button to complete and then exit the program.
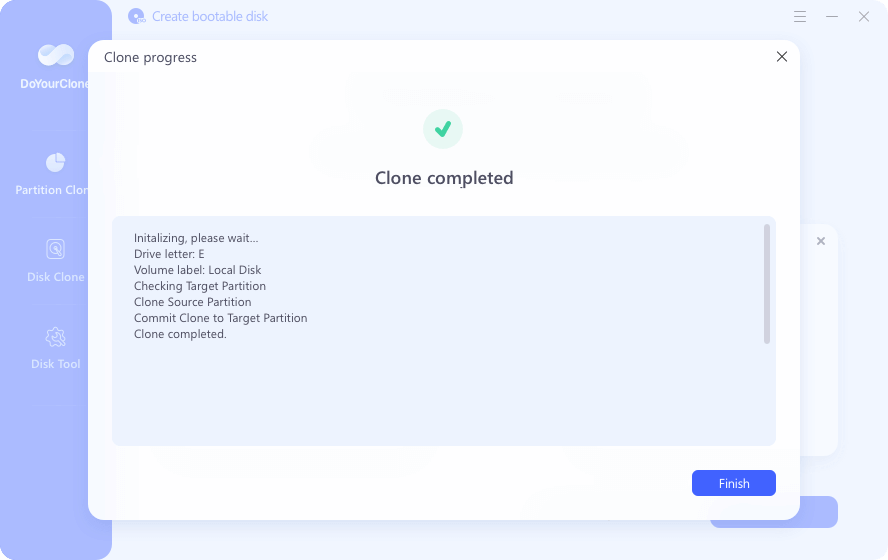
Now, you have a bootable copy for Windows 11 system drive. You can just use the new cloned drive to replace the old boot drive and start your computer. Do as follows to change the boot drive.
Step 3. Accessing the BIOS/UEFI:
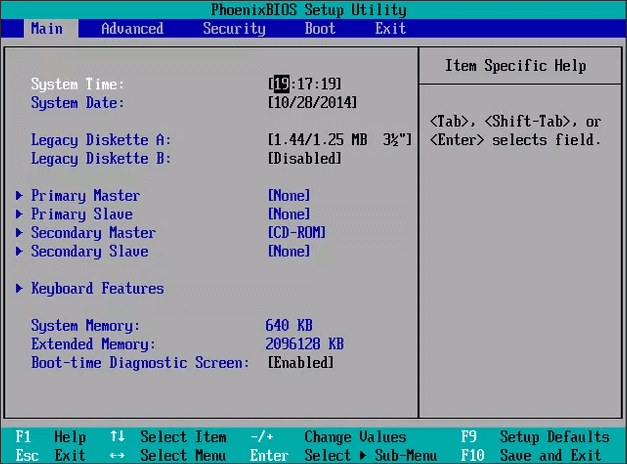
To get ready for this life-changing journey, restart your computer and press the assigned key (often F2, F10, or Del) during its awakening process. It will open the door to the BIOS or UEFI settings, where the magic of boot drive alteration happens.
Step 4. Navigating to Boot Order:
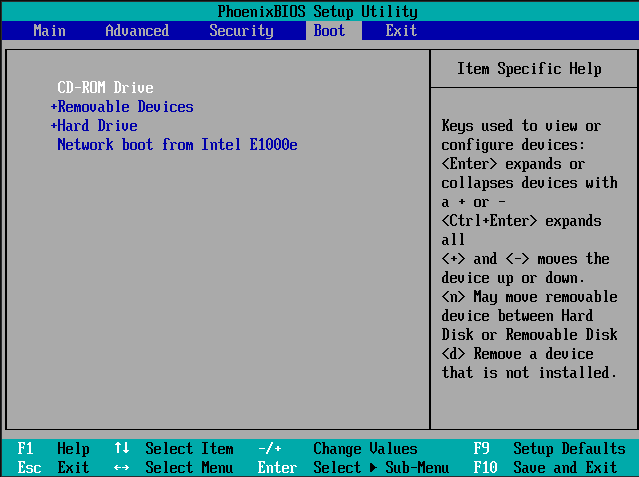
Find the "Boot Order" choices in the mysterious world of BIOS/UEFI. This holy ground tells your computer what order to look for usable devices. Use the arrow keys to move through this ethereal landscape and ensure your chosen drive has a clear way.
Step 5. Selecting the New Boot Drive:
Once everything is ready, find the chosen drive and move it to the top of the boot order list. Keep your changes, and then gracefully leave the BIOS/UEFI. The new age has begun, and your newly named boot drive is ready to take the lead.
Step 6. Restarting Your Computer:
Now that the settings are set, it's time for the big finale: restarting your computer. Watch as it starts its startup ballet, which is now being choreographed from the newly named boot drive and promises a show with smooth transitions.
Troubleshooting Boot Issues:
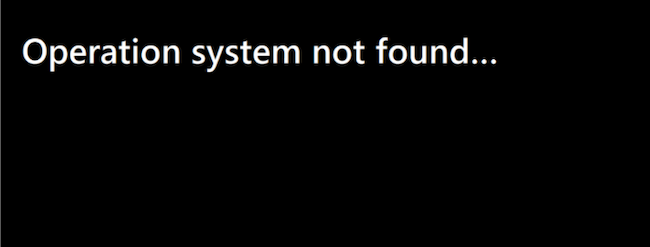
If you come across the discouraging "Operating System Not Found" message, do not worry. Make sure that the right drive is set as the main boot device in your BIOS or UEFI settings by checking them twice. It will restore harmony to your system's symphony.
🛠️ Incompatible Boot Loader:
Moving to a new boot drive may cause problems with the bootloader occasionally. Don't worry; there are many ways to solve the problem. You can easily fix or restore the bootloader by using the Windows installation media as the baton for the digital orchestra.
- Boot the system from the Windows 11 installation media.
- Select the language and region preferences, then click "Next."
- Select "Repair your computer" and click "Troubleshoot."
![change boot drive on Windows 11]()
- Opt for "Advanced options."
![change boot drive on Windows 11]()
- Select "Startup Repair."
![change boot drive on Windows 11]()
🛠️ Hardware Drivers Woes:
When you switch to a new hard drive, your drivers might not work with each other. You can get through this digital chaos by making sure that not only are the drivers for the new storage device installed, but they are also the most up-to-date versions. It will create a song of perfect performance.
🛠️ Corrupted Boot Configuration Data (BCD):
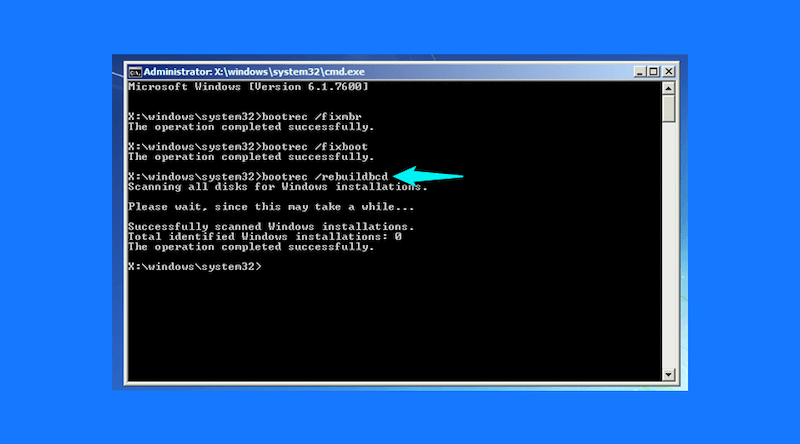
While your system is playing a beautiful tune, broken BCD files can ruin the harmony. The Windows startup disc can be a skilled tool to get to the Command Prompt and run healing commands like bootrec /rebuildbcd to bring your system back into harmony.
Do as above to boot from Windows 11 installation media and go to the "Advanced options" page. There you can find and select the option "Command Prompt". Then you can enter the commands to fix the boot issue:
🛠️ Partition Predicaments:
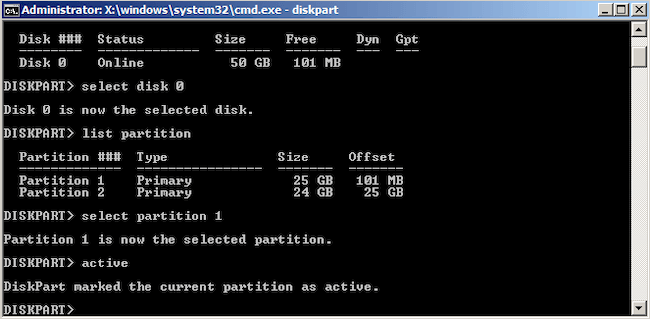
Ensure that the partition settings of the new boot drive work well with each other. The "active" tag should be on the system partition, like the first orchestra chair. Using disk management tools, fix any partition dissonance to ensure the digital music flows smoothly.
Do as the last method and open the "Command Prompt" by booting from the windows 11 installation media. Then enter the following commands to set the new cloned system drive as active:
list disk
select disk 0 (ensure to choose the new boot disk)
list partition
select partition 1 (ensure to choose the right system partition)
active
🛠️ Secure Boot and Compatibility Mode:
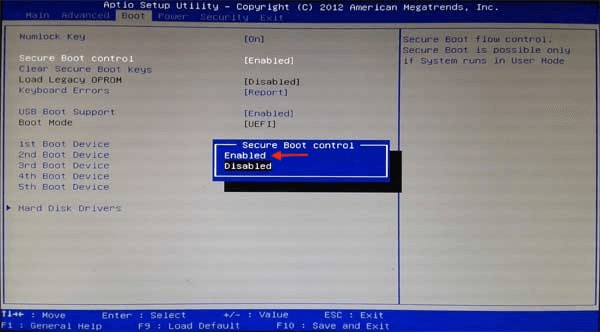
If you want to switch from traditional BIOS to UEFI (or vice versa), change the Secure Boot and Compatibility Support Mode settings in the BIOS/UEFI. Take your time and be sure of yourself as you change these choices to ensure they work well with the rest of your digital experiences.
Conclusion:
Windows 11 users may need to change the boot drive for several reasons, such as replacing a failed drive or upgrading the system drive. Even though the process is usually easy, problems can come up out of the blue and stop starting from working.
In this complete guide, we want to teach users how to quickly change the boot drive without any problems and fix common boot problems. Always be careful, back up your info, and look at the instructions with your system for specific steps.
DoYourClone - Best Disk Clone Software
DoYourClone is a 100% safe, powerful and easy-to-use disk cloning program. It supports to clone any hard drive, clone HDD to SSD, upgrade old drive to new drive, create bootable clone backup for Windows and macOS. With this program, you can easily clone any hard drive. It supports sector by sector clone, SSD upgrade clone, etc.
Hot Articles
- Best Free Data Recovery Software Review
- Best Data Erasure Software Review
- Best Disk Cloning Software Review
- Fix External Hard Drive Not Showing Up on Mac
- Fix RAW External Hard Drive
- Reset A M1 Mac to Factory Settings
- How to Back Up Mac Data
- Uninstall Apps on Mac
- Install Windows-style Start Menu on Mac
- Fix iMac Black Screen and Fix iMac Boot Issue


