Recover deleted, formatted or corrupted videos and other files.
Free TrialQuick Navigation:
- Why the Seagate Hard Drive Becomes Read-Only?
- Fix Seagate Hard Drive Read-Only On Windows Issue
- Best Practices to Avoid the Issue and Protect Data
- Conclusion
Many people like Seagate hard drives because they are reliable and work well for storing data. On the other hand, finding out that your Seagate hard drive is read-only on Windows 11 or 10 can be frustrating. Because of this problem, you can't write to or change files on the drive, which could slow you down.
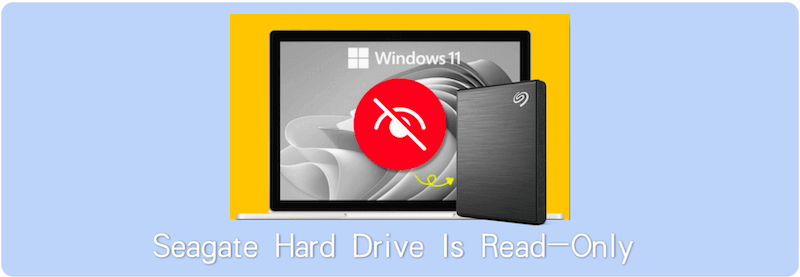
This guide will discuss the most likely reasons for this problem and explain how to fix it. You can get your Seagate hard drive to work properly again by figuring out what's wrong and fixing it. It will make managing your data on your Windows system much easier.
Why the Seagate Hard Drive Becomes Read-Only?
What's the reason for the read-only issue for Seagate hard drive? Actually, there are different issues that would cause the problem, especially for the external drive. Here we can list the common reasons that would lead to read-only issues for Seagate drive.
🔗 Connection problem - If the connection of the Seagate drive to the computer is not stable, the drive might become read-only, such as loose USB port, damaged cable, etc.
⚠️ File system errors - There would be errors with the file system that cause the Seagate disk cannot be written accessed.
🔐 Permission settings - Someone or you may change the permission before that make the Seagate drive read-only.
⛔ Outdated driver - Outdated driver for the Seagate drive could also make the drive read-only, especially after upgrading the operating system to latest.
💻 Hardware issues - Hardware issues or some part of the drive was physically damaged inside, it would cause a variety of issues, like drive become read-only.
Fix Seagate Hard Drive Read-Only On Windows Issue
Based on the factors that would cause the Seagate hard drive becomes Read only, here are some solutions you can follow. Mostly, the problem can be solved with some of these method. Now, let's check and find a solutions for you:
👨🔧 1. Check Connection
First, the connection of the Seagate hard drive would cause the read only problem. So it's better to check the drive connection first.
To start fixing the problem, check the Seagate hard drive and its links for any damage. Ensure the cables are securely connected and look for damage or signs of wear on the drive.
Unplug the connection and reconnect to have a try. Also, you can change a USB port or cable to check if it's the problem with the USB port or the cable.
If there is a physical problem, like dents or links that aren't tight, you should contact Seagate support for help.
👨🔧 2. Run Disk Check Utility
File system problems would also make the Seagate hard drive read-only. In such a case, you can check and try to fix the file system of the drive and then check if the drive will be writable again.
The built-in Windows tool CHKDSK (Check Disk) can look for and fix file system problems on a hard drive. When your Seagate hard drive stops working, this tool can help you figure out what's wrong and fix it.
- Open the Command Prompt as an administrator. Write "Command Prompt" into the search bar, right-click, and choose "Run as administrator."
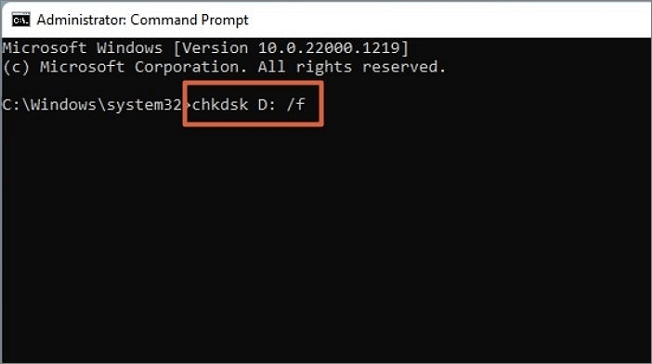
- Type chkdsk /f X: in the Command Prompt window. "X" should be changed to the drive name for your Seagate hard drive. Press Enter to run the command.
![Seagate drive read-only on Windows 11/10]()
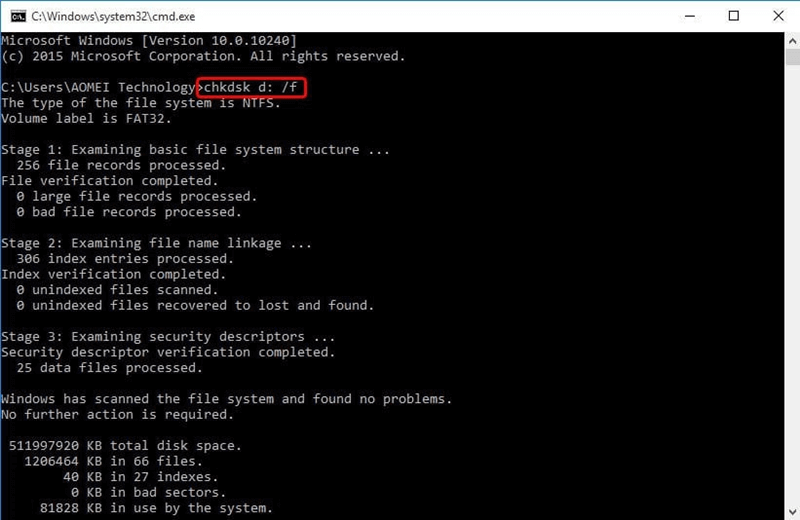
- CHKDSK will start to look for mistakes on the given drive and fix them if it finds any.
![Seagate drive read-only on Windows 11/10]()
- That depends on how big your hard drive is and how bad the mistakes are. The process could take a while. Please wait a little while longer and let CHKDSK finish its job.
- When CHKDSK is done checking and fixing the drive, the Command Prompt window will show a rundown of what it found.
- The Command Prompt window is now closed. Check whether the problem with your Seagate hard drive being read-only has been fixed. If not, you should try other steps to fix the problem.
If the CHKDSK can find some errors with the file system and repaired the errors, you can then just access the Seagate hard drive again and check if it's still read-only.
👨🔧 3. Adjust Permissions
You might be unable to write to the Seagate hard drive if the permissions are incorrectly set up. By changing the rights, you can give your user account access to change files on the drive. Here are the steps to check and assign the permission for Seagate hard drive in Windows:
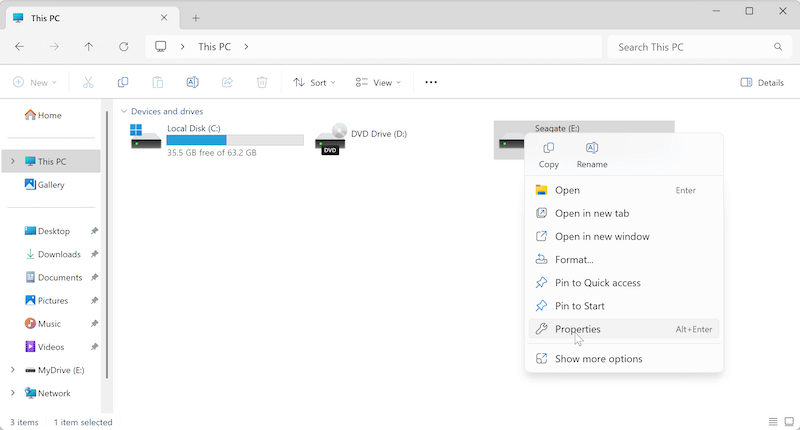
- Pick up File Explorer and go to the Seagate hard drive.
- Right-click on the drive and click "Properties" from the menu.
![Seagate drive read-only on Windows 11/10]()
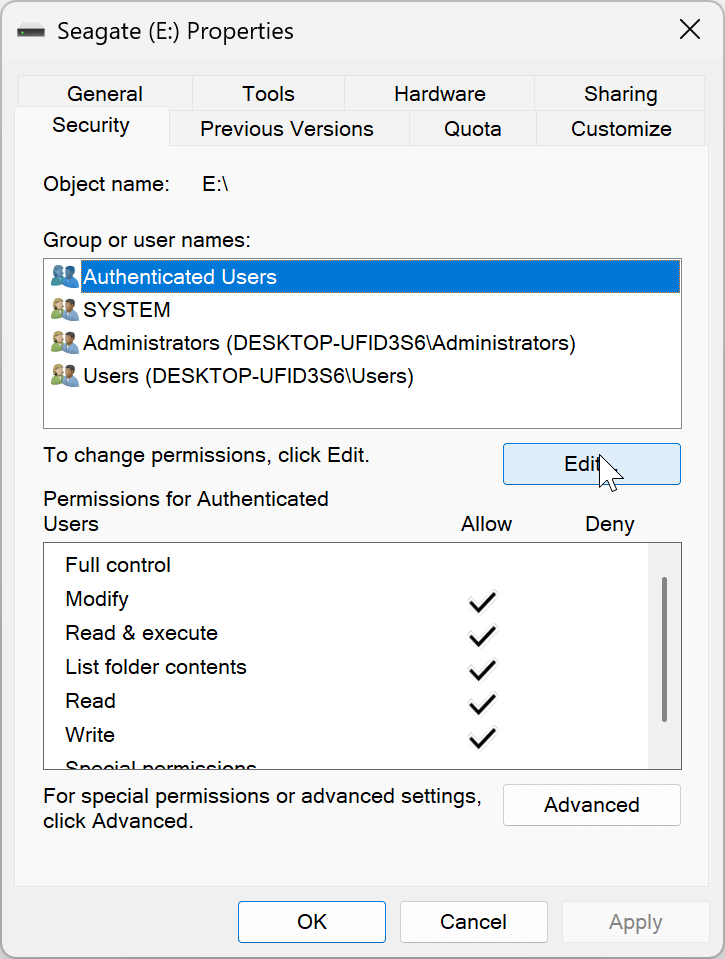
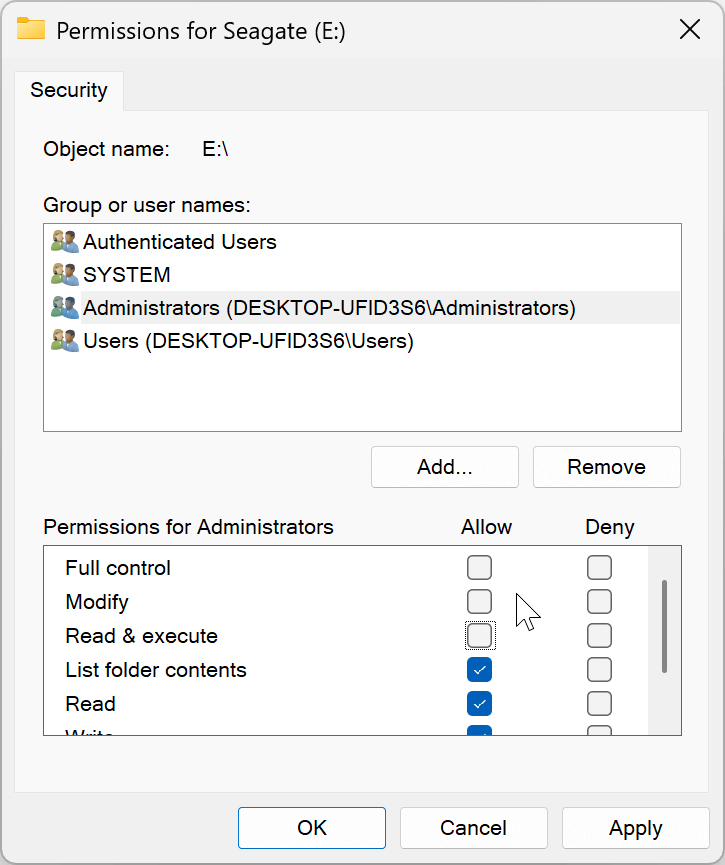
- Pick up the Properties window and select the "Security" tab. Press the "Edit" button. You should give management permission to go ahead.
![Seagate drive read-only on Windows 11/10]()
- It will show a list of user accounts and what they can do. Pick out your account from the list.
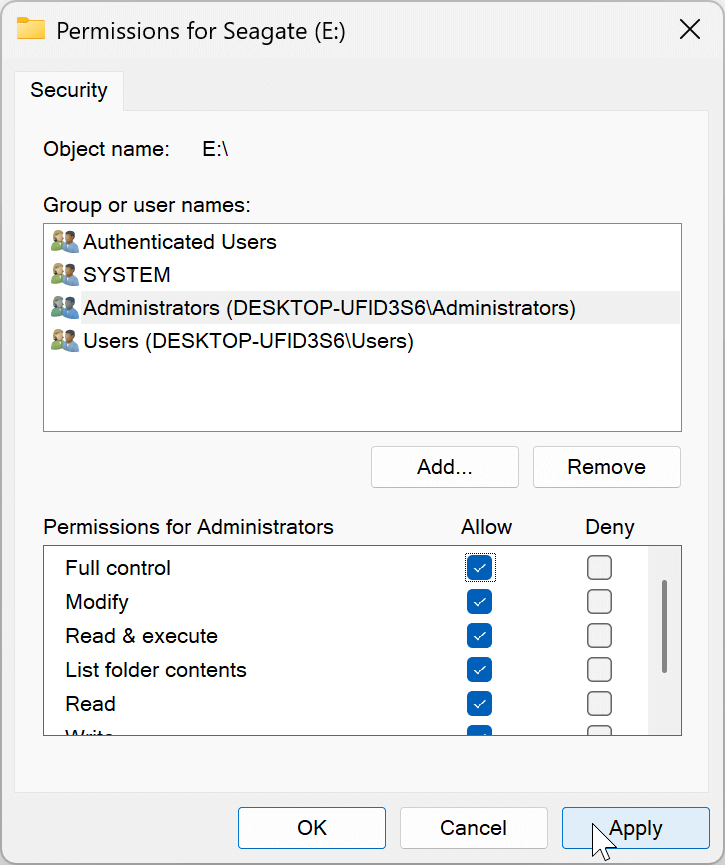
- Ensure the box next to "Full Control" is checked to give your user account full control over the drive.
![Seagate drive read-only on Windows 11/10]()
- If "Full Control" is already checked, ensure all the other needed rights are also turned on.
- Click "Apply" to make the changes take effect. Click "OK" to close the Properties box and save the changes.
![Seagate drive read-only on Windows 11/10]()
To ensure that changing the rights fixed the problem, try writing to the Seagate hard drive again. If not, you may need to do more troubleshooting.
👨🔧 4. Update Device Drivers
When device drivers are out of date or don't work with each other, they can cause problems that make your Seagate hard drive appear as read-only. Updating device drivers ensures that everything works together and might fix this problem.
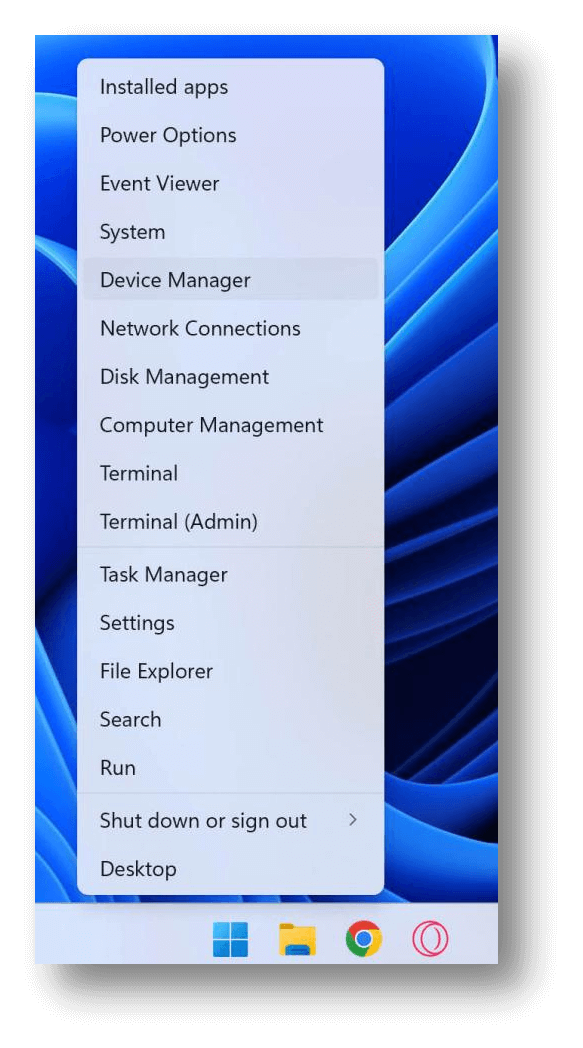
- Right-click on the Start button in the bottom left corner of the screen. In the screen that comes up, choose "Device Manager."
![Seagate drive read-only on Windows 11/10]()
- Find the "Disk drives" group in the Device Manager window and make it bigger.
- Right-click on your Seagate hard drive from the list of disk drives. Pick "Update driver" from the screen that pops up.
![Seagate drive read-only on Windows 11/10]()
- As you follow the on-screen directions, Windows will look for and install the most up-to-date drivers for your Seagate hard drive.
Check to see if the Seagate hard drive is no longer seen as read-only after restarting. If the problem keeps happening, you may need to do more troubleshooting.
Best Practices to Avoid the Issue and Protect Data
To avoid the Seagate drive becoming read-only issue and protect your data in the future, it's better to take the following tips:
1. Handle the drive properly. Don't unplug the disk without ejecting it or while it's in use. It would cause damage to the drive and files.
2. Often check the connection. Check and ensure your port and cable is in good stable.
3. Update drivers for device. Update the drivers for hardware if there are new version available.
4. Check drive health. Regularly check the health status of the drive. If there are issues with the drive, ensure to move the files to another drive for security.
5. Back up data regularly. It's a good habit to keep multiple copies of your important files on different devices. It can help save your data if issues happen with the drive. You can back up your data to external drive, network location (NAS), or upload to cloud server, etc.
Here we suggest you a method to back up the data on Seagate hard drive - using the disk cloning software DoYourClone. It can create an exact copy for your Seagate drive. It is a good method to back up the external drives. When you need to back up the data, you can connect the drive and do the clone, you don't need to keep the external drives connected all the time.
DoYourClone
- Clone and back up your Seagate and other hard drives.
- Create exact copy of your data on a hard disk.
- Support cloning system drive and ensure it's bootable.
You can download and install the software on your computer first. Then connect your Seagate drive and another drive to the computer to clone and back up the Seagate drive.
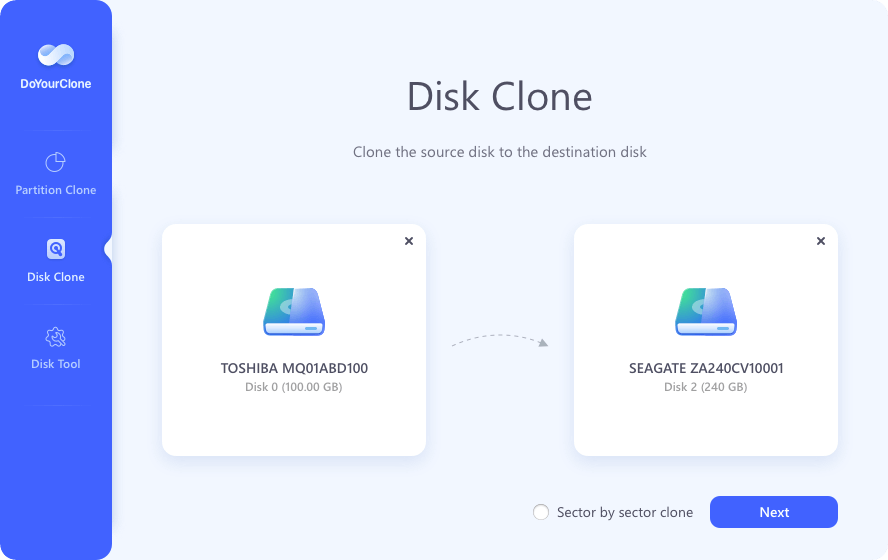
Step 1. Start the software and first change to Disk Clone mode. Choose the Seagate drive as source and another drive as destination. Then click Next button to continue.
💡 Note:
As the disk cloning process will overwrite the destination drive, ensure the following tips:
1. Use an empty disk as destination drive to hold the backup.
2. Ensure to choose the source and destination drives correctly.
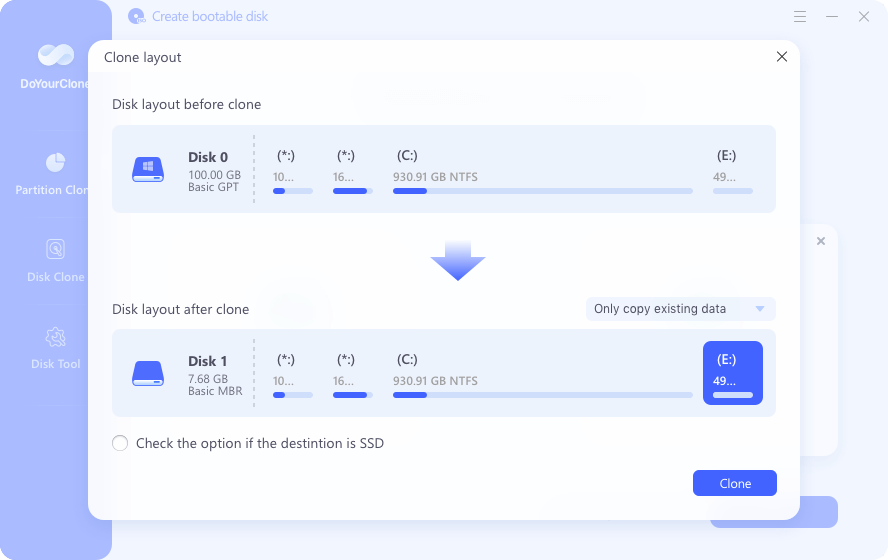
Step 2. You can edit and change the layout of the partitions on the destination drive. After that, you can click Clone to execute.
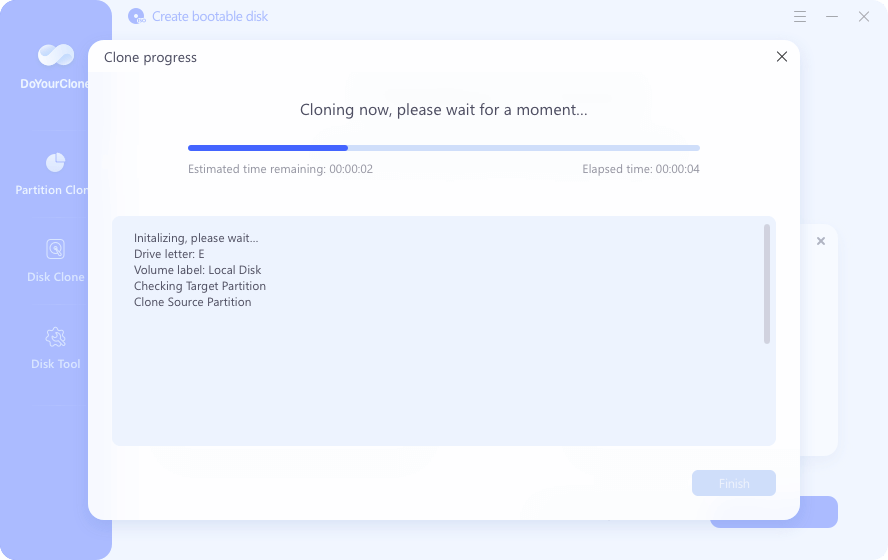
Step 3. It will take some time to finish the disk cloning process depending on the size of your Seagate drive.
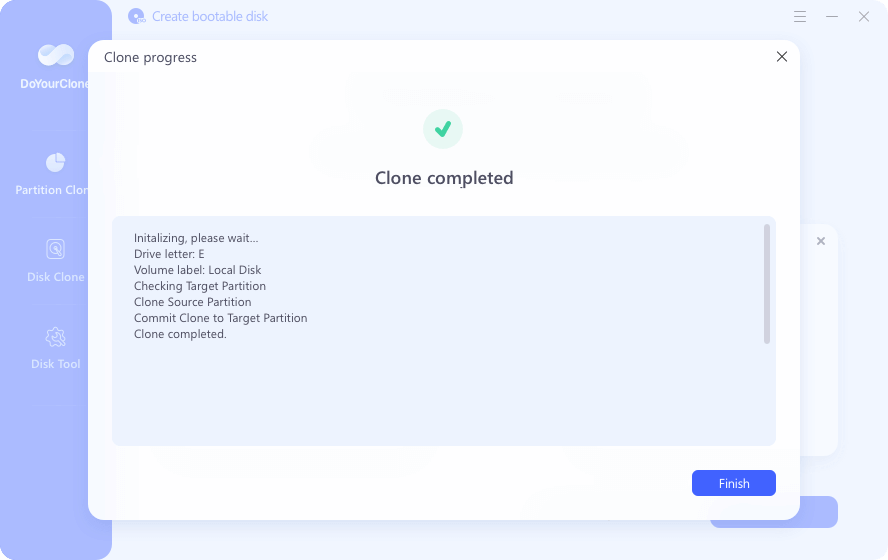
Step 4. Once the disk cloning process gets completed, you can check the cloned data on the destination drive.
Conclusion:
To sum up, fixing a Seagate hard drive that can't be read on Windows 11 or 10 requires a systematic repair approach. People who own Seagate drives can get them to work properly again by checking for physical damage, changing rights, turning off write protection, and installing the latest device drivers.
Using these methods, you can ensure that managing your data goes more smoothly and get back to work on your Windows system. If the problem continues, you may need more help from Seagate support or professional experts to fix it.
Related Products
Hot Articles
- Best Free Data Recovery Software Review
- Best Data Erasure Software Review
- Best Disk Cloning Software Review
- Fix External Hard Drive Not Showing Up on Mac
- Fix RAW External Hard Drive
- Reset A M1 Mac to Factory Settings
- How to Back Up Mac Data
- Uninstall Apps on Mac
- Install Windows-style Start Menu on Mac
- Fix iMac Black Screen and Fix iMac Boot Issue
