Back Up Data for M3 Chip Mac
Back up your M3 Mac with Time Machine or make a full bootable clone with disk cloning software.
Quick Navigation:
Why do you need to factory reset the M3/M3 Pro/M3 Max/M3 Ultra Mac machine? There are many reasons, such as:
In this detailed guide, we'll show you how to reset your M3-chip iMac, MacBook Pro, MacBook Air... to its factory settings. And if you will sell your Mac, you can use a third-party data erasure tool - DoYourData Super Eraser for Mac to help you wipe all sensitive data from the startup disk.
Reset Adventure Preparation:
Step 1: Safeguard Your Data:
The information stored on your M3 chip Mac is its lifeblood. Therefore, you must regularly back it up. Use Apple's reliable backup tools like Time Machine or iCloud to keep your data safe.
Step 2: Bid Adieu to Accounts:
It's best to delete all user accounts before resetting your MacBook Pro. Before attempting a factory reset, ensure your device is disconnected from iCloud, iTunes, and other online services.
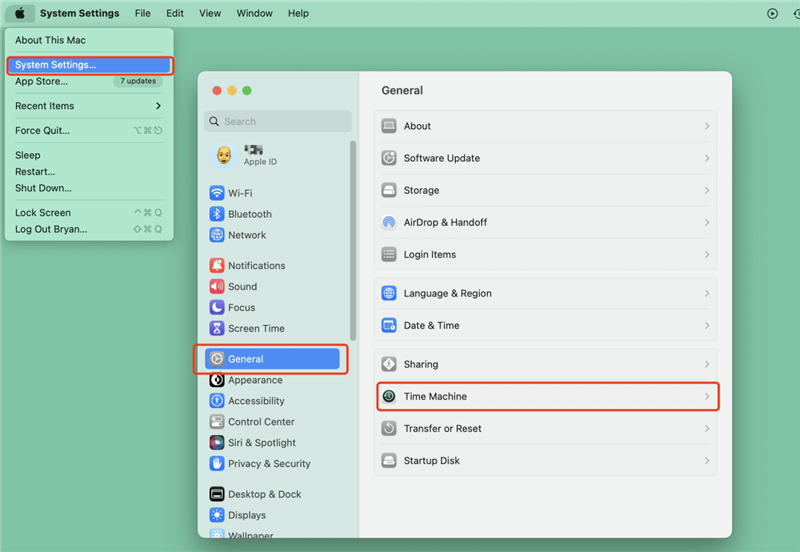
You must back up your information before doing a factory reset. Protect your data, documents, and configurations using a Time Machine or iCloud backup. Your data on your M3 chip Mac can be backed up completely to an external storage device using Time Machine, and it can also be synchronized and stored in the cloud using iCloud. Launch Time Machine, attach your backup disk, and follow the steps to generate a complete backup. You can choose what to back up to iCloud in System Settings by clicking the iCloud icon. After starting a backup, you should wait until it has successfully finished before continuing.
If you want to make a bootable clone backup for your M3 chip Mac before factory reset, you can download and install DoYourClone for Mac on your M3 chip Mac and run it to clone everything on the M3 chip Mac to an external hard drive.
Back Up Data for M3 Chip Mac
Back up your M3 Mac with Time Machine or make a full bootable clone with disk cloning software.
Log out of your accounts with your M3 chip Mac before attempting a reset. All associated services, such as iCloud, iTunes, and others, will be affected. Select Apple ID or iCloud from the System Settings menu, then click "Overview." Click the "Sign Out" of your accounts and follow the on-screen instructions.
First, double-check that your work is safely stored, and only then power off your M3 chip Mac. To power down your Mac, pick "Shut Down" by clicking the Apple menu icon in the top left corner of the screen.
Restart the M3 chip Mac, press and hold the Power button until you see the macOS Recovery mode screen.
Click on Options and then click Continue. If asked select a user account and enter your admin password.
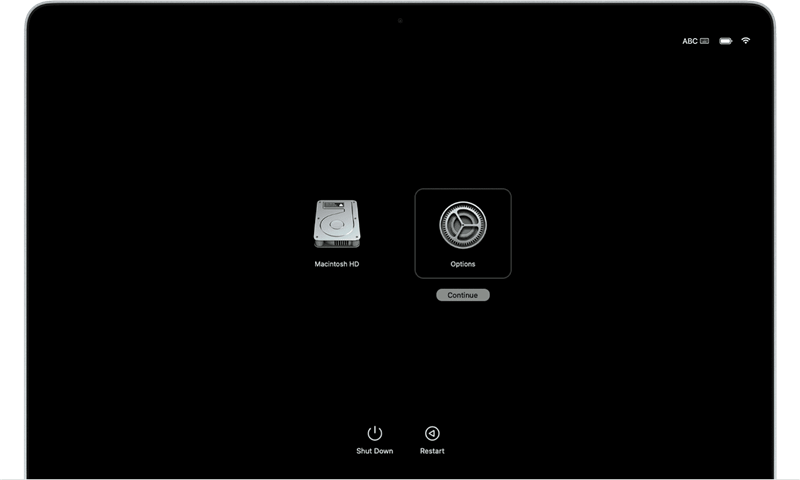
Once you've entered macOS Recovery Mode, look for "Disk Utility" among the available applications and click it to launch it. Disk Utility is a robust application for managing and troubleshooting Mac disk operations. To access the Disk Utility, click the "Continue" button.
To access the primary disk on your M3 chip Mac, open Disk Utility and navigate to its location. Usually, the disk will be labeled "Macintosh HD" or something like that. To delete something, select "Erase" from the menu bar.
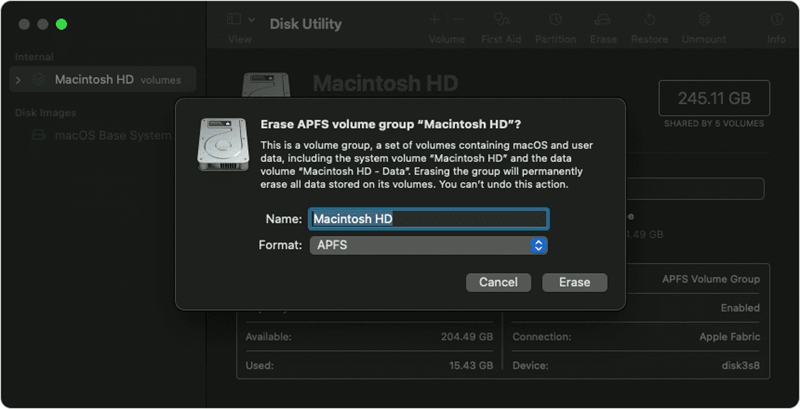
Choose "APFS" as the disk format in the resulting dialogue box. After giving the disk a name, you can erase it by clicking the "Erase" button.
Disk Utility will show a warning regarding the permanent nature of the erase operation. To continue wiping the disk, click "Erase" again to confirm. All information on the selected disk will be erased permanently.
Once the disk has been erased, you can return to the utilities panel in macOS Recovery Mode by closing Disk Utility. To reinstall macOS on your M3 Mac, select "Reinstall macOS, " then adhere to the installer's on-screen prompts.
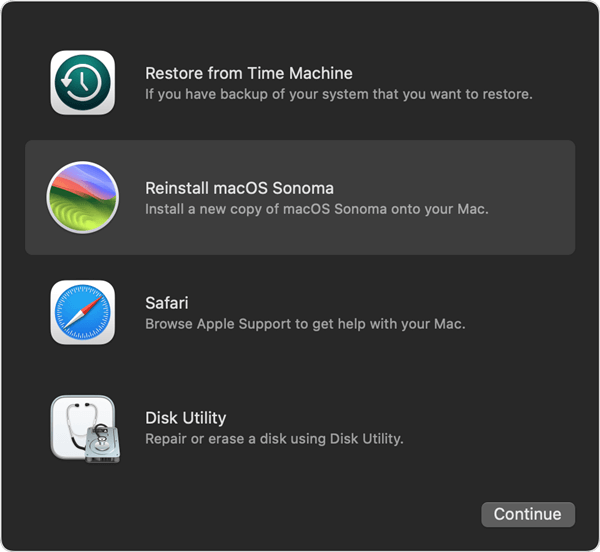
Your M3 chip Mac will automatically restart after the reinstallation of macOS. Follow the on-screen prompts to set up your device as if it were a new M3 chip Mac. You'll be prompted to set up your Apple ID, choose a language and location, and customize several preferences.
Please note that the data which is erased by Disk Utility is not lost forever. With right data recover software, you can recover lost data from your M3 chip Mac after factory reset or erasing the startup disk with Disk Utility.
Before you sell or donate your M3 chip Mac, you need to permanently wipe all sensitive data off. To prevent data recovery, you can use DoYourData Super Eraser for Mac, a certified data erasure app, to help you securely and permanently erase all data from your M3 chip Mac.
If you have reset the M3 chip Mac to its factory settings, you only need to permanently erase the deleted/lost files on the hard drive so that no body can recover your personal information from the SSD.
Step 1. Open DoYourData Super Eraser for Mac, then select data erasure mode - Wipe Free Space. This mode will wipe free disk space of the M3 chip Mac disk, then permanently erase all deleted/lost files on the disk.
Step 2. Select the startup disk and click on Wipe Now button.
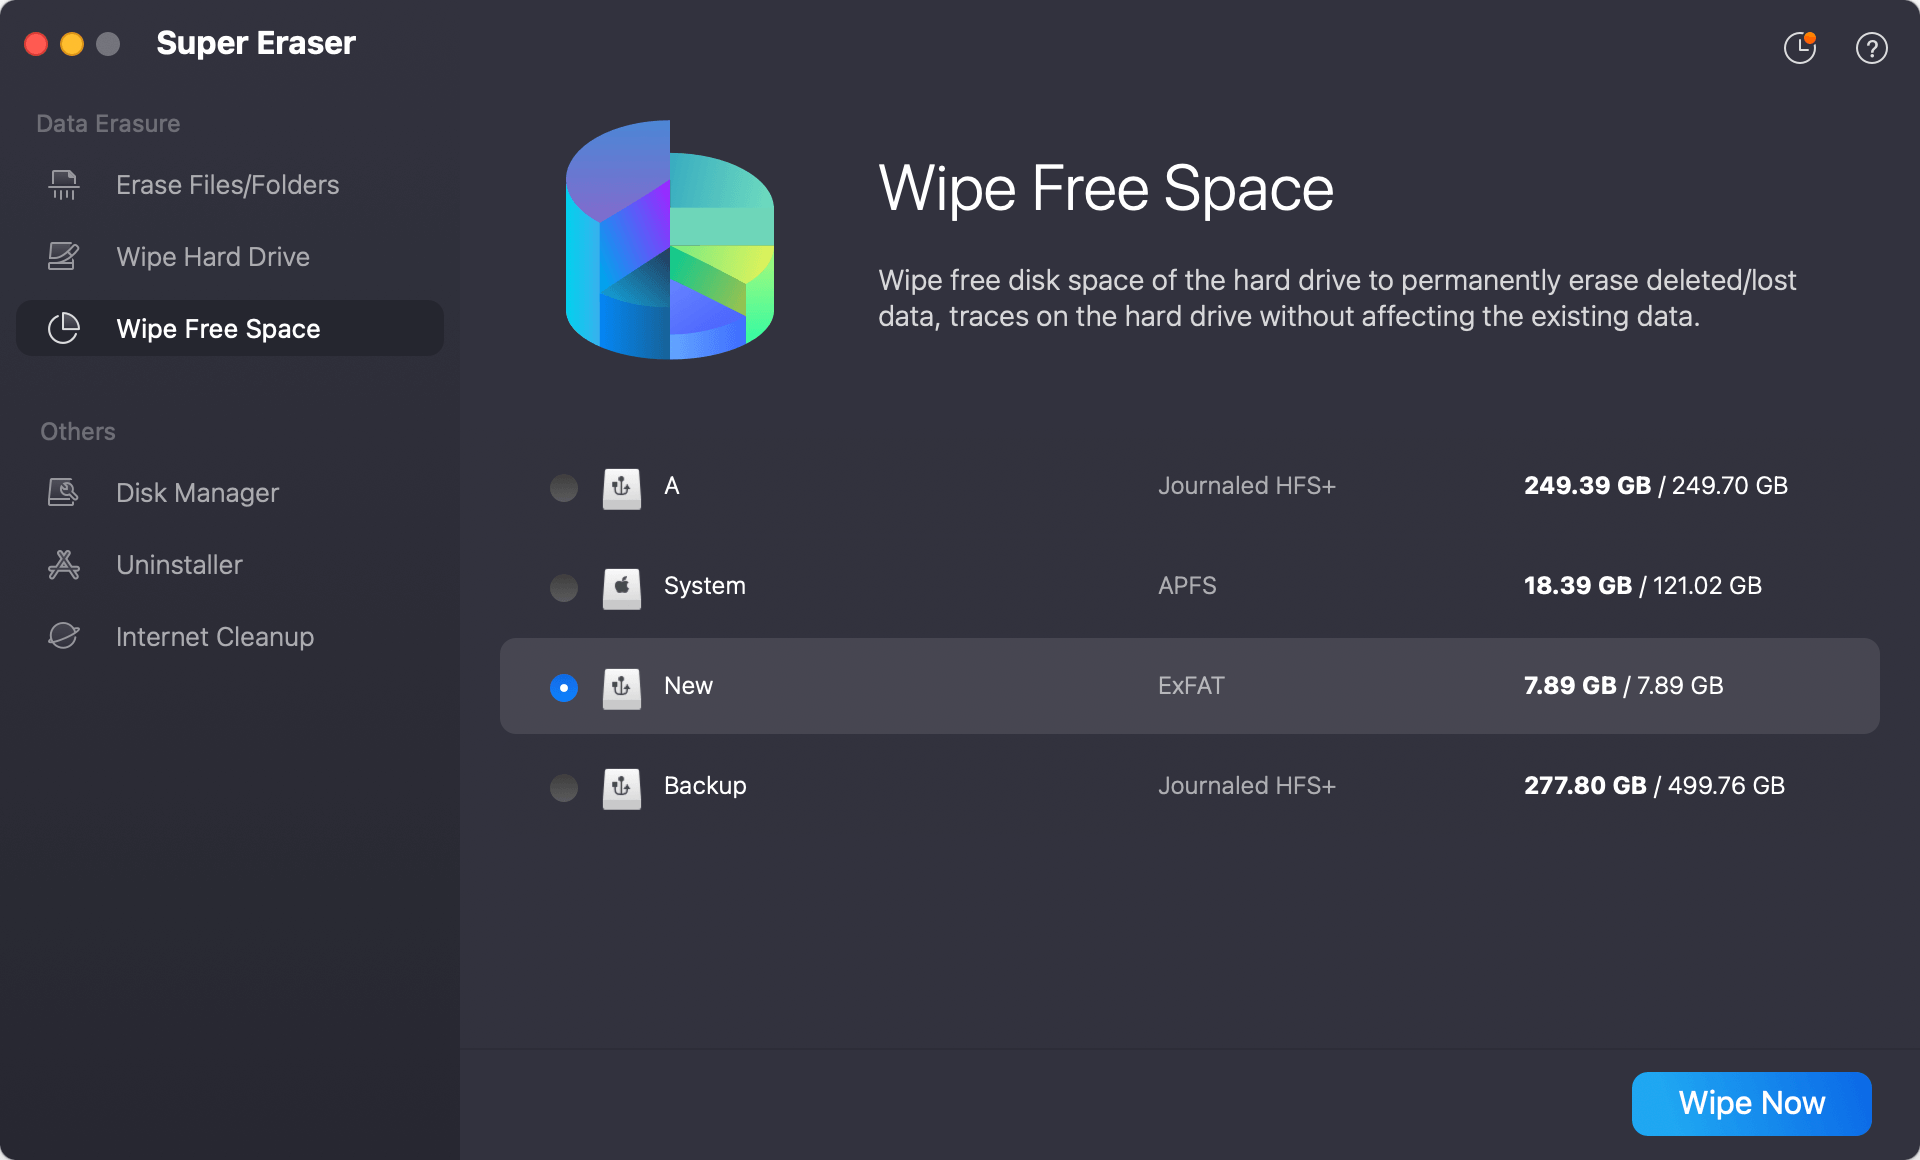
When the process gets finished, all deleted/lost files are gone forever, can not be recovered by any method.
By attentively following these procedures, you've successfully done a factory reset on your M3 chip Ma. This procedure not only fixes nagging problems but also prepares your gadget for an exciting new experience or user. Keep your internet connection solid while reinstalling macOS for the best reset experience possible. Take pleasure in the revitalized performance of your M3 chip Mac and start anew!
Erase All Contents and Settings also can help you erase your M3-chip Mac, but the erased data is not lost forever because the erased data can be recovered by data recovery software. If you want to wipe all sensitive data permanently, you can use a data erasure app - such as DoYourData Super Eraser for Mac to help you permanently destroy all data.
Hot Articles
