Guide: Mount An External Hard Drive Using Terminal on A Mac
![]() Ricky Lin updated on November 1, 2023
Ricky Lin updated on November 1, 2023
Quick Navigation:
- Use Terminal to Mount or Repair An External Hard Drive
- Other Methods to Mount An External Hard Drive on Mac
- Recover Data from An Unmounted External Hard Drive on Mac
Compared to the graphical user interface, Terminal makes handling your external hard hard drive much easier. Type the necessary command into the Terminal and press Return to execute it. The program will promptly carry out the user's instructions. However, the Terminal will not be cautious when carrying out commands.
Back up your Mac before using Terminal to prevent unintentional data loss caused by the uninstall command. The backup guarantees data restoration in case of data loss. Let's say you didn't do backups and ran some risky commands, leading to a catastrophic data loss.
In such a circumstance, data recovery software may be able to salvage what you've lost. In the following paragraphs, you will learn about standard Terminal commands and free Mac data recovery applications.

Use Terminal to Mount or Repair An External Hard Drive
Mac Terminal Force-mount External Hard Disk:
If you engage in resource-intensive activities like gaming, software development, or video editing on your Mac, you may run into storage troubles.
To get around this, connect an external hard drive to your Mac Terminal. However, you have no idea how to utilize Terminal or what commands to employ. To finish the mounting process, follow these easy steps.
Join the disk to the Mac.
To open Terminal, type "Terminal" into Spotlight Search.
Press Enter after typing the following command: diskutil list.
Any gadgets are available for your perusal. Determine the cause of the non-mounting external disk. Here, "disk1" is the internal name for the disk in macOS.
To create the USB directory, enter sudomkdir /Volume. Change "USB" to the disk name you're trying to mount. If prompted for an administrator password, please enter it now.
Enter the following command into the window and run it: sudo mount -t hfs /dev/disk1 /Volumes/USB. The term "disk1" is used here just as an illustration. You should swap out the disk with your personal identifying number when operating.
Verify that the disk is visible on your Mac's desktop or Finder.
Format a Disk Drive Via the Terminal:
When wiping your external drive using Terminal, you must be more cautious. Given that accidentally erasing data from the incorrect disk might be catastrophic. Be sure to save your work before running the program. Here are the Terminal commands for formatting an external hard drive:
diskutileraseDisk $FileSystem $DriveName $DriveID
Change the APFS, JHFS+, HFS+, FAT32, or ExFAT file system, drive name, and disk identifier to what you need. If an external drive is given, the command will delete and format all data using that system. The backed-up information may be reloaded onto the freshly formatted disk later.
Verify and Repair External Drive Using Terminal:
You can use Terminal to check if your external hard disk is working properly or if it is corrupted. The command to check the integrity of a portable hard drive is as follows:
diskutil verifyVolume $DriveID
If the command returns no output, it suggests there was no error. If not, the Mac disk needs to be fixed. To fix the external hard disk, type the following command into the Terminal:
diskutil repairVolume $DriveID
After the problem is fixed, you can use the storage device normally. If it is not possible, then you should format the drive.
Unmount and Remount Mac Drives with One Command:
The below command syntax combines the mount and unmount commands into a single operation. Be sure to swap out the identification with the correct one.
diskutil unmount /dev/identifier;diskutil mount /dev/identifier;echo "Remounted Volume"
Following these procedures, you can mount and unmount any disk drive on your Mac using Terminal.
Other Methods to Mount An External Hard Drive on Mac
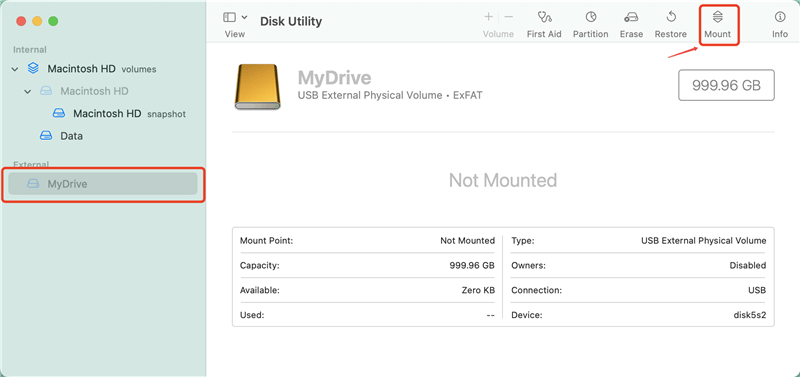
Mount External Hard Drive on Mac with Disk Utility
Disk Utility is a built-in application which can manage disks and external devices on Mac. If you want to mount an external hard drive on Mac, just connect the external hard drive to your Mac, open Disk Utility, select the external hard drive and click on Mount button.
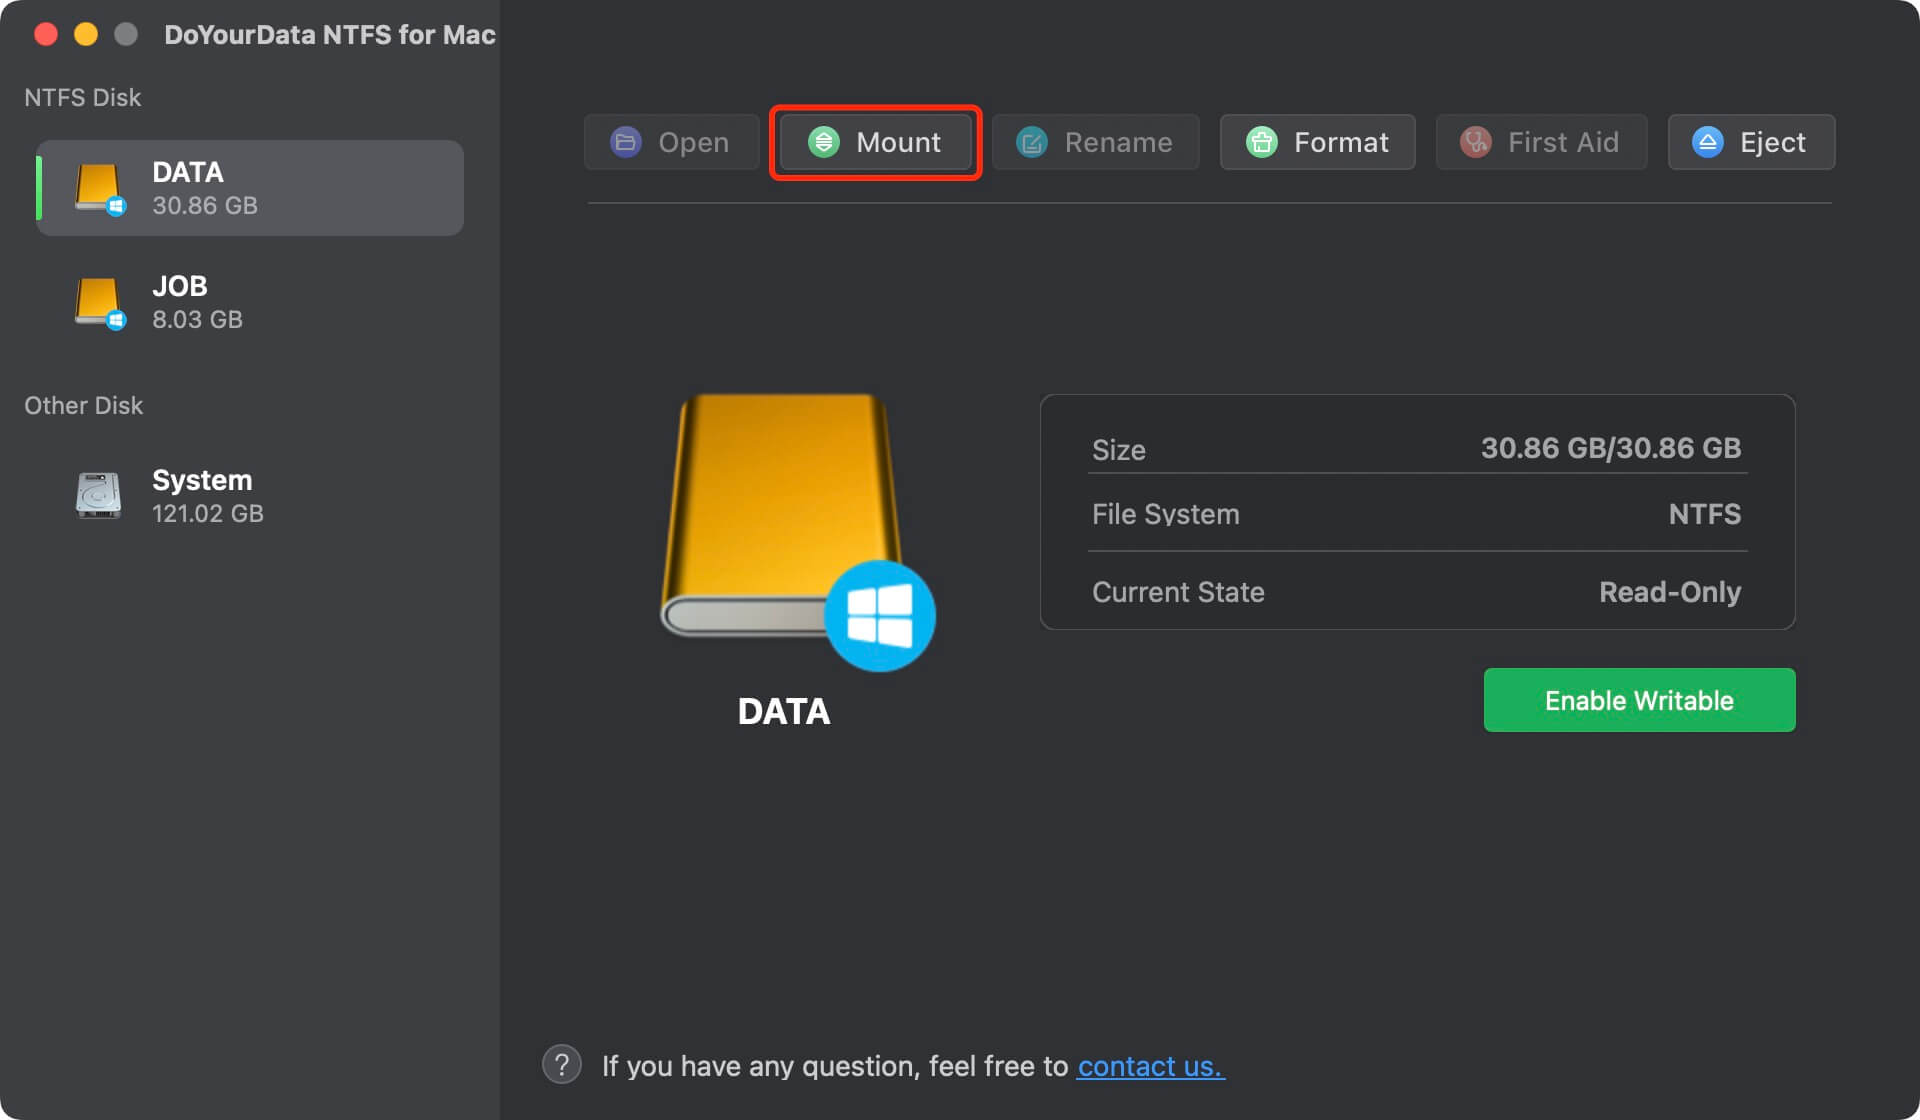
Mount External Hard Drive on Mac with NTFS for Mac
NTFS for Mac tool can enable full NTFS read-write on Mac and it also can help you mount hard drive on Mac.
Step 1. Download and install DoYourData NTFS for Mac on your Mac.
Step 2. Open DoYourData NTFS for Mac, select the external hard drive and click on Mount button.
Recover Data from An Unmounted External Hard Drive on Mac
Even if an external hard drive fails to mount on a Mac, data can be salvaged using a data recovery program. However, this strategy will only succeed if Disk Utility recognizes your external drive and displays its correct size when you connect it.
Do Your Data Recovery is our top pick for data recovery software because it features a simple interface that allows users to recover their data. And it's compatible with pretty much any external hard drive out there.
Step 1. Download and install Do Your Data Recovery for Mac, then run it from Launchpad.
Step 2. Select the hard drive to start data recovery.

Step 3. Click on Scan button to deeply scan the unmounted drive. It will find all existing files, deleted/lost files stored on the drive.

Step 4. Once the scan is completed, you can preview and recover the files you will need.

Conclusion:
No one likes to see their Mac have storage problems. After all, it causes further interference in your regular activities. An external hard disk is a great help in this situation. In this tutorial, we looked at using Terminal to mount an external hard disk on a Mac. And you also can use Disk Utility or NTFS for Mac tool to mount external hard disk o Mac.
In some cases, to repair a damaged external hard drive, USB flash drive on your Mac, you need to erase it. The data recovery software can help you recover lost data from a hard drive which is erased by Disk Utility or recover lost data from an unmounted drive.
Written & Updated by Ricky Lin
Ricky Lin is an senior editor of DoYourData who lives in Adelaide, Australia. He is interested in writing technology articles related with data recovery, computer issue fixes, disk clone, iPhone data recovery, video edit, Mac optimization, etc. He Joined DoYourData in 2019 and have written 500+ articles to help both Windows users and Mac users to solve data or computer problems.
Hot Articles
- Best Free Data Recovery Software Review
- Best Data Erasure Software Review
- Best Disk Cloning Software Review
- Fix External Hard Drive Not Showing Up on Mac
- Fix RAW External Hard Drive
- Reset A M1 Mac to Factory Settings
- How to Back Up Mac Data
- Uninstall Apps on Mac
- Install Windows-style Start Menu on Mac
- Fix iMac Black Screen and Fix iMac Boot Issue