Quick Navigation:
- Understanding Data Loss in macOS High Sierra
- 4 Methods to Recover Lost Data in macOS High Sierra
- Preventing Future Data Loss in macOS High Sierra
- Conclusion
macOS High Sierra, known for its enhanced storage management and security features, is still susceptible to data loss due to various reasons. Despite any reason, loss of important data and information can be stressful for the user. This guide will walk you through the most effective methods to recover lost data in macOS High Sierra.
Understanding Data Loss in macOS High Sierra
Data loss can happen to anyone, and understanding its causes can help prevent future incidents. Common reasons for data loss in macOS High Sierra include:
🗑️ Accidental Deletion: This is the most frequent cause, often occurring when users inadvertently delete important files or empty the Trash without realizing what was inside.
Formatting: Reformatting a disk or partition without backing up files can lead to data loss.
💥 System Crashes or Errors: Unexpected shutdowns, software crashes, or macOS errors can cause files to become corrupted or disappear.
☠ Malware or Virus Attacks: Though macOS is less prone to viruses than other operating systems, it is not immune. Malware can corrupt or delete files.
🔥 Physical Damage to Storage Media: Hardware failures such as disk damage, power surges, or spills can lead to data inaccessibility.
👨🔧 Immediate Steps to Take After Data Loss
When you realize that data has been lost, taking prompt action is crucial to increasing the chances of recovery:
- Stop Using the Affected Device: Continuing to use the Mac or the storage device can overwrite the lost data, making recovery more difficult or impossible.
- Check the Trash Folder: If the files were accidentally deleted, they might still be in the Trash. Open the Trash bin and look for the missing files. If found, simply right-click and select "Put Back" to restore them.
4 Methods to Recover Lost Data in macOS High Sierra
Recover Lost Data Using Time Machine Backup
If you have been using Time Machine, macOS's built-in backup solution, you might be able to recover your lost files from a backup. Time Machine is an integral part of macOS that automatically backs up your files, apps, and system settings. Connect the backup drive and use Time Machine to restore the lost files. Here's how to use it to recover lost data:
- Connect the Time Machine Backup Drive: Ensure that the backup drive is connected to your Mac.
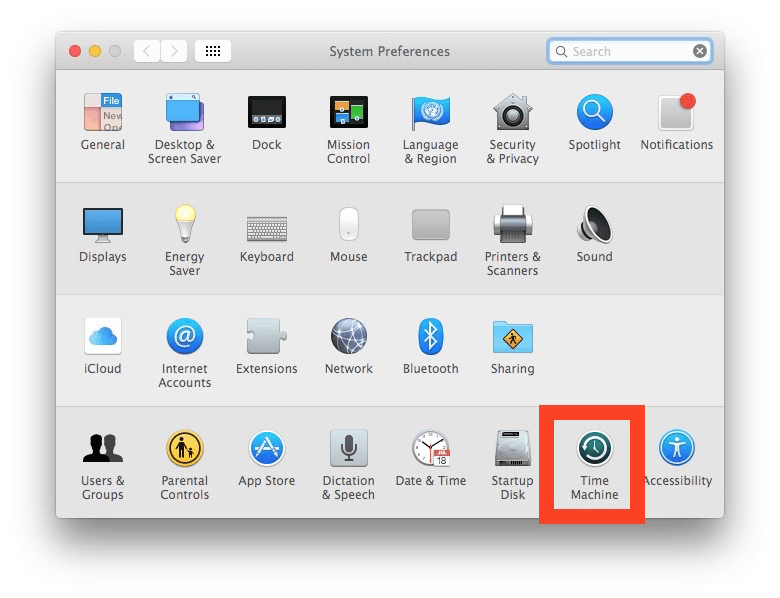
- Open Time Machine: Go to the Apple menu > System Preferences > Time Machine and click on "Enter Time Machine."
![recover lost data in macOS High Sierra]()
- Locate the Lost Files: Navigate through the timeline on the right side to find the point in time when the files were still present. Browse through folders to locate your lost files.
- Restore the Files: Check the files you want to recover and click the "Restore" button. The files will be restored to their original location.
![recover lost data in macOS High Sierra]()
Using Disk Utility
Disk Utility is a built-in tool designed to repair and manage disks. If there are issues with the drive and make the drive or files inaccessible, you can use the Disk Utility to fix the drive issues and them get back the files. To use it for recovery:
- Open Disk Utility. Select the affected disk or partition.
![recover lost data in macOS High Sierra]()
- Click on "First Aid" to check and repair the disk.
![recover lost data in macOS High Sierra]()
Disk Utility's "First Aid" feature can fix some disk errors that might be causing the drive and data to be inaccessible.
Recover Data with Do Your Data Recovery in macOS High Sierra
If you cannot restore the files or fix the drive issues to get back the files with all the above methods, there is another solution - using the third-party data recovery software for Mac. With professional data recovery software, it's able to deeply scan the drive to analyze and search for lost files. If the lost files are not overwritten or badly damaged, it will be no problem to recover the files with data recovery software.
To recover data successfully, it's necessary to choose a reliable data recovery software. For macOS High Sierra, we suggest you use the software Do Your Data Recovery for Mac, it's a comprehensive tool designed for macOS.
Do Your Data Recovery for Mac
- Best data recovery software for macOS High Sierra or other systems.
- Deeply scan drive to search for lost files on Mac.
- Effective to recover lost files from HDD, SSD, or other drives.
⭐ Key Features of Do Your Data Recovery for Mac
- Comprehensive File Recovery:
- Supports recovery of various file types, including documents, photos, videos, music, and more.
- Works with multiple file systems like HFS+, APFS, FAT, NTFS, and EXT.
- Partition Recovery:
- Recovers lost or deleted partitions and retrieves data from them.
- Preview of Recoverable Files:
- Allows users to preview files before recovery, helping to ensure that the right files are recovered.
- Filters results based on file type, size, and date to streamline the recovery process.
- Fast and Deep Recovery:
- Efficiently recovers recently deleted files or files from damaged partitions.
- Conducts a thorough search for lost files, including those from formatted or heavily damaged drives.
- Performs a detailed scan of the storage device to find lost files that aren't recoverable through standard methods.
- Identifies file signatures to recover files that may be partially corrupted or have missing metadata.
- RAID Recovery:
- Supports recovery from RAID configurations, including RAID 0, RAID 1, RAID 5, and RAID 6.
- User-Friendly Interface:
- Features a straightforward, user-friendly interface that simplifies the data recovery process.
- Gives consumers detailed information to help them through the recovery process.
- Support for External Drives:
Recovers data from a variety of storage media, such as SSDs, memory cards, USB flash drives, and external hard disks.
Do Your Data Recovery's combination of powerful recovery tools and user-friendly features makes it a versatile choice for recovering lost or deleted files on macOS.
👨🔧 How to Use the Software to Recover Lost Data in macOS High Sierra:
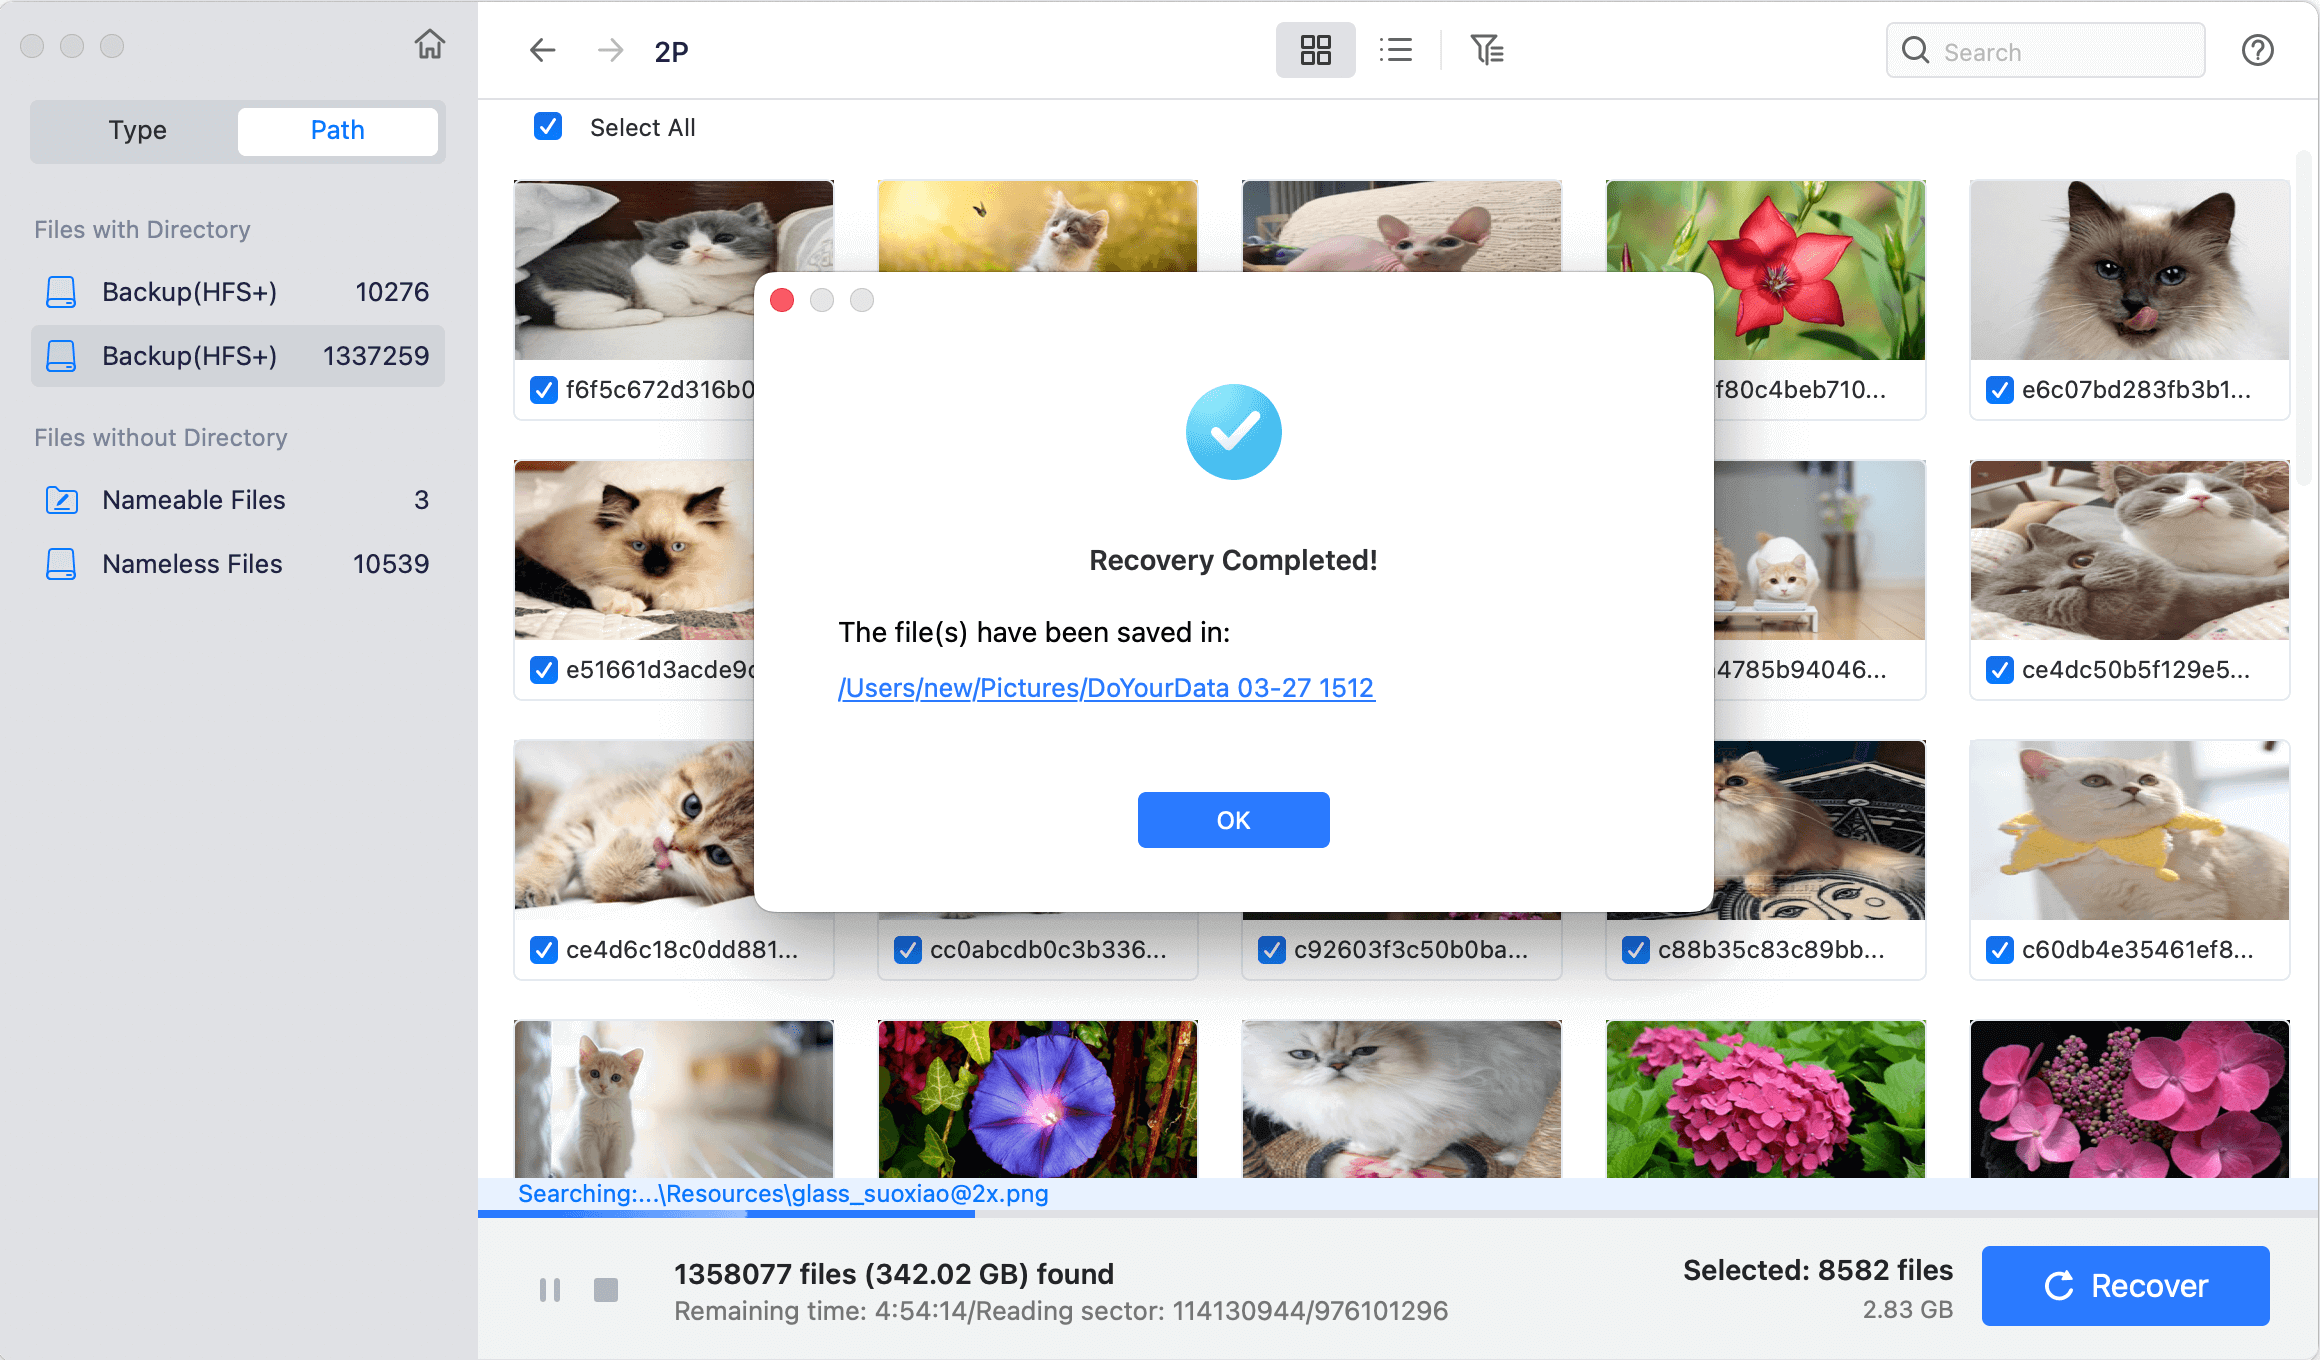
Step 1. Launch Do Your Data Recovery for Mac and grant the necessary permissions to access your storage devices. Choose the disk or partition where you lost the data.

Step 2. Click on the "Scan" button and the software will start to scan the drive and search for any possible lost files.

Step 3. After the scan is finished, view the files that can be recovered and choose the ones that require restoration.

Step 4. Select a secure location to store the recovered files (not the original drive) after clicking "Recover" button.
Terminal Commands for Data Recovery
For more technically inclined users, Terminal can be a powerful tool to recover lost files in macOS High Sierra:
💡 Note: Terminal commands can be complex and carry a risk of further data loss if not used carefully.
Open Terminal from the Applications > Utilities folder.
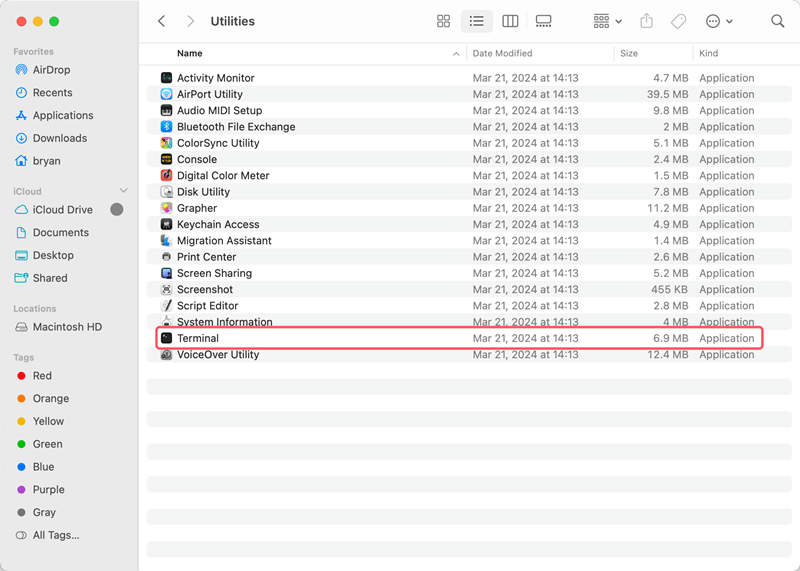
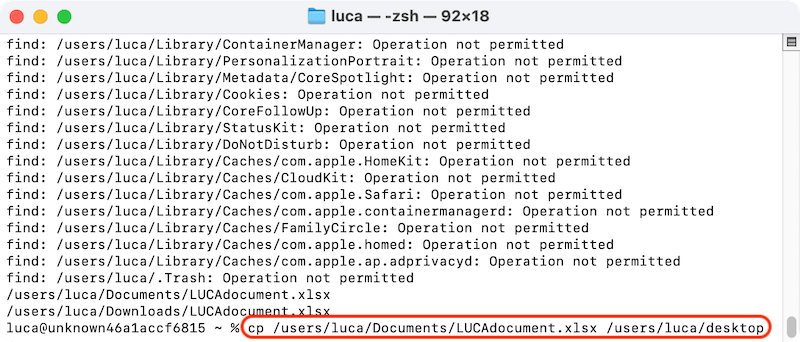
Using cp Command:
Use basic commands like cp (copy) and mv (move) to try and locate and recover lost files.
cp /Volumes/DiskName/Path/To/File /New/Location
Using Diskutil Command:
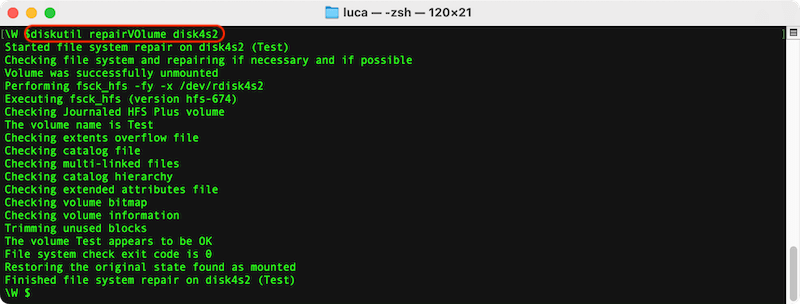
The command can be used to repair the volume problems and them make the the drive or files visible in Finder. If can be useful if the files are lost due to volume issues.
- Type diskutil list to see a list of all connected drives and partitions.
- Use the command diskutil repairVolume /dev/disk# (replace disk# with your disk identifier) to attempt repair.
![recover lost data in macOS High Sierra]()
Using fsck Command:
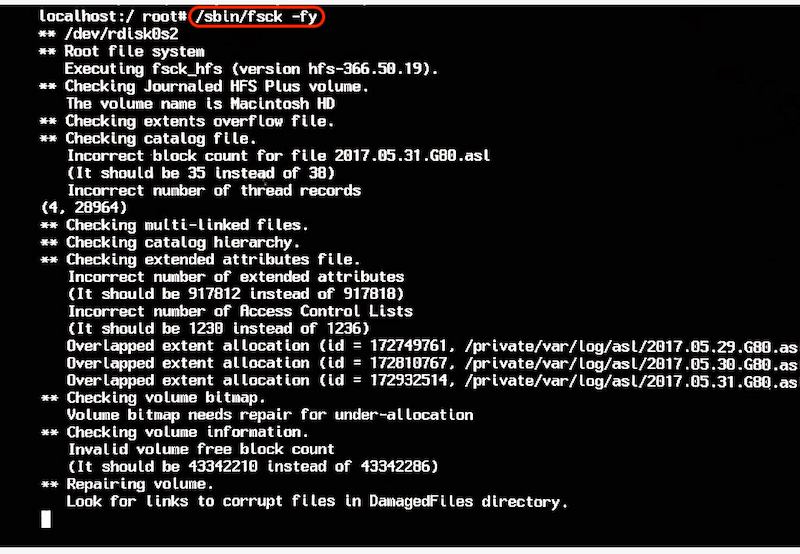
If the file system of your drive is corrupted, it's able to check and fix the file system with this command. Then it will make the drive work and show the files again.
- Reboot your Mac in Single User Mode by holding down Command + S during startup.
- Type /sbin/fsck -fy and press Enter. This will check and repair the file system.
![recover lost data in macOS High Sierra]()
- If Terminal indicates that the disk has been repaired, type reboot to restart your Mac.
Preventing Future Data Loss in macOS High Sierra
While data recovery is possible, preventing data loss is always better. Here are some tips:
- Regular Backups: Utilize Time Machine or another backup solution to back up your data regularly.
- Use Cloud Storage: Store important files in the cloud using services like iCloud, Google Drive, or Dropbox for added redundancy.
- Install Reliable Security Software: Protect your Mac from malware and ransomware by installing reliable antivirus software.
- Be Cautious When Deleting Files: Double-check the files you're about to delete, and avoid emptying the Trash until you're certain.
- Monitor Disk Health: Use tools like DriveDx or Disk Utility to regularly check the health of your storage devices.
Conclusion
Data loss on macOS High Sierra can happen for various reasons, but with the right knowledge and tools, you can recover lost data effectively. Whether you use built-in features like Time Machine and Recovery Mode, third-party Mac data recovery software, or advanced Terminal commands, it is important to act quickly and carefully to increase the likelihood of successful recovery. Moreover, adopting preventive measures such as regular backups and proper security practices will minimize the risk of future data loss.
You can make sure that your data is safe and that you are ready to retrieve it in the event of an emergency by taking the precautions listed above.
Do Your Data Recovery for Mac
Do Your Data Recovery for Mac, one of the best Mac data recovery software, can help you easily and completely recover deleted, formatted or lost files from Mac HDD/SSD, external HDD/SDD, USB drive, memory card, digital camera, or other storage devices.
