The reliable Mac data recovery software to recover deleted or lost files.
Free TrialWhat Is Disk Utility? How to Use Disk Utility on Mac?
![]() Updated by Justin Kenny on 2022-06-11
Updated by Justin Kenny on 2022-06-11
There are a lot of talking points about Disk Utility on Mac, a built-in tool that helps you perform and finish many tasks. Whether you intend to reformat an external hard drive or create a new partition, Disk Utility makes things look effortless for you.
On top of that, you can also access Disk Utility from macOS Recovery Mode, meaning you don't need to use any special bootable tools to partition Mac hard drive.
The good thing is that we'll show you how to use Disk Utility on Mac in this guide.
Quick Navigation:
- 1. What is Disk Utility?
- 2. Where is the location or Disk Utility on your Mac?
- 3. What is the role of Disk Utility?
- 4. What is the role of First Aid in Disk Utility?
- 5. What is the functionality of Erase in Mac Disk Utility?
- 6. What is the role of Restore in Disk?
- 7. What is the role of Partition in Disk Utility?
- 8. What is the role of Volume in Mac Disk Utility?
- 9. What is Unmount in Disk Utility?
- 10. Best Disk Utility alternative software
What is Disk Utility?
Disk Utility is nothing but a built-in disk manager tool on Mac, and you can access it without your Mac. It performs important functions as it helps you erase, partition, and restore external storage devices and internal disks. You'll find two utilities in your classic Mac OS: Disk Copy and Utility.

Where is the location or Disk Utility on your Mac?
You can access the Disk Utility in the ''Other'' folder provided that your Mac is functioning appropriately. However, if you're unable to boot up your Mac, you won't be able to access Disk Utility without booting into macOS Recovery Mode.

What is the role of Disk Utility?
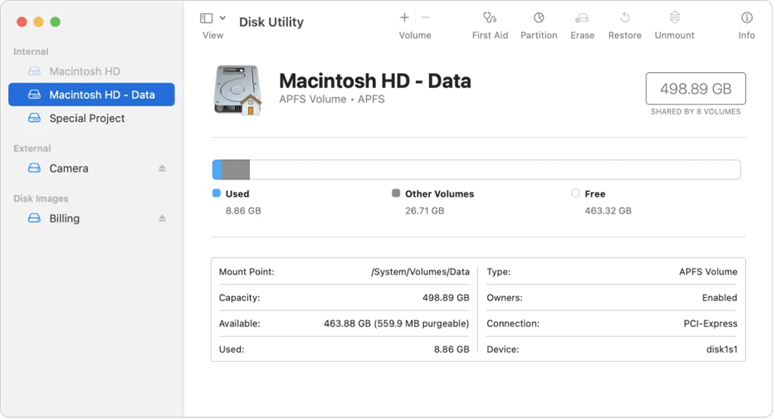
Before heading to Disk Utility's essential functions, let's talk about the items listed in the picture below. The icons in the picture may look different from your Mac as you might be using a different operating system. The picture shows the Disk Utility main interface.
After clicking View and Show All Devices, you'll be able to see all the detected disk images and external or internal drives on the left sidebar.
If you're using macOS 10.13 or later, you'll notice APFS under the startup disk icon.
When looking at the top right side of the menu, you can see six tools utilized on volumes and shown disk listed horizontally.
The tools help you delete or add volumes, repair and check hard drives, and unmount, restore, erase, and partition a volume or disk.
Luckily, you'll learn about using the tools later in the article.
What is the role of First Aid in Disk Utility?
Let us talk about the role First Aid plays in Disk Utility.
Check hard drives
Disk Utility First Aid assists you in diagnosing the hard drive problems if it has been facing some.
Since it is a built-in tool, you can use it to check and repair damages that happened to your disk.
When running the latest version of El Capitan, you hit the first Aid after clicking the desired drive to assess your drive. Later, First Aid Utility will assess each volume and partition map on your disk.
However, checking the problems via First Aid might make your PC work slowly or stop responding.
Repair hard drives
After detecting the problem, the role of First Aid is to fix the issues as soon as possible. You can see a tick if your disk isn't facing any issue.
However, startup disks might report a problem saying First Aid found corruption that needs to be repaired.
At this point, you shouldn't waste time before running the First Aid option from macOS Recovery Mode.
However, you're recommended to run First Aid a couple of times for non-startup disks to ensure an effective and consistent result. However, you might consider backing up your data if you face ‘Disk Utility can't repair this disk’.

What is the functionality of Erase in Mac Disk Utility?
Here are the scenarios that urge you to format or erase a disk.
- When you tend to prepare an external hard drive for backups.
- Preparing Mac for Sale.
- If you want to reformat a drive, your operating system doesn't support it.
- You're looking to create bootable USB drives with your Mac Disk Utility.
- When you want to refresh a device by cleaning up all files.
If you intend to clean your hard drive securely, the security options you can see after hitting the Erase icon enable you to select the way to remove the data.
However, if you're opting for the fastest mode, it only erases header information, and you can recover that information via Mac data recovery software.
Hence, it would help if you opted for moving the slider icon to the secure mode to ensure complete removal of your disk as nobody finds it practical to access your important data afterward.
However, you need to select the format depending on how you'd like to use your formatted drive.

What is the role of Restore in Disk?
With the Restore option, you've got the leverage to copy the volume to another volume. When cloning one Mac hard drive to another, all you need to do is create photos via Disk Utility of your targeted Mac hard drive.
Disk images help you copy the structure and data of a disk, which might help copy a particular system to different PCs. Moreover, it also helps you go back to the previous configuration and back up the system. Here's the step-by-step guide to creating images of your Mac hard drives.
Step 1: After selecting the desired drive, you'll need to tap the File icon. Next, select an image from (partition name) after hitting the New Image icon. Later, you need to save it to your desired location.
Step 2: You'll need to restore that image to another partition via receiving drive. Hence, you'll need to select Choose Restore after hitting the Restore icon. However, this process removes receiving partition data.

What is the role of Partition in Disk Utility?
If you partition your hard drive, it tends to get split into different logical drives, which allows you to use the drives independently.
You'll enter the pie chat window after hitting the Partition window. Next, you can adjust the partition's size and number after tapping the Delete or add icon under the pie chat.
Select a format suited to your requirements after naming the disk and then confirm the action by talking the Apply icon.

What is the role of Volume in Mac Disk Utility?
After entering the Mac Disk Utility interface, you first see the Volume icon with Delete (-) and add (+) buttons. If you select an APFS disk and click the Delete Volume or Add Volume button, you can easily delete or create an APFS volume.
If you're using Mac OS High Sierra or a later version, you can add volume pretty easily compared to partitioning the hard drive to run different operating systems. Since APFS has flexible space management, you can use multiple volumes, sharing the free space.

What is Unmount in Disk Utility?
Every disk in your disk's utility sidebar is mounted by default. However, sometimes, you might need to avoid false information transmission by unmounting a disk. You can find the mount option on the top right side of your screen.
Best Disk Utility alternative software
There are many applications can replace Disk Utility to help Mac users to format hard drive, clone Mac data or erase Mac hard drive. For example:
#1 DoYourData Super Eraser for Mac
This software can help you permanently wipe all sensitive data before selling or donating your Mac, or wipe data from external disk, USB flash drive, memory card, etc. It also can help you format hard drive or repair damaged disk on Mac.

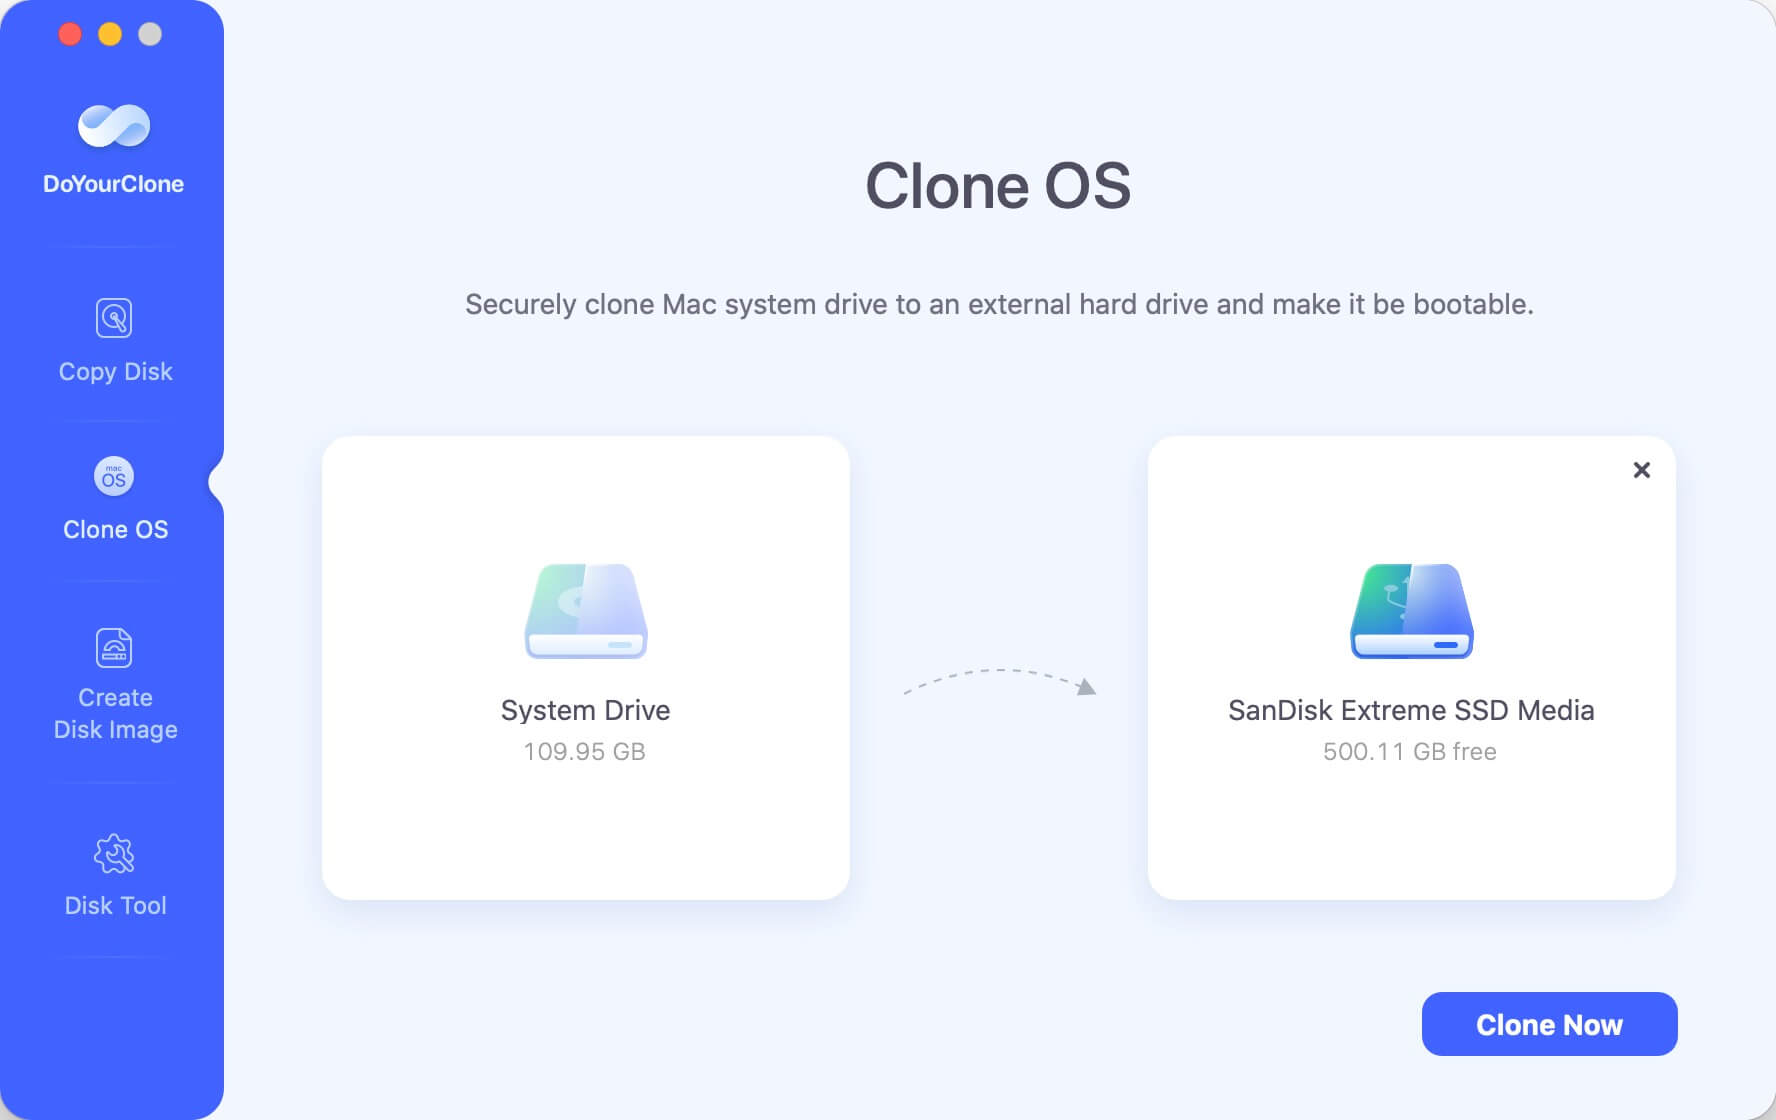
#2 DoYourClone for Mac
DoYourClone for Mac is a powerful, easy-to-use and safe disk cloning application. It can help you clone hard drive, create disk image and create bootable clone backup on Mac. You can use it to clone hard drive or create a bootable clone backup for your Mac.
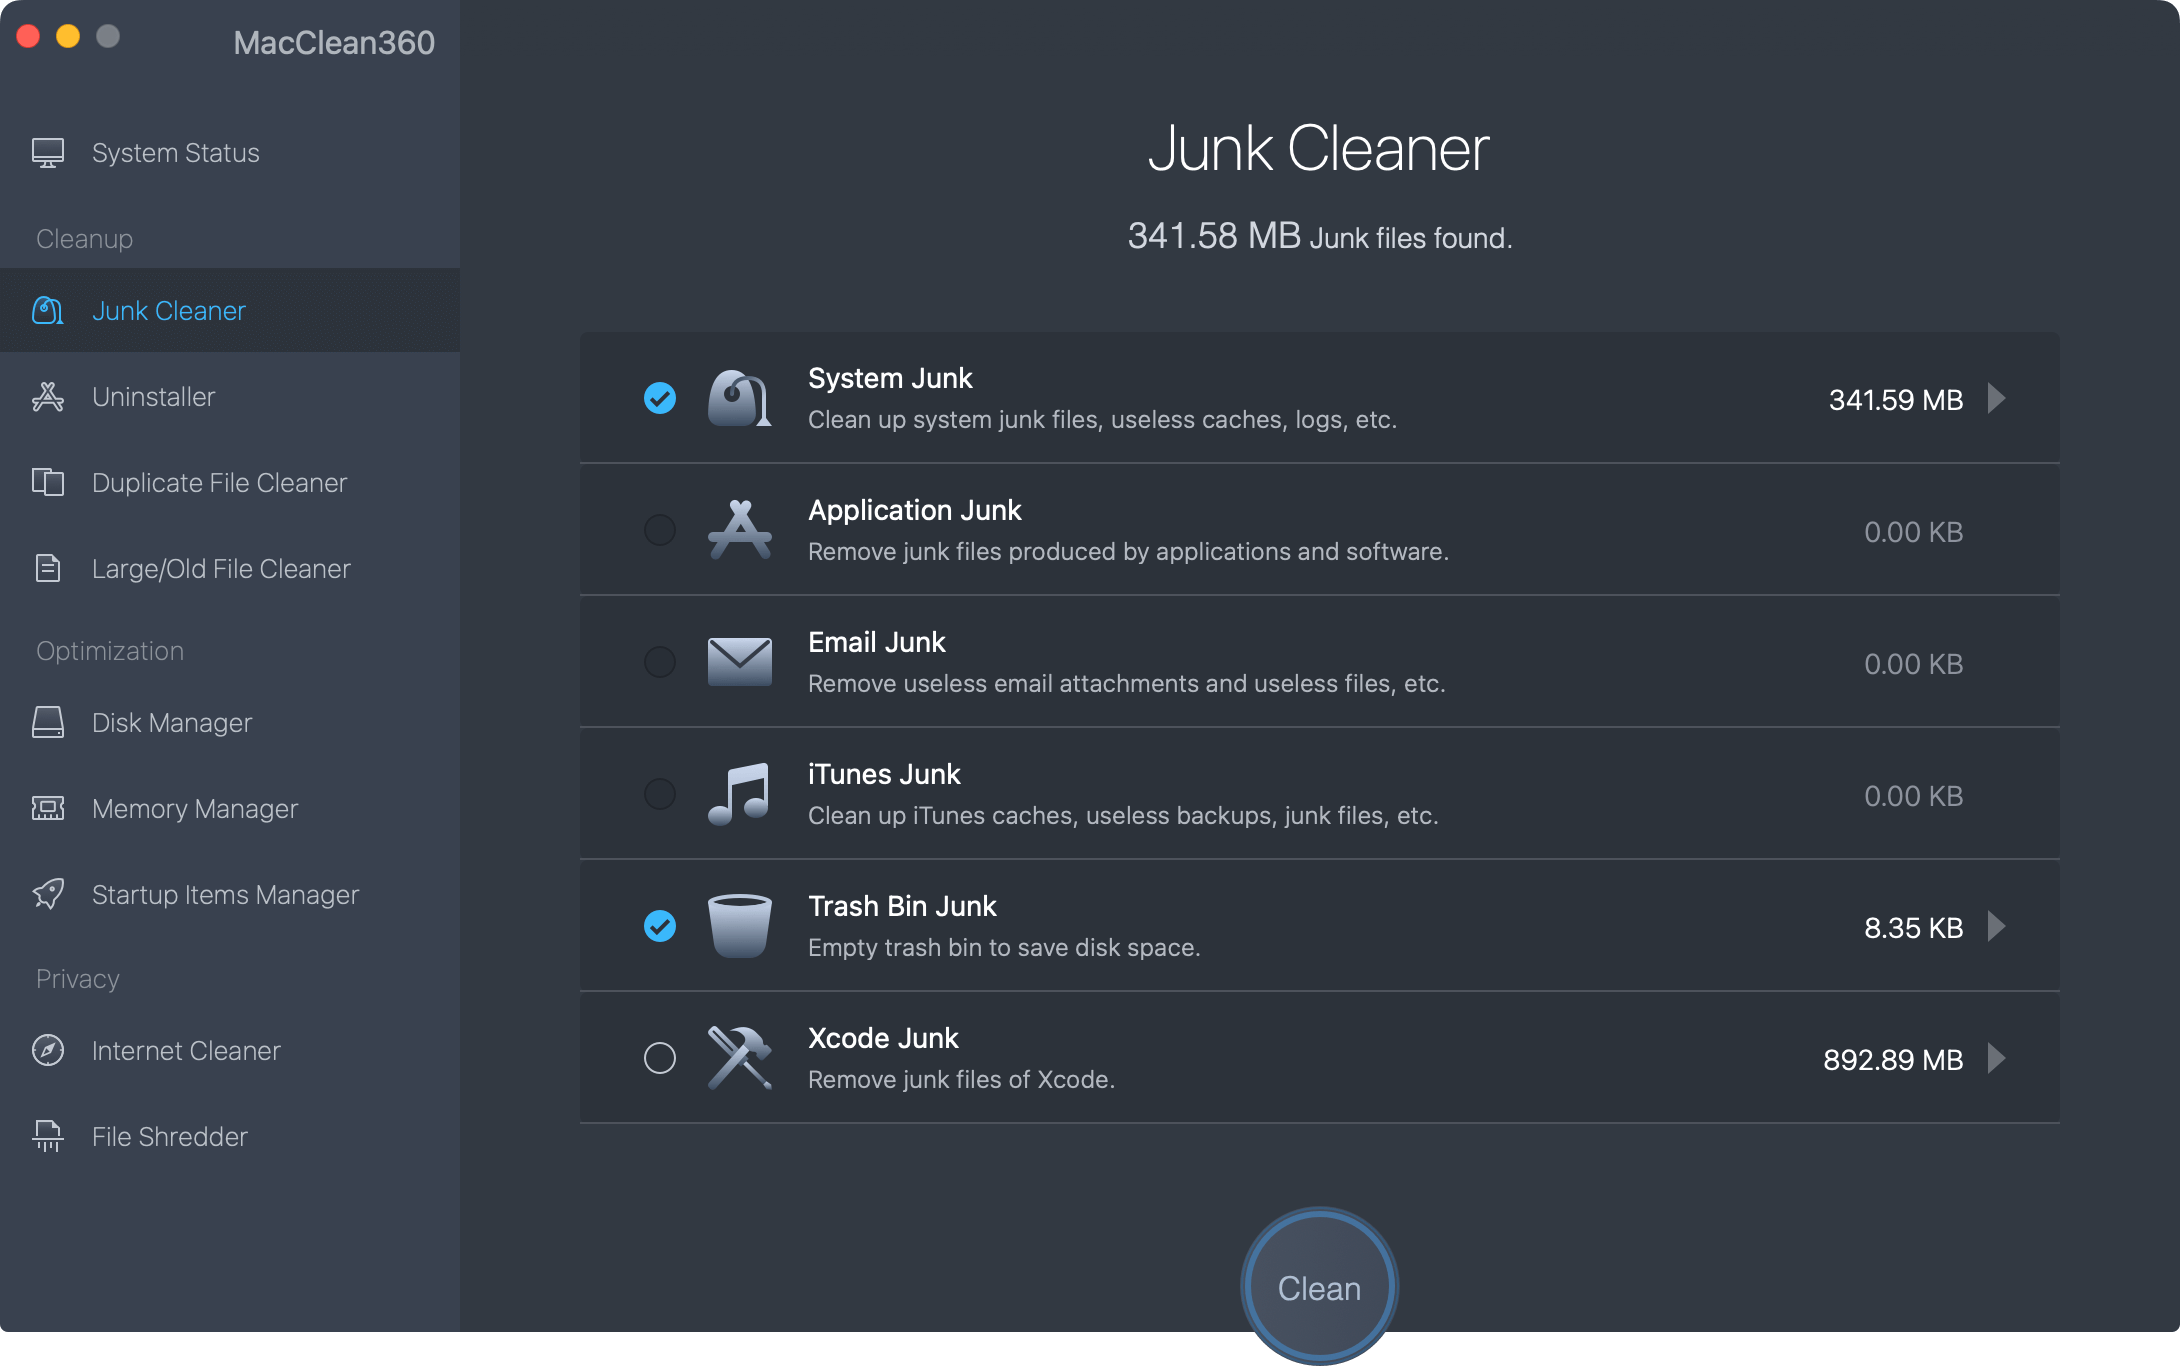
#3 MacClean360
It can help you format disk or erase data on Mac. And it can help you quickly clean up all junk data on Mac or uninstall useless applications by only 1 click.
With these applications, you can manage disks on your Mac. We strongly recommend to wipe all data before you selling or donating your Mac.
DoYourData Products
DoYourData Super Eraser for Mac
Permanently shred files or wipe hard drive to prevent data recovery on Mac.
Free TrialClone HDD, SSD, Mac OS, external disk, USB drive, and more under Mac OS.
Free TrialWritten & Updated by Justin Kenny
Justin Kenny is a writer & editor of DoYourData. He joined DoYourData in 2016 and focuses on writing articles about Windows data recovery, Mac data recovery, external device data recovery, hard drive clone, data erasure, Mac cleanup, computer issue fixes, etc. He is a super fan of Apple devices and is big on testing new digital device and system utility software.