Clone and back up Mac RAID hard drive
Clone RAID hard drive on Mac with the clone software DoYourClone as a full backup.
Quick Navigation:
RAID (Redundant Array of Independent Disks) is a powerful storage solution that offers various benefits like improved performance, fault tolerance, and redundancy. Mac users, like many others, often utilize RAID configurations to protect their data and ensure their system's reliability. However, despite its advantages, RAID is not immune to failure, and when it does fail, data loss can occur. This article provides a comprehensive guide to recover data from Mac RAID hard drive, covering everything from understanding RAID levels to identifying failure symptoms, and exploring both DIY and professional data recovery options.
RAID combines multiple hard drives into a single storage unit to improve performance and provide redundancy in case of a drive failure. There are several RAID levels, each with its unique configuration and benefits:
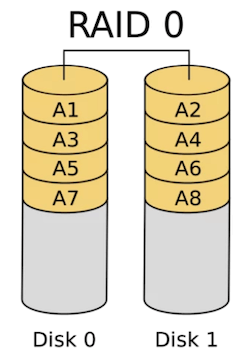
RAID 0 (Striping): RAID 0 splits data across multiple disks (at least two), significantly improving read and write performance since data is accessed from multiple drives simultaneously. However, it offers no redundancy; if one disk fails, all data is lost. RAID 0 is best suited for scenarios where speed is critical, such as video editing or gaming, and where data loss is not a major concern.
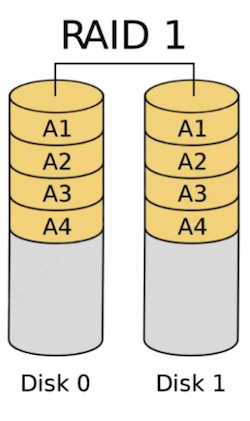
RAID 1 (Mirroring): RAID 1 mirrors data across two or more disks, ensuring high redundancy and reliability. If one disk fails, the data remains accessible from the other disk(s), making recovery straightforward. However, this setup cuts usable storage in half, as data is duplicated. RAID 1 is ideal for critical data storage where data loss is unacceptable, such as in small servers or financial records.
RAID 5 (Striping with Parity): RAID 5 combines striping with parity, distributing both data and parity information across at least three disks. This setup provides a good balance between performance, storage efficiency, and fault tolerance. If one disk fails, the array can rebuild data from the parity information. RAID 5 is commonly used in servers and environments where both performance and redundancy are important.

RAID 6 (Striping with Double Parity): RAID 6 is similar to RAID 5 but adds an extra layer of redundancy by using double parity, allowing it to tolerate the failure of two disks simultaneously. This makes RAID 6 highly reliable but slightly slower than RAID 5 due to the additional parity calculations. It's suitable for environments with large amounts of critical data where high fault tolerance is essential.

RAID 10 (1+0, Mirroring and Striping): RAID 10 is a combination of RAID 1 and RAID 0, offering both speed and redundancy by mirroring data across pairs of drives and then striping the mirrored sets. This setup requires at least four disks and provides high performance and reliability, but it also reduces usable storage to half of the total disk capacity. RAID 10 is ideal for high-performance applications like databases where both speed and data protection are needed.

Mac systems, particularly those used in professional environments, often employ RAID setups to safeguard critical data, speed up access times, or handle large files, such as video editing or database management. Despite the benefits, RAID setups can fail due to various factors like hardware malfunctions, software corruption, or user error.
Recognizing the signs of RAID failure is crucial to taking prompt action to prevent further data loss. Common symptoms of RAID failure on a Mac include:
🔊 Unusual Noises from Drives: Clicking or grinding sounds may indicate a mechanical failure in one or more hard drives.
💻 Slow System Performance: A noticeable slowdown in accessing files or running applications may suggest that one of the RAID drives is malfunctioning.
⚠️ RAID Not Mounting or Recognized: The RAID volume may fail to mount or appear as "unrecognized" in Disk Utility.
🙁 Frequent System Crashes or Freezes: Random reboots, crashes, or the Mac becoming unresponsive could be related to a failing RAID array.
⛔ Corrupted or Missing Files: Files that are suddenly missing, corrupted, or inaccessible may indicate underlying RAID issues.
To diagnose a RAID failure on a Mac, you can use built-in tools such as Disk Utility to check the status of the RAID set or third-party software to conduct more thorough diagnostics.
Before attempting any data recovery from a failed Mac RAID hard drive, it's important to follow a few preparatory steps:
Tools and Software for Checking RAID Health on Mac:
If you decide to recover data yourself, there are several methods available:
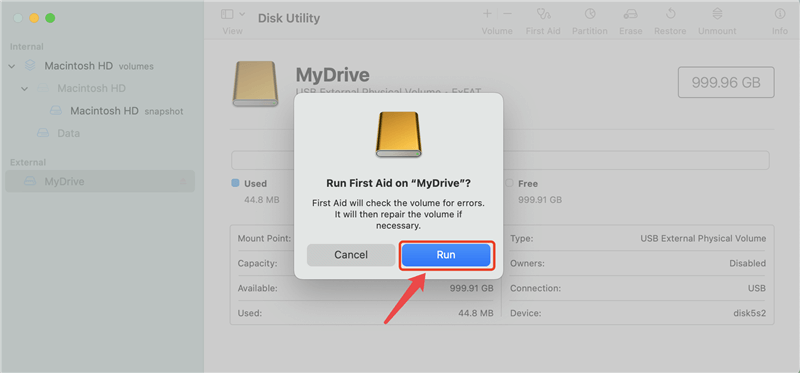
Disk Utility can be used to attempt a repair of the RAID set:


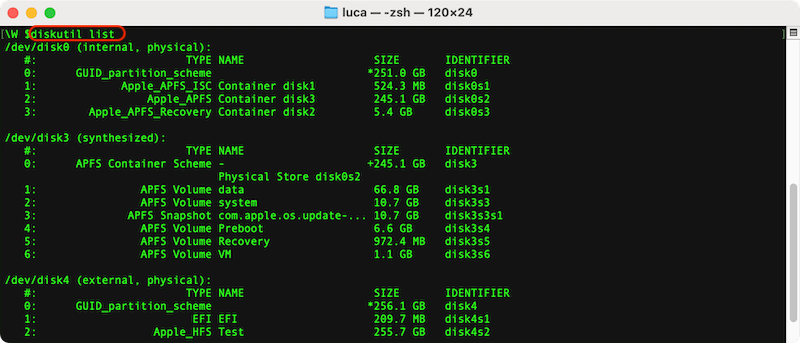
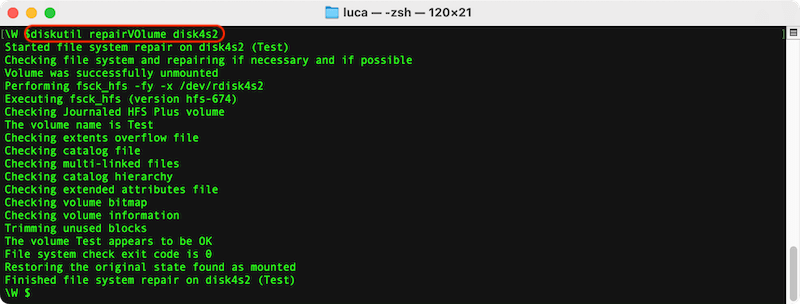
Terminal commands can also be used for advanced users familiar with command-line operations:
Pros and Cons of DIY Methods:
There are several RAID recovery software options available for Mac users. To recover data successfully from RAID hard drive, we suggest you use the software Do Your Data Recovery for Mac.
The software is a popular data recovery software that supports RAID recovery. It offers advanced RAID recovery tools for various RAID levels. with this professional-grade data recovery tool, you can recover lost data successfully from RAID in any data loss situations.
The tool provides a step-by-step wizard to guide you through the recovery process, making them suitable for users with moderate technical skills. Let's have an hands-on experience on Do Your Data Recovery for Mac:
Step 1: Download and install Do Your Data Recovery for Mac software on your Mac.
Step 2: Open Do Your Data Recovery and choose the RAID group from the left window. Next, choose your RAID array and press the Scan button.

Step 3: It will take some time to scan the Mac RAID hard drive. Just wait patiently until the scan is finished.

Step 4: Choose the data from your RAID array that you want to restore. With Do Your Data Recovery, you may view a variety of file formats immediately by using the preview feature.

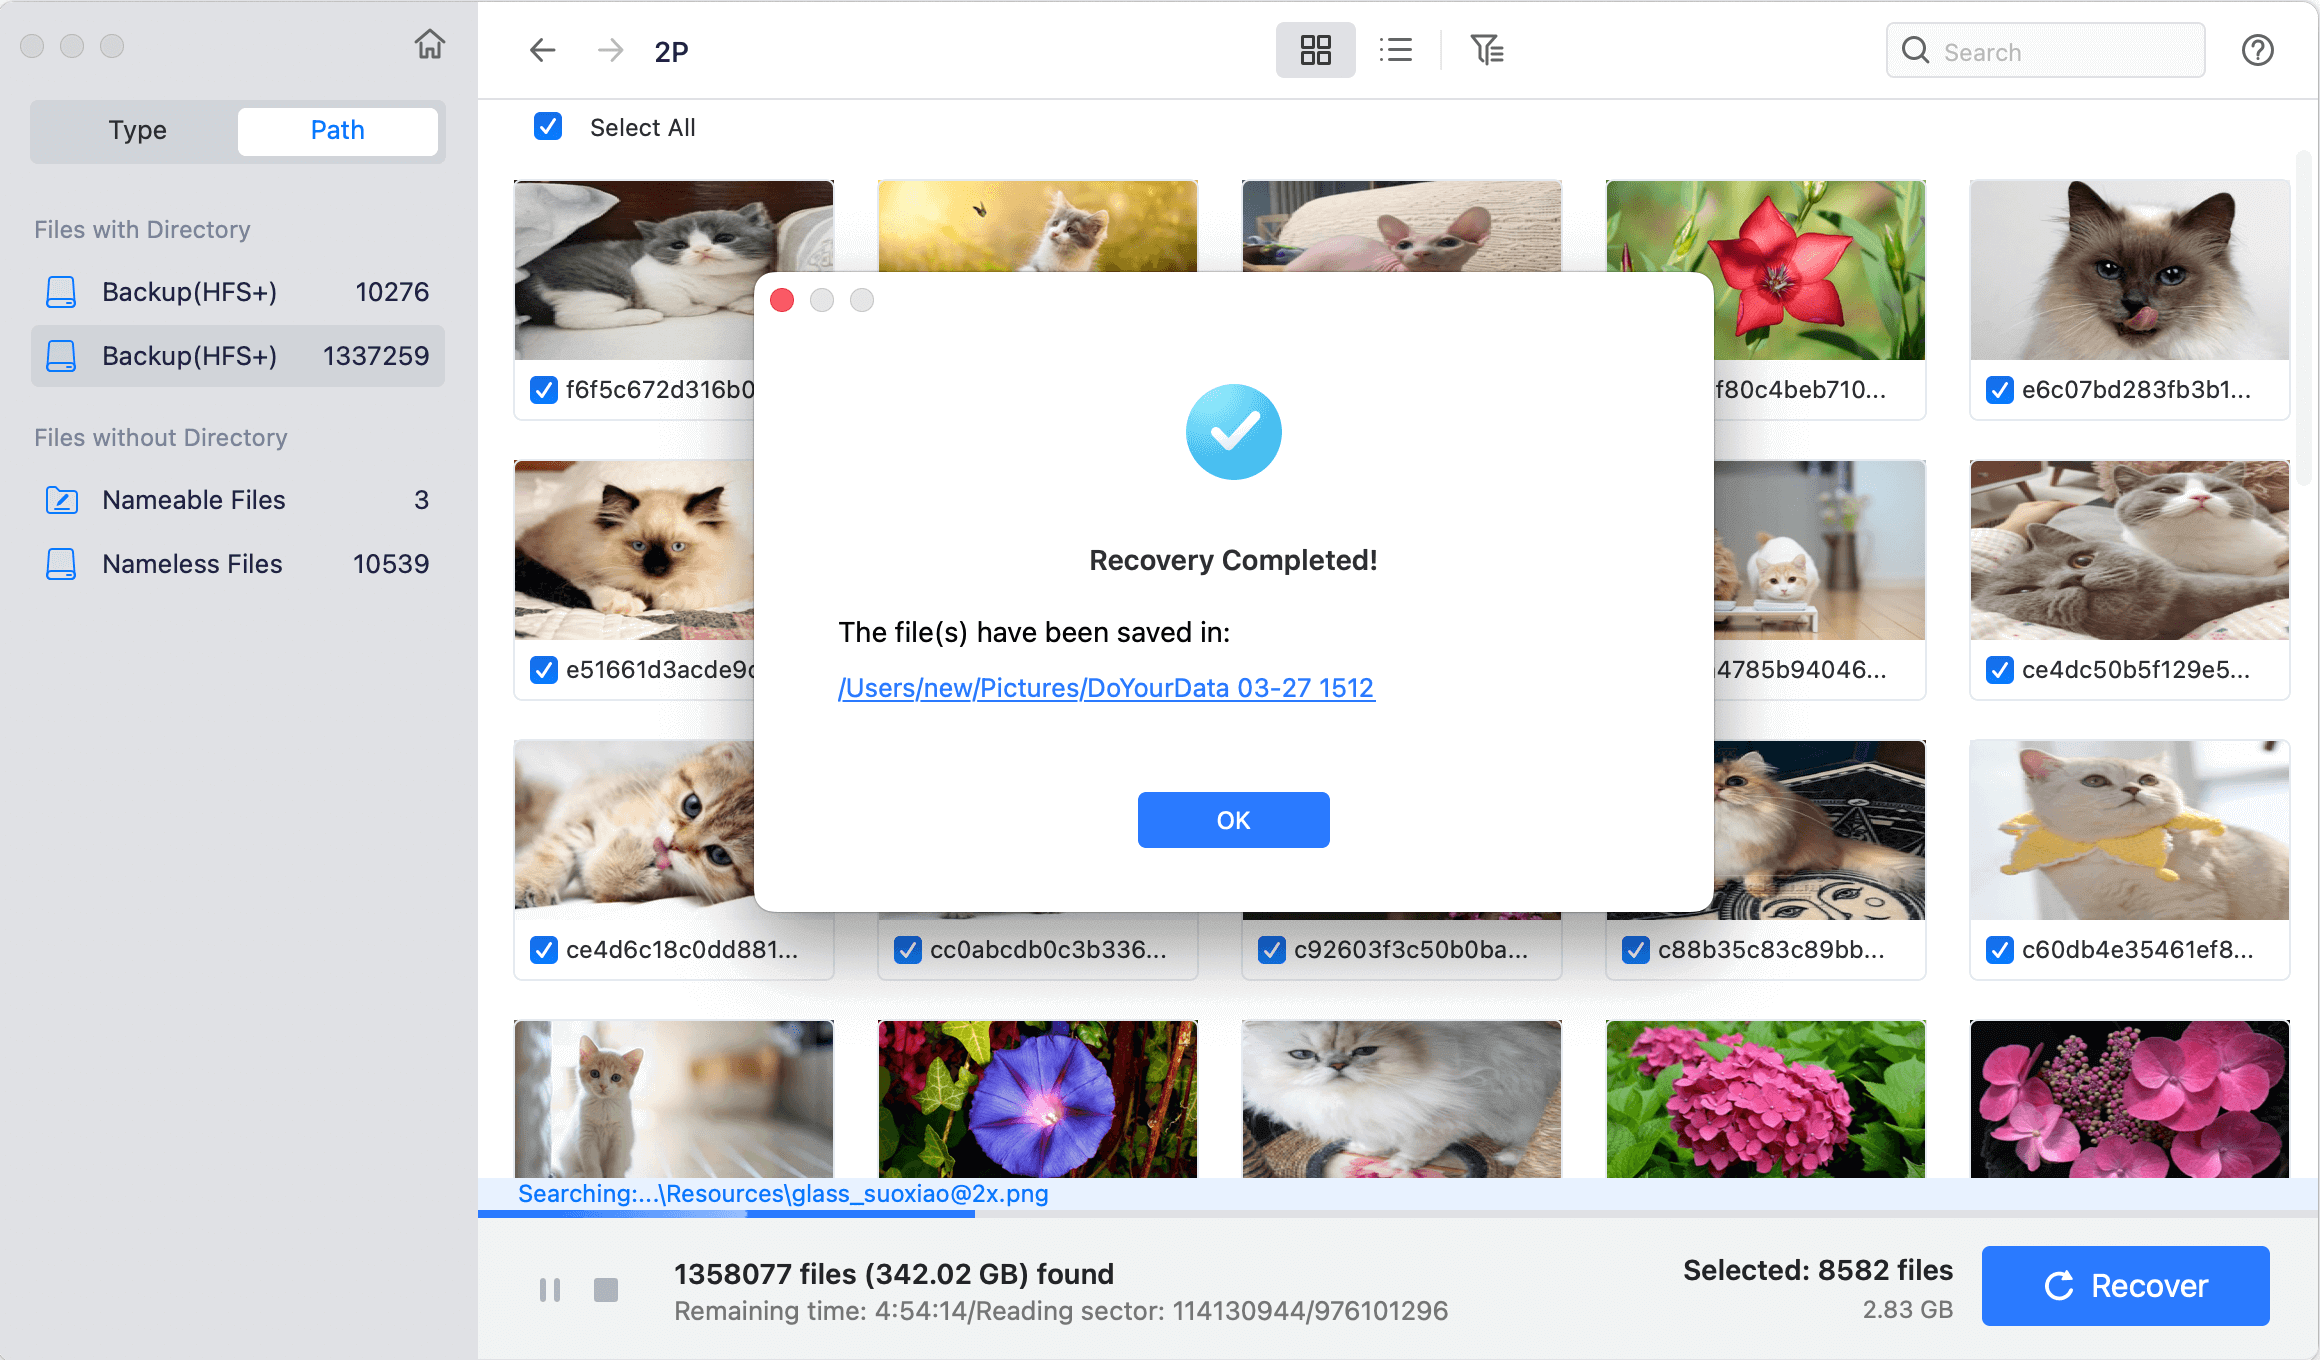
Step 5: Click the blue Recover button and select an appropriate recovery location when you have located and chosen what you want to retrieve.

Step 6: Lastly, a quick recovery report will be shown by Do Your Data Recovery along with a Finder option to access the restored data.
While DIY methods can be effective in some cases, certain situations warrant professional data recovery services:
Choosing a Reputable Data Recovery Service
Expected Costs and Turnaround Times
Preventive measures can significantly reduce the risk of RAID failures:
1. Regular Backups: Always maintain a separate backup of critical data. Use Time Machine, cloud services, or external storage devices.
Clone and back up Mac RAID hard drive
Clone RAID hard drive on Mac with the clone software DoYourClone as a full backup.
2. Monitor RAID Health: Use monitoring tools like SMART Utility or DriveDx to keep an eye on drive health and detect issues early.
3. Regular Maintenance: Periodically check the RAID array for errors using Disk Utility or other RAID management software.
4. Use Quality Hardware: Invest in high-quality drives and RAID controllers to minimize the risk of hardware failure.
5. Avoid Power Surges: Use an uninterruptible power supply (UPS) to protect your RAID setup from power fluctuations or outages.
Recovering lost files from Mac RAID hard drive can be a complex process, but with the right knowledge and tools, it is possible to recover valuable data and prevent future incidents. Whether you choose a DIY approach, Mac RAID data recovery software, or seek professional assistance, the key is to act quickly, follow best practices, and maintain regular backups to safeguard your data. Remember, while RAID provides redundancy, it is not a substitute for proper data management and protection.
Do Your Data Recovery for Mac
Do Your Data Recovery for Mac, one of the best Mac data recovery software, can help you easily and completely recover deleted, formatted or lost files from Mac HDD/SSD, external HDD/SDD, USB drive, memory card, digital camera, or other storage devices.
