The reliable Mac data recovery software to recover deleted or lost files.
Free Trial
It is simple to back up Mac data thanks to the built-in Time Machine program in macOS or OS X. You will require an external storage device in order to use Time Machine to generate backups.
Quick Navigation:
- 1. Setting up a Time Machine
- 2. How to make your Mac's Time Machine backups active?
- 3. What to do when data are missing from a Time Machine backup?
- 4. How to Make Time Machine Appear on the Mac Menu Bar?
- 5. Why is my Mac unable to identify my Time Machine?
- 6. Best alternative to Time Machine
Time Machine will begin creating backups hourly for the last 24 hours, daily for the previous month, and weekly for all prior months after you connect the storage device and choose it as your backup drive. When your backup drive is full, the oldest backups are removed.
Setting up a Time Machine
Apple support explains that you can choose any of the following backup techniques: linked external disk, such as a USB or Thunderbolt drive, to your Mac Time Machine compatible network attached storage (NAS) system that utilizes SMB External disk attached to an AirPort Time Capsule, AirPort Extreme Base Station, or AirPort Time Capsule shared as a Mac's Time Machine backup destination.
How do I backup my MacBook to a portable hard drive? It's known as a Time Machine Backup. We cannot take a Mac backup on the same Mac or on a different partition from the same partition, just as with Windows OS. A wise practice is to take a full backup before updating the OS on any device, without taking any unnecessary risks or rushing to use the new Mac OS.
Here, we go through the whole instructions for backing up a Mac before installing the newest version of Mac OS. Your Mac that is running macOS Yosemite, Mojave, Sierra, El Capitan, Monterey, or Ventura. If you don't follow the instructions for taking a Time Machine backup, you risk losing your data and having to utilize one of the Mac's data recovery programs.
The only legitimate way to back up your whole system, including Settings, Mail, Contacts, Photos/Videos, Documents, and folders, is with a time machine. One of the safe services Apple provides on your iPhone. Learn how to activate your device's Time Machine backup.
To start utilizing Time Machine on your Mac for backup purposes, simply follow these instructions.
How to make your Mac's Time Machine backups active?
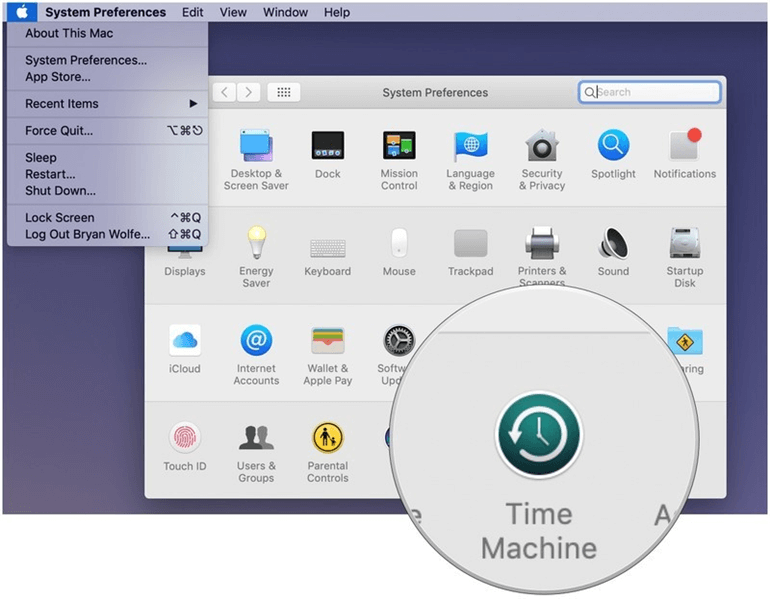
System Preferences may be found under Apple menu.
Select the Time Machine symbol.

Select Backup Disk by clicking.
Choose the disk that you want to use for a Time Machine backup.

Click Select Backup Disk, select the desired disk, and Time Machine backups will be enabled on your Mac.
To automatically back up your Mac to the selected drives, check the Back Up Automatically option.
Check the Back Up Automatically option to make Time Machine backups available on your Mac.

Your hard disk is now prepared to receive Time Machine backups.
What to do when data are missing from a Time Machine backup?
System Preferences may be found under Apple menu.
Select the Time Machine symbol.
Select System Preferences from the Apple menu, then pick the Time Machine icon to restore files from a Time Machine backup.
In the menu bar, choose the checkbox next to Show Time Machine.
After selecting the Time Machine symbol in the Menu bar, click Enter Time Machine.
Check the option next to Show Time Machine in the menu bar to recover files from a Time Machine backup. Enter Time Machine by clicking.
Click Restore after locating the problematic file or folder.
It's all set! That file will be copied back to its original place on your hard disk by Time Machine.
How to Make Time Machine Appear on the Mac Menu Bar?
You can quickly start and stop Backup whenever you want without visiting settings choices by using the Time Machine shortcut on the top Mac menu bar. Let's add or delete the Time Machine shortcut from the menu bar in Mac OS Ventura.
Go to System Settings by selecting the Apple logo from the top menu.
Next, choose Show in Menu Bar for Time Machine under "Menu Bar Only" in Control Center > scroll to the List. We are done now. Now that the TM Shortcut has been added to the menu, clicking on it reveals choices to start or stop running backups.
Step 1: Go to the Apple Menu in step one.
Step 2. After that, choose System Preference.
Step 3: Next, locate and launch Time Machine. In the System Preferences, look for Time Machine. Select Startup Backup Disk.

Due to Bootcamp, two operating systems may run on a single Mac (macOS 11 and Windows). If not, all you will see is your macOS system name.
If you select Bootcamp, you will backup the entire system as well as all partition data.
Note that the external drive appears in the list if you connect any third-party disk for a sizable backup.
Step 4: After that, choose Use disk.

Why is my Mac unable to identify my Time Machine?
Your Mac may not be recognizing the Time Machine disk for a number of reasons, including an incompatible drive format, a corrupted data partition that has been used on other computers, a cable connection issue, or a hardware issue. OS bug on Mac. Make sure your network is operational and linked to both your Mac and your Time Machine drive if it is connected to the network.
Best alternative to Time Machine
If you think Time Machine is not the right tool for you to clone Mac hard drive, just try disk cloning app - such as DoYourClone for Mac. This Time Machine alternative is much easier to use and will help you clone disk or create bootable clone backup on Mac.
DoYourClone for Mac
- Clone HDD, SSD, USB drive, external storage device, etc.
- Create bootable clone backup for Mac.
- Create disk image backup on Mac.
For example, you can follow the steps below to create a bootable clone backup for Mac:
Step 1. Open DoYourClone for Mac, choose mode - Clone OS. This mode will clone Mac’s startup disk to an external hard drive and make it be bootable.
Step 2. Connect an external hard drive to the Mac, and select it as the destination drive.
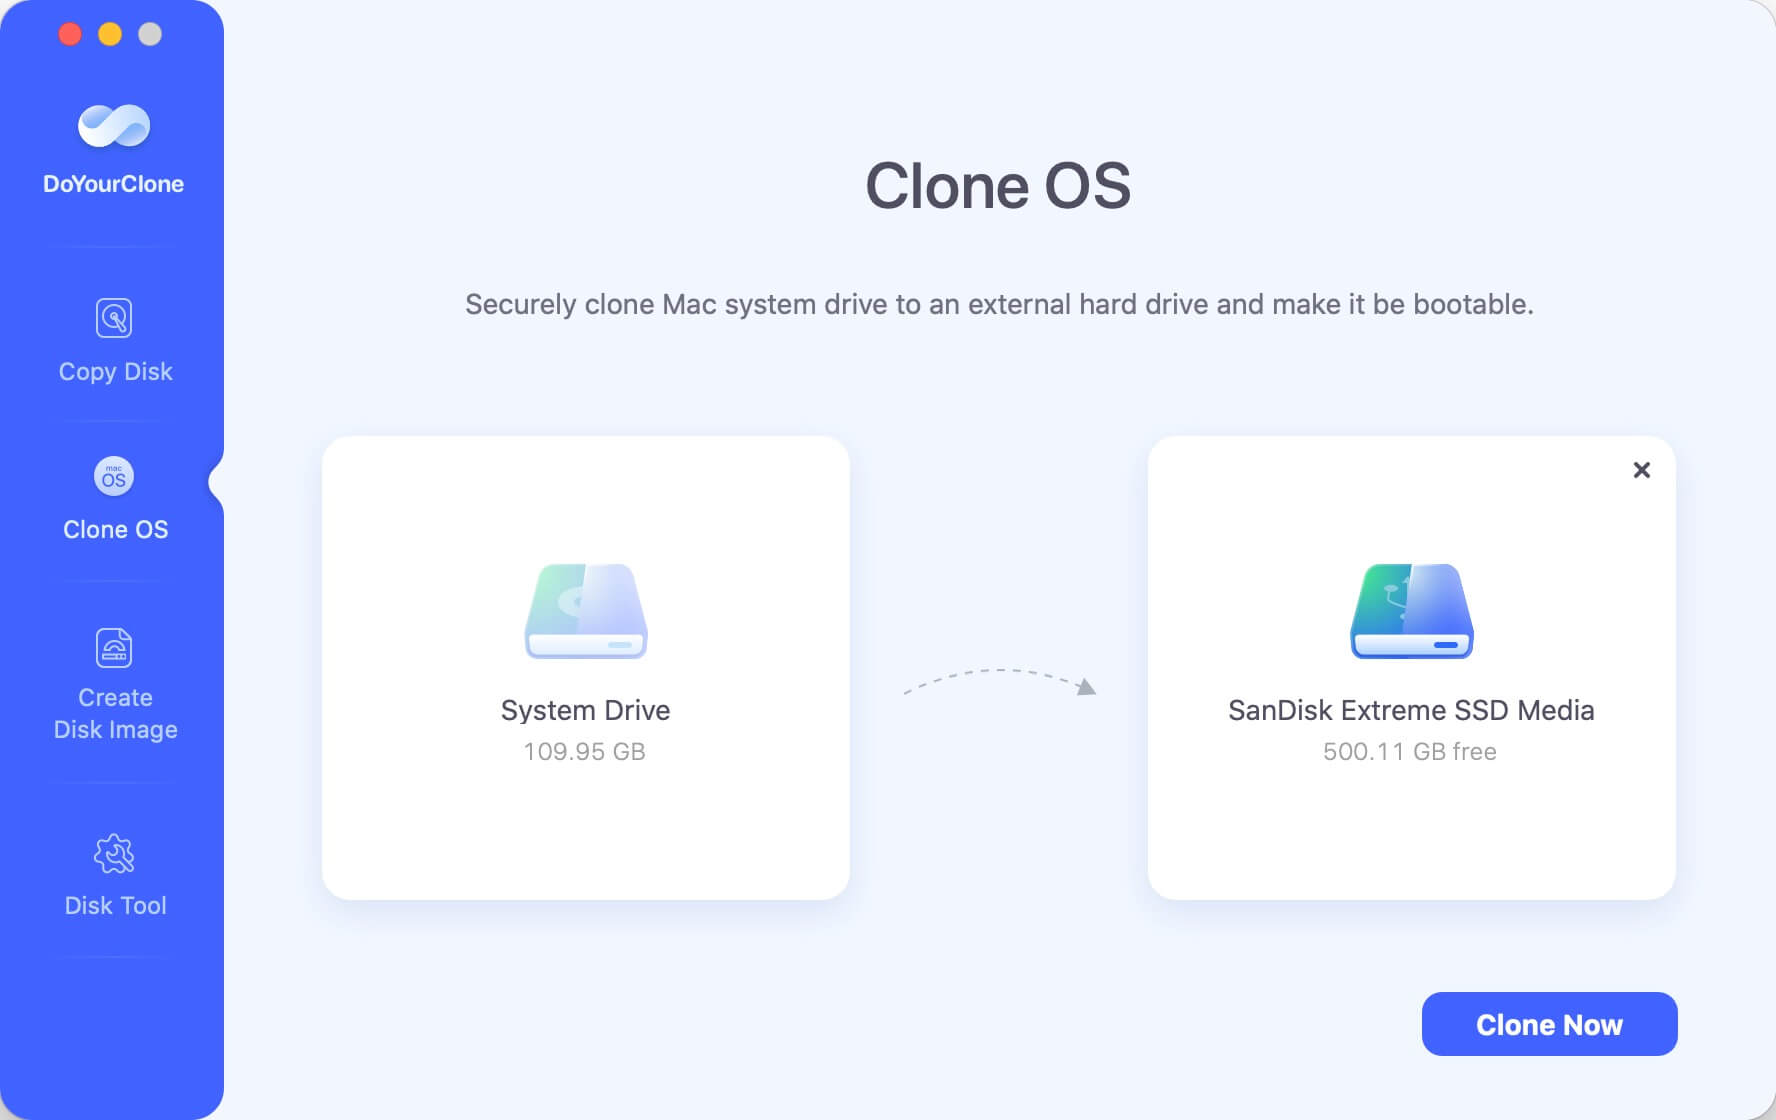
Step 3. Click on Clone Now button to clone all data from the startup disk to the external hard drive.

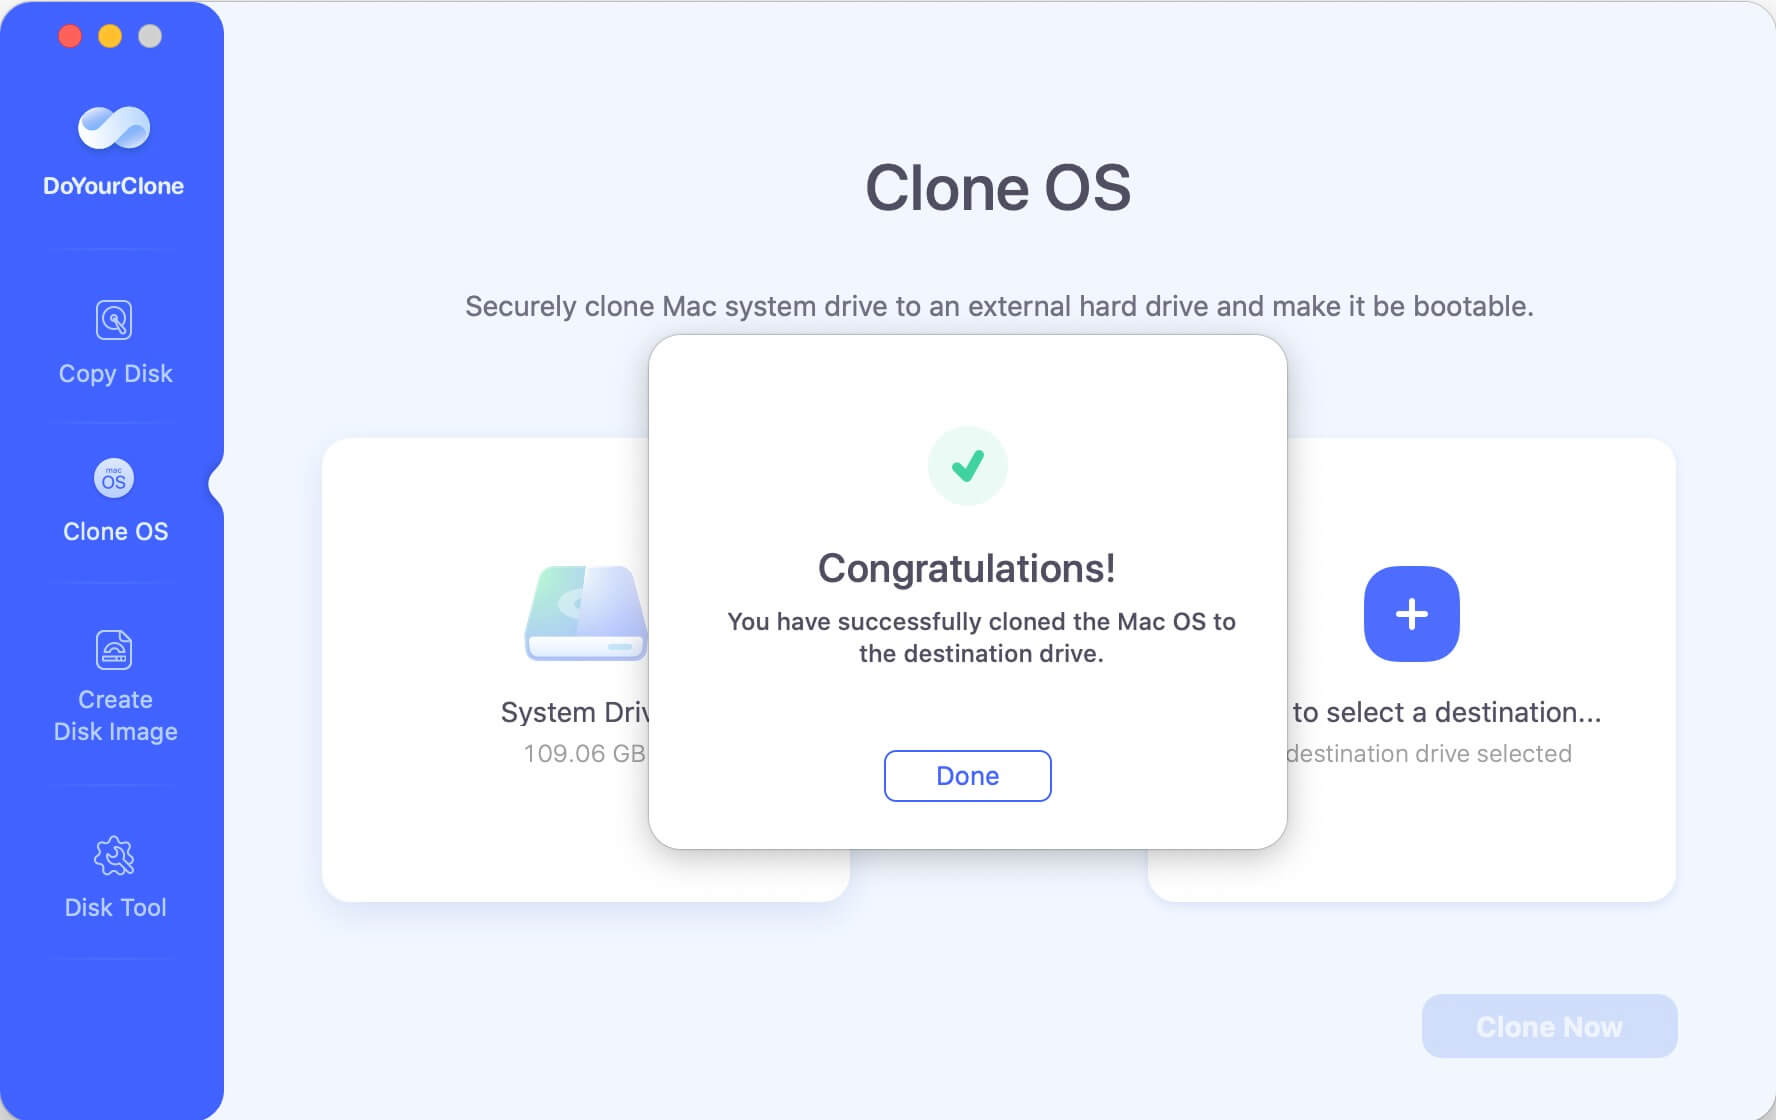
Once the process gets finished, you will get a bootable clone backup.
DoYourData Products
DoYourData Super Eraser for Mac
Permanently shred files or wipe hard drive to prevent data recovery on Mac.
Free TrialClone HDD, SSD, Mac OS, external disk, USB drive, and more under Mac OS.
Free TrialWritten & Updated by Justin Kenny
Justin Kenny is a writer & editor of DoYourData. He joined DoYourData in 2016 and focuses on writing articles about Windows data recovery, Mac data recovery, external device data recovery, hard drive clone, data erasure, Mac cleanup, computer issue fixes, etc. He is a super fan of Apple devices and is big on testing new digital device and system utility software.