Quick Navigation:
- Overview of macOS 10.12 Sierra
- Why Create a Bootable USB Installer?
- Prerequisites: What You Need
- Preparing the USB Drive
- Using Terminal to Create the Bootable USB
- Installing macOS 10.12 Sierra Using the Bootable USB
- Final Steps and Post-Installation
- Conclusion
Creating a bootable USB installer for macOS 10.12 Sierra can be a lifesaver, especially if you need to reinstall your operating system, troubleshoot, or perform a clean install on your Mac. With older macOS versions, like Sierra, being phased out, knowing how to create your own installer is critical for keeping older hardware running smoothly. In this guide, we'll walk you through the process from start to finish, providing all the steps and tools you need.

Overview of macOS 10.12 Sierra
This version was released in 2016 which introduced several notable features to the Apple ecosystem, including Siri for Mac, enhanced cloud storage options, and deeper integration with the Apple ecosystem. Despite its age, it remains a reliable operating system for older Mac models that may not support the latest macOS versions. For users with older hardware, keeping macOS Sierra available is crucial, particularly when a fresh installation is needed to rejuvenate system performance.
Why Create a Bootable USB Installer?
A bootable USB installer is essential for several reasons. First, it allows you to perform a clean installation of macOS, wiping out any old data and starting fresh. Second, it serves as a recovery tool in case of system failures or malware attacks. Third, for troubleshooting purposes, having a bootable macOS USB drive lets you quickly reinstall the operating system if something goes wrong. Whether you're an IT professional or a casual Mac user, this is a handy tool that can save you time and headaches.
Prerequisites: What You Need
Before we begin creating the bootable USB installer for macOS Sierra, let's go over the key requirements you'll need to get started:
🎯 USB Drive Specifications
You will need a USB flash drive or USB hard drive with at least 16 GB of storage to create the installer. A larger capacity won't hurt, but 16 GB is the minimum requirement to hold the macOS installer. Additionally, it's recommended to use a USB 3.0 drive for faster data transfers and quicker installations. Keep in mind that the drive will be erased during the process, so back up any important data before starting.
🎯 macOS 10.12 Sierra Installer
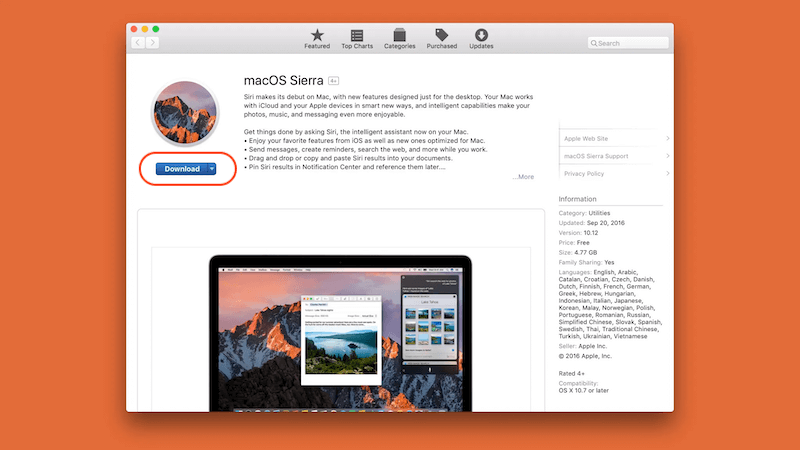
The macOS Sierra installer is essential for creating the bootable USB drive. If you have previously downloaded macOS Sierra from the Mac App Store, it should be available in your Purchases section for re-download. Here's how you can find it:
- Go to the App Store on your Mac.
- Go to the Purchased tab.
- Find macOS Sierra in the list and click Download.
![create a bootable USB installer for macOS 10.12 Sierra]()
Alternatively, you can search for trusted sources online to download the installer. Be sure to use a reputable source to avoid downloading malicious software.
🎯 Reliable Internet Connection
While the actual installation process won't require an internet connection, downloading the macOS Sierra installer and ensuring your USB drive is ready for the process will need one. A stable and fast connection will make this step quicker and hassle-free.
Preparing the USB Drive
Now that we have all the prerequisites in place, it's time to prepare your USB drive for the task.
Before creating a bootable installer, you'll need to format your USB drive using Disk Utility, a built-in tool in macOS. This process will erase all existing data on the drive, so ensure that nothing important is stored on it.
Here's how to format your USB drive:
Step 1. Attach your Mac to your USB disk.
Step 2. Go to Applications > Utilities > Disk Utility to launch Disk Utility.

Step 3. Choose your USB drive from the list on the left in Disk Utility.
Step 4. Press the Erase button, which is the window's top button.
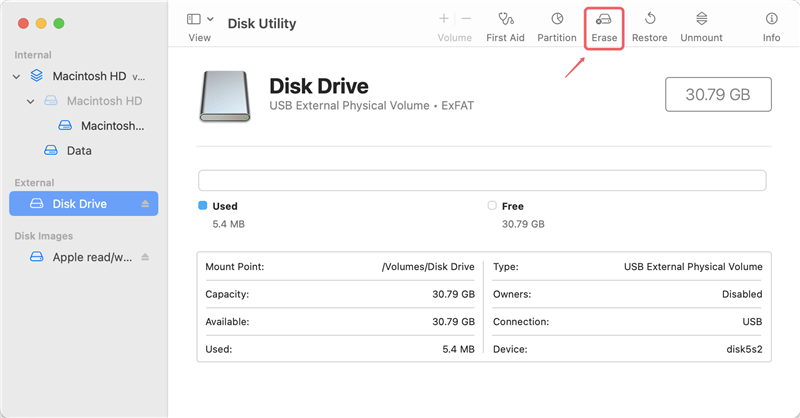
Step 5. Make the following configurations in the Erase window:
- Name: You can name the drive something recognizable, like “SierraInstaller.”
- Format: Choose Mac OS Extended (Journaled).
- Scheme: Select GUID Partition Map.
Step 6. Once everything is configured, click Erase to format the drive.
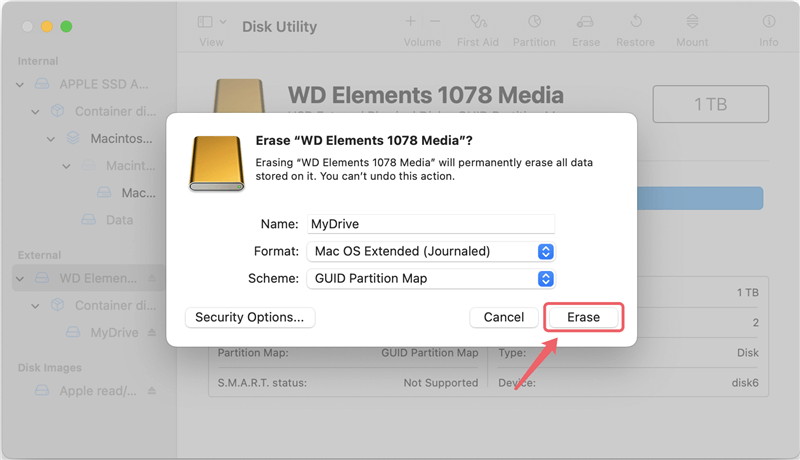
Disk Utility will take a few moments to format your USB drive. Once it's done, your drive is ready to be transformed into a bootable macOS installer.
Using Terminal to Create the Bootable USB
With the USB drive formatted and ready, the next step involves using the Terminal app to create the bootable installer. This process is straightforward, and we'll walk you through the command you need to use.
🎯Accessing Terminal
Terminal is a powerful tool that lets you control your Mac using text commands. You can open Terminal by following these steps:
Step 1. Open Finder and navigate to Applications > Utilities.
Step 2. Double-click on Terminal to open it.
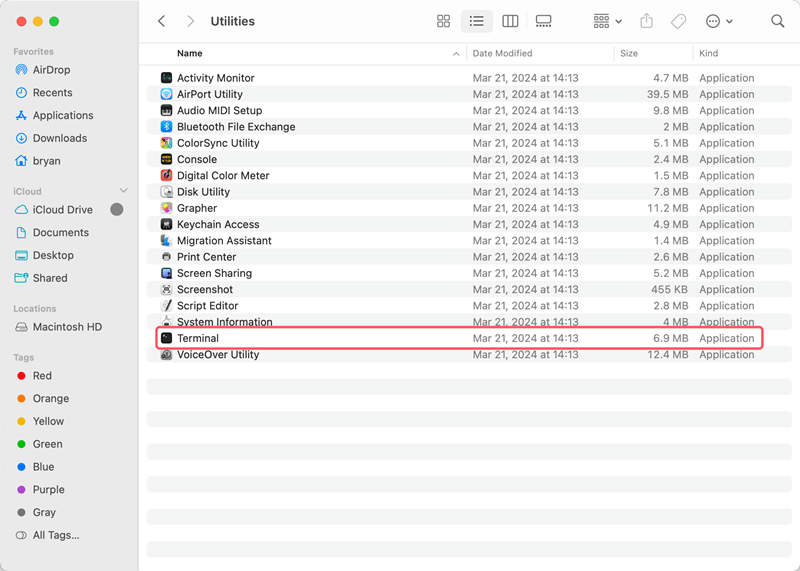
Once Terminal is open, you're ready to enter the command to create the bootable USB.
🎯Command for Creating the Bootable USB
Here is the command you'll use to create the bootable macOS Sierra installer. Be sure to enter it exactly as shown:
sudo /Applications/Install\ macOS\ Sierra.app/Contents/Resources/createinstallmedia --volume /Volumes/SierraInstaller --applicationpath /Applications/Install\ macOS\ Sierra.app --nointeraction
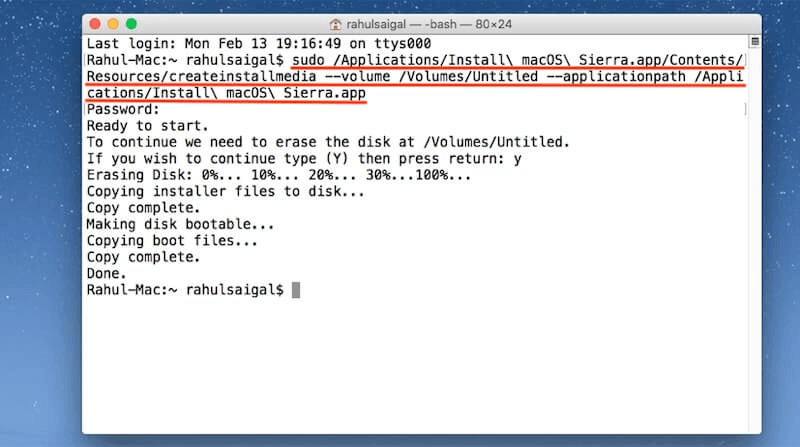
Let's break down this command:
- sudo: Grants administrative privileges needed for this process.
- /Applications/Install\ macOS\ Sierra.app/Contents/Resources/createinstallmedia: This points to the macOS Sierra installer you downloaded earlier.
- --volume /Volumes/SierraInstaller: This specifies the location of your formatted USB drive (replace “SierraInstaller” with the name of your drive if you named it something different).
- --applicationpath /Applications/Install\ macOS\ Sierra.app: Points to the location of the macOS installer.
- --nointeraction: Ensures the process runs without requiring further input.
After entering the command, hit Enter, and you'll be prompted to enter your Mac's password. This is necessary for granting administrative permissions. Once you input your password, the process will begin.
Creating the bootable USB installer can take several minutes, depending on the speed of your USB drive. During the process, you'll see a progress indicator in the Terminal window. Once it's complete, Terminal will notify you that the USB installer has been successfully created.
🎯Verifying the Creation
To verify that the process was successful, open Finder and check the contents of your USB drive. You should see the macOS Sierra installer on the drive. Additionally, you can run the following command in Terminal to check:
ls /Volumes/SierraInstaller
If you see files related to macOS Sierra, your bootable USB drive is ready for use.
Installing macOS 10.12 Sierra Using the Bootable USB
Now that your bootable USB installer is ready, the next step is to use it to install macOS Sierra. Here's how to proceed:
🎯Booting from the USB Drive
To install macOS Sierra, you need to boot your Mac from the USB drive. Follow these steps:
Step 1. First, place the USB disk into your Mac.
Step 2. As soon as you hear the starting chime, restart your Mac and depress the Option key.
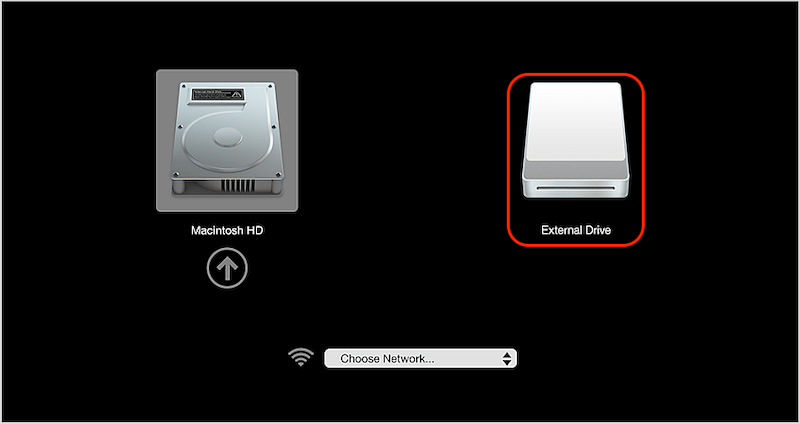
Step 3. The Startup Manager page will appear. You may view a list of available drives here. To choose your USB device, use the arrow keys; it should be named something like "Install macOS Sierra."

Step 4. To boot from the USB device, press Enter.
Once your Mac has booted from the USB drive, you'll be taken to the macOS Utilities screen. From here, you can choose to install macOS Sierra. Click on Install macOS and follow the on-screen instructions.

🎯Step-by-Step macOS Installation
Here's a quick overview of the installation steps:
- Choose the disk or partition where you want to install macOS Sierra. If you're doing a clean install, you may need to erase the existing partition using Disk Utility.
![create a bootable USB installer for macOS 10.12 Sierra]()
- Follow the prompts to begin the installation. Your Mac will restart during the process.
![create a bootable USB installer for macOS 10.12 Sierra]()
- Once the installation is complete, you'll be taken to the setup screen, where you can configure your Mac as if it were new (Wi-Fi, iCloud, etc.).
🎯Troubleshooting Installation Issues
While the installation process is generally smooth, you may encounter a few issues:
- USB drive not showing up: If the bootable USB drive isn't appearing in Startup Manager, make sure it was created properly and is formatted correctly.
- Installation failure: If the installation fails, try erasing the destination drive using Disk Utility and retry the process.
Final Steps and Post-Installation
After the installation of macOS Sierra is complete, there are a few more steps to ensure everything is running smoothly.
🎯 First-Time Setup of macOS 10.12 Sierra
The first-time setup includes setting up your Apple ID, iCloud, and Wi-Fi. Be sure to complete these steps to get your Mac up and running. Additionally, you'll be prompted to set up features like Siri, Touch ID (if applicable), and system preferences.
🎯 Running Software Updates
Once you're up and running, it's crucial to check for and install any available software updates. Even though macOS Sierra is an older version, there may be security patches or bug fixes available through the Software Update section.
To check for updates:
- Choose System Preferences from the Apple menu.
- Select Software Update and carry out any necessary updates.
🎯 Backing Up Your Installation
Now that your Mac is back to a working state, it's a good idea to create a backup. Use Time Machine to back up your system to an external hard drive. This way, if something goes wrong in the future, you can easily restore your Mac without going through the installation process again.
You can also create a bootable clone for your macOS 10.12 Sierra as a full backup. With DoYourClone for Mac, you can achieve that goal easily. The software can clone the macOS 10.12 Sierra system drive completely along with the systems data, personal files, applications, settings. It can ensure the cloned drive is bootable directly.
DoYourClone - Reliable Disk Clone Software
- Create bootable clone backup for macOS 10.12 Sierra.
- Clone everyhing from the Mac system drive.
- Simple to handle and cloning macOS drive easily.
To create a bootalble clone backup for macOS Sierra with the software, please do as following steps:
Step 1. Run ths Mac cloning software from launchapad or Applications. Change to the Clone OS mode.
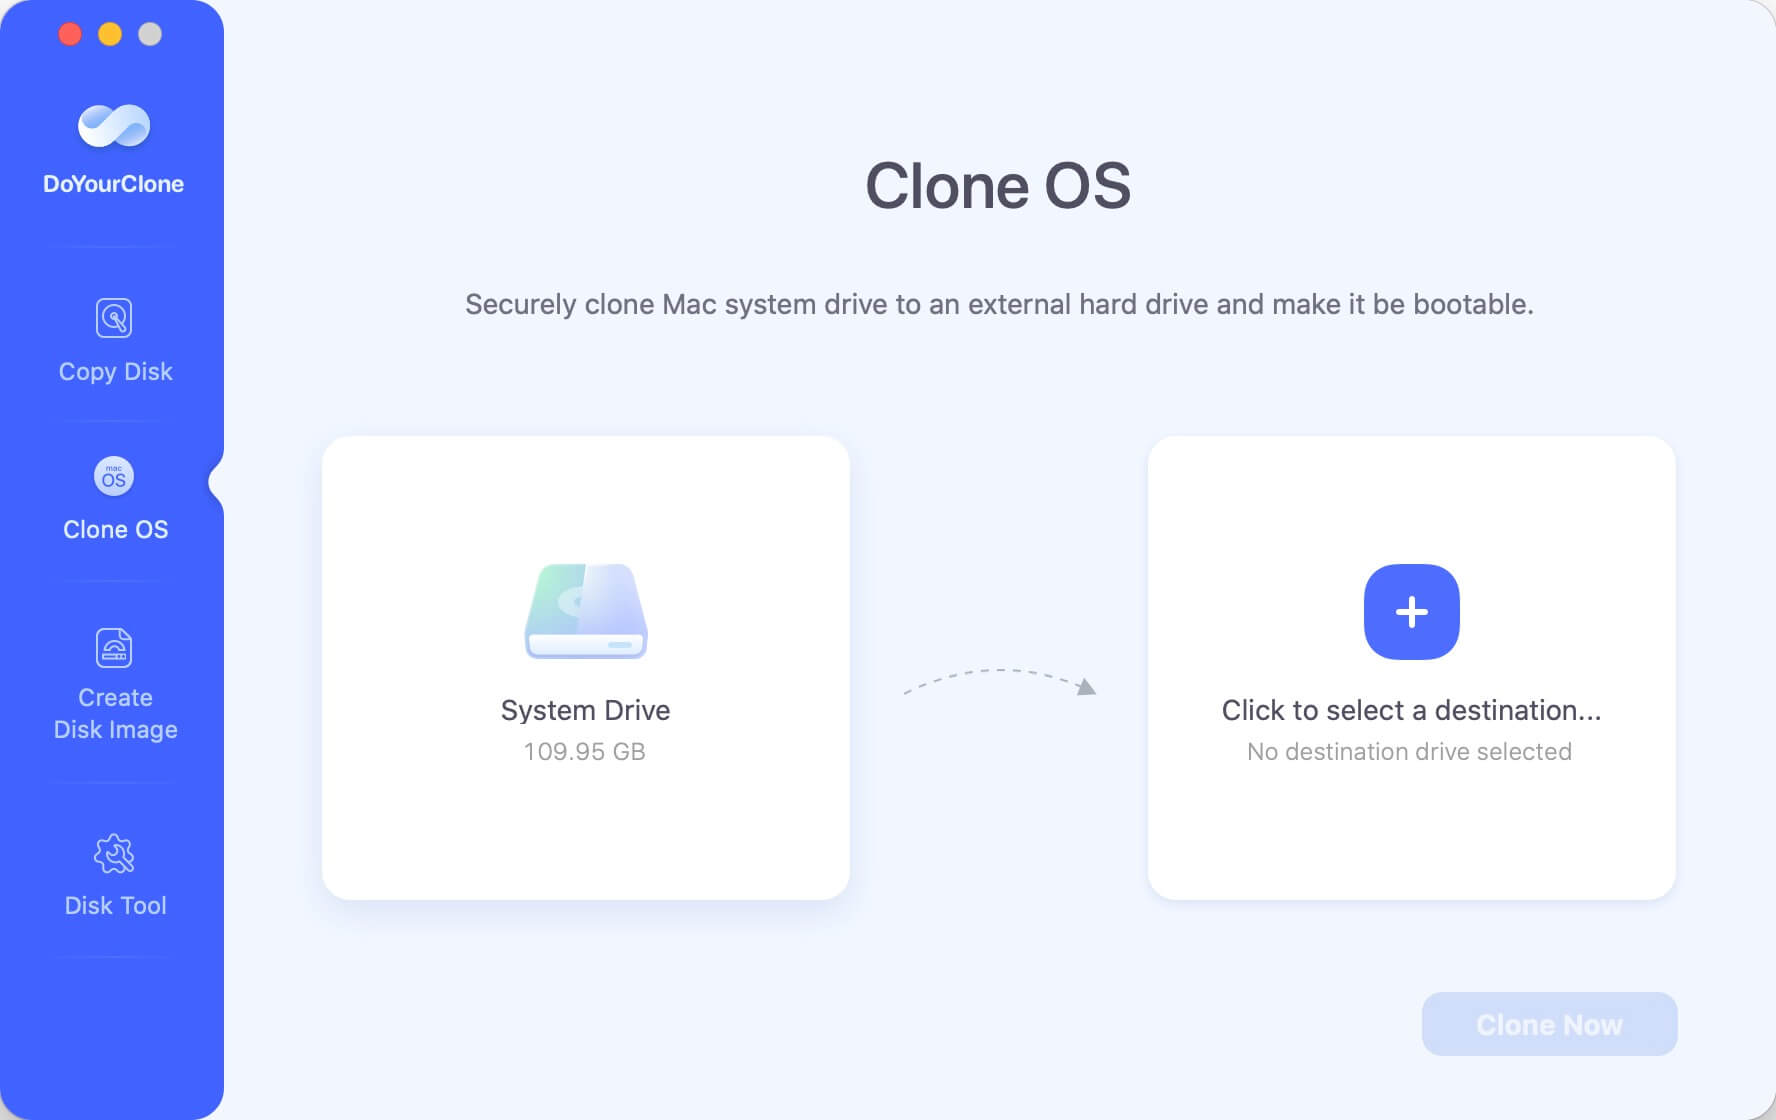
Step 2. Choose an external hard drive as destination. The process will overwrite the destination drive, so ensure to back up the data on external drive first or use an empty drive.
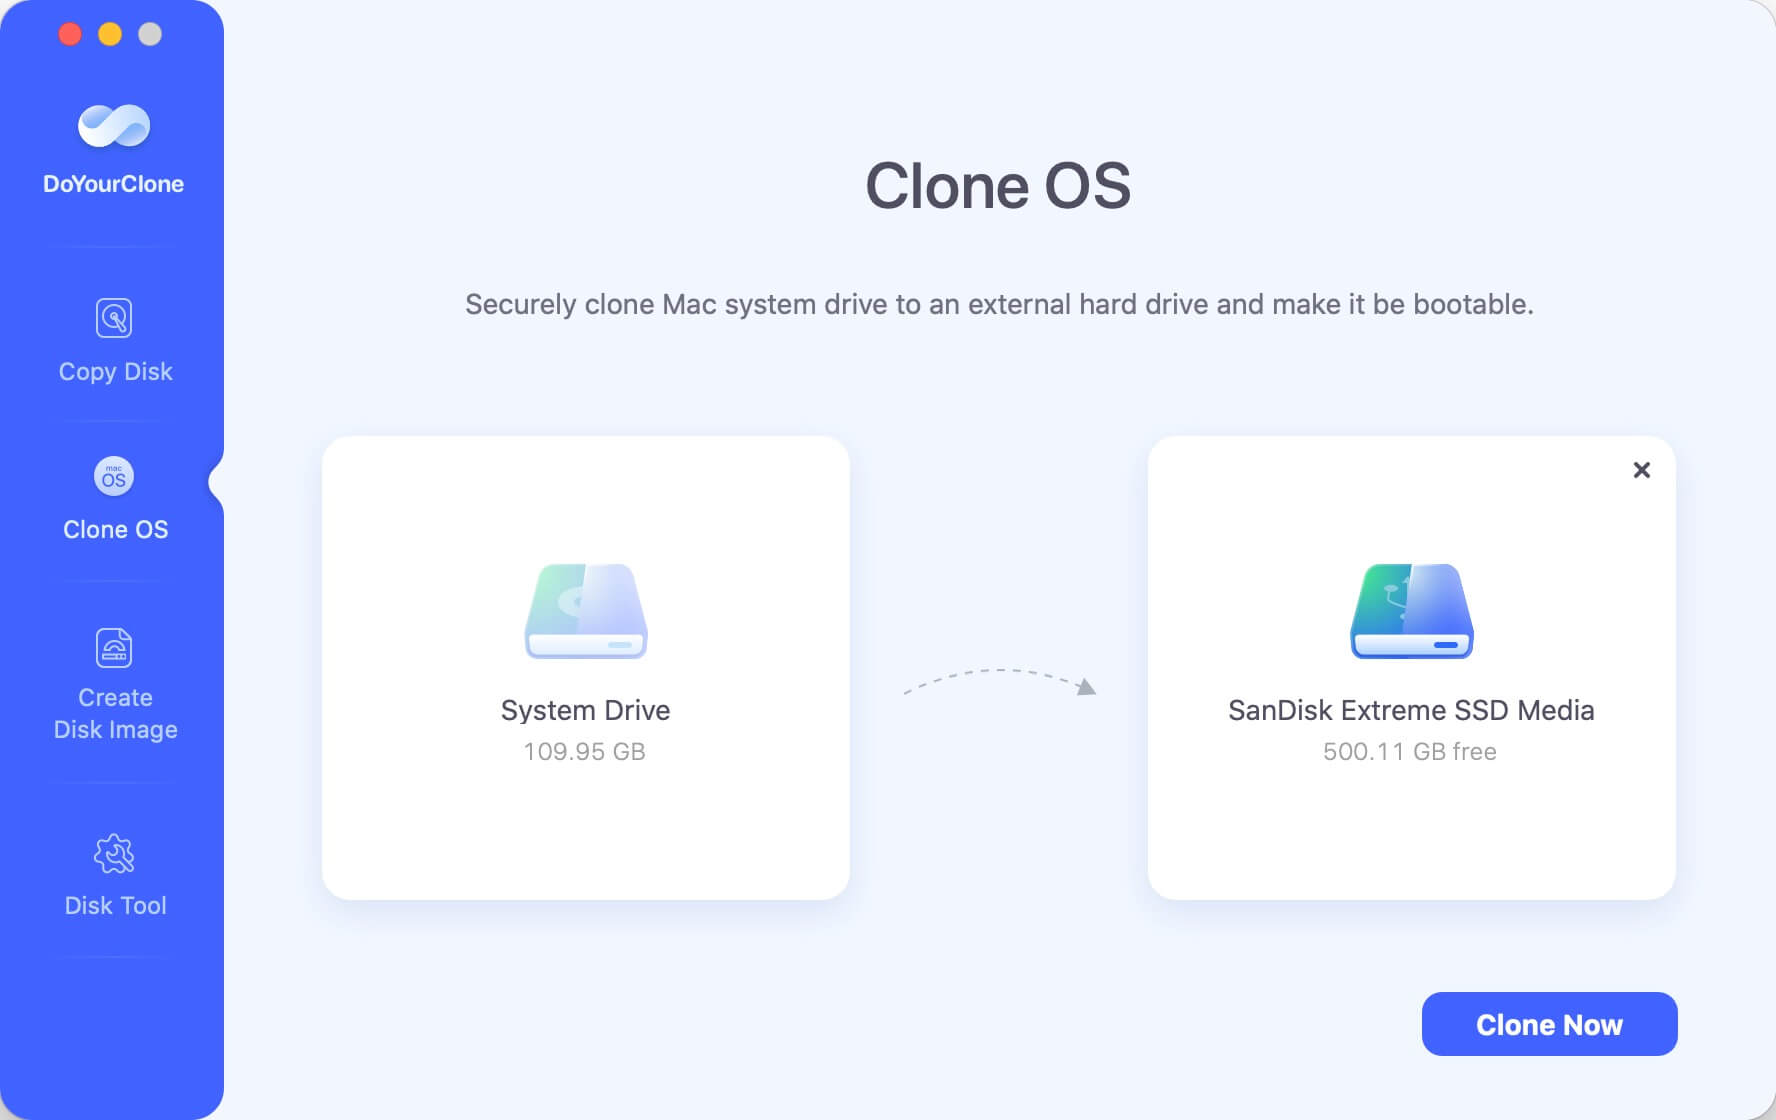
Step 3. Click the Clone Now button and the software will start to clone everything from the macOS 10.12 Sierra to the external drive.
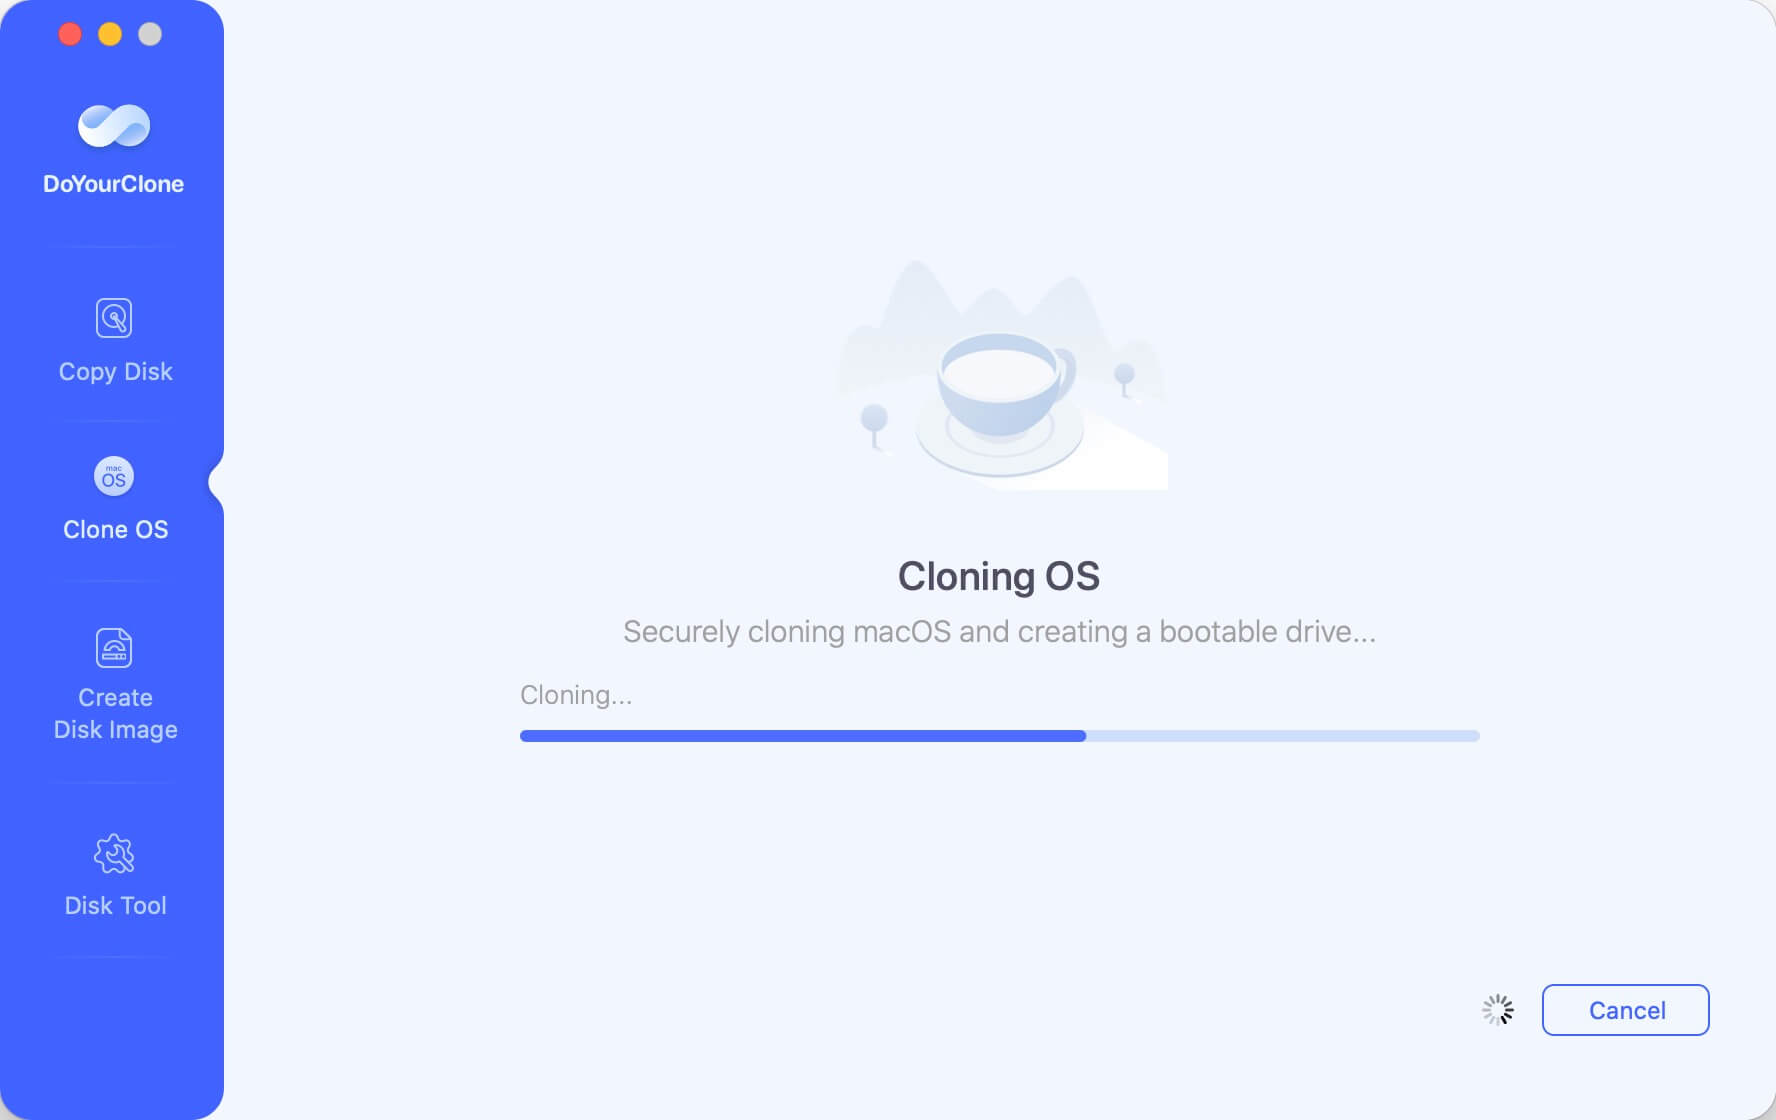
After the cloning is finished, you can then do as above to restart the computer, click the Option button while the computer starting. Then choose the cloned drive to verify if it can boot up normally. If so, it's cloned successfully and you can keep it as a full backup.
Conclusion
Creating a bootable USB installer for macOS 10.12 Sierra is a straightforward process that can help you maintain your Mac's performance and longevity. Whether you're reinstalling the operating system, troubleshooting, or setting up a clean install, having a bootable USB drive provides a flexible and reliable way to manage your Mac.
By following the steps outlined in this guide, you've learned how to format a USB drive, use Terminal to create the installer, and boot your Mac from the USB for a smooth installation process. Keep this USB installer handy for future use, and consider creating backups to protect your data. If you ever need help or further instructions, Apple's official support site and community forums are great resources for troubleshooting and additional guidance.
DoYourClone for Mac
DoYourClone for Mac, one of the best Mac disk cloning software, can help you clone HDD, SSD, external storage device on Mac, upgrade HDD to SSD, create full disk image backup, etc. It also can clone everything from your Mac to an external HDD/SSD and create a full bootable clone backup. 100% safe and easy-to-use.
Hot Articles
- Fix External Hard Drive Read-Only Issue on Mac
- How to Wipe Trash Bin on Mac?
- Recover Lost Data from WD (Western Digital) External Hard Drive on Mac
- Fix External Hard Drive Not Showing Up on Mac
- How to Wipe SD Card on Mac?
- Mount and Unmount the External Hard Drive on the Mac
- Run First Aid on Mac to Repair Disks
- Fix Can't Save Files to An External Hard Drive on Mac
- (Solved) External SSD Not Detected in Disk Utility on Mac
- Why Can't Format A Hard Drive To NTFS on Mac? Can We Fix It?
