Quick Navigation:
- Putting Together the Essentials
- Use Terminal to make a macOS Monterey USB installer
- Back up your Mac before installing macOS Monterey
- Installing macOS Monterey from the USB Installer
- Recover Lost Data After Monterey Installation
- Conclusion
For Mac users who want to do clean installs, fix system problems, or install the operating system on more than one device, making a bootable USB installer for macOS Monterey is a must. The newest version of Apple's operating system, macOS Monterey, has a lot of new features and changes that make it a great upgrade.

This guide provides detailed instructions on how to prepare your USB drive, download the macOS Monterey installer, create a bootable USB driver, and install macOS Monterey using it. Whether you've used a Mac before or this is your first time, this guide will give you the information and tools you need to create a bootable USB driver. It ensures that the installation process goes smoothly and your Mac runs at its best.
Putting Together the Essentials
Before you start making something, make sure you have these things:
- A Mac Running macOS: To get the driver and make the bootable drive, you'll need a Mac that already has macOS installed.
- At least 16GB USB flash drive: Pick a USB that can hold at least 16GB of data. Before you format, make a copy of any important files because it will delete all the data that is already there. For faster transfers, it's best to use a USB 3.0 drive.
- Administrator Access: To run instructions in Terminal, you'll need to be an administrator on your Mac.
💠 Format the USB drive in Disk Utility
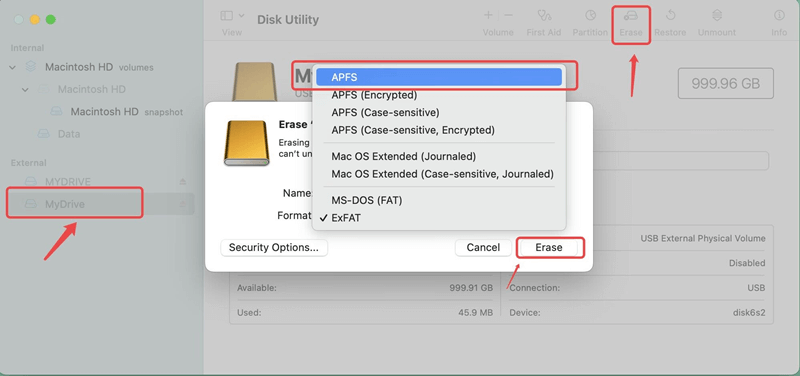
You need to format your USB drive properly in order to make a bootable USB installer. Do these things:
Step 1: Connect the USB Drive: Connect your USB drive to a Mac's USB port.
Step 2: Start up Disk Utility: To get to Utilities, open Finder and go to Applications. Start up Disk Utility.

Step 3: Format the USB Drive:
Pick out your USB drive from the list on the left side of Disk Utility.
- Press the Erase button at the very top.
- Name your USB drive.
- Pick APFS as the file type.
- Choose the GUID Partition Map method.
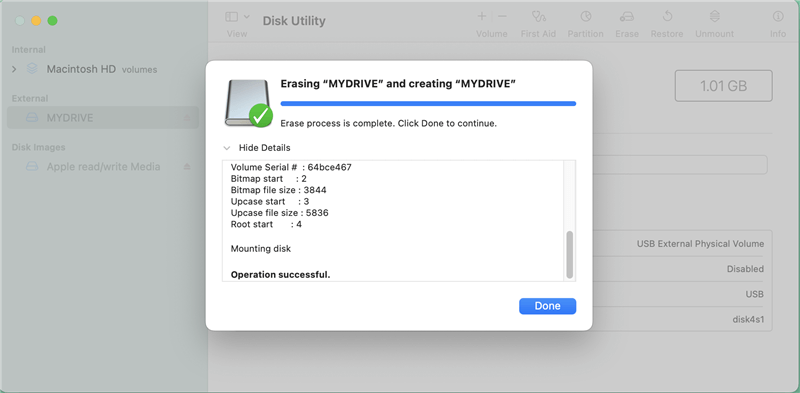
- To erase the drive, click Erase.
![create bootable USB installer for macOS Monterey]()
Step 4: Confirm Formatting: Click Done when the process is done. Now, your USB drive is ready for the next step.
💠 Downloading macOS Monterey
You need the macOS Monterey launcher file to make a bootable USB installer. These steps will help you get it:
Step 1: Open the App Store
- On your Mac, open the App Store.
- Type "macOS Monterey" into the search bar and hit Enter.
Step 2: Download macOS Monterey
- To begin the download, click the Get button.
![create bootable USB installer for macOS Monterey]()
- Once the download is done, macOS Monterey will be added to your Applications folder.
Or you can try to download the installation package from a trusted source.
Use Terminal to make a macOS Monterey USB installer
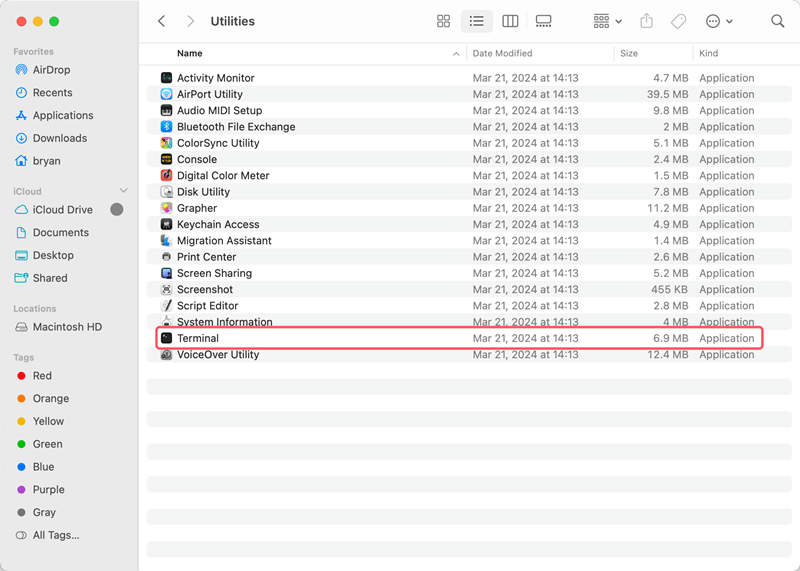
Step 1: Open the Terminal.app App from /Applications/Utilities.
Step 2: Type the following command:
sudo /Applications/Install\ macOS\ Monterey.app/Contents/Resources/createinstallmedia --volume /Volumes/YOURUSBDRIVE --nointeraction

Step 3: Type in your password and press Enter.
💠 Verifying the Bootable USB Installer
Before you use the bootable USB installer, you should make sure it was made properly.
Step 1: Check the Contents of the USB Drive
- Start up Finder and pick out your USB drive from the list on the left.
- Check to see if it has the setup files for macOS Monterey.
Step 2: Test the Bootable USB Installer
- When your Mac starts up, hold down the Option key.
- Pick out the USB drive from the starting manager.
- Your bootable USB installer will work right if you see the macOS Monterey installation screen.
Back up your Mac before installing macOS Monterey
To avoid issues while installing the macOS Monterey or you may need to downgrade the system later, it's highly suggested to create a full backup of your Mac. You can use Time Machine to back up the Mac.
Here we will introduce another simple and reliable way for backing up Mac. You can use the software DoYourClone for Mac to fully clone the Mac. The software can clone all the data to an external drive and make the external hard drive bootable. If you want to go back to the previous operating system, you can easily boot from the cloned external hard drive directly.
DoYourClone - Reliable Disk Clone Software
- Reliable clone and backup software for macOS.
- Create bootable clone for macOS Monterey and other systems.
- Fully clone all the data and system from the Mac drive.
Install the Mac clone software to your computer, and then start it from the launchpad. Follow the steps below to start the disk cloning process.
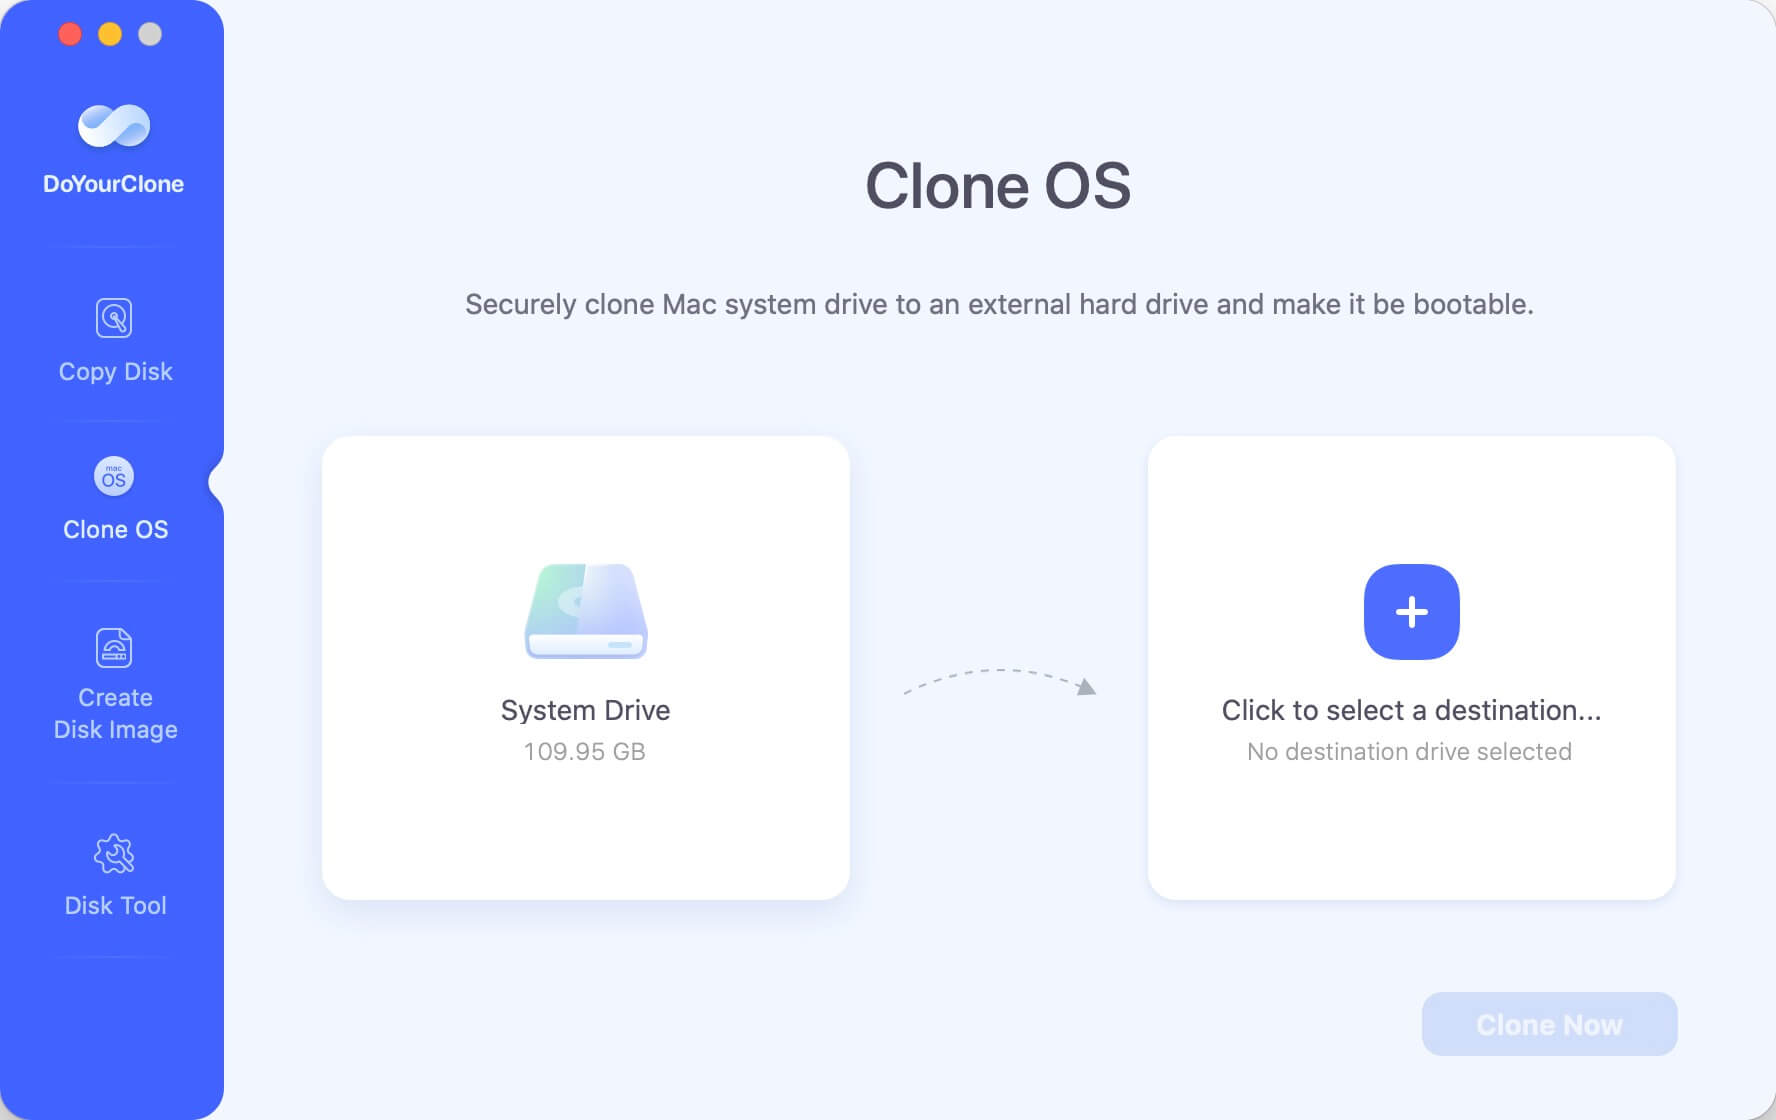
Step 1. Select the Clone OS mode from the software. This mode is to clone a bootable and full copy of your Mac system drive.
Step 2. Select an empty external hard drive as the destination. Please ensure to use a drive with enough space to hold the data from the system drive.
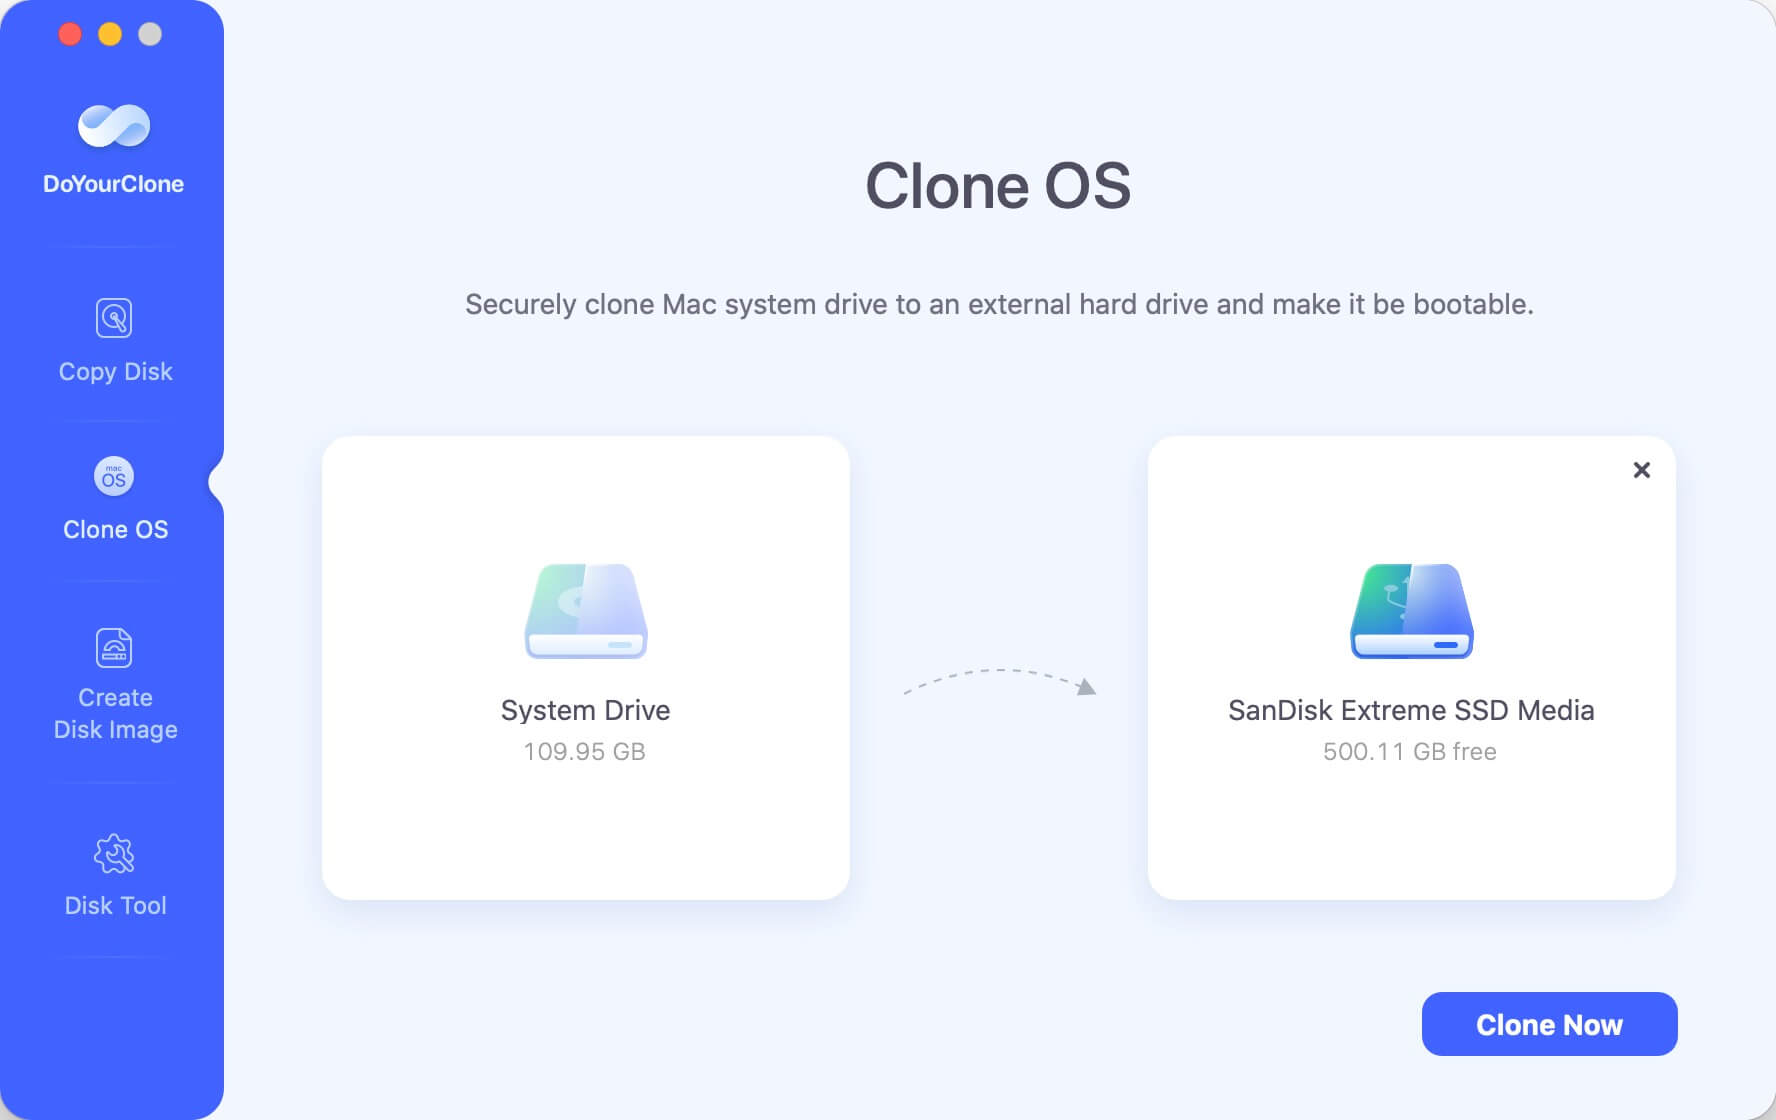
Step 3. Click the Clone Now button and the software will start the clone the system and personal data to the destination drive.
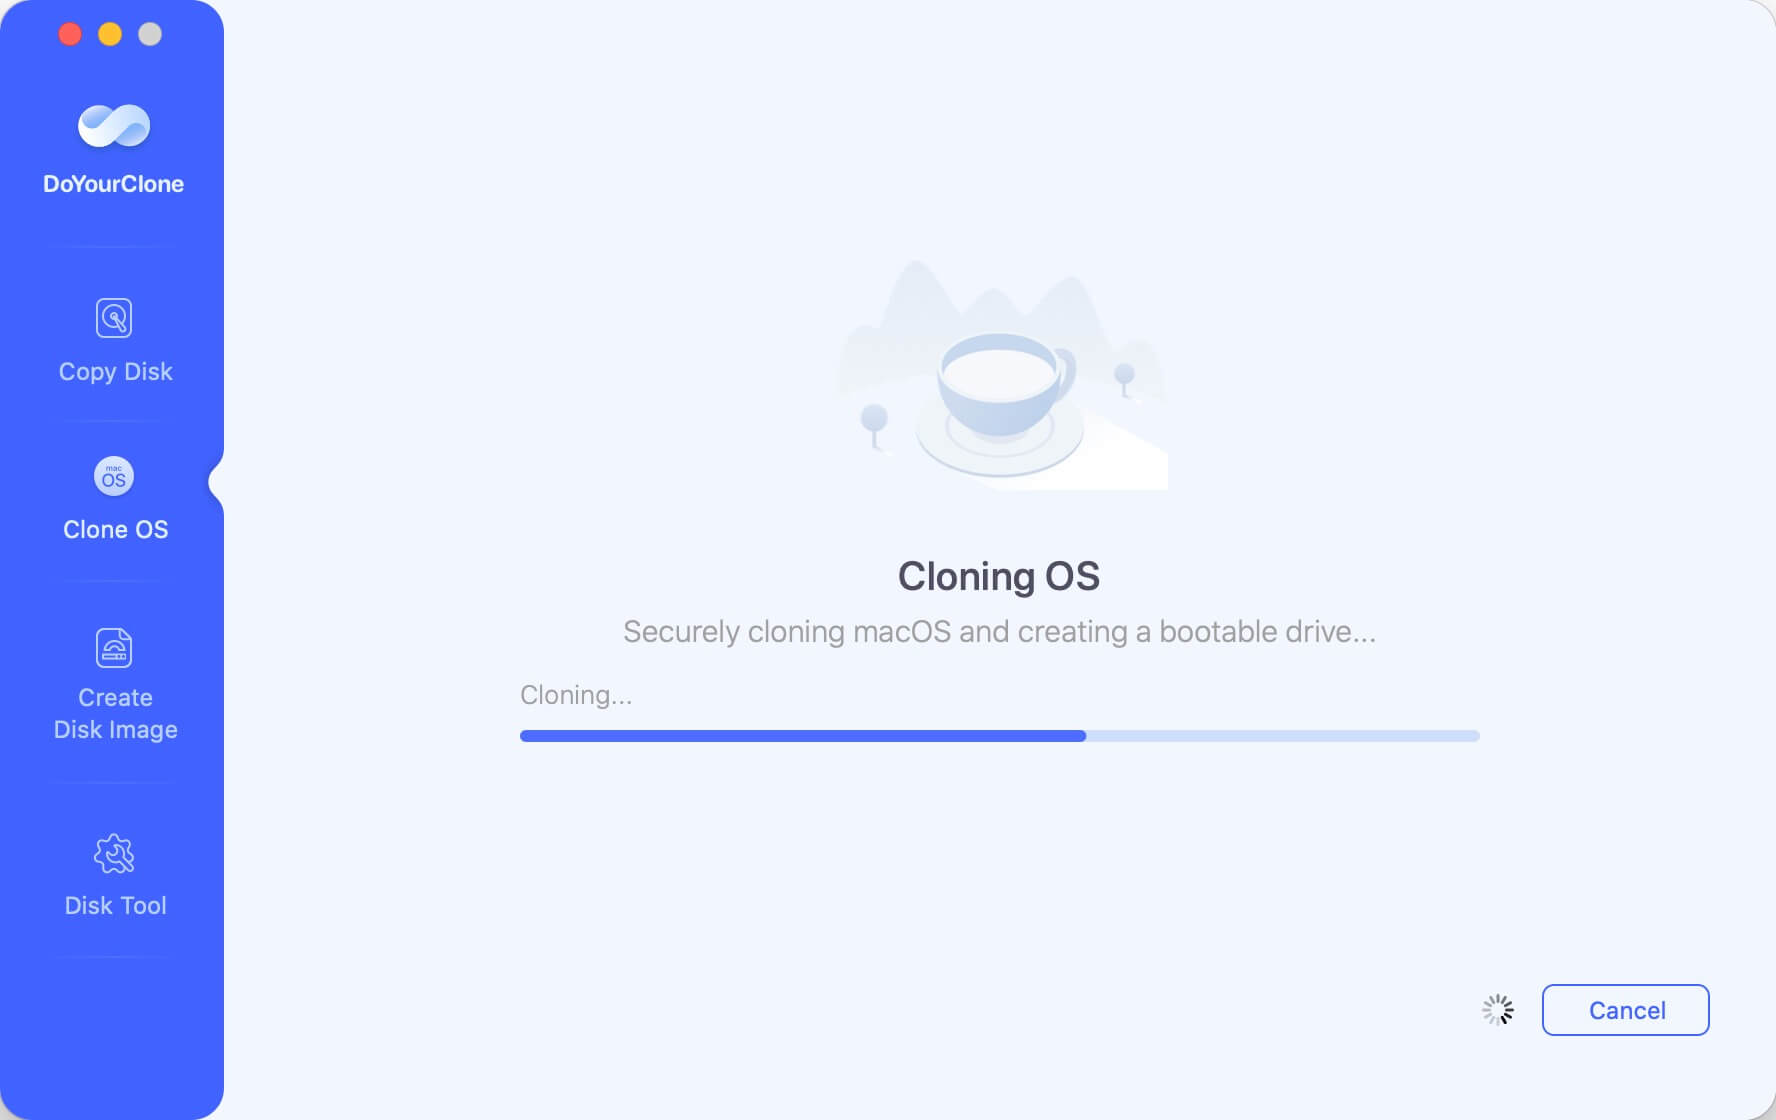
After cloning the drive, you can also verify if it's bootable as above. Now you have the full backup of your Mac, just feel free to install macOS Monterey on your Mac.
Installing macOS Monterey from the USB Installer
You can use your bootable USB driver to put macOS Monterey on your Mac now that you have one.
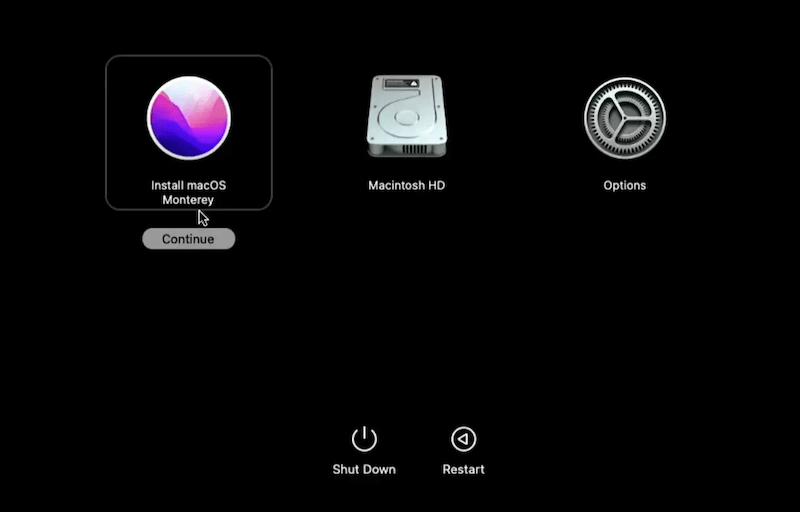
Step 1: Boot from the USB Installer
- The bootable USB driver should be installed on your Mac.
- When your Mac starts up, hold down the Power key (or the Command + R keys).
- Pick out the USB drive from the starting manager.
![create bootable USB installer for macOS Monterey]()
Step 2: Begin the Installation
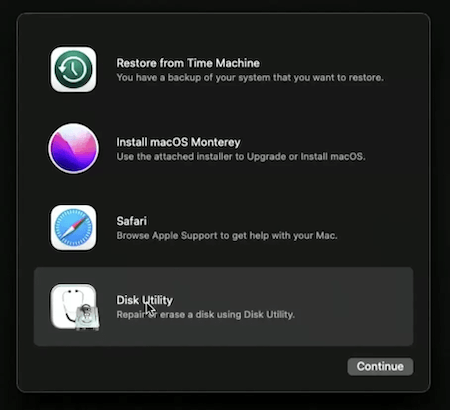
- After the macOS Monterey software finishes loading, pick a language and click Next.
- Choose Install macOS Monterey from the macOS Utilities screen and click Carry on.
![create bootable USB installer for macOS Monterey]()
Step 3: Follow the On-Screen Instructions
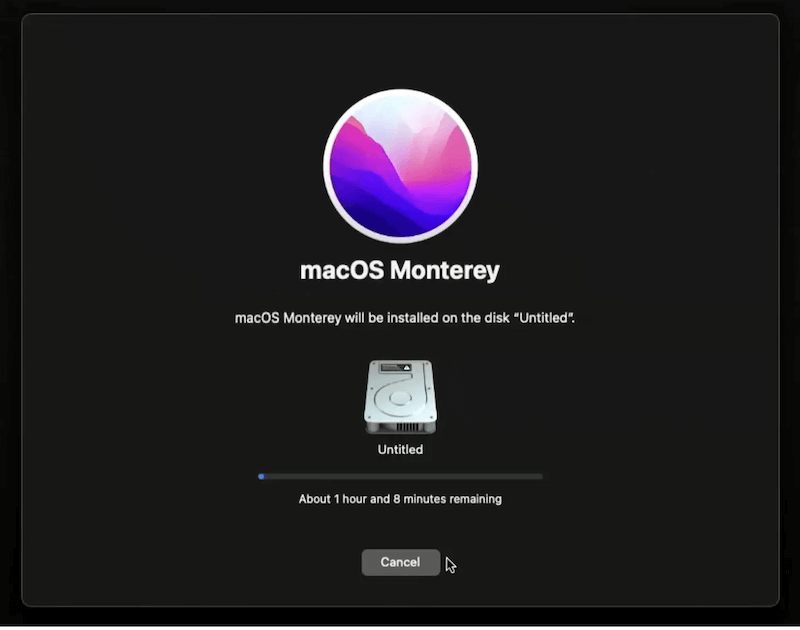
- Pick out the drive where you want to put macOS Monterey.
- Complete the process by following the steps shown on the screen.
![create bootable USB installer for macOS Monterey]()
Step 4: Complete the Installation
After the download is complete, your Mac will restart. Follow the setup assistant's instructions to set up your tastes and settings.
After successfully installing the macOS Monterey, you can also use the software DoYourClone for Mac to create a bootable copy of the newly installed operating system. It can be helpful to restore the system if there are issues with the system or you want to restore to the original system status in the future.
Recover Lost Data After Monterey Installation
When you move to a new operating system like Monterey and lose data, it's not fun. However, the Do Your Data Recovery for Mac is a tool that might help you recover lost data after running Monterey. It can retrieve information from many different storage devices, such as USB drives, external hard drives, and memory cards.
Step 1. Select the drive to be scanned
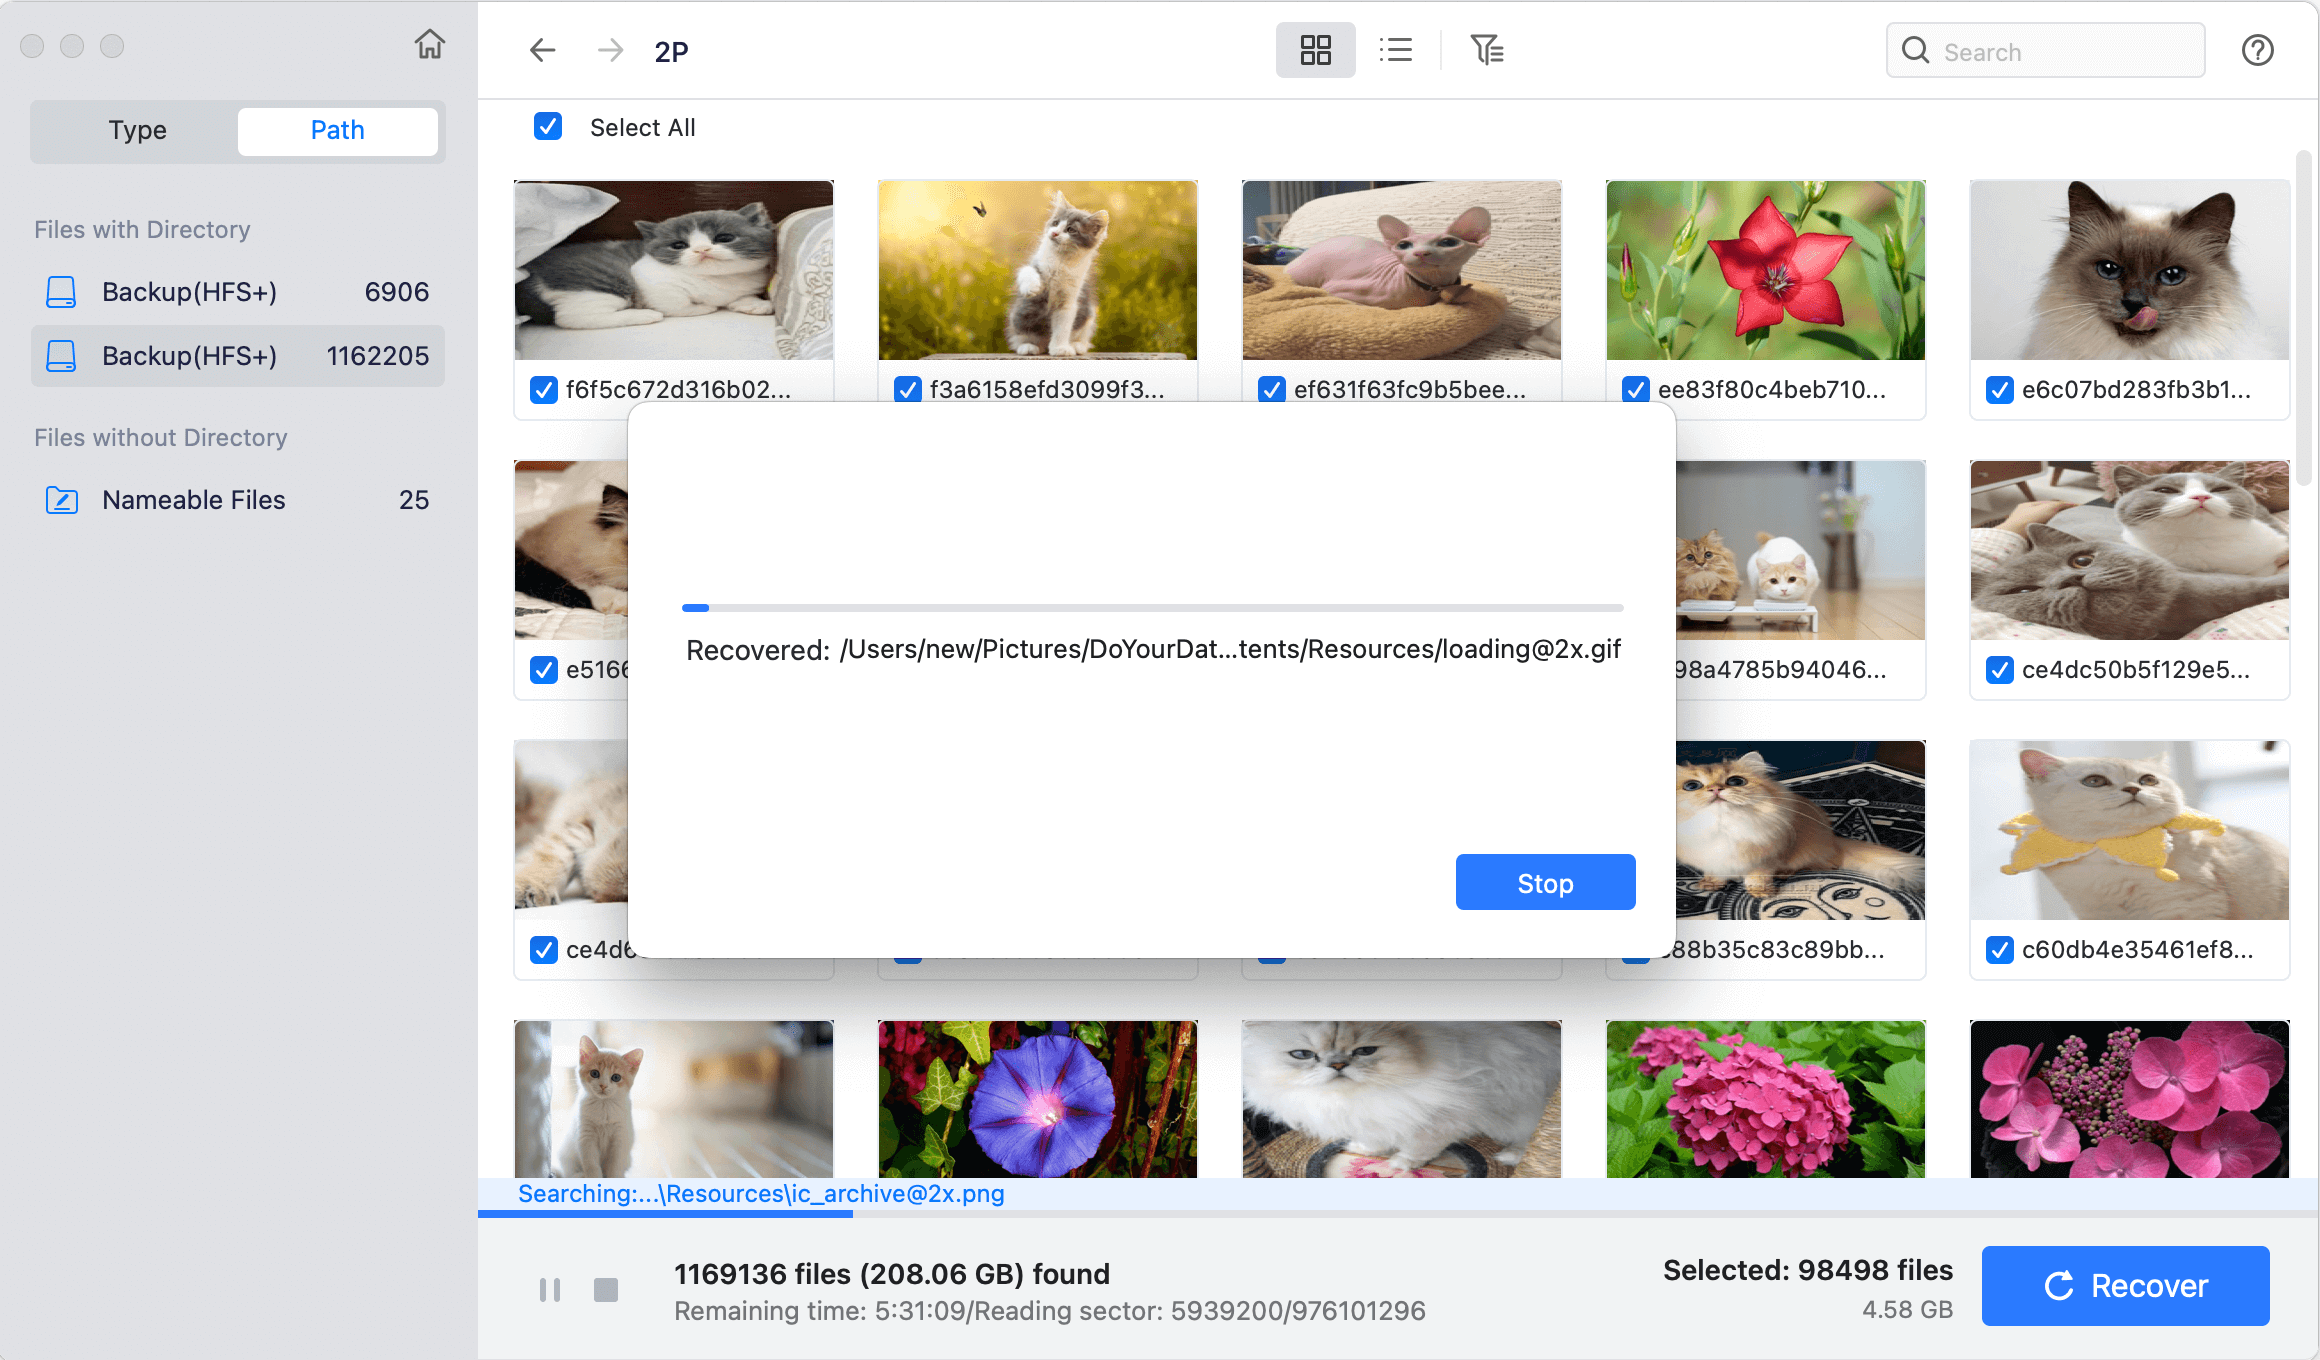
It is the main window for the data recovery software. It lists all the drives attached to your Mac. To retrieve lost or deleted files, choose a drive and click the Scan button.

Step 2. Select your lost data/files
Do Your Data Recovery for Mac will start scanning your chosen disk space right away and show you the results. If you know what you want, you can sort the results to find it.

Step 3. Recover lost/deleted data
Once you've found the files you want to recover, you can preview them and then hit Recover to start the process. Please ensure to save the recovered files to another drive instead of the original drive where you lost data.
Conclusion
That is a useful skill for making a bootable USB driver for macOS Monterey, which makes setting up or fixing up your Mac easier. If you follow this guide, you'll be able to safely make a bootable USB installer that you can use to install macOS Monterey.
This way, you'll always have a reliable tool on hand, whether you need to fix system problems or run the OS on multiple devices. Now that you have your bootable USB driver ready, it will be easy to use the new features and improvements of macOS Monterey. Have fun installing it!
DoYourClone for Mac
DoYourClone for Mac, one of the best Mac disk cloning software, can help you clone HDD, SSD, external storage device on Mac, upgrade HDD to SSD, create full disk image backup, etc. It also can clone everything from your Mac to an external HDD/SSD and create a full bootable clone backup. 100% safe and easy-to-use.
Hot Articles
- Fix External Hard Drive Read-Only Issue on Mac
- How to Wipe Trash Bin on Mac?
- Recover Lost Data from WD (Western Digital) External Hard Drive on Mac
- Fix External Hard Drive Not Showing Up on Mac
- How to Wipe SD Card on Mac?
- Mount and Unmount the External Hard Drive on the Mac
- Run First Aid on Mac to Repair Disks
- Fix Can't Save Files to An External Hard Drive on Mac
- (Solved) External SSD Not Detected in Disk Utility on Mac
- Why Can't Format A Hard Drive To NTFS on Mac? Can We Fix It?
