Quick Navigation:
- Why Do You Need to Format an SDHC or SDXC Card Before You Use It?
- Preparation for Mac SDHC/SDXC Card Format
- Steps to Format SDHC/SDXC Cards to NTFS on Mac
- Formatting with Boot Camp or Virtual Machine
- Conclusion
Do you need to change the file system on an SDHC or SDXC card to NTFS on your Mac? Formatting to NTFS is often needed when moving big files or getting the card ready to use on a Windows computer. However, macOS doesn't naturally support writing to NTFS, which can make the process seem hard. The good news is that there are methods that work.
We'll show you how to format your SDHC or SDXC card to NTFS on a Mac in different ways. From the end, you'll have a card that works perfectly on both macOS and Windows. Let's talk about how to quickly and effectively do it.
Why Do You Need to Format an SDHC or SDXC Card Before You Use It?
When you format an SD card, you ensure it is ready to use with your device and operating system. This process helps organize the storage on the card, eliminate any data that's already there, and fix any file system problems. This process not only makes the card work better but also lowers the chance of data loss and makes it last longer.
Preparation for Mac SDHC/SDXC Card Format
A few important steps must be taken before you start the editing process to make sure everything goes smoothly.
🔹 Backing Up Data on the Card:
It is the first and most important thing you need to do. Make a copy of any important data on your SDHC or SDXC card. If you format the card, you will lose all of its data, so make sure you have backups of any files you want to keep. You can move these things to your Mac or another drive. Bring up Finder on your Mac, then put the card in and drag the files from it to a folder on your Mac.
How to back up your SD card on Mac? Read More >>
🔹 Ensuring Compatibility with Your Mac
Next, make sure that the SDHC or SDXC card you are using works with your Mac. These days, most Macs come with SD card slots that can hold both SDHC and SDXC cards. If your Mac doesn't have an SD card slot, you can use a separate card reader. Also, make sure that the running system on your Mac is up to date. Older versions of macOS may not work with newer SDXC cards.
🔹 Checking for Card Issues
If you want to make sure the formatting works, you should check the SD card for any mistakes or problems before you start. You can use the Disk Utility app on your Mac. Open Disk Utility on your Mac, put the SD card in, pick it out from the list of drives, and click on "First Aid." The tool will check the card for mistakes and try to fix any it finds. You might have to get a new card if the mistakes are so bad that they can't be fixed.
Steps to Format SDHC/SDXC Cards to NTFS on Mac
There is a simple way to format an SDHC or SDXC card on a Mac in Disk Utility. However, there is no option to select the NTFS as file system when you try to format the card. Then how to format the SDHC or SDXC card to NTFS on Mac?
To format an SD card to NTFS file system, you need a third-party software to achieve the goal. The best NTFS drive for Mac - DoYourData NTFS for Mac - can help you in such a case.
DoYourData NTFS for Mac
- Most reliable and fast NTFS driver for Mac.
- Format card or drive to NTFS on Mac.
- Make NTFS drive writable in macOS.
The software can not only format the SD card, it can also format hard drive, SSD, USB flash drive to NTFS on Mac. Also, the software is able to make the NTFS format drive writable on Mac.
After installing the software on your Mac, just run it from the launchpad. Find where your Mac's SD card space is. If your Mac doesn't have an SD card slot built-in, you can use a separate card reader. Put the SDHC or SDXC card into the reader or slot. Select the SDHC/SDXC card in the software and click the Format button at the right side.
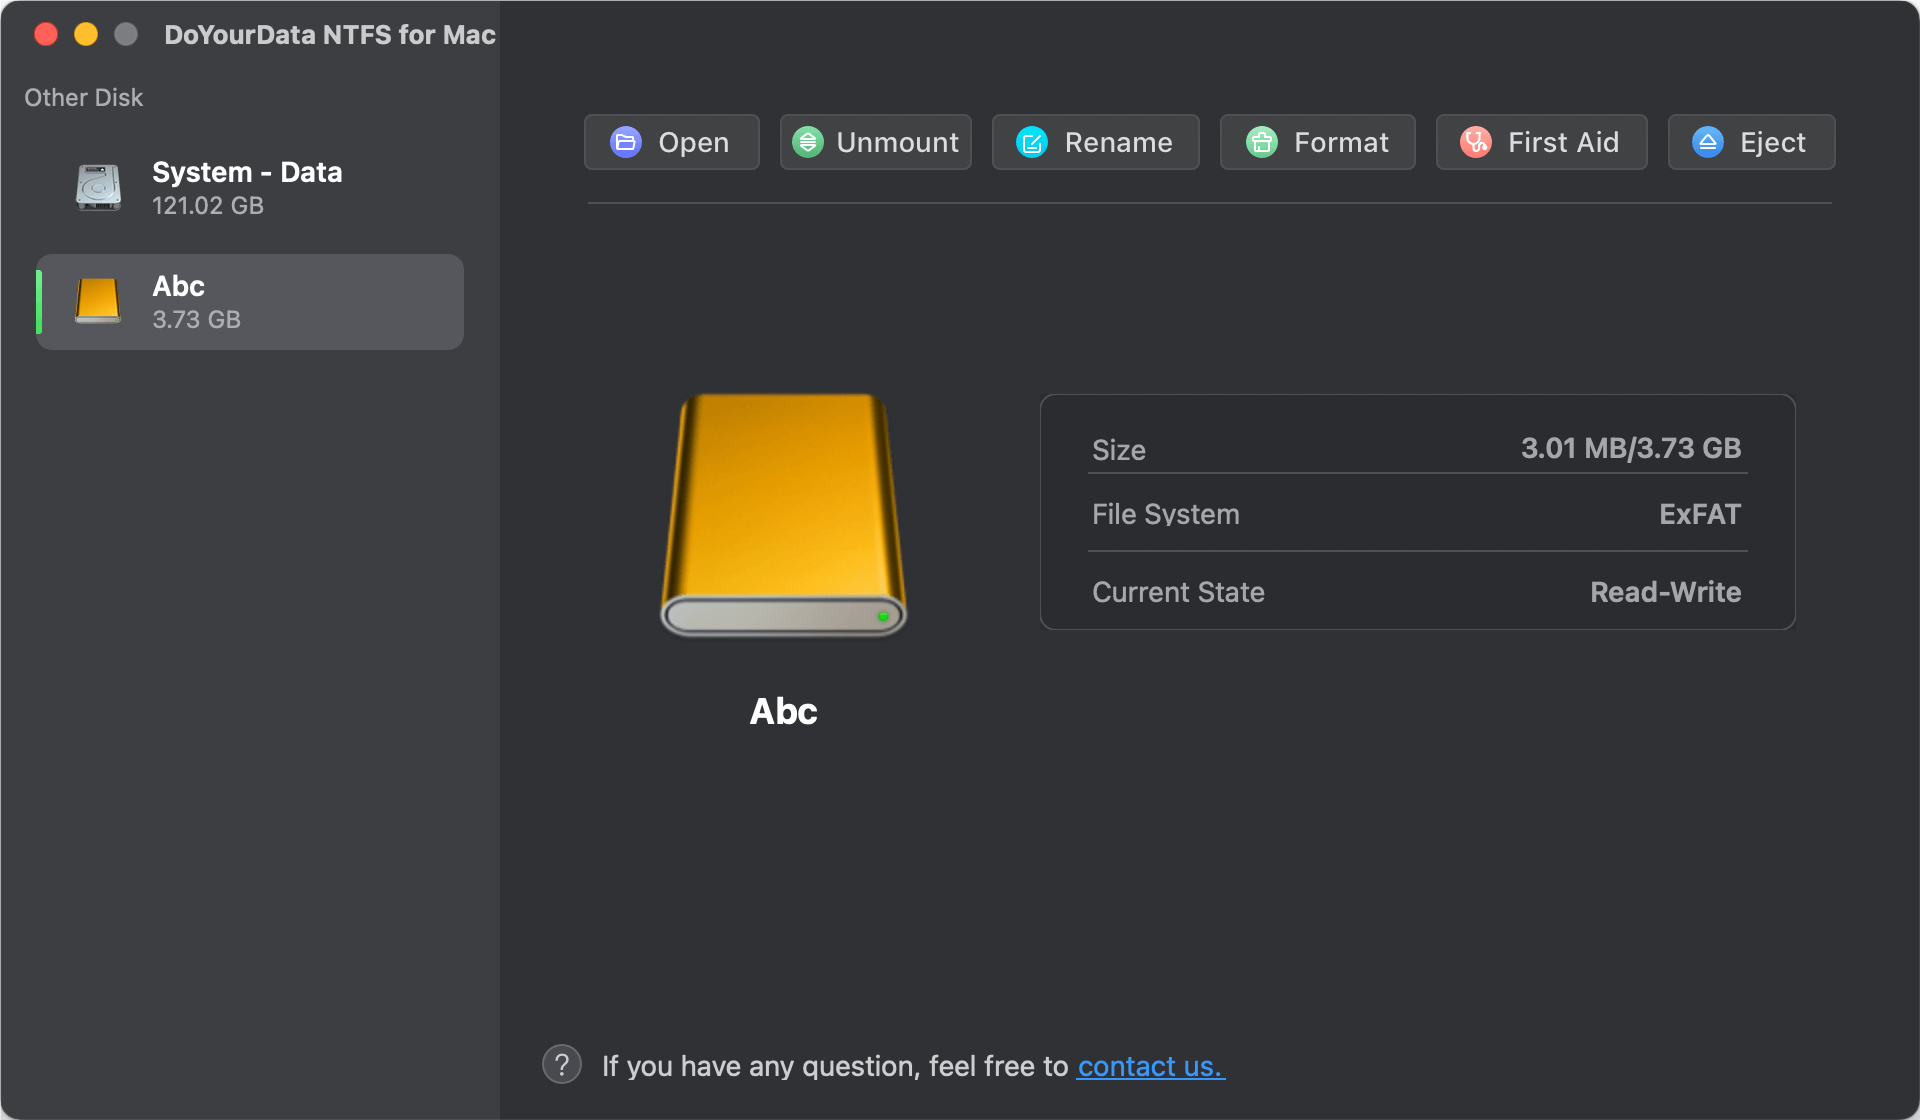
Here you can select NTFS as the file system to format the card in the software.
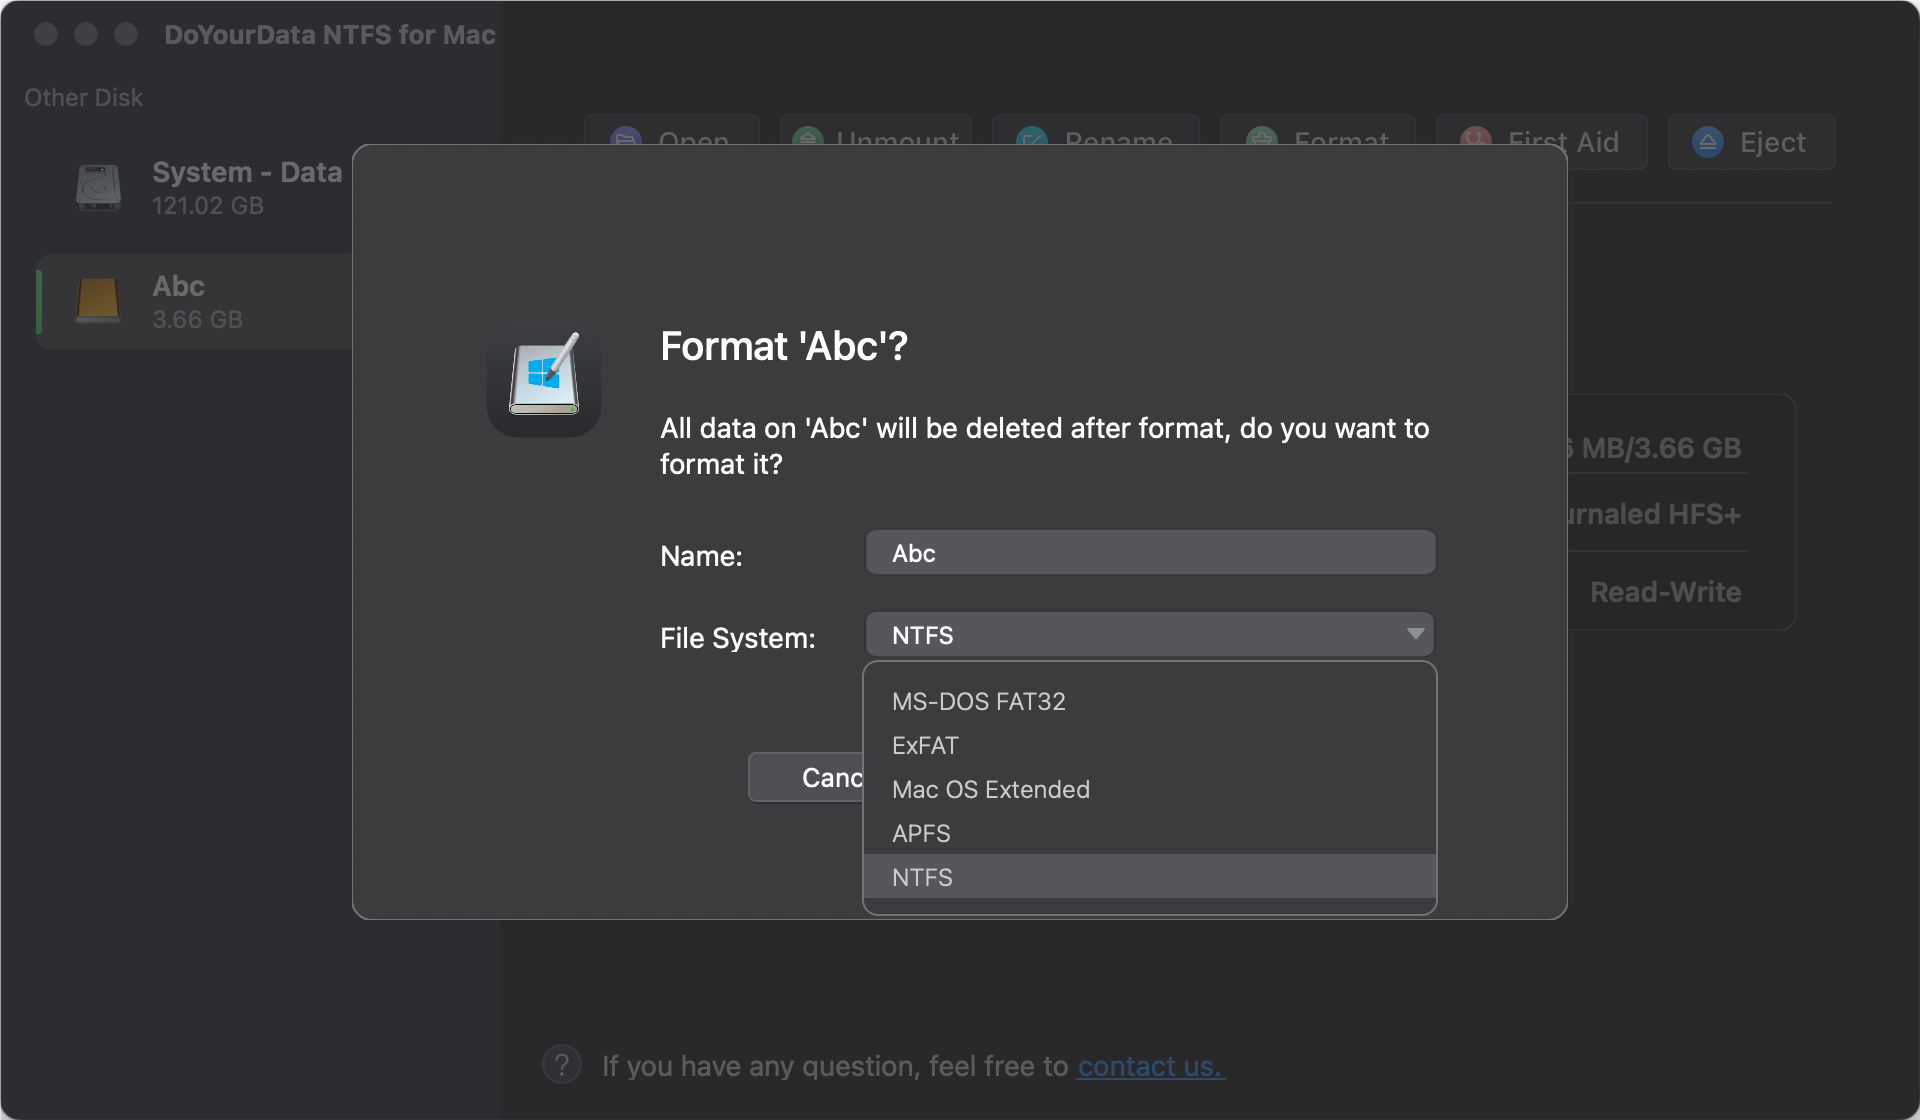
What's more, after installing the software, you can then directly format other devices in Disk Utility to NTFS. You can go and check it:
Step 1: Open the Disk Utility tool. To find it, go to Finder > Applications > Utilities > Disk Utility. You can also press Command + Space and type "Disk Utility" into Spotlight.

Step 2: On the left side of the Disk Utility window is a list of files. The list will help you find your SDHC or SDXC card. It often shows up under "External" and might have the card's capacity or brand name written on it. To choose the SD card, click on it.
Step 3: Select the SD card and click on the Erase button at the top of the Disk Utility window. Then, you can choose the file system. Now, you will find the there is an option for NTFS.
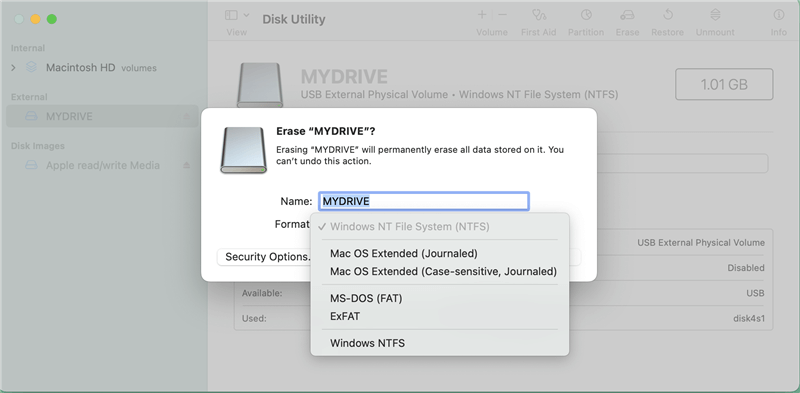
Step 4: give the card a name. In the same window, in the "Name" field, you can give your SD card a name. Pick a name that will make it easy to find the card again.
Step 5: Once you've chosen the right file system and given it a name, hit the Erase button to begin the formatting process. It will start to reset the card with Disk Utility. It might take a few minutes to do it.
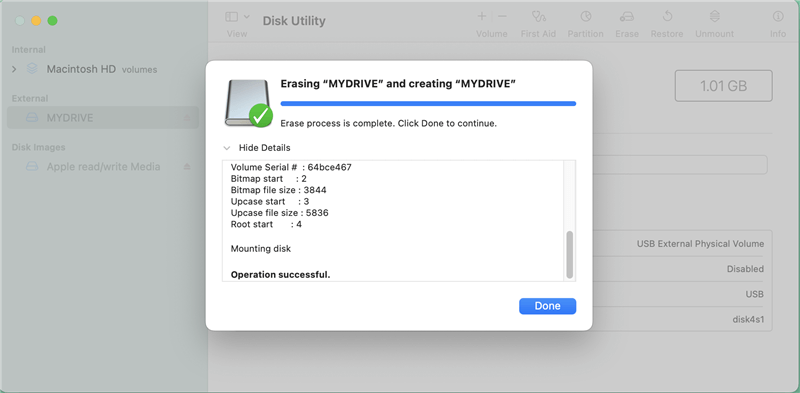
Step 6: When the formatting is done, Disk Utility will show a message confirming that it was successful. This is the end of formatting your SD card. You can now use it.
And after installing the software DoYourData NTFS for Mac on the Mac, you can not only format the card or drive to NTFS, but also the NTFS formatted devices will be writable directly on Mac.
Formatting with Boot Camp or Virtual Machine
If you'd rather use Windows' built-in tools, you can change the SDHC or SDXC card to NTFS by running Windows on your Mac with Boot Camp or a virtual machine (VM) like Parallels or VMware.
Step 1: Set Up Windows on Mac
To use a virtual machine, you need to install and run Windows on your Mac using software like Parallels or VMware.
You could also use Boot Camp to make a partition and run Windows right on your Mac.
Step 2: Insert the SDHC/SDXC Card
Use the VM or Boot Camp to get into Windows.
The SDHC or SDXC card should be put into the SD card slot.
Step 3: Format the SDHC/SDXC Card
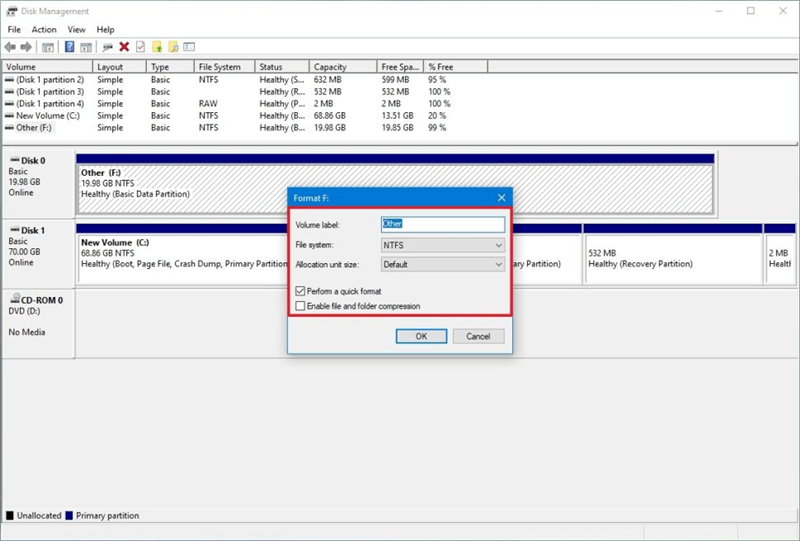
Right click the start menu and choose "Disk Management" to open Disk Management.
Right-click on your SDHC or SDXC card and select "Format."
Pick "NTFS" as the file system, give the card a name, and click "OK."
Step 4: Eject the SDHC/SDXC Card
It is safe to remove the card after formatting it and use it on Windows machines.
💡 Note: If you format the SDHC or SDXC card to NTFS in Windows virtual machine, the SD card will only be writable in Windows systems, it cannot be writable on Mac. If you want to make sure the SD card could be formatted to NTFS and writable on Mac, use the first method with DoYourData NTFS for Mac.
At last, you can also format your SDHC/SDXC card to exFAT instead. This file system is widely used for SD card and can hold large files. What's more, the file system exFAT can be readable and writable natively in both Windows and macOS.
Conclusion:
It might look hard to format an SDHC or SDXC card to NTFS on a Mac, but it's actually very easy if you know what to do. There is a reliable and easy way to format and SD card to NTFS on Mac with DoYourData NTFS for Mac. It makes sure that your SD card can handle big files and work with Windows devices.
Just make sure you back up your info before you format, and check to see if your device can handle NTFS. If you follow these steps, you'll have a storage option that works on both macOS and Windows that meets your needs.
DoYourData NTFS for Mac
DoYourData NTFS for Mac is a safe, powerful and easy-to-use NTFS for Mac tool. It allows macOS to read & write files on NTFS drives without any limitation. It is also a comprehensive disk management tool for Mac to mount/unmount disk, format disk, repair disk, read-write disk...on Mac.