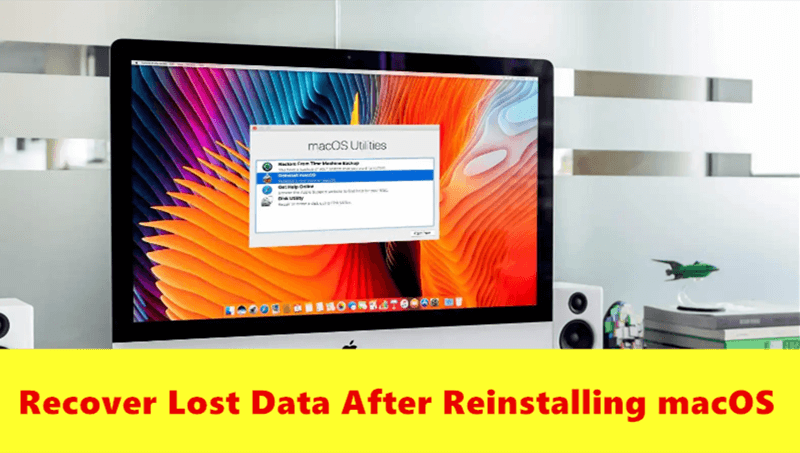
Recover lost data after reinstalling macOS
If you failed to back up important files before reinstalling macOS, you can recover the lost data with the Mac data recovery software.
Quick Navigation:
Mac OS X 10.11 El Capitan is a widely-used version of Apple's operating system that introduced several performance improvements and new features. Over time, you may encounter situations where you need to reinstall the operating system or troubleshoot your Mac. In these cases, a bootable USB installer allows you to perform a clean installation, recover a damaged OS, or install the OS on multiple Macs. In this guide article, we will learn the step-by-step process of creating your own bootable USB installer for El Capitan.
There are several reasons why you might want to create a bootable USB installer for this version:
Before we dive into the process, let's review the prerequisites and tools you'll need to complete this task.
🛠️ Requirements:
To create a bootable USB installer, you will need the following:
Here we will show you the tips you need to know and the detail steps to follow and create the bootable USB installer for Mac OS X 10.11 El Capitan:
Before you begin to create the USB installer and install the system Mac OS X 10.11, it's important to back up your personal data and current system. This process will erase all the data on the drive, and if you are doing a clean installation of Mac OS X El Capitan, your Mac's data will be erased too. A full backup can help you get back the system status and personal files if there are issues happen during the process.
You can back up your Mac with Time Machine. It's a free solution provided with macOS. However, we suggest you a simple way to back up the Mac with DoYourClone for Mac. With this software, you can easily create a fully and bootable clone for your Mac, along with the the personal files.
To create a fully and bootable clone of your Mac, just follow the steps here:
Step 1. Download and install the software DoYourClone for Mac on your computer. Connect an empty external hard drive to the Mac.
Step 2. Run the software form launchpad and change to the mode Clone OS.
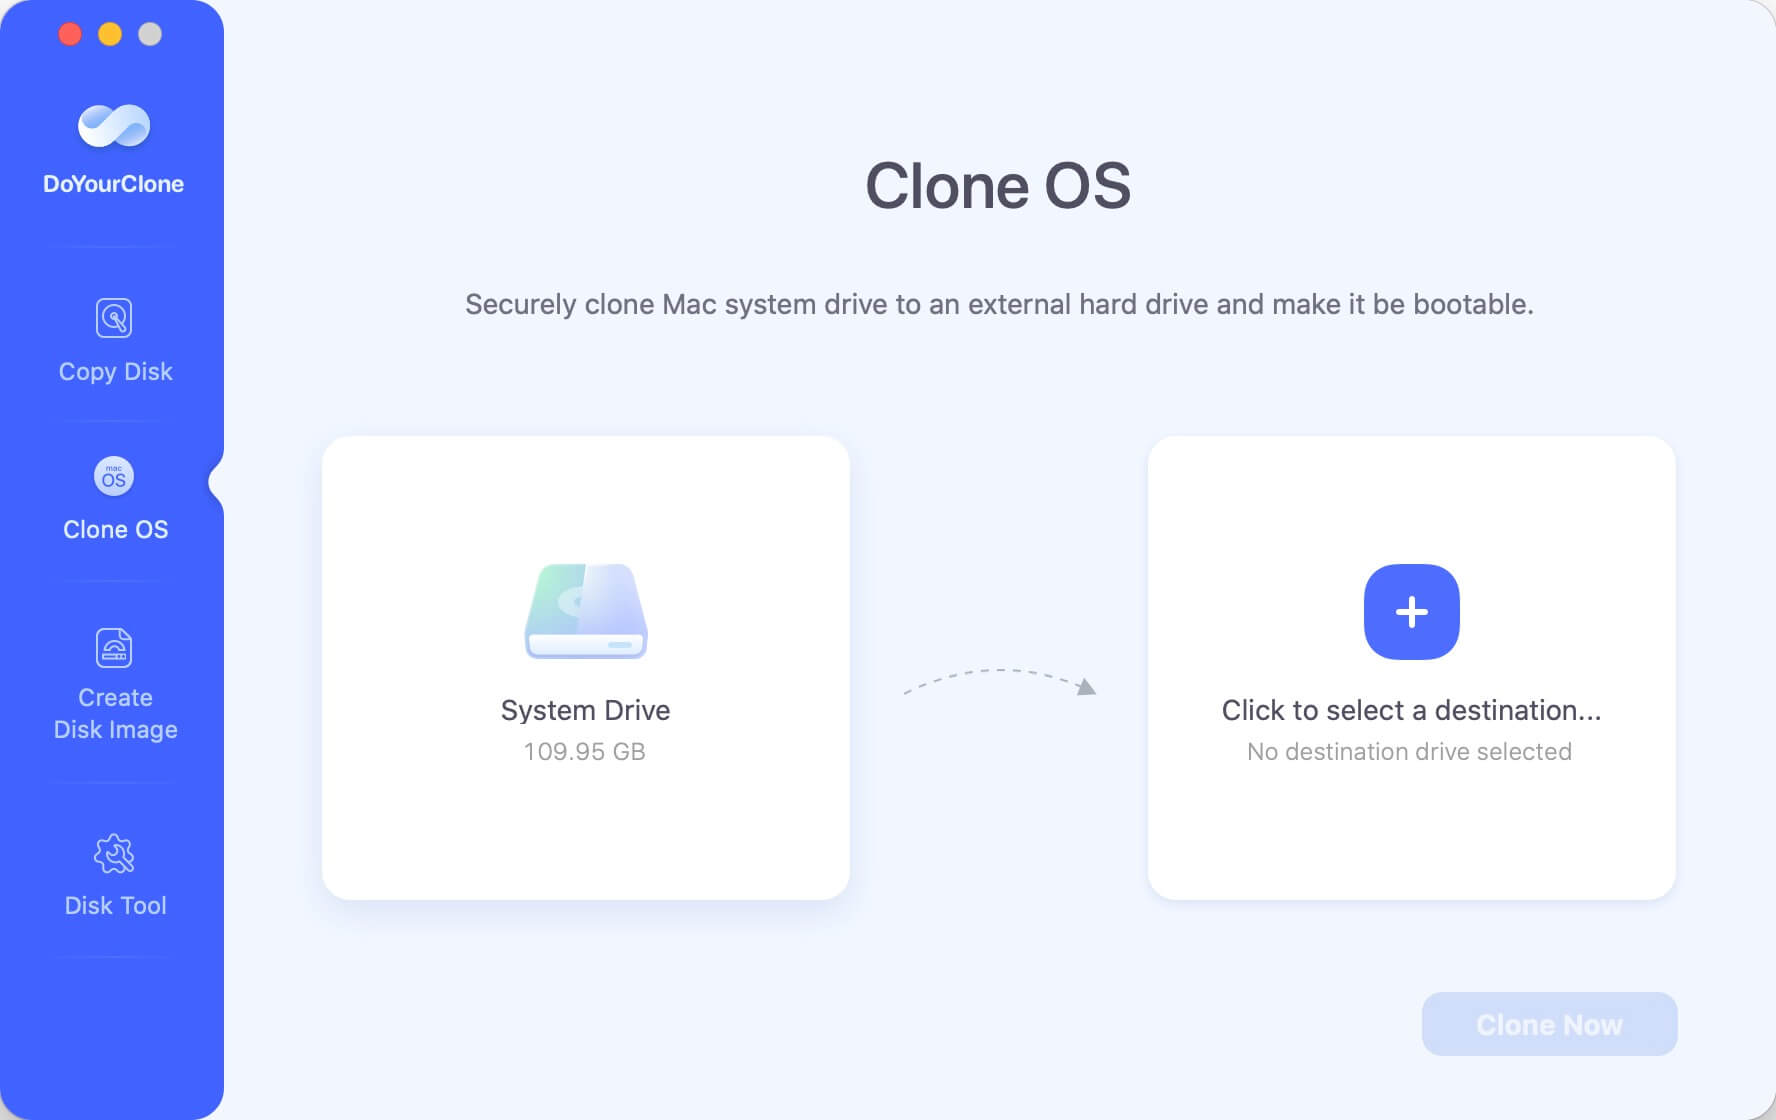
Step 3. The system drive of your Mac will be selected automatically as source, you can just select the empty external drive as destination drive.
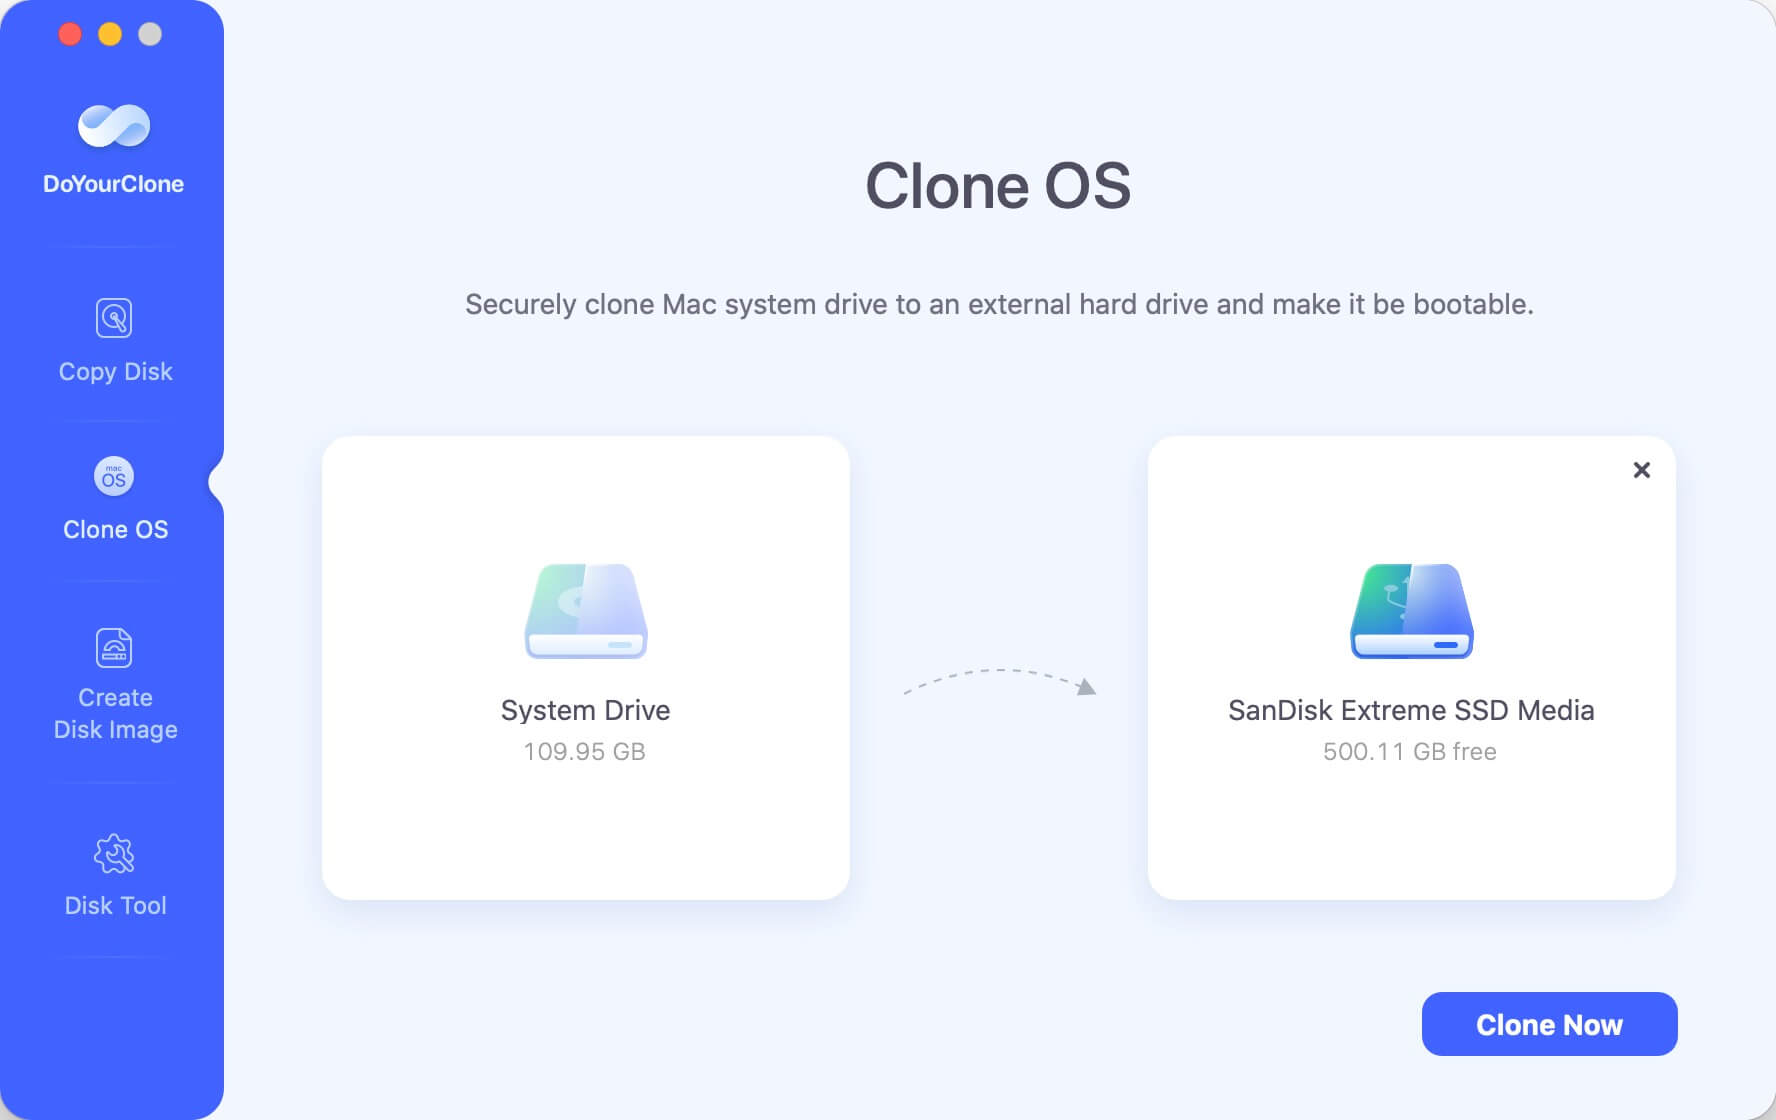
Step 4. Click Clone Now button, then the software will then proceed to copy the system and personal files from the Mac drive to the external hard drive.
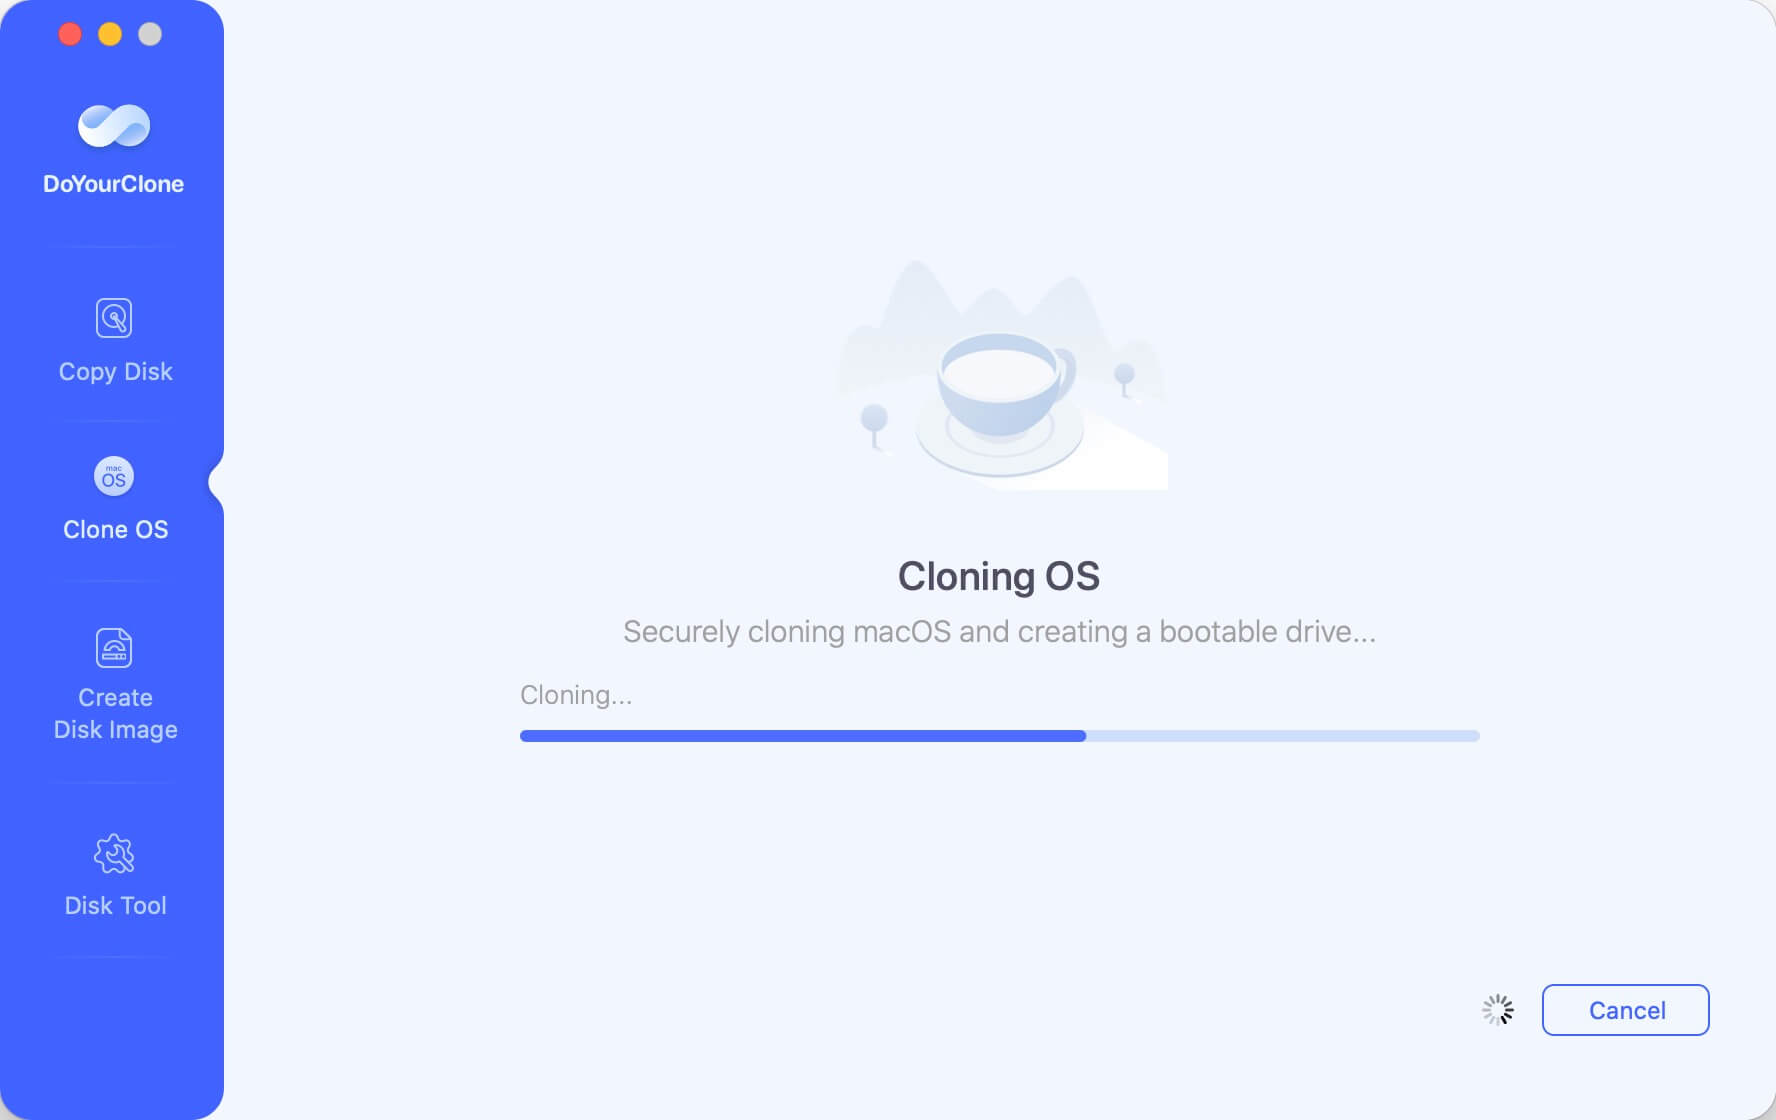
Once the process is done, you can verify the data on the external drive to confirm if the data is backed up successfully. Also, you can try to boot the computer from the cloned drive to confirm if it's bootable.
If you have backed up your data or system on the Mac, you can then follow the guide below to create the USB installer and install the system Mac OS X El Capitan.
Step 1: Download Mac OS X El Capitan Installer
To create the bootable USB, you'll need the El Capitan installer file. You can usually find it on the Mac App Store or through the Apple support website. Make sure you download it from a reliable source. If you already have the installer, you can skip this step. If not, follow the steps below to download it.
You can also download the OS from the apple download page directly
Once downloaded, the installer should automatically launch. Do not proceed with the installation just yet. Instead, close the installer by clicking Quit. The installer file will now be saved in your Applications folder under the name Install OS X El Capitan.
Step 2: Prepare the USB Flash Drive
Before you can turn the USB flash drive into a bootable installer, you need to format it properly. Here's how to do it:
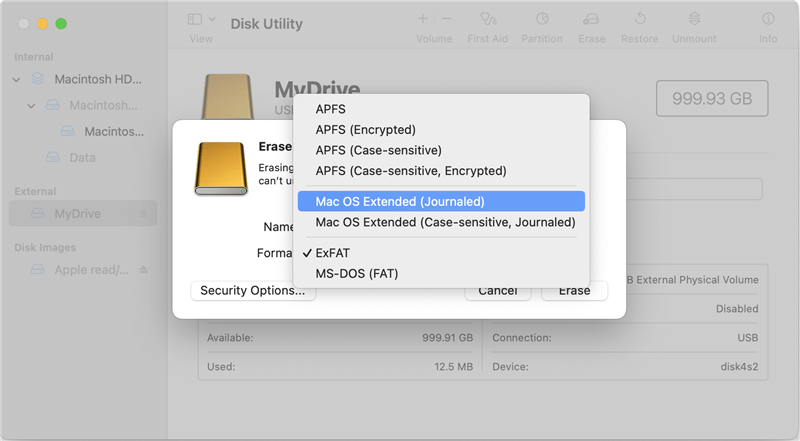
Once the USB drive is formatted, it is ready for the bootable installer.
Step 3: Create the Bootable USB Installer Using Terminal
Now that your USB drive is prepared and the installer is downloaded, you'll use Terminal to create the bootable installer. Terminal is a powerful tool in macOS that allows you to input commands directly into your Mac's operating system.
sudo /Applications/Install\ OS\ X\ El\ Capitan.app/Contents/Resources/createinstallmedia --volume /Volumes/MyVolume --applicationpath /Applications/Install\ OS\ X\ El\ Capitan.app --nointeraction
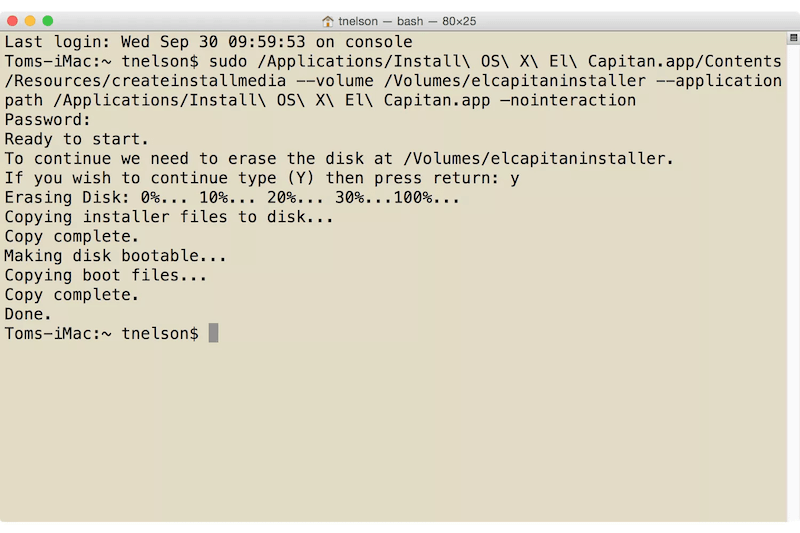
You will be prompted to enter your Mac's administrator password. Type it in (note that you won't see the password as you type) and press Enter again.
The Terminal will now begin creating the bootable USB installer. This process might take several minutes, so be patient. You'll see various messages in Terminal indicating the progress. Once the process is complete, Terminal will display a message saying "Done."
Step 4: Boot From the USB Installer
Now that your bootable USB installer is ready, you can use it to install or reinstall OS X El Capitan on your Mac. Follow the steps below to boot from the USB installer.
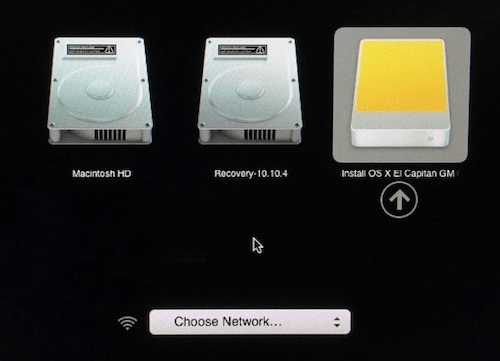
Your Mac will now boot into the OS X installer. From here, you can either install OS X El Capitan on your Mac's hard drive, erase your hard drive for a clean installation, or access additional tools such as Disk Utility for troubleshooting.
Step 5: Installing Mac OS X El Capitan
Once you've booted into the installer, follow these steps to install OS X El Capitan:
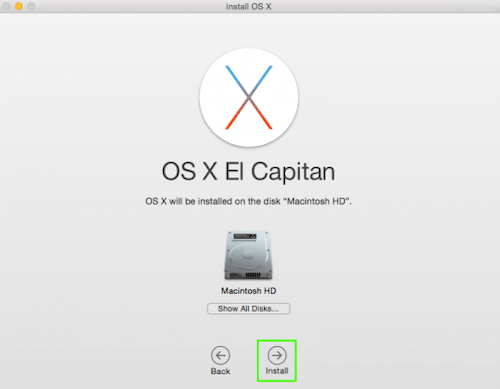
After installation is finished, Mac will restart and you will be asked to set up OS X El Capitan as though it were a brand-new system.
Recover lost data after reinstalling macOS
If you failed to back up important files before reinstalling macOS, you can recover the lost data with the Mac data recovery software.
⚠️ USB Drive Not Recognized
If your Mac doesn't recognize the USB drive when you try to boot from it, there are a few potential solutions:
⚠️ Installer Fails to Complete
If the installation process fails, there could be several reasons:
A bootable USB installer offers several benefits over simply reinstalling the OS through Recovery Mode or other methods.
Speed ✈️
One of the primary advantages is speed. Installing OS X El Capitan from a bootable USB installer is typically much faster than downloading the operating system through Apple's servers, especially if you have a slow or unreliable internet connection.
Flexibility ⚙️
A bootable USB installer gives you the flexibility to install the OS on multiple Macs without downloading the installer each time. This is particularly useful if you manage multiple Macs in an office or educational setting.
Troubleshooting 👨🔧
Having a bootable installer on hand allows you to quickly troubleshoot your Mac if it refuses to boot properly. You can easily boot from the USB drive and access tools like Disk Utility, reinstall the OS, or recover data.
Creating a bootable USB installer for Mac OS X 10.11 El Capitan is a simple yet invaluable process. With just a few tools—a USB drive, the installer, and Terminal—you can create a robust recovery and installation tool for your Mac. Whether you're looking to perform a clean installation, fix issues, or set up multiple Macs, this guide ensures you can complete the process with ease. The ability to install macOS quickly and efficiently without relying on the internet or other complex tools makes a bootable USB installer an essential tool for any Mac user.
By following the steps outlined above, you'll have a working bootable USB installer in no time, ready to solve any software issues or give your Mac a fresh start. Before you install the system with the USB installer, ensure to create a full backup of your current Mac system in case issue happen during the installing process.
DoYourClone for Mac
DoYourClone for Mac, one of the best Mac disk cloning software, can help you clone HDD, SSD, external storage device on Mac, upgrade HDD to SSD, create full disk image backup, etc. It also can clone everything from your Mac to an external HDD/SSD and create a full bootable clone backup. 100% safe and easy-to-use.
