Quick Navigation:
- Understanding Hard Drive Cloning
- Preparations Before Cloning
- Step-by-Step Guide Using Disk Utility
- Cloning with DoYourClone for Mac
- Troubleshooting Common Issues
- Best Practices for Maintaining Cloned Drives
- Conclusion
Cloning a hard drive is an essential process for anyone looking to upgrade their system, create a backup, or migrate to a new storage device. On Mac OS X El Capitan, cloning ensures you have an exact replica of your operating system, applications, and files. Unlike a typical backup, which focuses on saving individual files and folders, cloning replicates the entire drive structure, including boot information, which is crucial if you ever need to restore or boot from the cloned drive.

In this guide, we'll take you through the complete process of cloning a hard drive on Mac OS X El Capitan. Whether you are upgrading to a solid-state drive (SSD), creating a reliable backup of your entire system, or simply looking to migrate your data, this article will provide clear, step-by-step instructions using both built-in and third-party tools.
Understanding Hard Drive Cloning
Before diving into the actual process, it's essential to understand what hard drive cloning is and why you might need it. Cloning creates a bit-by-bit copy of your entire hard drive, replicating everything from your operating system to your personal files and applications. The end result is an identical twin of your drive that can be used to boot your Mac or recover your system in case of failure.
🔷 Difference Between Cloning and Backups
While backups focus on copying files and folders, a clone replicates everything, including hidden system files, partitions, and boot data. A clone is more useful if you need to:
- Upgrade your Mac's storage drive without reinstalling macOS and applications.
- Migrate to a new Mac and retain all your settings and files.
- Keep a bootable copy of your system in case of drive failure.
🔷 Common Use Cases for Cloning
Some typical scenarios where cloning a hard drive becomes essential include:
1. Upgrading to an SSD: When upgrading from a traditional hard drive to a faster SSD, cloning allows you to move everything without reinstalling macOS or reconfiguring your settings.
2. Creating a System Backup: A clone can serve as a full system backup, ensuring that you have an exact copy of your drive ready for quick restoration in case of failure.
3. Migrating to a New Mac: When moving to a new Mac, cloning makes transferring your data and system setup seamless.
Preparations Before Cloning
Before you start cloning your hard drive, there are a few preparations you need to make to ensure the process goes smoothly.
🔷 Check Available Space
The destination drive where you'll be cloning your data must have enough space to store everything from the source drive. For instance, if your source drive has 500 GB of data, the destination drive must have at least 500 GB of free space.
🔷 Verify the Health of the Source Drive
It's important to check the health of your source drive before cloning. A drive with bad sectors or errors could result in an incomplete or corrupted clone. To check the drive's health, you can use Mac's built-in Disk Utility:
- Open Disk Utility from the Applications > Utilities folder.
![clone a hard drive on Mac OS X El Capitan]()
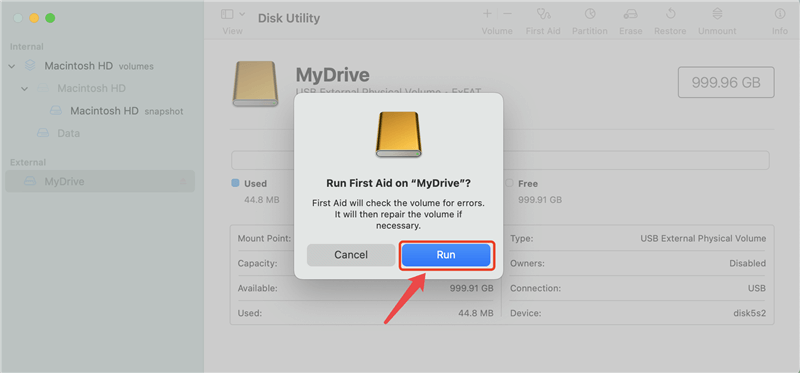
- Select your drive from the list on the left. Click on First Aid button.
![clone a hard drive on Mac OS X El Capitan]()
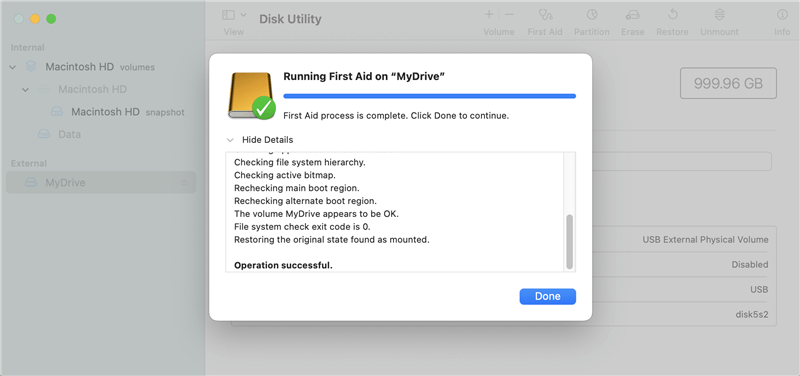
- Then click Run to check for errors.
![clone a hard drive on Mac OS X El Capitan]()
- If any errors are found, try repairing them before proceeding.
![clone a hard drive on Mac OS X El Capitan]()
🔷 Format the Target Drive
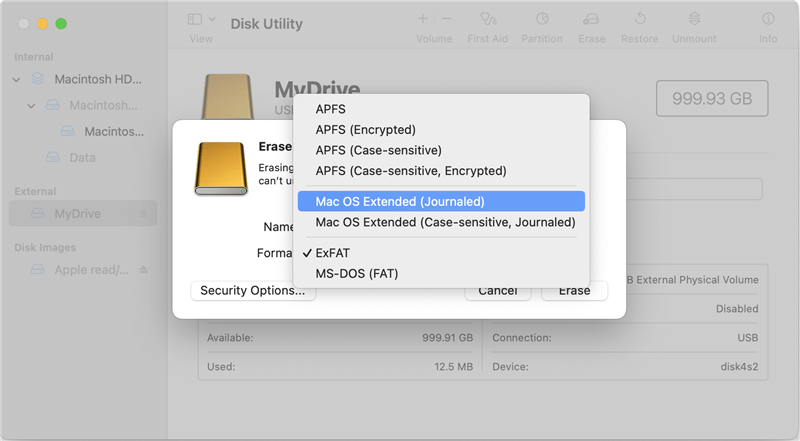
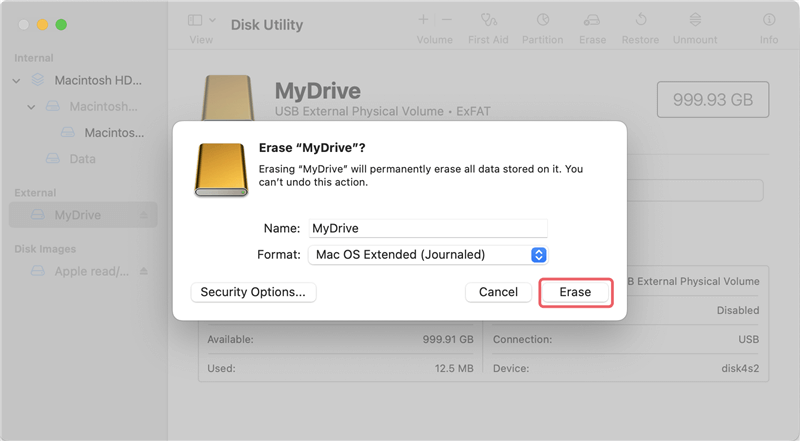
If the target drive is new or contains other data, you'll need to format it. The drive should be formatted as "Mac OS Extended (Journaled)" to ensure compatibility with Mac OS X El Capitan. To format the drive:
- Open Disk Utility.
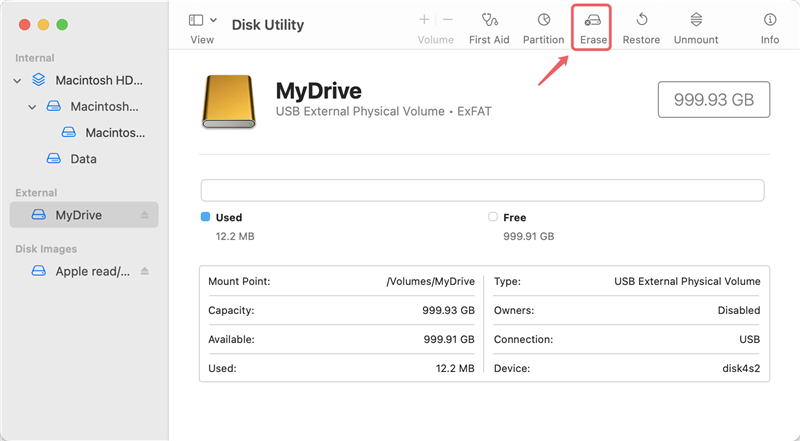
- Select the destination drive from the list and click Erase.
![clone a hard drive on Mac OS X El Capitan]()
- Choose Mac OS Extended (Journaled) from the format options.
![clone a hard drive on Mac OS X El Capitan]()
- Click Erase to format the drive.
![clone a hard drive on Mac OS X El Capitan]()
🔷 Tools Needed for Cloning
There are several tools available for cloning a hard drive on Mac OS X El Capitan, including built-in options and third-party applications. Here's an overview of the most popular choices:
1. Disk Utility (Built-in)
Mac OS X comes with a built-in tool called Disk Utility that can be used to clone a hard drive. It's a free and reliable option, but it lacks some advanced features found in third-party tools.
2. DoYourClone for Mac (Third-Party)
DoYourClone for Mac is a highly recommended cloning tool for Mac. It is a popular third-party tool for cloning hard drives on macOS. It offers more control and flexibility, such as the ability to schedule regular clones and incremental backups.
Step-by-Step Guide Using Disk Utility
Step 1: Open Disk Utility
To start the cloning process, open Disk Utility by going to Applications > Utilities > Disk Utility. This tool is included with Mac OS X El Capitan and can be used to clone your hard drive without the need for third-party software.
Step 2: Select the Target Drive
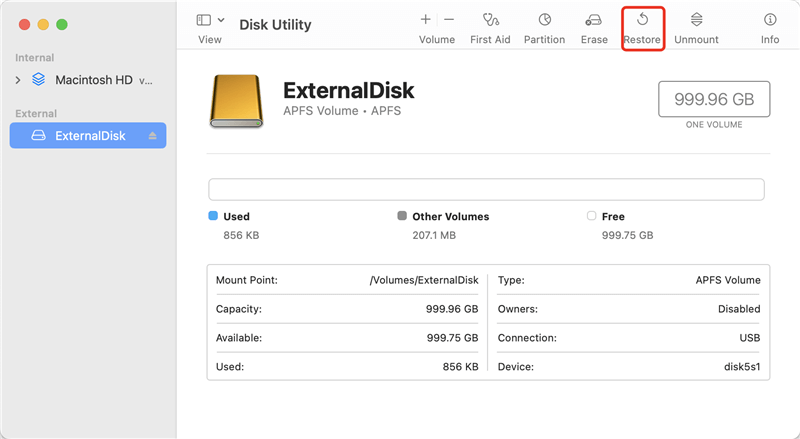
Once Disk Utility is open, select the destination drive (the drive to which you want to clone your data) and click the Restore tab.
Step 3: Select the Source Drive
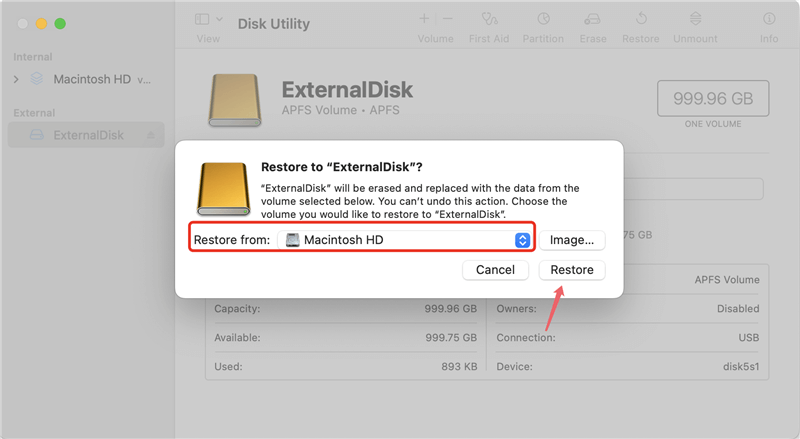
In the pop up window, select the source drive from Restore from drop down list.
Step 4: Confirm the Cloning Process
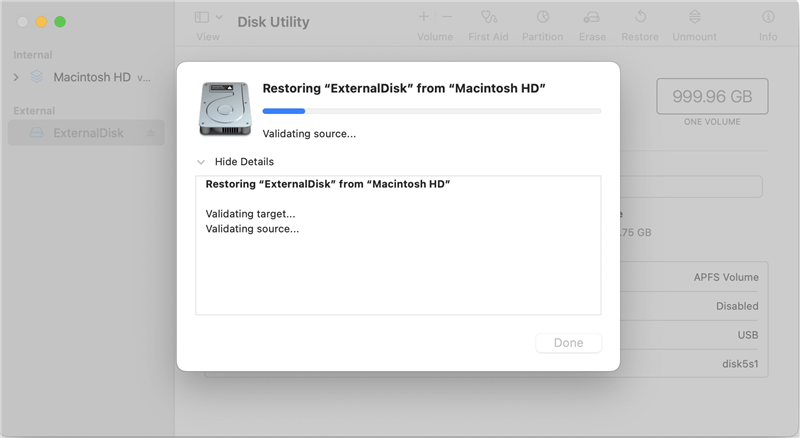
After setting the source and destination, click Restore to begin the cloning process. Disk Utility will start copying all the data from the source drive to the destination drive. Depending on the size of your data, this process may take some time.
Cloning with DoYourClone for Mac
DoYourClone for Mac is a powerful third-party cloning tool that offers more control than Disk Utility. It's ideal if you need advanced features.
DoYourClone - Reliable Disk Clone Software
- Most reliable disk cloning software for Mac OS X El Capitan.
- Create bootable and full clone for the Mac system drive.
- Compatible with the latest macOS operating systems.
The tool is easy to use and offers reliable cloning features. It's especially useful for users who want a simple interface and reliable disk cloning
🔷 Step-by-Step Cloning Process:
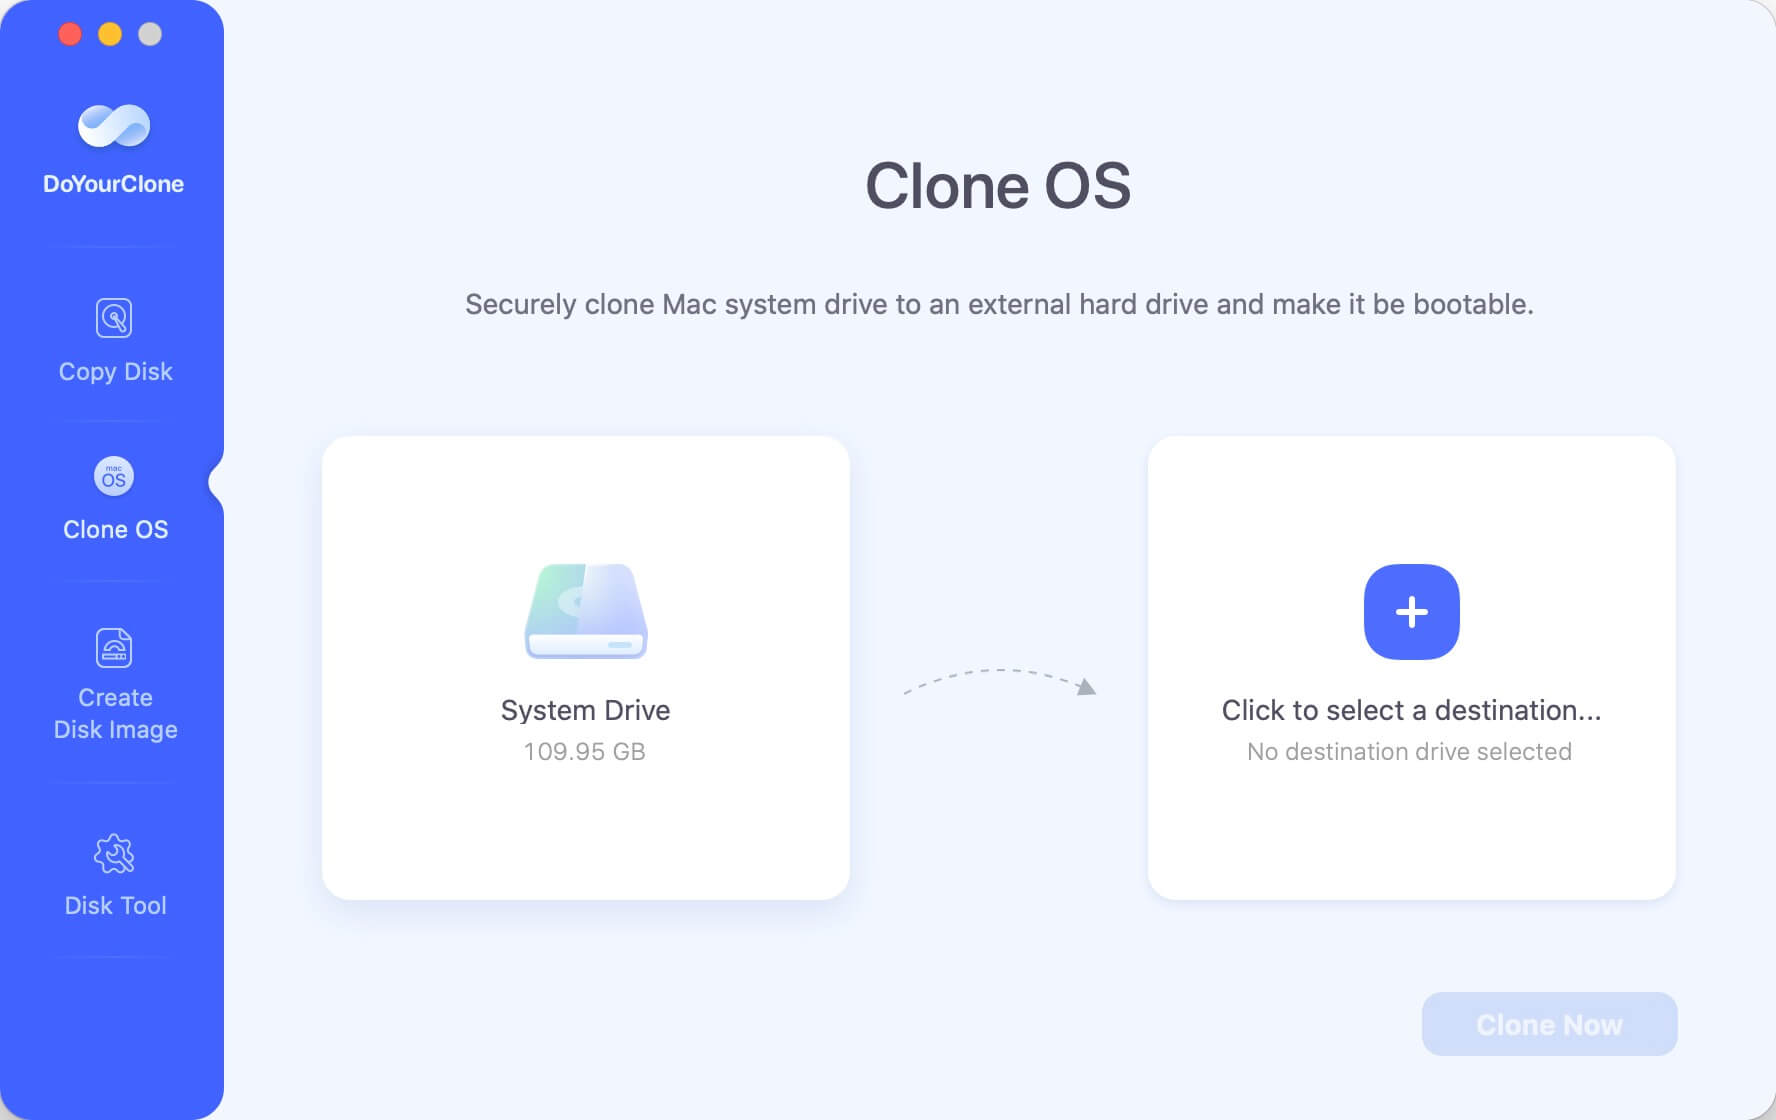
Step 1. Connect an external hard drive to the Mac computer.
- Download the application. Install it on your Mac.
- After installation, open the software from launchpad. Change to the Clone OS option which will clone the entire Mac system drive.
![clone a hard drive on Mac OS X El Capitan]()
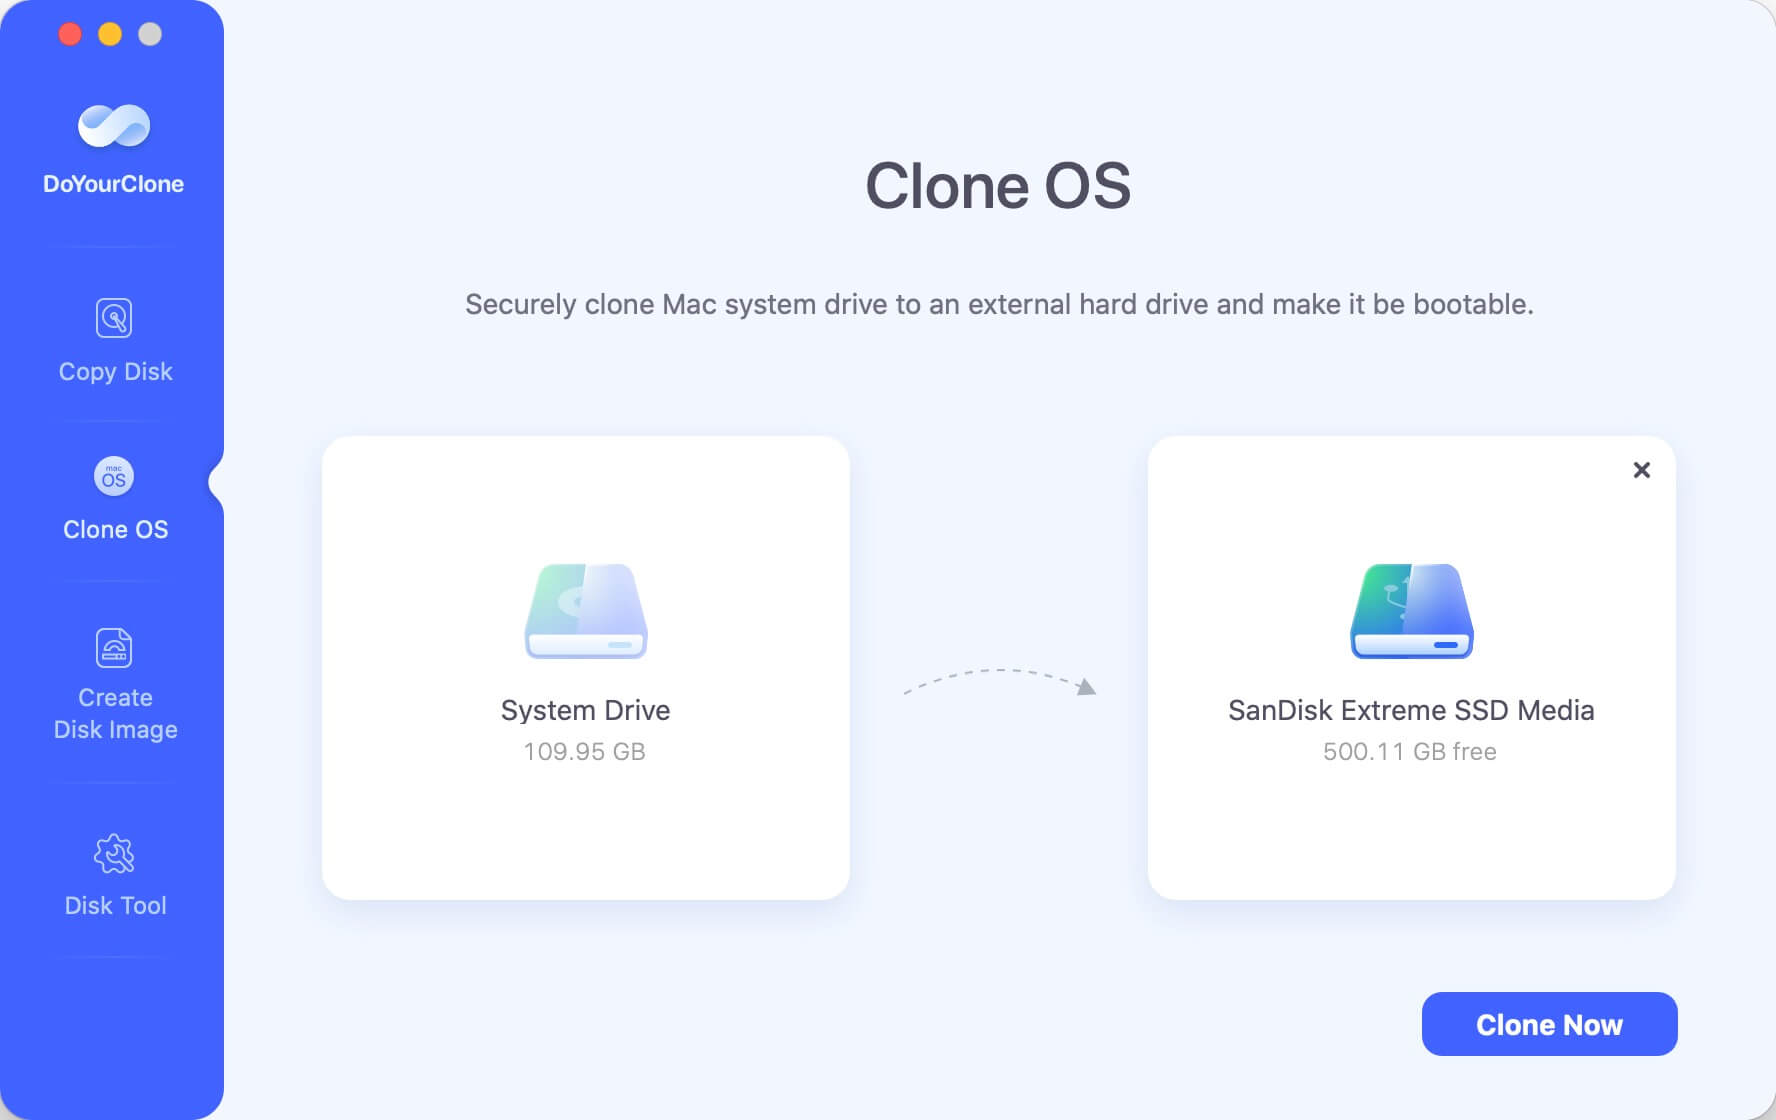
- In the destination section, choose the external hard drive as target drive.
![clone a hard drive on Mac OS X El Capitan]()
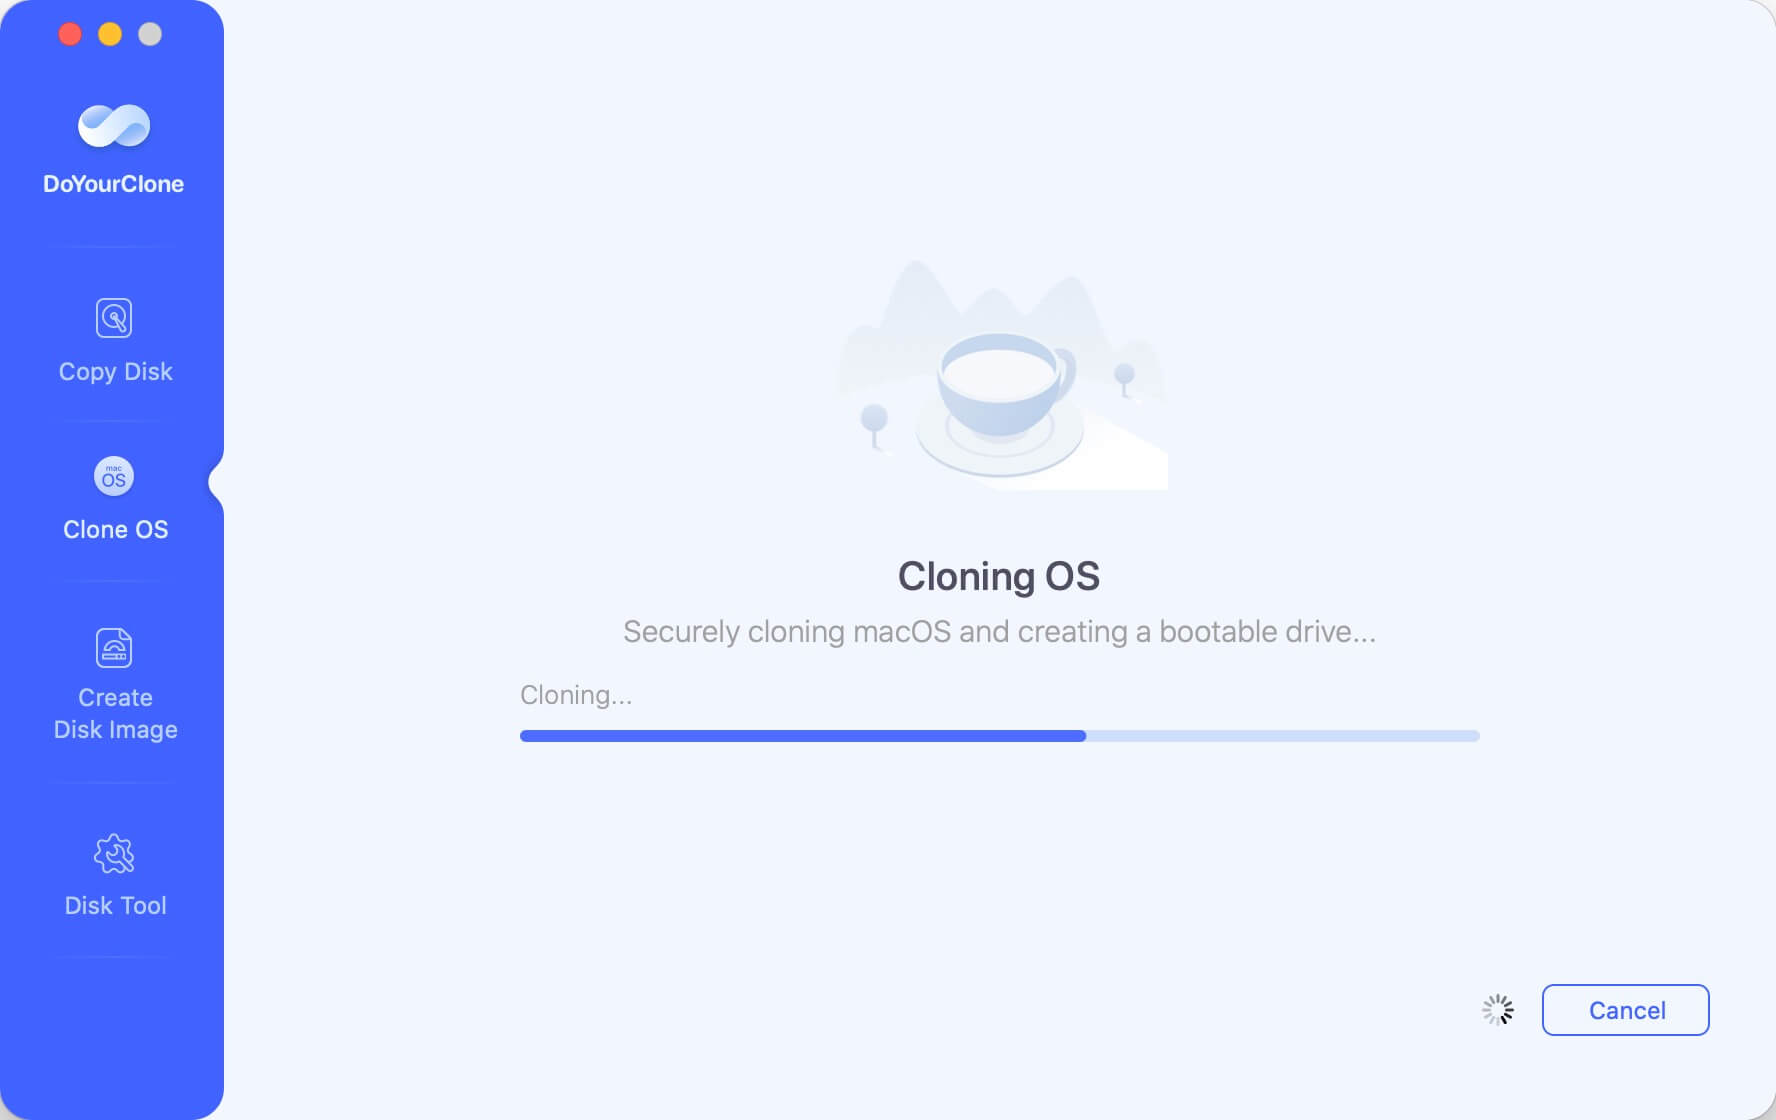
- Once you've selected the destination, click Clone Now to start the process. The software will begin copying all the data from your source drive (system) to your destination drive.
![clone a hard drive on Mac OS X El Capitan]()
Once the cloning process is complete, there are a few steps you should take to ensure everything went smoothly.
🔷 Verifying the Cloned Drive
One of the most important steps after cloning is verifying that the cloned drive is bootable. To check if the clone was successful, follow these steps:
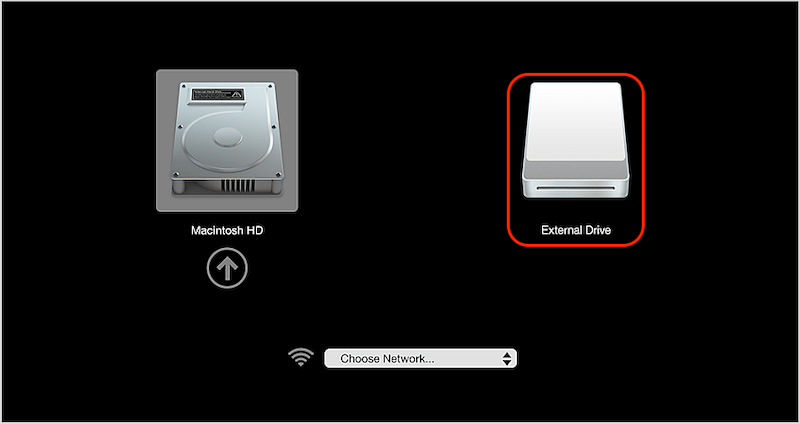
- Restart your Mac.
- Hold down the Option key while the system boots up.
- You'll see a list of available boot drives. Select the cloned drive from the list.
![clone a hard drive on Mac OS X El Capitan]()
- If your Mac successfully boots from the cloned drive, the cloning process was successful.
Troubleshooting Common Issues
- Cloning Errors: If you encounter errors during the cloning process, it's a good idea to check the health of both the source and destination drives using Disk Utility's First Aid feature.
- Boot Issues After Cloning: If your cloned drive doesn't boot, make sure the destination drive is formatted correctly and that all system files were copied. You may need to attempt the cloning process again or use a different cloning tool and method.
- Disk Not Showing Up: If your destination drive doesn't appear in Disk Utility or DoYourClone for Mac, try disconnecting and reconnecting it, or check if it needs to be formatted.
Best Practices for Maintaining Cloned Drives
Keeping your cloned drive updated is crucial to ensure that you can rely on it in case of system failure. Here are some best practices to follow:
🔷 Regular Updates
Schedule regular clones or incremental backups to keep the data on your cloned drive current. This way, if your main drive fails, you won't lose any recent changes.
🔷 Comprehensive Backup Strategy
While cloning is an excellent way to protect your system, it should be part of a larger backup strategy. Consider using Time Machine, cloud, or another backup service to regularly back up your important files in addition to cloning.
Conclusion
Cloning a hard drive on Mac OS X El Capitan is an effective way to upgrade your system, create a bootable backup, or migrate to a new drive without losing any data. Whether you use the built-in Disk Utility or opt for third-party tools like DoYourClone for Mac, the process is relatively straightforward and highly beneficial. Regularly updating your cloned drive ensures that you always have a reliable backup ready in case of emergencies.
DoYourClone for Mac
DoYourClone for Mac, one of the best Mac disk cloning software, can help you clone HDD, SSD, external storage device on Mac, upgrade HDD to SSD, create full disk image backup, etc. It also can clone everything from your Mac to an external HDD/SSD and create a full bootable clone backup. 100% safe and easy-to-use.


