Quick Navigation:
- Is Upgrading Right for You?
- Upgrade Options for Surface Pro Storage
- Factors to Consider Before Upgrading
- How to Upgrade Internal SSD on Surface Pro?
- How to Clone Data from Old Drive to New SSD?
- Conclusion
Not having enough storage space on your Surface Pro can get in the way of your work. You can upgrade from the outside, but think about upgrading from the inside for a real speed boost. It's not as easy as upgrading the SSD in a regular laptop, but you can do it with the right information and tools for your Surface Pro.
This guide can help you make smart choices, deal with compatibility issues, and follow the upgrade process. Before we start, remember that you'll need to know a bit about technology, and some types might not be able to be upgraded by the user. Let's see if an upgrade fits your needs and dive into the exciting world of a Surface Pro with faster boot times and more space!
Is Upgrading Right for You?
Before you get out your screwdrivers and thermal paste, here are some things you should think about to see if a storage update is right for you:
- Storage Shortage: The most obvious sign is a constant fight for free space. If you have to delete files constantly to make room for new ones, upgrading is a good idea.
- Performance Lag: Compared to standard HDDs, SSDs make boot times and application loading times much faster. When you add an HDD to an older Surface Pro, it can make it run much faster.
- Technical Expertise: You must be comfortable with technology for the update process. If taking gadgets apart makes you nervous, you might want help from a professional or look into external storage options.
- Compatibility Considerations: Adding a new drive isn't the only way to improve the storage on a Surface Pro.
Surface Pro Model:
There are many Surface Pro models which can be upgraded differently. Microsoft publicly says that changing internal parts is not recommended, and some models, like the Surface Pro 4 and later models with glued-down backs, are very hard to open without damaging them. Check to see if your model can be upgraded before you go ahead with the update. Online tools and teardown guides can be useful for confirmation.
SSD Type:
SSDs in the M.2 form factor are used in Surface Pros, but there are different types of M.2 SSDs. SATA-based M.2 SSDs are the most popular type for Surface Pros, but newer models may use NVMe PCIe SSDs, which are even faster. Ensure that the SSD you choose works with your Surface Pro type.
Upgrade Options for Surface Pro Storage:
Increasing the storage on your Surface Pro can be done in several ways, each with its pros and cons:
1. External Storage:
External hard drives (HDDs) or solid-state drives (SSDs) are a quick and cheap way to add more storage to your Surface Pro without opening it up. External drives that are either USB-C or USB-A can be easily linked to your device to give you more space for files, backups, and media. External storage can be moved around and used in different ways, but it might not work as well as internal storage.
2. MicroSD Card Expansion:
Many Surface Pro types come with a microSD card slot, which lets users add more storage with microSDXC cards. MicroSD cards are easy to find and don't cost much, making them a good choice for people needing more storage space. Even though microSD cards can hold more data, they might not be as fast or reliable as internal SSDs.
3. Internal SSD Upgrade:
Upgrading the internal SSD is the best option for users who want the most speed and storage space. To update the Surface Pro's internal SSD, you have to open it up and replace the old SSD with a faster or larger drive. This method smooths the connection with the device and guarantees top performance, but it might need technical know-how to void the warranty.
Factors to Consider Before Upgrading:
Before you decide to add more storage to your Surface Pro, think about the following:
- Warranty Implications: If you open your Surface Pro to add more storage, the guarantee might be voided. Make sure to read the guarantee carefully and think about the risks.
- Compatibility: Not all types of Surface Pro can have their storage expanded. Make sure that the way you plan to change works with the device you want to use.
- Performance Requirements: Figure out how much data you need and how you usually use it. Are you mostly keeping documents, multimedia files, or programs that use many resources?
- Budget: The cost of upgrading storage varies based on the method and space needed. Set up a budget that considers your wants and available funds.
How to Upgrade Internal SSD on Surface Pro?
Here are the steps you need to take to update the internal SSD on your Surface Pro:
1. Backup Your Data:
Before you make any changes to your gear, ensure you have a copy of all your important files on an external drive or a cloud storage service.
2. Gather Necessary Tools:
You'll need the right tools, like a small Phillips screwdriver, a prying tool, and a wrist strap that doesn't let static electricity hurt you.
3. Prepare the Surface Pro:
Close all your apps and turn off your Surface Pro. Put the gadget on a clean, flat surface that gets a lot of light.
4. Open the Device:
Be careful as you take the display part off the chassis with the prying tool. Be careful and take your time to avoid damaging the delicate parts.
5. Locate the SSD:
Once inside, the existing SSD is usually near the middle of the gadget. It'll be held in place with screws, and a heat sink or shield might go over it.
6. Replace the SSD:
Carefully release it from its slot and remove it. Put in the new SSD and make sure it is properly aligned and connected. Use the screws to hold the new SSD in place.
7. Reassemble the Device:
After putting in the new SSD, carefully line up the connectors on the display unit before putting it back on the chassis. Make sure that any screws or clips are tight by securing them.
8. Power On and Test:
Turn on your Surface Pro and make sure the system can see the new SSD. Bring back the data you backed up and ensure everything works correctly.
How to Clone Data from Old Drive to New SSD?
Microsoft Surface disk cloning software - such as DoYourClone can help you securely and quickly clone all data from the old hard drive to the new SSD.
Step 1. Download and install DoYourClone on the Surface Pro, then open this disk cloning software.
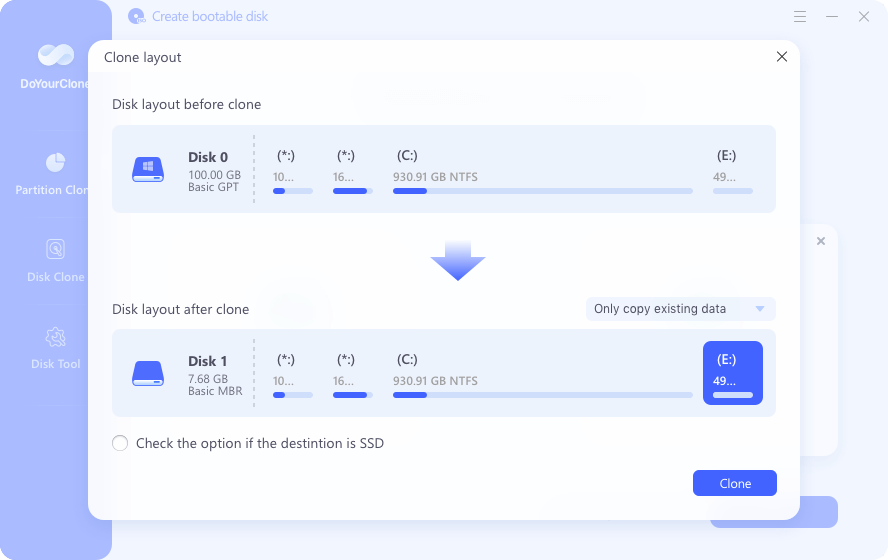
Step 2. Choose Disk Clone mode, then select the old hard drive as the source disk, select the SSD as the destination disk, click Next.

Step 3. Tick Check the option if the destination is SSD, then click on Clone button to move everything from the old hard drive to the new SSD.
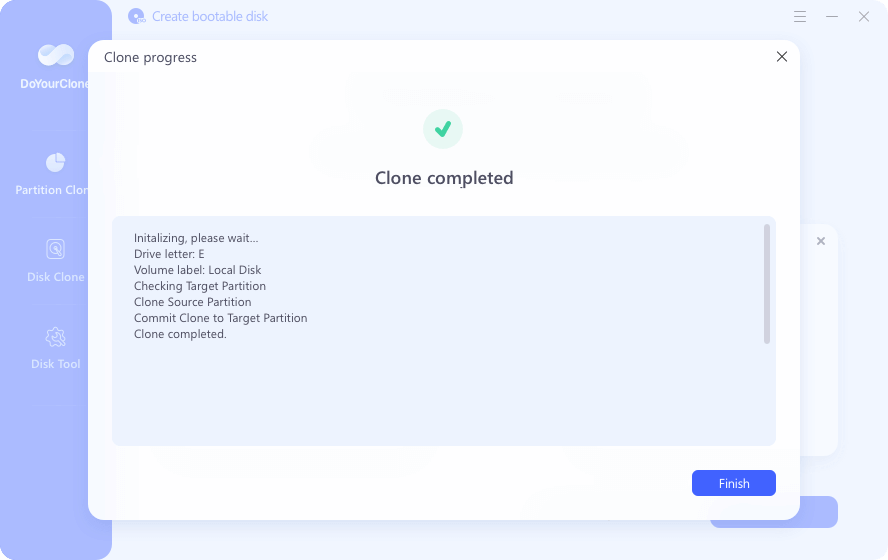
Step 4. Don't close the program before the cloning progress gets finished. It will clone Windows OS, user files, settings, programs from the old hard drive to the new SSD.

Step 5. Once the process gets finished, you can check the cloned data on the SSD and set it as the new boot drive.
Conclusion:
Adding more storage to your Surface Pro makes it much easier to use and faster, storing more files, running demanding apps, and getting more done. It's important to think carefully about your needs and the choices you have before choosing external storage, microSD card expansion, or an internal SSD upgrade. Following the steps in this guide, you can safely add more storage to your Surface Pro and get the most out of it.
Written & Updated by Ricky Lin
Ricky Lin is an senior editor of DoYourData who lives in Adelaide, Australia. He is interested in writing technology articles related with data recovery, computer issue fixes, disk clone, iPhone data recovery, video edit, Mac optimization, etc. He Joined DoYourData in 2019 and have written 500+ articles to help both Windows users and Mac users to solve data or computer problems.
Hot Articles
- Best Free Data Recovery Software Review
- Best Data Erasure Software Review
- Best Disk Cloning Software Review
- Fix External Hard Drive Not Showing Up on Mac
- Fix RAW External Hard Drive
- Reset A M1 Mac to Factory Settings
- How to Back Up Mac Data
- Uninstall Apps on Mac
- Install Windows-style Start Menu on Mac
- Fix iMac Black Screen and Fix iMac Boot Issue