
Back Up MacBook Pro with Time Machine
Connect an external hard drive to the MacBook Pro, then set it as the Time Machine backup drive to back up your data.
In this article, we will introduce three methods to wipe data from MacBook Pro before you sell/donate or dispose of the computer. You can use Disk Utility, Erase All Contents and Settings or disk wipe software to help you wipe everything off the MacBook Pro and make sure nobody can recover your private information.
![]() Updated by Shirly Chen on March 23, 2024
Updated by Shirly Chen on March 23, 2024
Quick Navigation:
“I am planning to sell my old MacBook Pro (M1-chip, Ventura). I delete my documents and empty the trash, but the deleted files still can be found after I use a data recovery app to scan the drive. Is there any way to permanently wipe all the data from the MacBook Pro?”
Getting rid of everything on your MacBook Pro might sound like a big job, but don't worry - it's like giving your machine a new start! This guide will make the process easier for you, whether giving it to someone else, fixing problems that won't go away, or just wanting a fresh start. Think of this as a digital spring cleaning.
We'll carefully walk you through each step, ensuring your personal information is safe, and your MacBook Pro is ready for a new start. This guide will help you clean up your device and prepare it for new adventures, from making backups to reinstalling macOS.
There are many reasons behind why you should wipe your MacBook Pro, such as:
Before you wipe your MacBook Pro, you must ensure that your important files and data are safe. Apple's Time Machine backup can easily back up data on MacBook Pro. Put a portable hard drive into your MacBook Pro, open "System Preferences (or System Settings)" choose "Time Machine," and set up the backup. Before you do anything else, make sure the backup process is finished.
Back Up MacBook Pro with Time Machine
Connect an external hard drive to the MacBook Pro, then set it as the Time Machine backup drive to back up your data.
You also can use a disk cloning application to make a full bootable clone backup for your MacBook Pro.
Step 1. Download and install the best Mac disk cloning application - DoYourClone for Mac on your MacBook Pro.
Step 2. Connect an external hard drive to the MacBook Pro and open DoYourClone for Mac. Choose OS Clone mode. This mode will clone everything (macOS, user files, apps, settings included) from the MacBook Pro to the external hard drive.
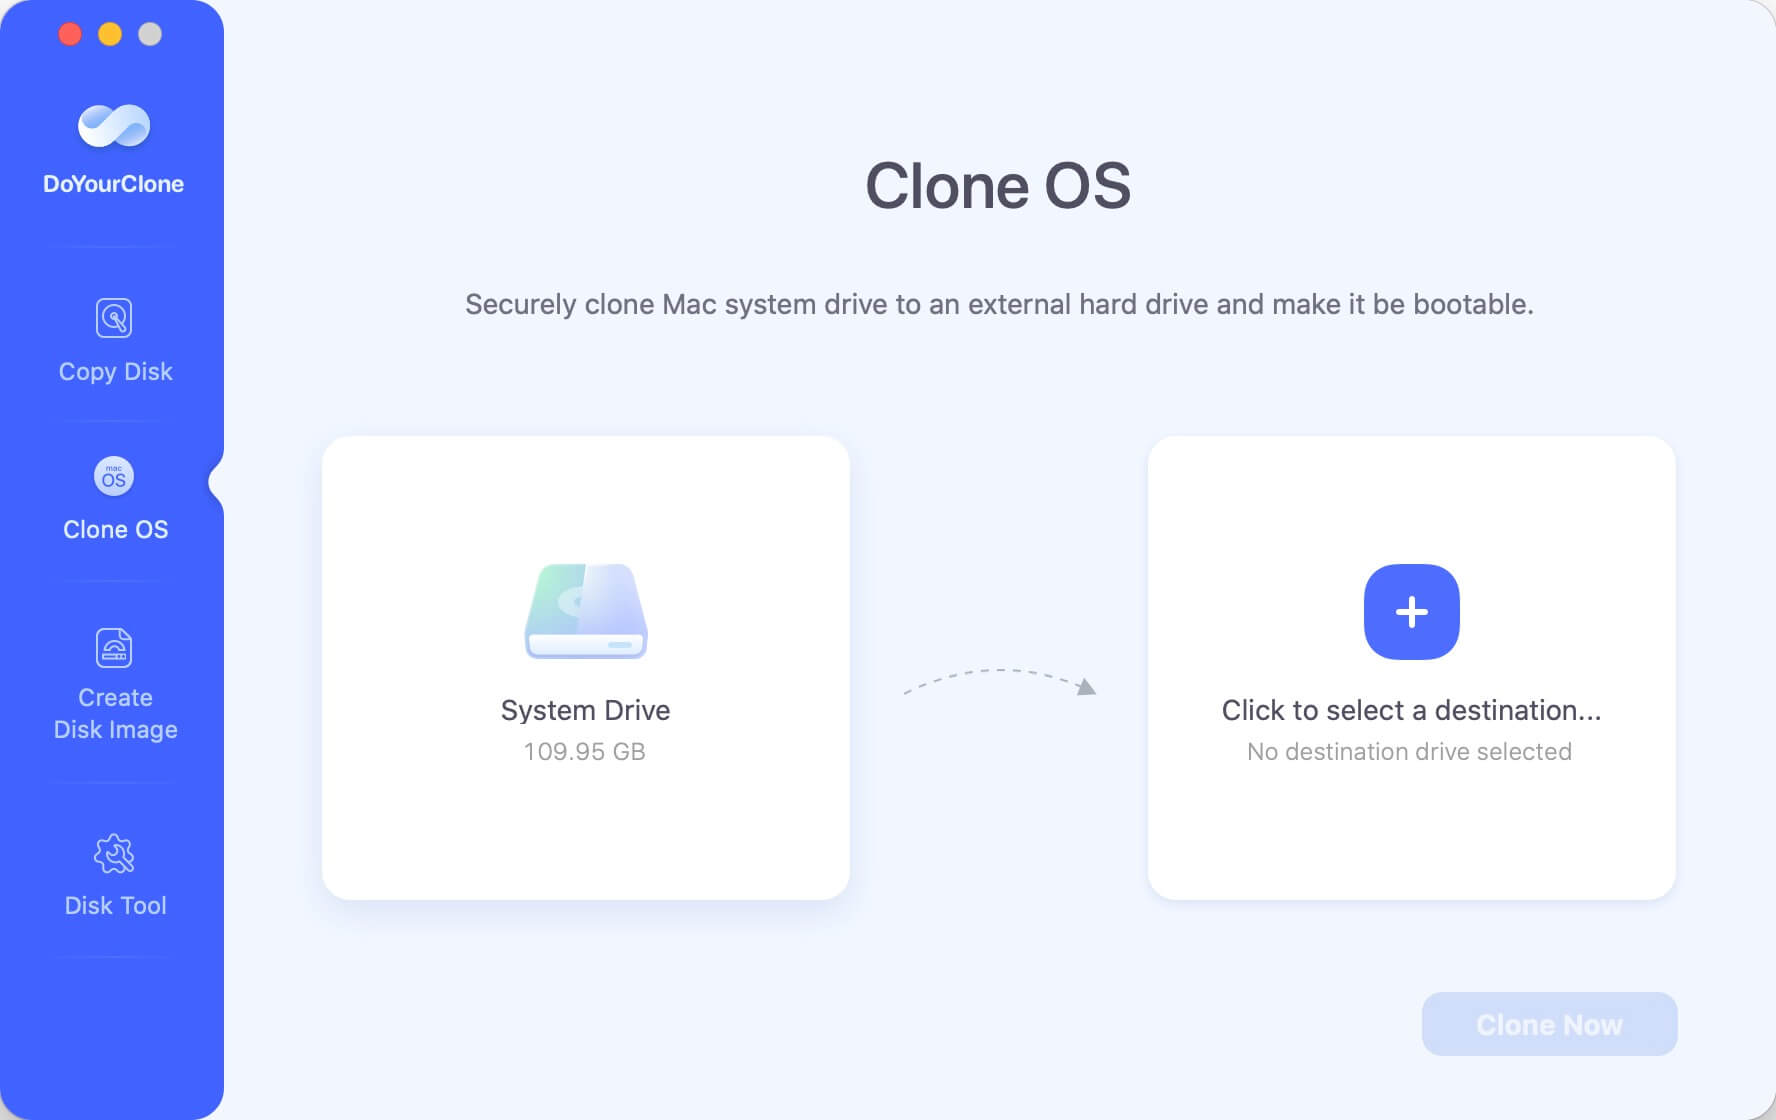
Step 3. Select the external hard drive as the destination drive, then click on Clone Now button to clone all data from the MacBook Pro to the external hard drive and create a full bootable clone backup.
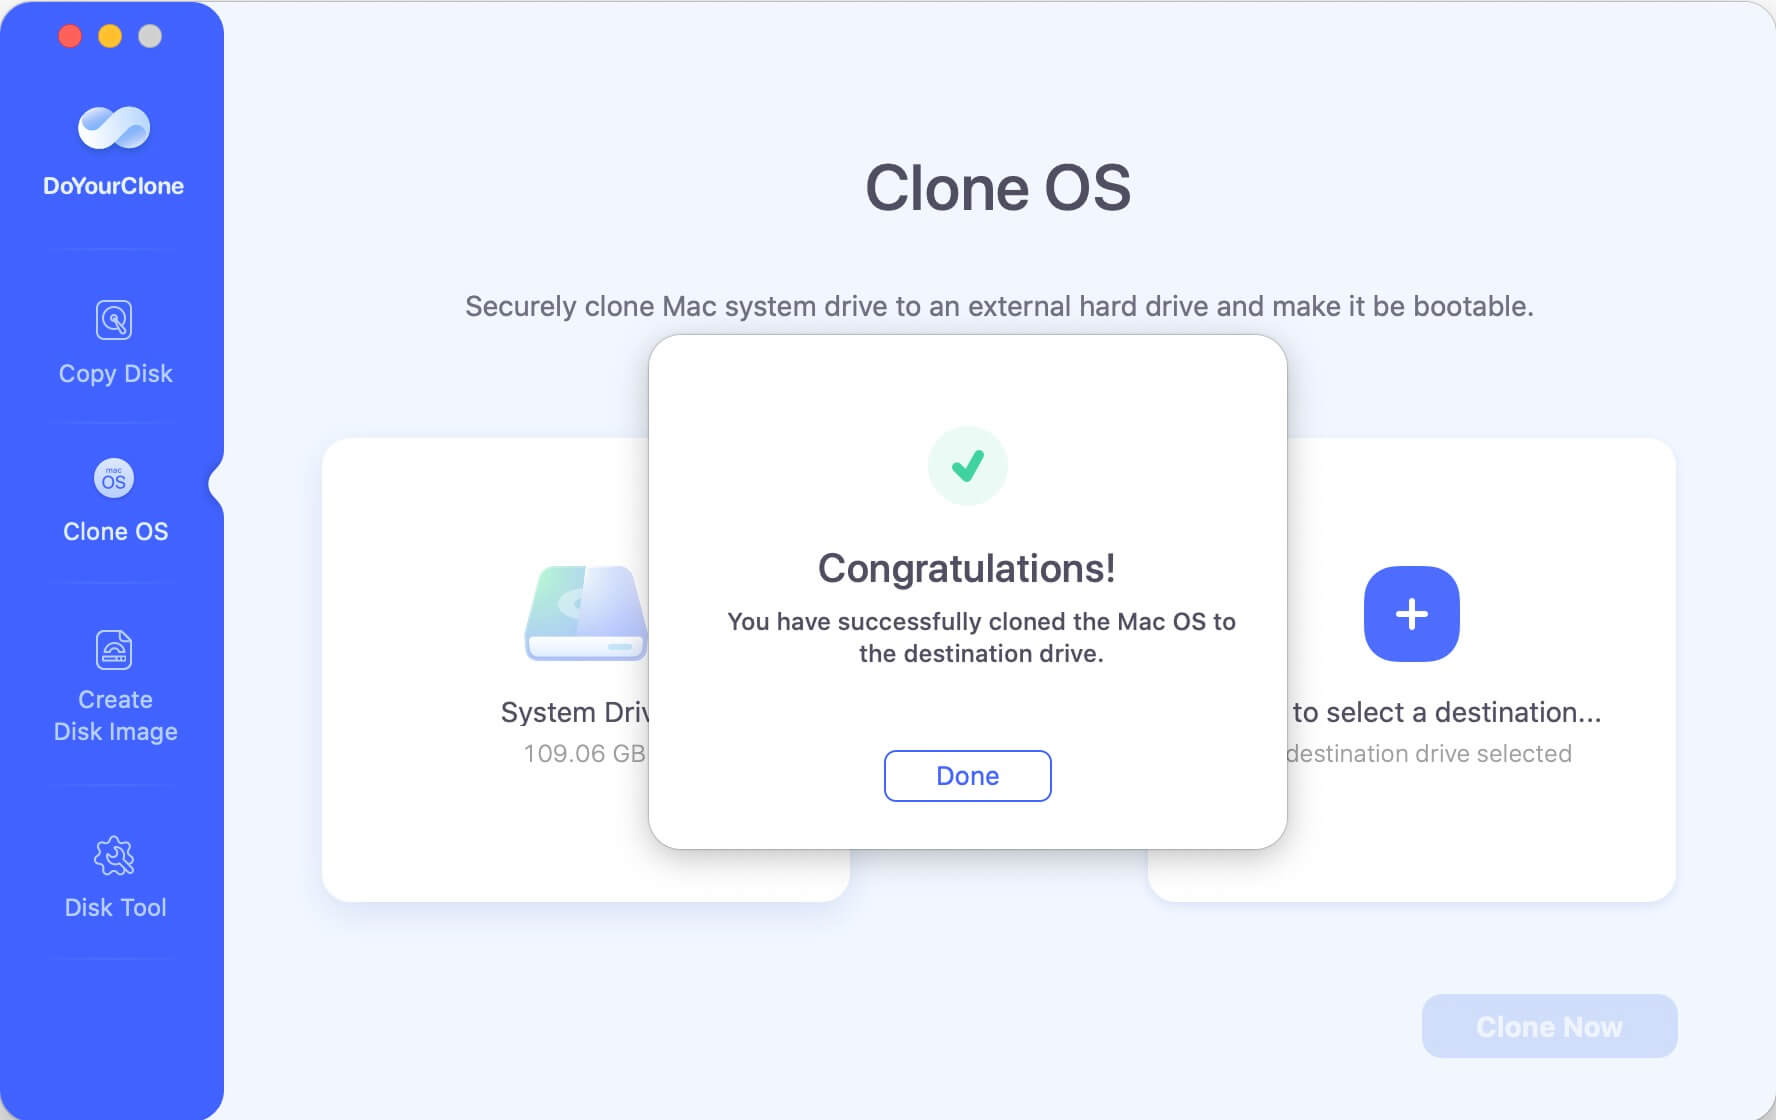
Once the process gets finished, you can check the cloned data on the external hard drive. Then eject the external hard drive from the machine.
Your Mac doesn't have a Reset button like an iPhone or iPad, which would let you erase everything and put it back to its original settings with just one click. To wipe a MacBook Pro, delete all saved files on the Mac's internal hard drive, remove any custom settings, and unplug the MacBook from services and software to avoid problems. In this article, we will show you three methods to factory reset your MacBook Pro, wipe everything permanently.
Step 1. Sign out of iCloud and Other Accounts.
macOS Ventura or later: Go to Apple menu > System Settings, then click the account name in the sidebar; on the right, scroll down and click Sign Out.
macOS Monterey, macOS Big Sur or macOS Catalina: Go to Apple menu > System Preferences > Click Apple ID, then select Overview in the sidebar and click Sign Out.
Earlier versions of macOS: Go to Apple menu > System Preferences > Click iCloud > Click Sign Out.
Step 2. Start MacBook Pro in macOS Recovery Mode.
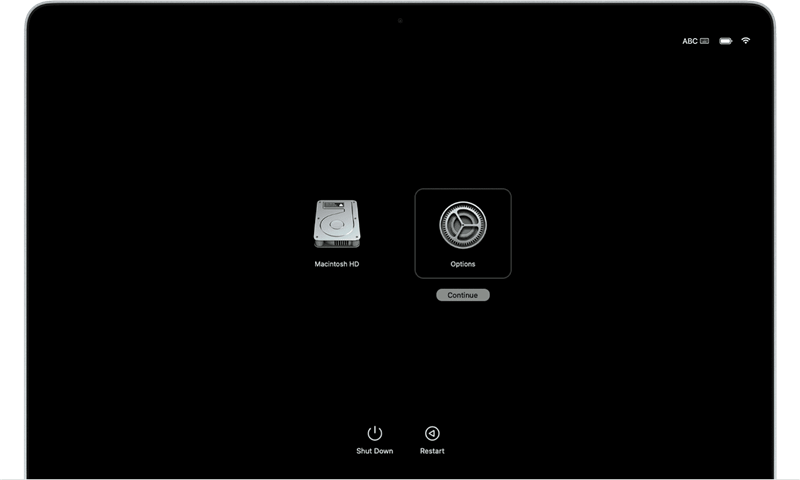
It would help if you restarted your MacBook Pro in macOS Recovery mode to erase everything. When your MacBook Pro starts to restart, hold down the Command and R keys until the Apple logo shows. You will now be able to boot into Recovery Mode. If the MacBook Pro is a Apple silicon M chip Mac, just restart the Mac, press and hold Power button to enter into macOS Recovery mode. Then choose Options and click on Continue button.
Step 3. Erase the Startup Disk of the MacBook Pro.
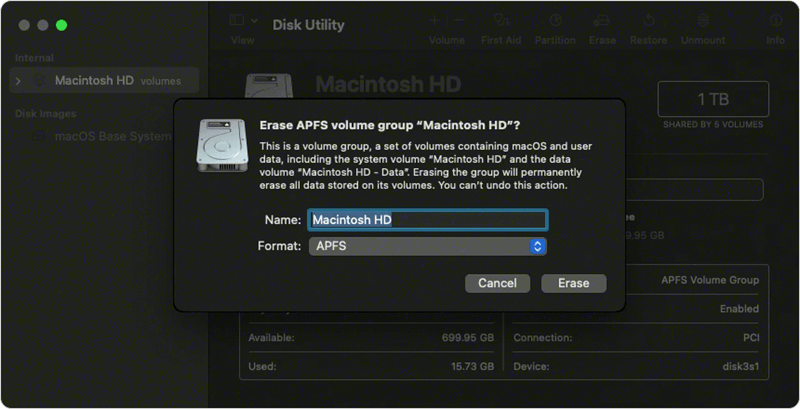
Select Disk Utility in macOS Recovery Mode. In the left tab, find the internal drive of your MacBook Pro and click "Erase." Pick the proper format (APFS for most newer macOS versions) and give your drive a name. Press "Erase" to completely erase the disk.
Step 4. Reinstall macOS.
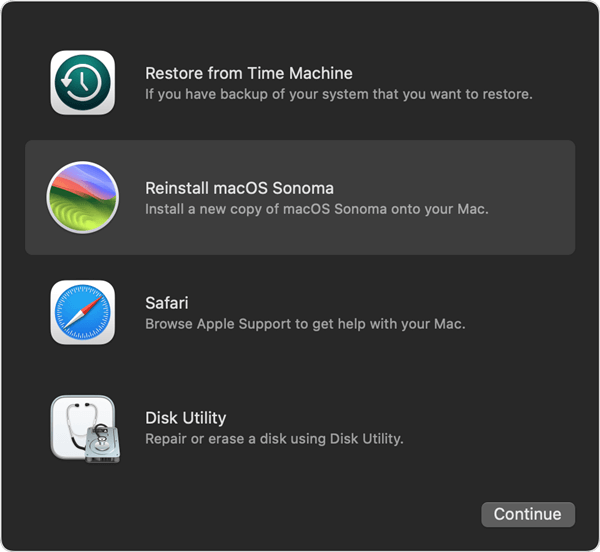
Now that the disk has been erased, it's time to restore macOS. After you close Disk Utility, click "Reinstall macOS" in the Utilities menu. Follow the steps on the screen, pick the drive you just erased as the installation location, and let the process finish. Wait a bit longer if you need to.
Step 5. Set Up Your MacBook Pro.
After the reinstallation of macOS is done, your MacBook Pro will restart and ask you to set it up as if it were brand new. Pick your language and area, then follow the steps to make a new user account. This step ensures that all of the data from the last user is erased, giving you a fresh start.
If your MacBook Pro is running macOS 12 Monterey or later, you can use a feature called Erase All Contents and Settings to help you wipe everything from the drive.
Start Erase All Contents and Settings:
For macOS Monterey: Click Apple menu > choose System Preferences > from the System Preferences menu in the menu bar, choose Erase All Content and Settings.
For macOS Ventura or later: Click Apple menu > choose System Settings > General > Transfer or Reset > then click Erase All Contents and Settings.
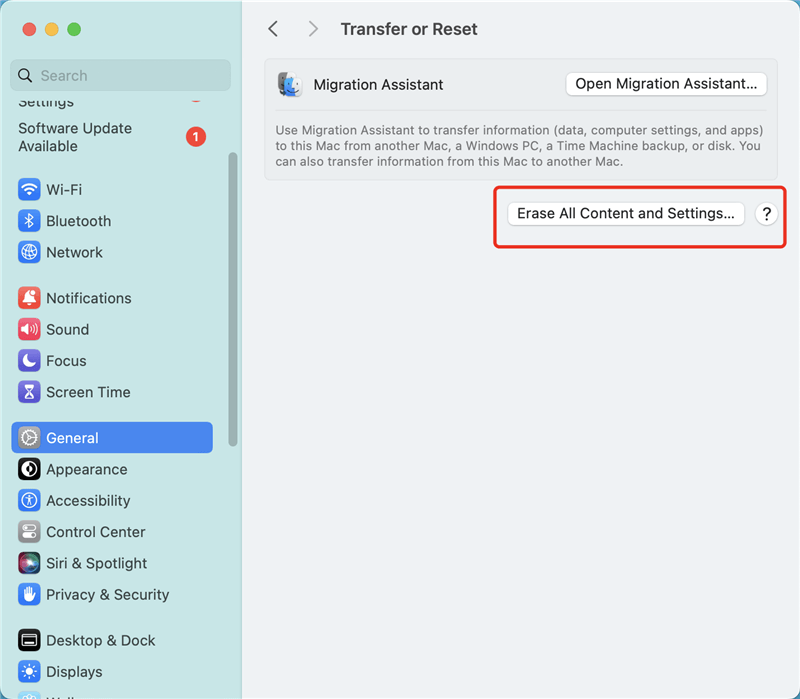
Then it will open erase assistant. Then follow on the onscreen instructions to erase the MacBook Pro.
If you're selling, donating or give your MacBook Pro and want to leave it in an out-of-box state, don't use the setup assistant or your previously connected Bluetooth devices, if any. Just press and hold the Power button on your Mac until it turns off.
Note: The erased data which is erased by Disk Utility is not lost forever and can be recovered by data recovery software. If you want to permanently wipe data on MacBook Pro, check the method 3.
To prevent the data stored on the MacBook Pro from being recovered by the next owner, you can use data erasure software to permanently erase all data from the internal disk.
DoYourData Super Eraser for Mac is a very easy-to-use yet powerful Mac data erasure software that can help you complete wipe data on all Mac devices and storage media devices. It can completely wipe data from MacBook Pro within 1-2 steps. So it is very conveniently to wipe your data on MacBook Pro at anytime, at anywhere. With advanced technology, it will permanently erase the data, beyond the scope of data recovery. And it will not cause any damage to the SSD.
DoYourData Super Eraser for Mac offers three data wipe modes:
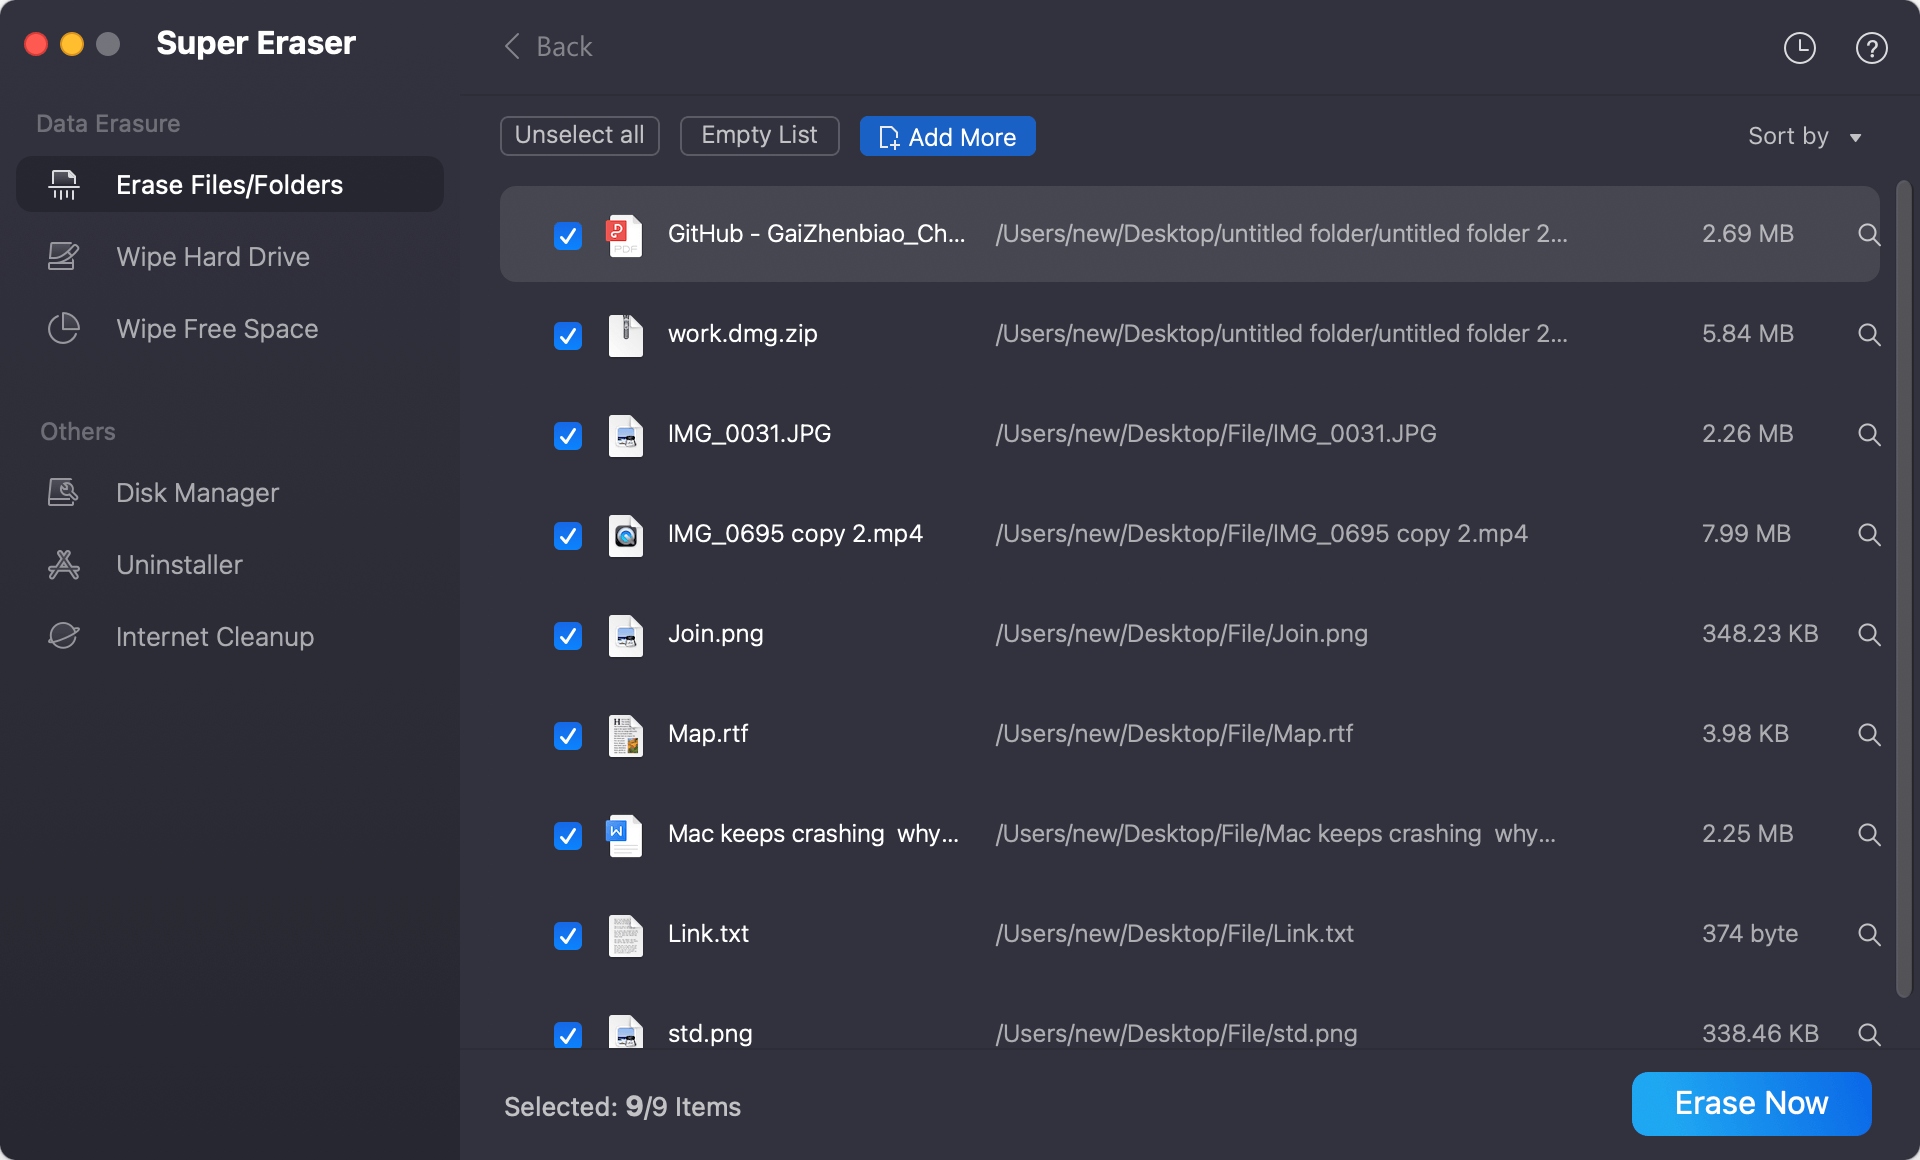
Mode 1: Erase the files or folders as you want.
You can add the files or folders to the erasure list, then click Erase Now, it will help you permanently erase the selected files/folders.
Mode 2: Wipe all data from a hard drive.
It will wipe the entire hard drive to permanently wipe all existing data and previously deleted data or traces.

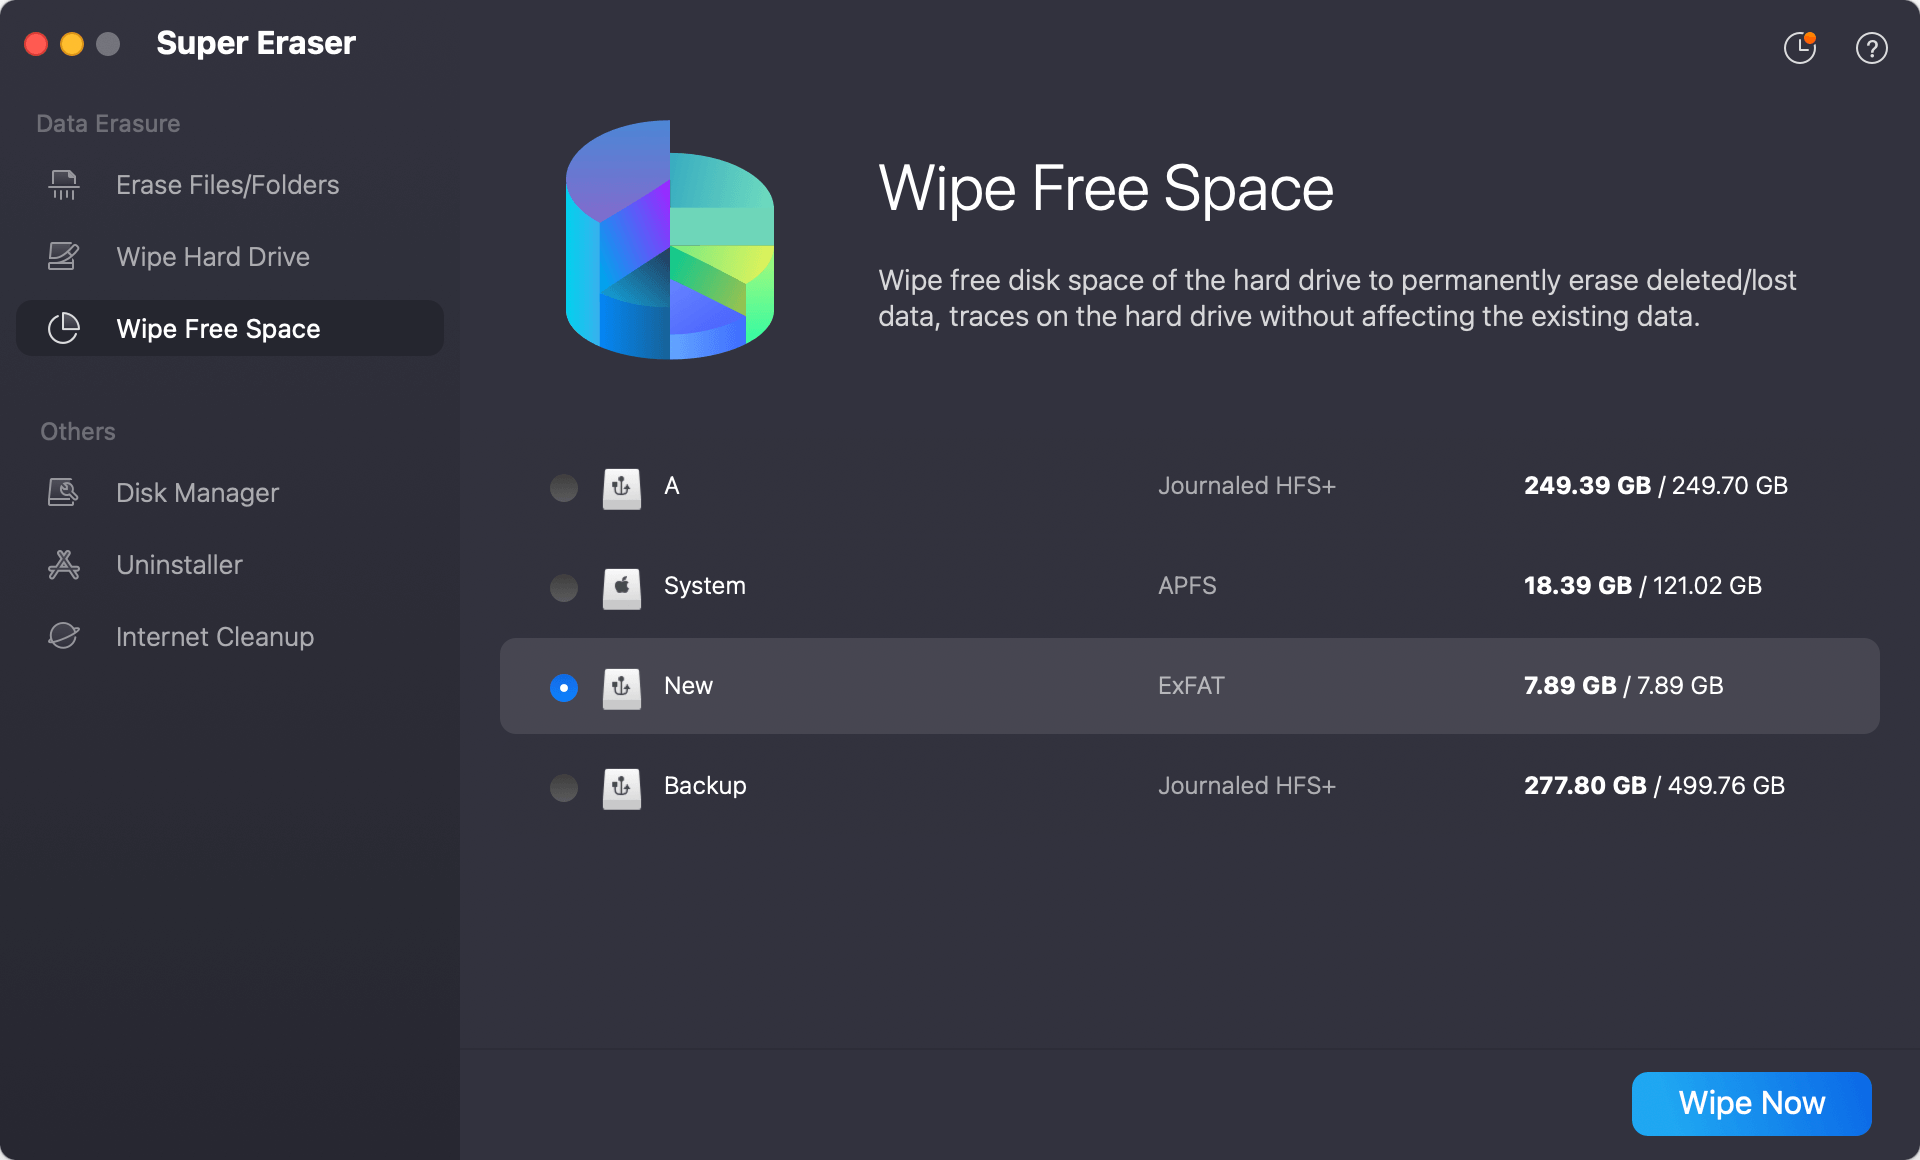
Mode 3: Wipe free disk space.
It will wipe free disk space of the hard drive and permanently erase all deleted/lost data on the hard drive.
It is recommended to back up your data before you wipe it using DoYourData Super Eraser for Mac, because once the erasure process gets finished, the erased data is lost forever, can’t be recovered by any method.
When selling, trading in or giving away your MacBook Pro, you need to do more to guarantee your personal security than simply deleting your files and calling it a day. DoYourData Super Eraser for Mac is the easy-to-use and efficient tool to help you securely wipe your sensitive data without causing any physical damage. Once the erasure process gets finished, you can sell or donate your MacBook Pro without any worry.
It might seem challenging to wipe your MacBook Pro, but this complete guide will help you do it without any problems. To ensure the wipe works, back up your files, log out of all your accounts, turn off FileVault, and carefully follow each step. After this is done, your MacBook Pro will be clean, refreshed, and ready for any experiences that come its way.
DoYourData Super Eraser for Mac is a powerful data erasure application. After erasing the startup disk with Disk Utility, you can use this tool to wipe free disk space of your MacBook Pro so that all your private data is erased permanently, can't be recovered by any method.

DoYourData Super Eraser for Mac
DoYourData Super Eraser for Mac is a 100% safe, powerful and easy-to-use data erasure program. It offers certified data erasure standards including Peter Gutmann, U.S. Army AR380-19, DoD 5220.22-M ECE to permanently erase data from Macs and external devices, making data recovery be impossible.
Written & Updated by Shirly Chen
Shirly Chen has been writing data recovery, data erasure articles for DoYourData over 4 years. She has been working as a professional website content writer & editor for quite a long time. She also writes articles about disk clone, Mac optimization, disk backup, etc.