Quick Navigation:
Wiping your Mac's startup disk is a significant step, often necessary when selling your Mac, resolving persistent issues, or starting fresh. This guide will walk you through the entire process, ensuring you can securely and effectively wipe your Mac's startup disk, reinstall macOS, and get your system running smoothly again.
Understanding the Startup Disk (also called Internal SSD/HDD, System Drive)
The startup disk (Macintosh HD, Apple SSD, etc.) is the primary storage device that contains the operating system (macOS) and the files necessary to boot up your Mac. It plays a crucial role in the overall functionality of your computer. Over time, various reasons might lead you to wipe this disk, including:
- Selling Your Mac: Ensuring all your data is erased before passing it on to the new owner.
- Persistent Issues: Solving software problems that can't be fixed by other means.
- Starting Fresh: Getting rid of clutter and starting with a clean system.
Before proceeding, it’s essential to back up your data to avoid losing important files.
Preparing to Wipe the Mac Startup Disk
Backing Up Important Data
Backing up your data is a critical first step. You have several options to ensure your data is safe:
- Time Machine: macOS's built-in backup solution. Connect an external hard drive and follow the prompts to back up your system.
- Cloud Services: Services like iCloud, Google Drive, or Dropbox can store your files online.
- External Drives: Manually copy essential files to an external hard drive.
- Disk Clone Software: Clone everything from your Mac to an external hard drive and create a full bootable clone backup.
Create Full Bootable Backup for Mac
Before erasing Mac startup disk, clone all data from it to an external hard drive and make a full bootable clone backup.
Ensuring Necessary Installation Media
You'll need a way to reinstall macOS after wiping the disk. Ensure you have:
- Internet Connection: For downloading macOS from Apple's servers.
- Bootable USB Installer (optional): Create a bootable installer if you prefer not to rely on an internet connection. This can be done using another Mac and a USB drive with at least 16GB of storage.
Logging Out of iCloud and Other Services
To avoid activation lock issues, log out of iCloud and other services:
- iCloud: Go to System Preferences/System Settings > Apple ID > Overview > Sign Out.
- iTunes (for old macOS version): Open iTunes, go to Account > Authorizations > Deauthorize This Computer.
- Other Services: Log out of any other accounts linked to your Mac.
Methods to Format and Wipe the Mac Startup Disk
After backing up your Mac, you can shut it down, choose a method to format/wipe startup disk and reinstall macOS.
Method 1: Using macOS Recovery Mode
Step 1. Boot Your Mac into macOS Recovery Mode.
To format the startup disk, you need to boot your Mac into macOS Recovery Mode because you can't format the drive while it's in use. The process differs slightly between Apple silicon Macs and Intel-based Macs.
For Intel-based Macs:
- Restart your Mac and immediately hold down the Command + R keys until the Apple logo or a spinning globe appears.
For Apple silicon Macs:
- Turn off your Mac.
- Press and hold the power button until the startup options window appears, showing available startup disks and options.
- Select "Options" and click "Continue" to enter Recovery Mode.
You will be asked to select a user account you know the password for. Choose the account and enter the password to proceed.
Step 2. Open Disk Utility.
From the macOS Utilities window (Recovery app), select Disk Utility and click Continue.
![wipe startup disk on Mac]()
Step 3. Select the Startup Disk in Disk Utility.
- In Disk Utility, click View and select Show All Devices. This will display all mounted drives in the left sidebar.
- Identify the startup disk, which is usually named Macintosh HD, Home HD, or a custom name. In macOS Catalina and later, the Mac hard drive typically has two volumes under an APFS container:
- Macintosh HD (where the operating system resides)
- Macintosh HD - Data (where user data is stored)
- APFS (Case-sensitive, Encrypted): Opt for this for maximum security and case-sensitive file handling.
- First, delete the Macintosh HD - Data volume:
- Select Macintosh HD - Data in the sidebar.
- Click the Delete Volume button (-) to remove it.
- If there are other internal volumes, delete them as well.
This step is crucial to avoid issues during reinstallation, such as the creation of another volume named Macintosh HD - Data - Data or encountering errors like "Enter a password to unlock the disk 'Macintosh HD - Data.'"
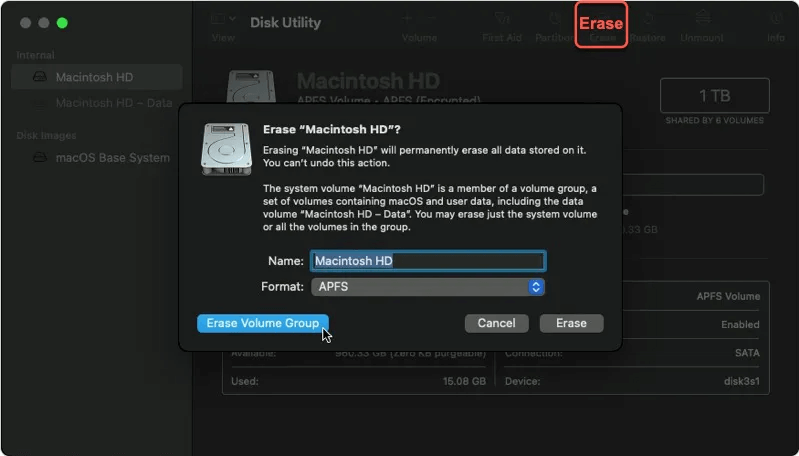
- After deleting Macintosh HD - Data, select the startup drive Macintosh HD and click Erase at the top-right menu bar.
![wipe startup disk on Mac]()
Step 4. Name and Format the Drive.
When the dialog box appears, you can either enter a new name for the startup drive or keep the default name, which is usually "Macintosh HD." Next, click the pop-up menu next to Format to select the desired file system.
Step 5. Name and Format the Drive.
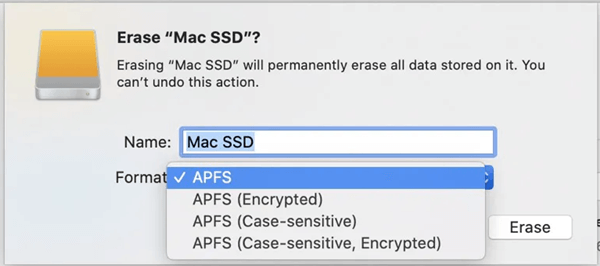
When the dialog box appears, you can either enter a new name for the startup drive or keep the default name, typically "Macintosh HD." Then, click the pop-up menu next to Format to select a file system. The file system options vary depending on the macOS version:
For Mac computers using macOS 10.13 or later:
- APFS: The default file system. Use this if you don't need an encrypted or case-sensitive format.
- APFS (Encrypted): Choose this for extra security.
- APFS (Case-sensitive): Select this if you prefer a case-sensitive file system, where “VIDEO” and “video” are considered different folders.
- APFS (Case-sensitive, Encrypted): Opt for this for maximum security and case-sensitive file handling.
For Mac computers using macOS 10.12 or earlier:
- Mac OS Extended (Journaled): Use this if you don't need an encrypted or case-sensitive format.
- Mac OS Extended (Journaled, Encrypted): Choose this for enhanced security.
- Mac OS Extended (Case-sensitive, Journaled): Select this if you prefer a case-sensitive file system.
- Mac OS Extended (Case-sensitive, Journaled, Encrypted): Opt for this for a case-sensitive system with added security.
![wipe startup disk on Mac]()
Select the file system that best meets your needs, or keep the default file system. For more information, see the comparison between APFS and Mac OS Extended.
Once you have chosen the name and format, click Erase to wipe the startup disk. If prompted, enter your Apple ID.
Step 6. Quit Disk Utility.
After erasing the startup disk, quit Disk Utility by clicking Disk Utility in the top-left menu bar and selecting Quit Disk Utility, or by clicking the red close button. You can also press Command + Q to exit Recovery Mode. To proceed with reinstalling macOS, select Reinstall macOS from the Utilities window and click Continue to start the installation process with the newly formatted startup disk.
Method 2: Using a Bootable USB Installer
Creating and using a bootable USB installer provides an alternative method, especially useful if your internet connection is unstable.
- Create a Bootable Installer: Download the macOS installer from the App Store or Apple’s website. Insert your USB drive, open Terminal, and use the appropriate command to create the installer (e.g., for macOS Ventura: sudo /Applications/Install\ macOS\ Ventura.app/Contents/Resources/createinstallmedia --volume /Volumes/MyVolume).
- Boot from the USB Installer: Insert the USB drive into your Mac. Restart and hold down the Option (⌥) key to enter the Startup Manager. Select the USB drive and press Enter.
- Erase the Startup Disk: Once the installer loads, select Disk Utility and erase the startup disk as described above.
- Install macOS: After erasing, proceed with the installation from the USB drive.
Note: The data is not lost permanently after erasing the startup disk with Disk Utility and can be recovered by data recovery software.
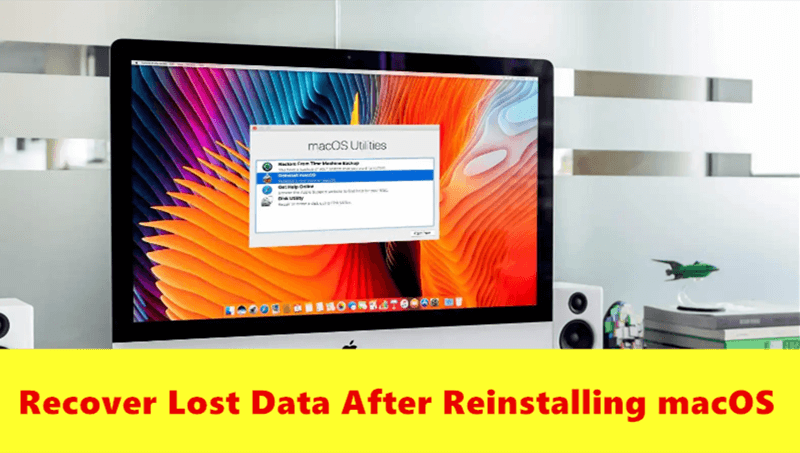
Recover Lost Data after Erasing Startup Disk and Reinstalling macOS
Mac data recovery software can deeply scan the Mac internal SSD and recover all deleted, formatted and erased data.
After Erasing Mac Startup Disk, What Should Do?
After wiping the startup disk and reinstalling macOS, there are several steps to set up your Mac:
Setting Up Your Mac:
Follow the on-screen prompts to set up your Mac. This includes:
- Choosing a Country/Region: Select your location to set up regional settings.
- Connecting to Wi-Fi: Ensure your Mac can access the internet.
- Signing in with Your Apple ID: This enables iCloud and other Apple services.
- Setting Up Your Account: Create a new user account for your Mac.
Wipe Data Permanently If You Will Sell or Donate Your Mac:
If you will sell, donate or dispose of your old Mac, you need to permanently erase all private data including existing data, deleted and lost data from the internal HDD/SSD. As said above, the lost data which is erased by Disk Utility is not lost for good and can be easily recovered by data recovery software. If you want to permanently erase the already deleted/erased/lost data from your Mac, just try data erasure application.
DoYourData Super Eraser for Mac is a reliable data erasure application for macOS. It offers certified data erasure methods such as HMG Infosec, NIST 800-88, Peter Gutmann's algorithm, DoD 5220.22-M, U.S. Army AR380-19 to help in securely and permanently erasing data from Mac HDD/SSD, external hard drive, USB flash drive, digital camera, SD card, etc.
DoYourData Super Eraser for Mac
- Securely and permanently erase files and folders from Mac startup disk.
- Wipe entire disk volume on Mac to permanently erase all data.
- Wipe free disk space of Mac startup disk to permanently erase all deleted/formatted/lost data without affecting the existing data.
Note: Once the data is erased by DoYourData Super Eraser for Mac, the data is lost for good, cannot be recovered by any method.
Follow the steps to securely and permanently wipe all deleted/erased/lost data after reinstalling macOS:
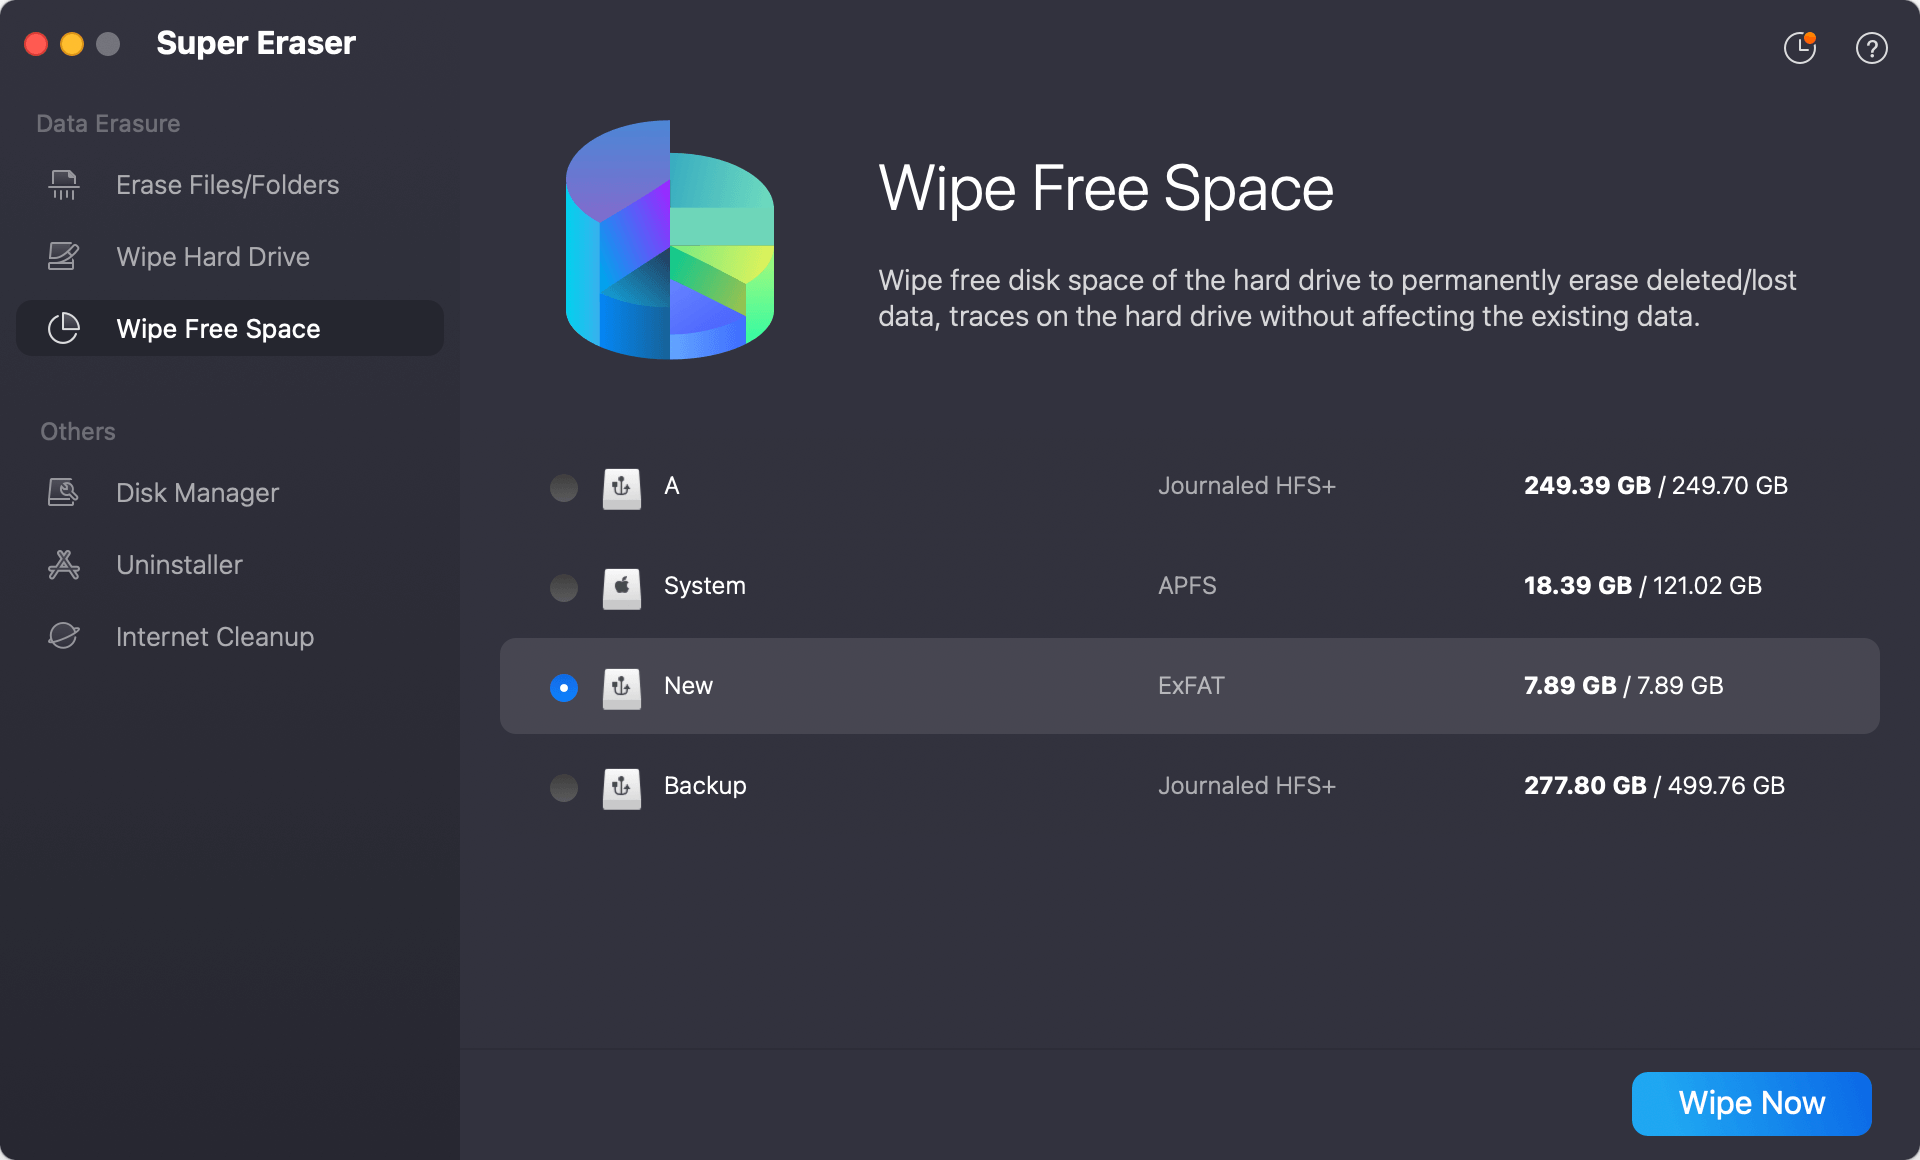
Step 1. Open DoYourData Super Eraser for Mac, choose Wipe Free Space mode, select the Mac startup disk, click on Wipe Now button.
![Wipe Free Space on Mac]()
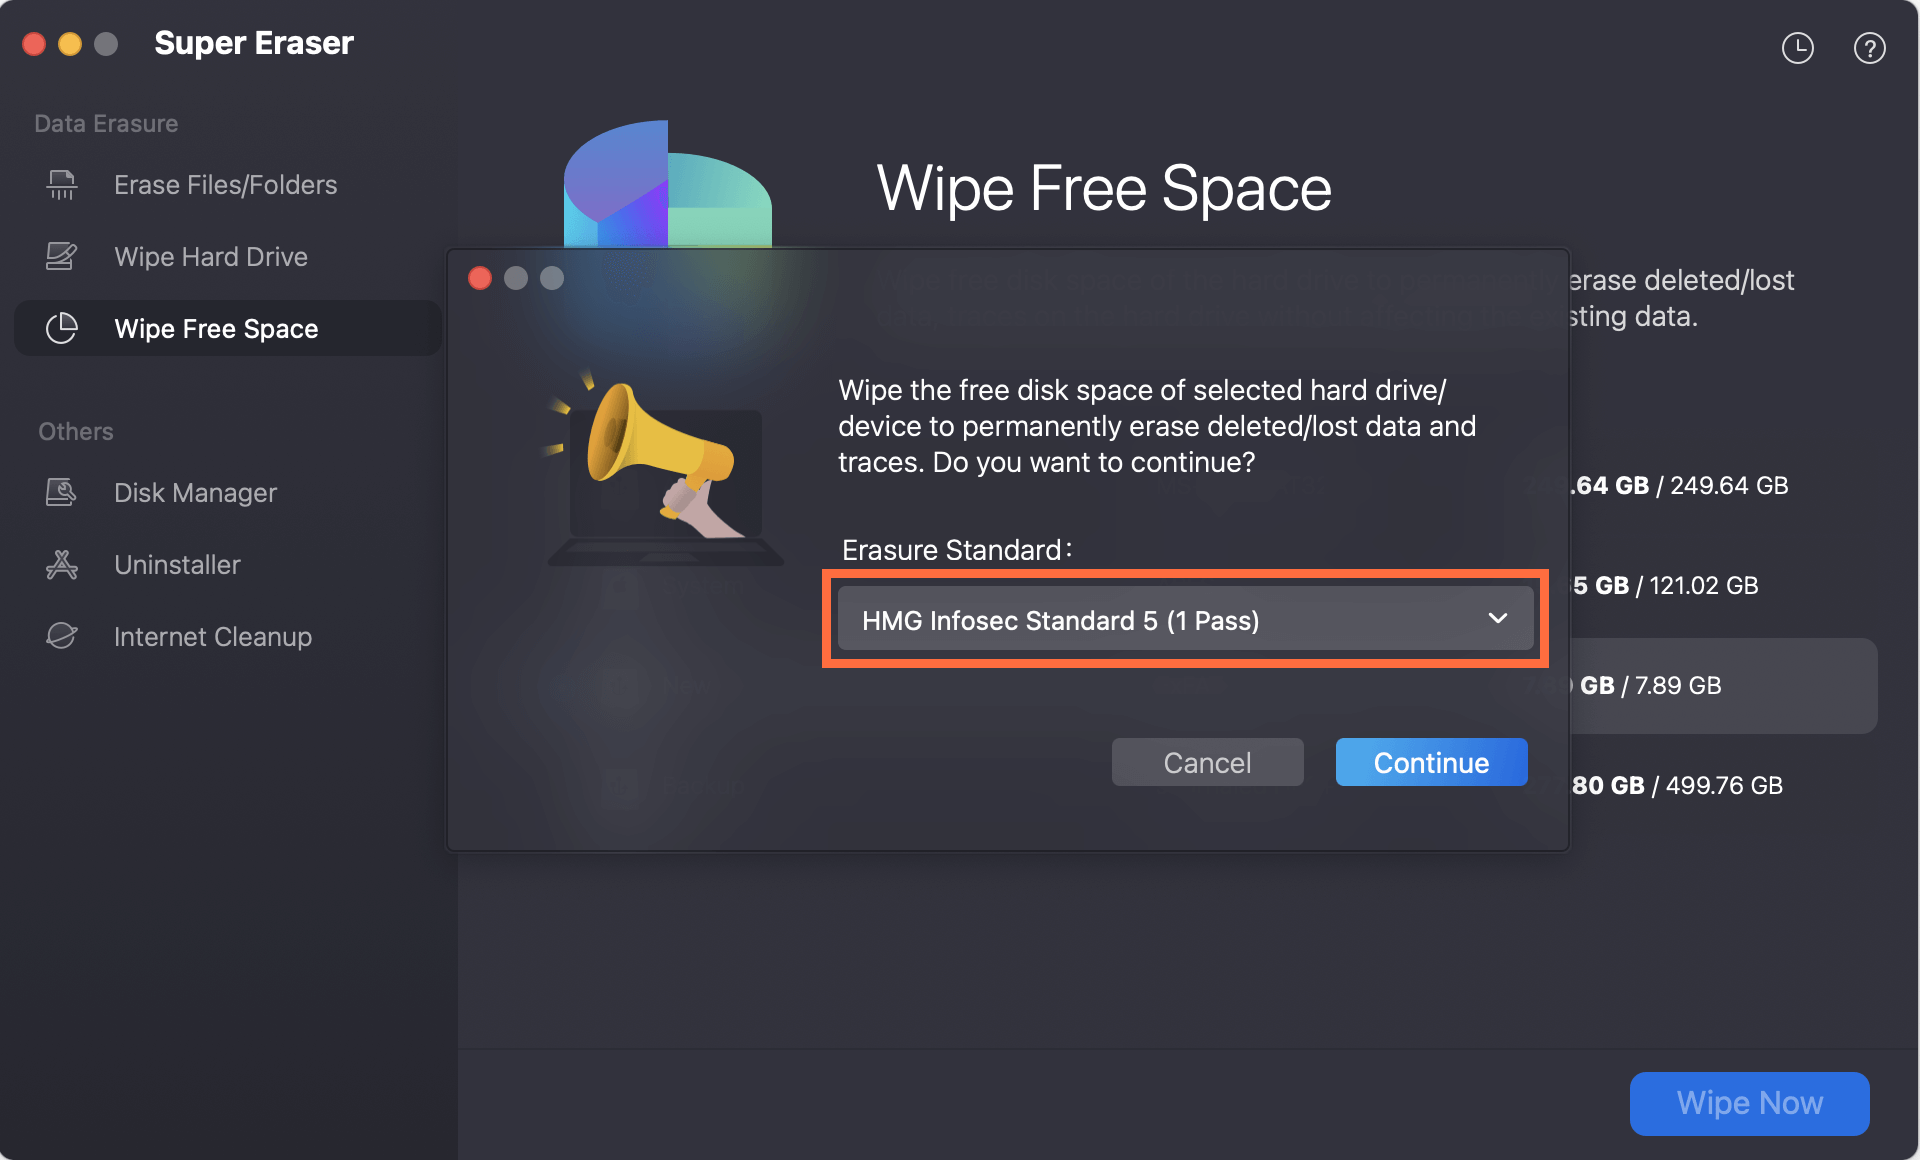
Step 2. Select a data erasure standard, click on Continue button.
![Wipe Free Space on Mac]()
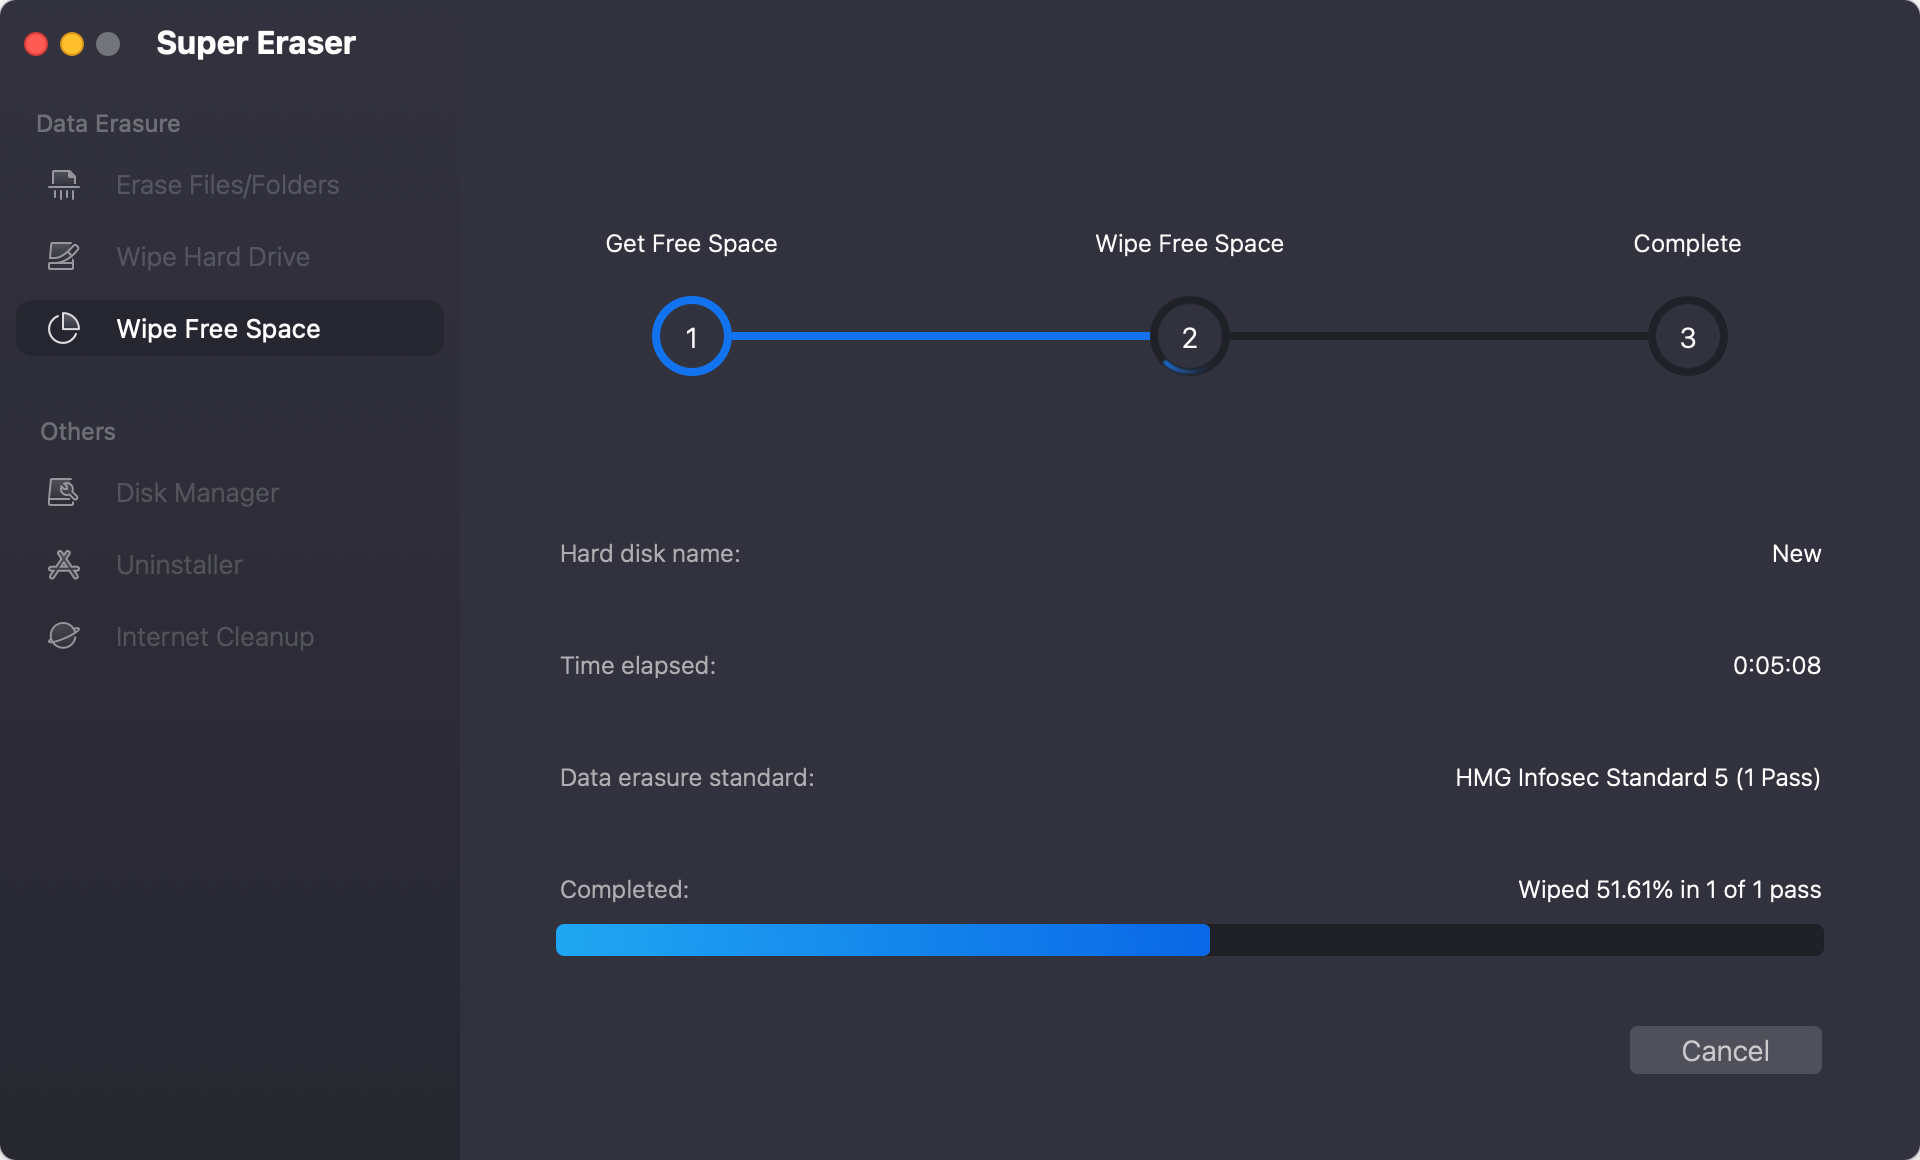
Step 3. Wipe free disk space of the Mac internal HDD/SSD and permanently erase all deleted/formatted/lost data.
![Wipe Free Space on Mac]()
It also offers other data erasure modes to help you permanently erase data on Mac:
Erase Files/Folders: The mode "Erase Files/Folders" can help you permanently erase files and folders from startup disk. Just add files/folders from the Mac startup disk to the erasure list, then click on "Erase Now" button. All the selected files/folders will be permanently erased. Wipe Hard Drive: Wipe non-system volume or external hard drive, USB flash drive, memory card, digital device on Mac.
Restoring Data from Backups (if needed):
Once macOS is installed, you can restore your data:
- Time Machine: Connect your backup drive, open Migration Assistant, and follow the prompts to restore your data.
- Cloud Services: Download your files from iCloud, Google Drive, Dropbox, or other cloud services.
- Manual Transfer: Copy files back from an external drive if you used this method for backup.
Reinstalling Essential Applications (if needed):
Reinstall the applications you need:
- App Store Apps: Open the App Store, go to Purchased, and reinstall your apps.
- Third-Party Apps: Download and install applications from their respective websites.
Troubleshooting Common Issues
While wiping and reinstalling macOS is usually straightforward, you may encounter some issues. Here are solutions to common problems:
Recovery Mode Doesn't Work:
If you can't access Recovery Mode:
- Internet Recovery: Restart your Mac and hold down Command + Option + R until you see the spinning globe. This will start Internet Recovery, allowing you to reinstall macOS.
- Bootable Installer: Use a bootable USB installer as an alternative.
Errors During the Process:
If you encounter errors while erasing or reinstalling macOS:
- Check Disk for Errors: In Disk Utility, use the First Aid feature to check for and repair disk errors before erasing.
- Retry the Process: Sometimes, simply restarting and trying again can resolve the issue.
Seeking Help:
If you're still having trouble:
- Apple Support: Contact Apple Support for assistance.
- Authorized Service Providers: Visit an Apple Authorized Service Provider for in-person help.
Tips for a Smooth Process:
To ensure a smooth wiping and reinstallation process:
- Stable Internet Connection: Ensure a reliable internet connection, especially if downloading macOS from Apple's servers.
- Backup Verification: Double-check that all important data is backed up before starting.
- Stay Updated: Keep your macOS and applications up to date for optimal performance and security.
Conclusion
Wiping your Mac's startup disk is a significant step that requires careful preparation and execution. By following the steps outlined in this guide, you can ensure that the process is smooth and your data is secure. Whether you're selling your Mac, resolving issues, or starting fresh, a clean installation of macOS can give your system a new lease on life. Remember to back up your data, prepare the necessary tools, and follow the instructions carefully to avoid any mishaps.
FAQs About Formatting or Wiping Startup Disk on Mac
1. How to format Mac startup disk?
Follow the steps below to format startup disk of your Mac:
- Restart your Mac.
- Press and hold Power button (If your Mac is an Intel-based Mac, press and hold Command+R) until it boots into macOS Recovery mode.
- Choose Options and click on Continue button. (Enter the password if required)
- Select Disk Utility, click Continue.
- Open Disk Utility, select the Mac startup disk, then click Erase.
- Select APFS or Mac OS Extended as the file system, click Erase again.
- Once the erasure process gets finished, go back to Utilities window, then reinstall macOS.
2. Is the data lost for good after erasing Mac startup disk?
No, the data is not lost for good after erasing startup disk & reinstalling macOS. Mac data recovery software can easily recover the deleted/lost data even you have reinstall macOS.
- Download and install a data recovery app - such as Do Your Data Recovery for Mac on your Mac.
- Open this recovery app, select the Mac internal SSD.
- Click on Scan button to deeply scan the SSD.
- Preview and recover lost files after scanning.
3. How to permanently wipe all data before selling my Mac?
Once you have reinstalled macOS, then use data erasure app to wipe free disk space of your Mac.
- Download and install DoYourData Super Eraser for Mac, open it.
- Choose Wipe Free Space mode.
- Select the Mac startup disk.
- Click on Wipe Now button.
- Select a data erasure standard, click on Continue button.
- Securely wipe free disk space of the disk.
DoYourData Super Eraser for Mac
DoYourData Super Eraser for Mac is a 100% safe, powerful and easy-to-use data erasure program. It offers certified data erasure standards including Peter Gutmann, U.S. Army AR380-19, DoD 5220.22-M ECE to permanently erase data from Macs and external devices, making data recovery be impossible.

