Back up Mac before formatting the drive
DoYourClone can create a bootable copy of your Mac before formatting the drive or doing other changes.
Quick Navigation:
Formatting a drive is a fundamental process that every Mac user should be familiar with, whether it's an internal drive housing your operating system or an external drive for additional storage. The act of formatting prepares a drive for use, ensuring it's optimized for your specific needs and ready to store data efficiently.
Whether you are setting up a new drive, troubleshooting issues, or preparing for a clean installation of macOS, understanding how to format both internal and external drives on Mac is crucial. This tutorial will take you step-by-step through the procedure, making sure you're prepared to tackle any Mac drive formatting requirements.
At its core, formatting a drive involves erasing all the existing data and setting up a new file system, which determines how data is stored and retrieved on the drive. This process not only prepares the drive for use but can also resolve certain issues such as corruption or compatibility problems. It is beneficial to realize that formatting is a destructive process—once a drive is formatted, all data on it is lost unless it has been backed up.
Internal drives are those installed inside your Mac, typically housing your operating system, applications, and personal files. External drives, on the other hand, are removable storage devices connected via USB, Thunderbolt, or other interfaces. While both types of drives can be formatted using similar processes, the use cases and considerations differ. For example, an internal drive might be formatted during a macOS reinstallation, while an external drive could be formatted for use as a backup or media storage.
Understanding the different file systems available is essential before formatting a drive. macOS supports several file systems, each suited to different tasks:
Choosing the right file system depends on how you intend to use the drive. For example, if you're formatting an external drive for file sharing between Mac and Windows, exFAT is typically the best choice.
Before you begin formatting a drive, there are several critical precautions you should take to avoid data loss and ensure a smooth process.
The most important step before formatting any drive is to back up your data. Formatting will erase all data on the drive, and this process is irreversible. Use Time Machine, iCloud, or an external backup solution to ensure that your important files are securely saved before proceeding.
Prior formatting, it's critical to back up your data. Formatting a drive will erase everything on it, so make sure you have copies of any important files. You can use Apple's Time Machine to create a backup, or simply copy your files to an external drive or cloud storage, or use disk cloning software to create a copy of your drive.
Back up Mac before formatting the drive
DoYourClone can create a bootable copy of your Mac before formatting the drive or doing other changes.
It's essential to double-check that you've selected the correct drive to format. Accidentally formatting the wrong drive can lead to significant data loss. When in Disk Utility (the macOS tool used for formatting), carefully read the drive names and capacities to ensure you're working with the intended device.
Be fully aware that formatting a drive not only erases all data but also sets up a new file system. This means that any existing data structures, partitions, or boot records will be permanently altered. Ensure that you're ready for this process before you proceed.
macOS provides a built-in tool called Disk Utility, which is powerful and user-friendly, making it easy to format both internal and external drives. While Disk Utility is usually sufficient for most users.
Or you can use third-party software like DoYourData Super Eraser for Mac, which may be necessary for specific tasks like wiping the data permanently.
Disk Utility is located in the Applications folder and then Utilities folder on your Mac. It provides a graphical interface to manage your drives, allowing you to partition, format, and repair them with just a few clicks. This guide will focus on using Disk Utility for drive formatting.
Formatting an internal drive usually involves reformatting the startup disk or another internal drive. This can be necessary if you're reinstalling macOS, troubleshooting issues, or repurposing the drive. Steps included:
1. Boot into macOS Recovery
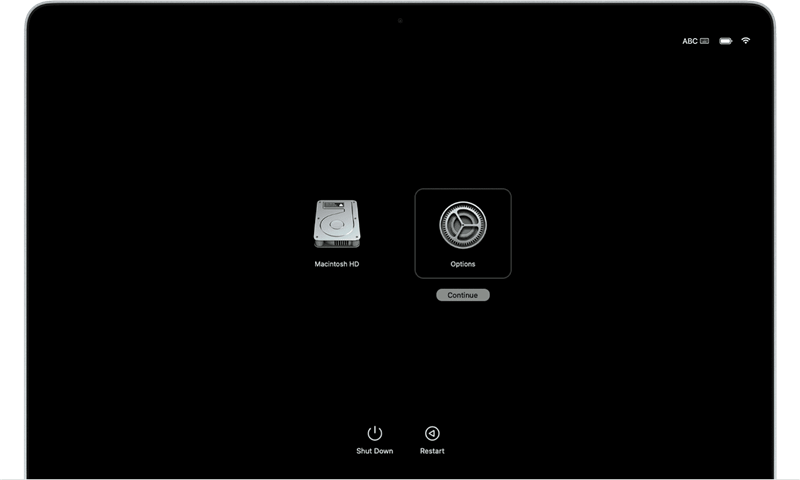
To format your internal drive, you need to boot into macOS Recovery mode. Here's how:
In the upper-left corner, click the Apple logo, then choose "Restart" and then the computer will reboot. Immediately hold down Power button (or Command (⌘) + R keys for old Macs) while your Mac restarts. Hold down these keys until you see a spinning globe or the Apple logo. Select Options and click Continue.
2. Open Disk Utility
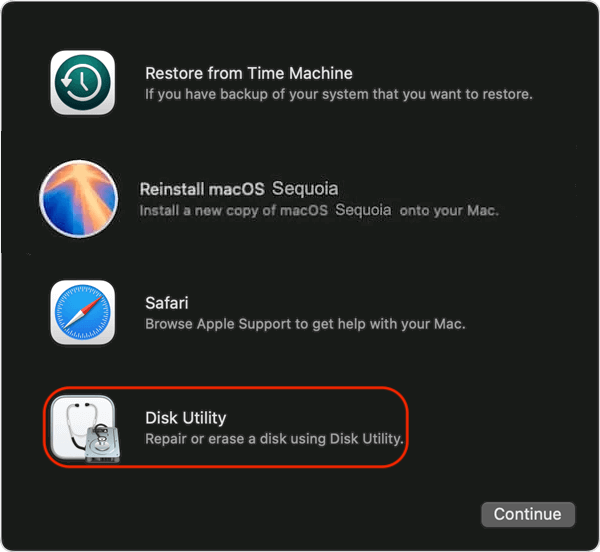
In macOS Recovery mode, you'll see a macOS Utilities window. Select "Disk Utility" and click Continue.
3. Select the Drive to Format
In Disk Utility, you'll see a list of drives and volumes on the left side. Select the internal drive you want to format. This is usually labeled as "Macintosh HD" or a similar name.
If you're formatting a specific volume rather than the whole drive, select the volume from the list.
4. Format the Drive
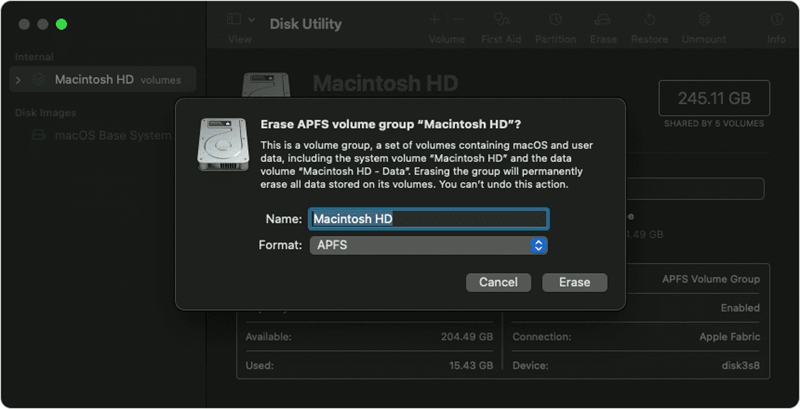
Click the Erase button at the top of the Disk Utility window. Enter a name for the drive. Choose the appropriate format like APFS or Mac OS Extended (Journaled). Click Erase to start the formatting process.
5. Reinstall macOS
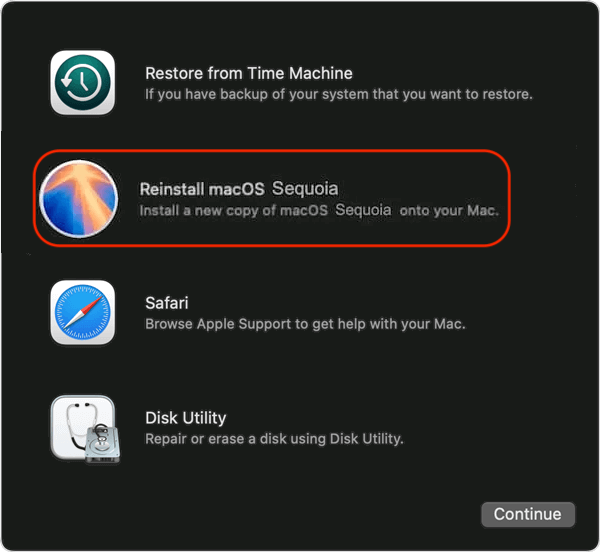
After formatting, if you plan to use the drive as your startup disk, you'll need to reinstall macOS. From the macOS Utilities window, select "Reinstall macOS" and click "Continue." Follow the instructions on screen to complete the installation.
Formatting an external drive is a bit simpler than formatting an internal drive and does not require booting into recovery mode. Here's how to format an external drive on a Mac:
Step 1. Connect the External Drive
Plug your external drive into your Mac using the appropriate cable.
Step 2. Open Disk Utility
To open Disk Utility go to "Applications" folder. In this folder, go to "Utilities" folder. Opt for "Disk Utility."

Step 3. Select the External Drive
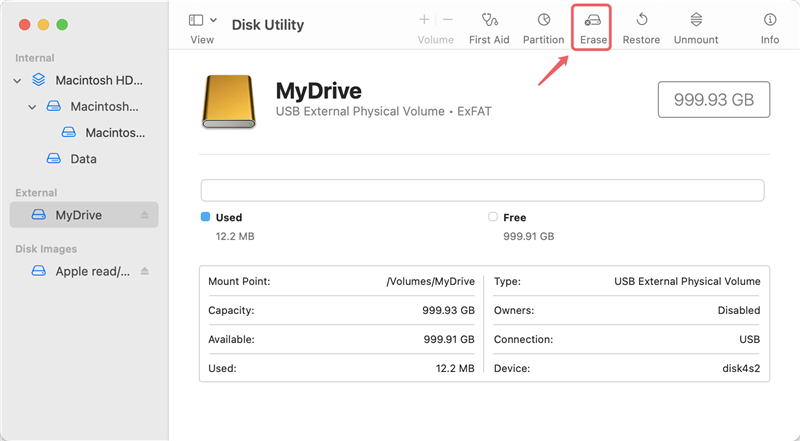
Locate and choose your external drive from the list on the left in Disk Utility. Take caution when choosing the drive to prevent unintentional data loss. Click the Erase button at the top of the Disk Utility window.
Step 4. Format the Drive
Enter a name for the drive. Choose the file system that suits your needs:
Choose "GUID Partition Map" for most external drives.
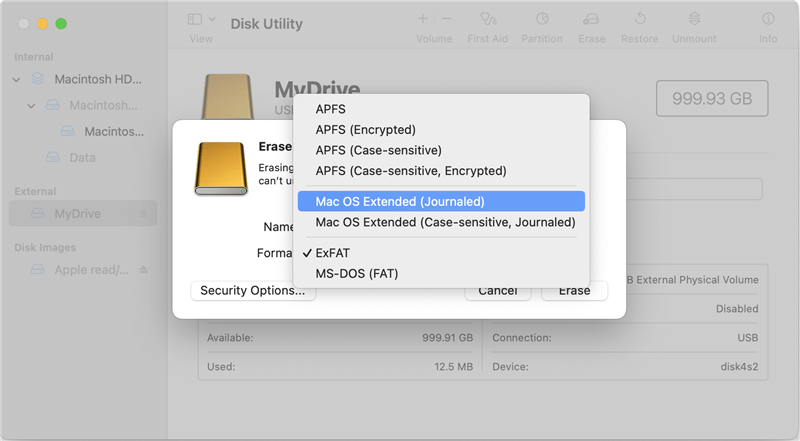
Step 5. Complete the Process
Click Erase to format the drive. Once the process is complete, Disk Utility will display a confirmation. You can now use the external drive with the new file system.
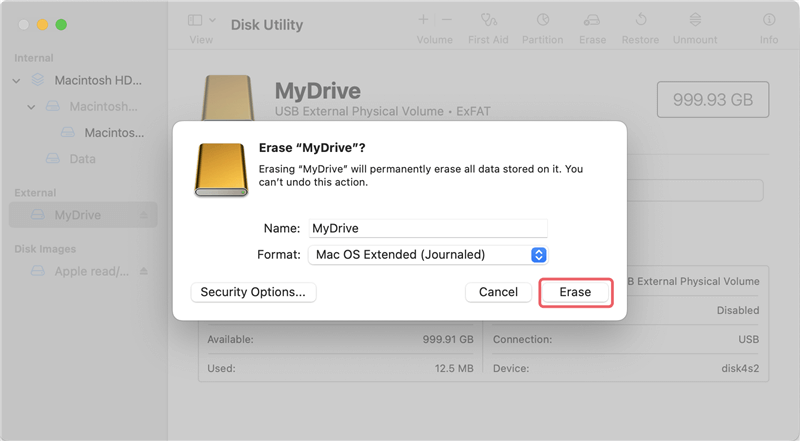
How to format drive to NTFS on Mac?
DoYourData NTFS for Mac can help you format an external hard drive to NTFS on Mac
Even if you have formatted the internal or external hard drive using Disk Utility on Mac, the formatted data on the drives is not gone for good. With professional and reliable data recovery software for Mac, it's easy to retrieve the files from the drives.
How to recover data from formatted drive on Mac?
If you erase a hard drive with Disk Utility on Mac, it's still able to get back the formatted data with the professional mac data recovery software.
In some cases, you may want to ensure the formatted data on the internal and external hard drives is no longer recoverable in any way. Then how to achieve that goal? The only thing you need to do is to wipe the formatted data permanently with a professional data wiping software.
The best one we suggest is DoYourData Super Eraser for Mac. This software is professional at data wiping for macOS. With international data sanitation algorithms, the software can ensure to wipe data permanently and ensure the wiped data will not be recovered in any way.
You can download and install the software on your Mac, then refer to the following guide to wipe the data from internal or external hard drive with the software.
Step 1. Connect your external hard drive to the Mac and then start the software from launchpad.
Step 2. Choose a proper mode to wipe data.

Step 3. Click Wipe Now button and then you need to choose a data erasure standard to wipe the data permanently.
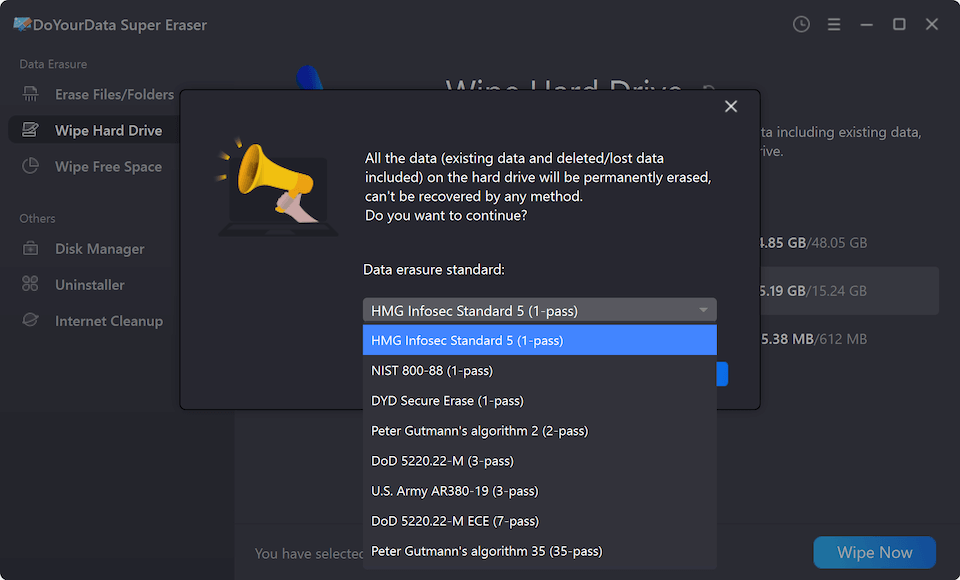
Step 4. After selecting the data erasure standard, you can click Continue button and the software will start to wipe the data from the selected drive.
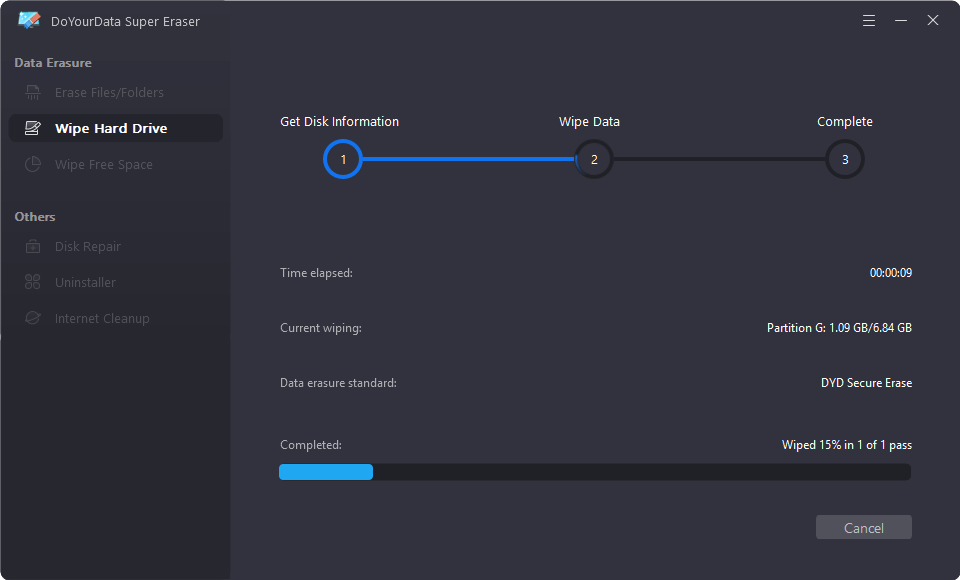
Once the data wiping process is done, the data is wiped completely on the drive. There will be no chance to recover the erased data.
After successfully formatting your drive, there are a few additional tasks you may need to complete:
🔹 Verifying the Formatted Drive's Functionality
Test the drive by copying files to and from it to ensure it's functioning correctly. For internal drives, make sure the operating system boots up properly and that all applications work as expected.
🔹 Restoring Data from Backup
If you backed up data before formatting, now is the time to restore it. Use Time Machine, iCloud, or other backup solutions to transfer your files back onto the drive.
🔹 Setting Up Partitions
If you need to divide your drive into multiple sections (partitions), you can do this in Disk Utility by selecting the drive and choosing the "Partition" option. This is useful for organizing data or setting up multiple operating systems on the same drive.
🔹 Adjusting Drive Settings and Permissions
For external drives, you may need to adjust permissions to allow other users or devices to access the files. Right-click the drive in Finder, choose "Get Info," and modify the sharing and permissions settings as needed.
Formatting drives on a Mac is a straightforward process, but it requires careful attention to detail to avoid data loss and ensure the drive is set up correctly. Whether you're working with an internal or external drive, this guide has provided you with the necessary steps to format and manage your storage devices efficiently. You can keep your drives in top shape and make sure that your data is accessible and safely kept by adhering to best practices and comprehending the effects of formatting.

DoYourData Super Eraser for Mac
DoYourData Super Eraser for Mac is a 100% safe, powerful and easy-to-use data erasure program. It offers certified data erasure standards including Peter Gutmann, U.S. Army AR380-19, DoD 5220.22-M ECE to permanently erase data from Macs and external devices, making data recovery be impossible.

