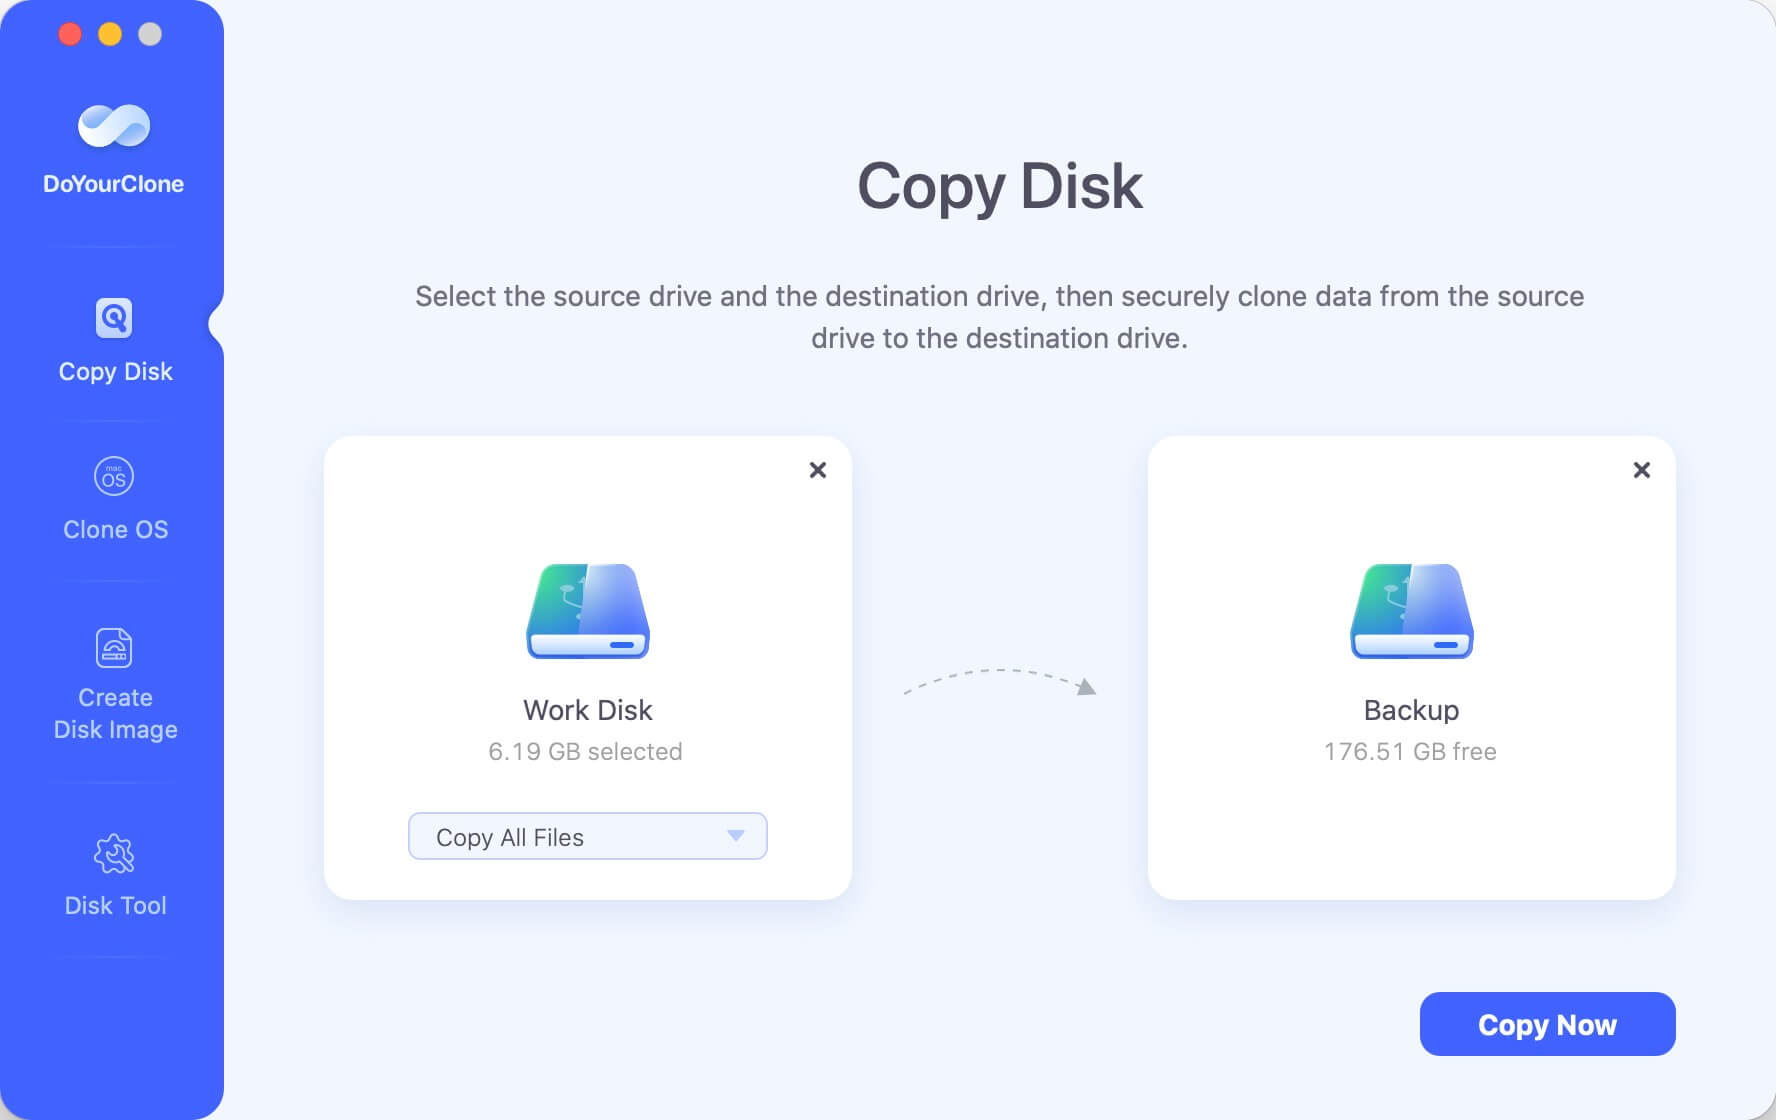
Back up data before formatting it
Clone to back up your data from the drive before you format it to NTFS on Mac.
Quick Navigation:
Formatting a hard drive to NTFS on a Mac can be a crucial task, especially if you need to ensure compatibility with Windows systems or want to take advantage of NTFS's robust file system features. However, since macOS does not natively support NTFS formatting, the process can be slightly more complex than formatting a drive to a Mac-friendly format like HFS+ or APFS.
In this article, we'll guide you through the steps needed to format a Hard Disk Drive (HDD) to NTFS on Mac, using various methods including third-party software and built-in tools. By the end, you'll have a complete understanding of how to format your HDD to NTFS on a Mac efficiently and safely.
Before diving into the formatting process, it's essential to understand why you might want to format a drive to NTFS and what makes this file system different from others available on macOS.
NTFS, which stands for New Technology File System, is the default file system used by Microsoft Windows. It is known for its reliability, security features, and ability to handle large files and volumes. NTFS supports file compression, encryption, and detailed permissions, making it a preferred choice for many users, especially in professional environments.
If you're a Mac user who needs to transfer files to a Windows computer, or if you're setting up a hard drive for use in a dual-boot system, formatting to NTFS can be a practical choice. However, since macOS only supports read-only access to NTFS-formatted drives, you'll need additional tools to format or write to an NTFS drive on your Mac.
Before deciding to format to NTFS, it's worth considering other file systems that might better suit your needs:
Before formatting your HDD to NTFS on Mac, it's crucial to prepare adequately to ensure a smooth process and prevent data loss.
Formatting a drive will erase all existing data on it, so it's vital to back up any important files before you begin. You can use Time Machine or another backup tool to create a full backup of your Mac, or simply copy important files to another drive.
Back up data before formatting it
Clone to back up your data from the drive before you format it to NTFS on Mac.
Since macOS doesn't natively support writing to NTFS, you'll need to choose a method that allows you to format the drive to NTFS. Below, we'll cover several options, including using third-party software and accessing a Windows virtual machine on your Mac.
There are several ways to format a hard drive to NTFS on a Mac, each with its own set of advantages and drawbacks. Let's explore these methods in detail.
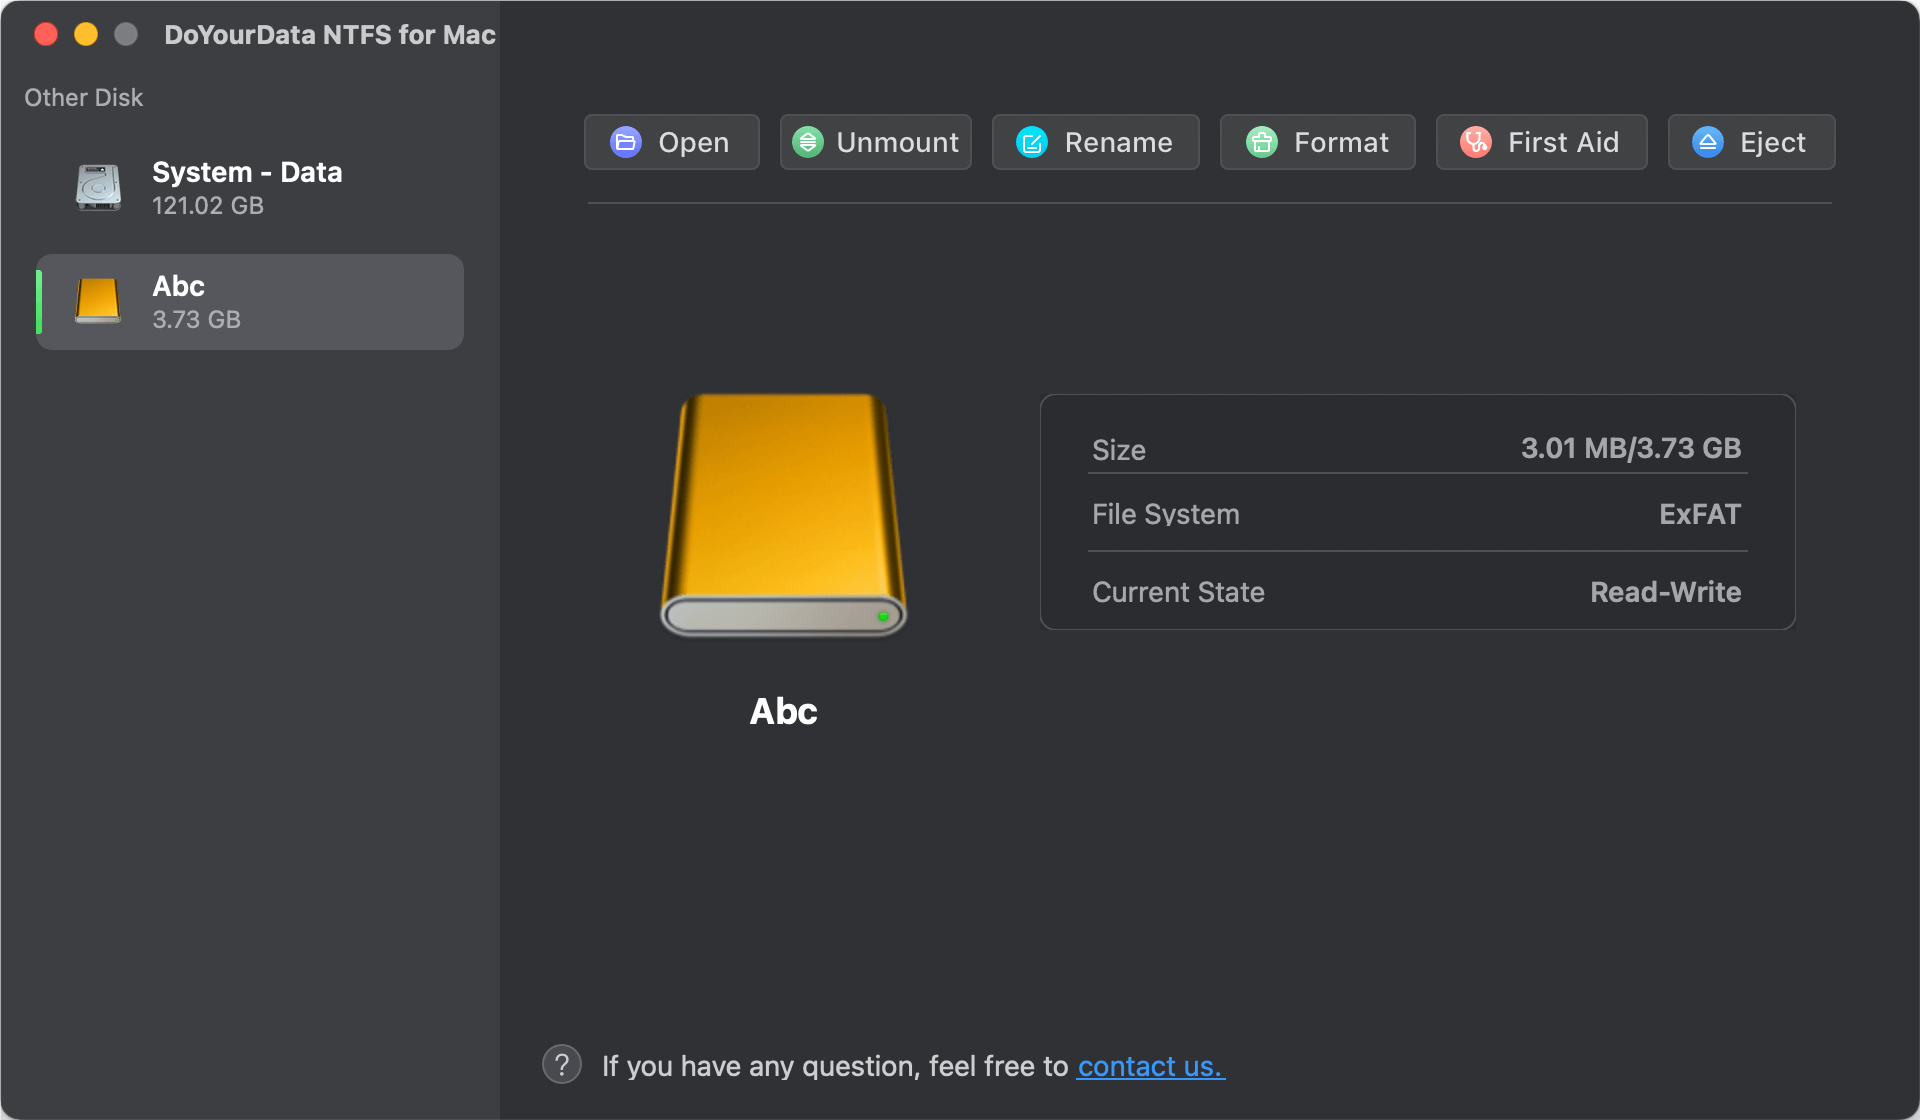
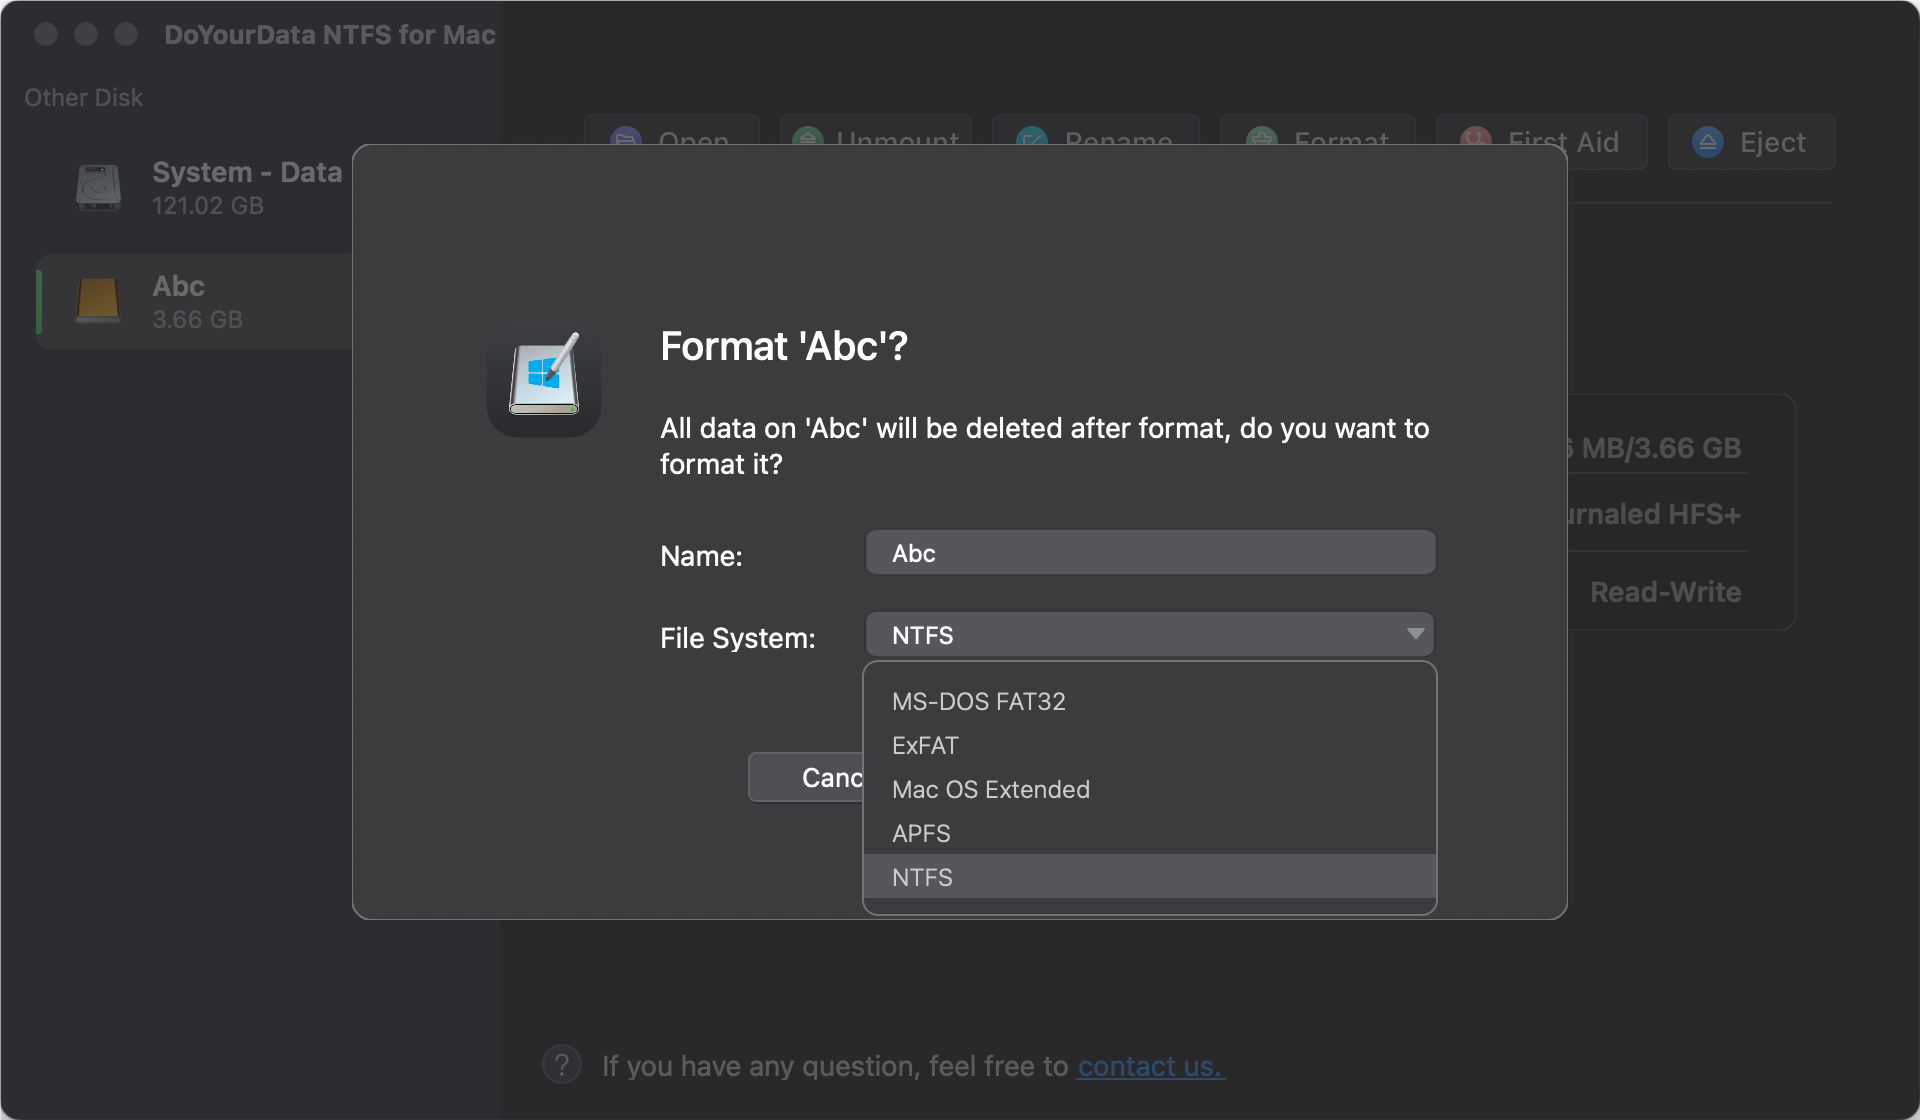
One of the easiest and most reliable ways to format a hard drive to NTFS on a Mac is by using third-party software. DoYourData NTFS for Mac is one of the most popular options available. It can not only format a drive to NTFS, but also make it writable on Mac.
Step 1: Download and Install DoYourData NTFS for Mac
Download the latest version of DoYourData NTFS for Mac. Install the software following the on-screen instructions.Step 2: Format the HDD to NTFS
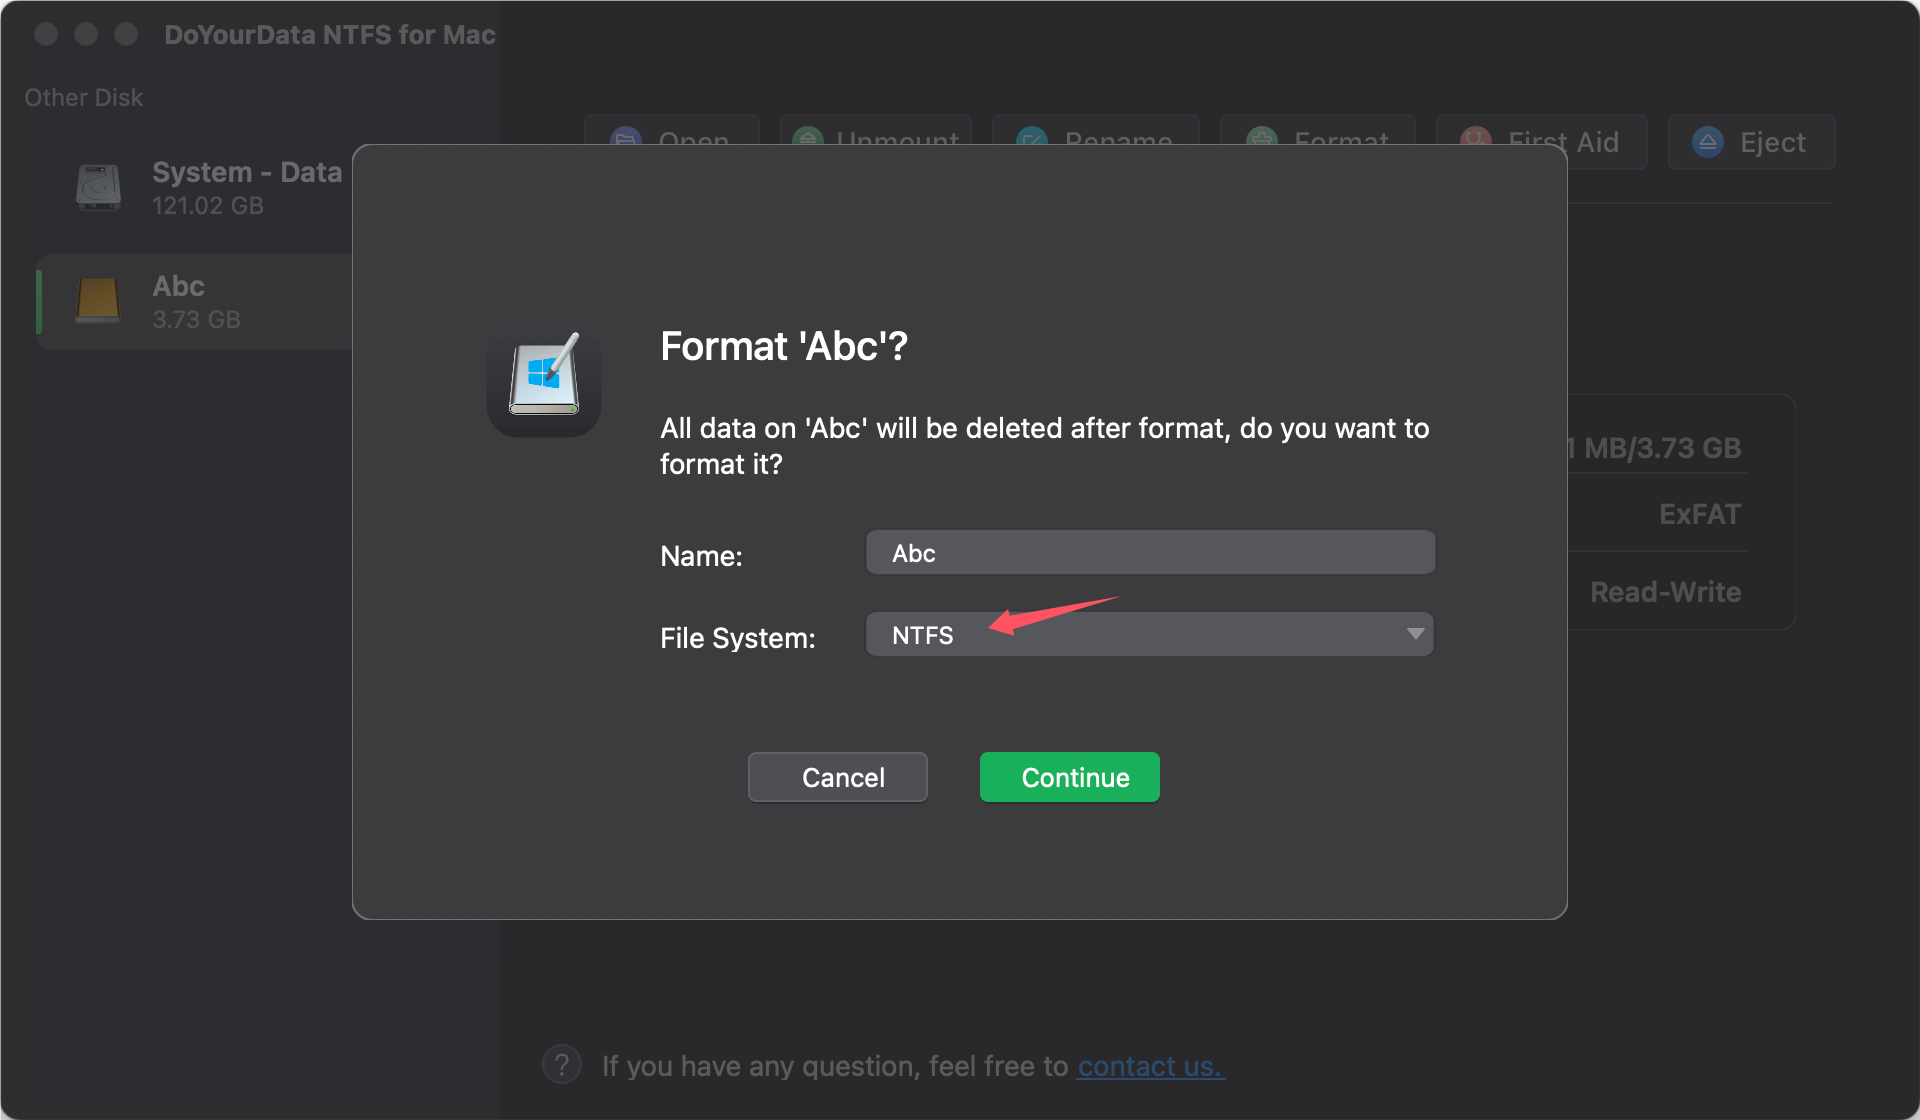
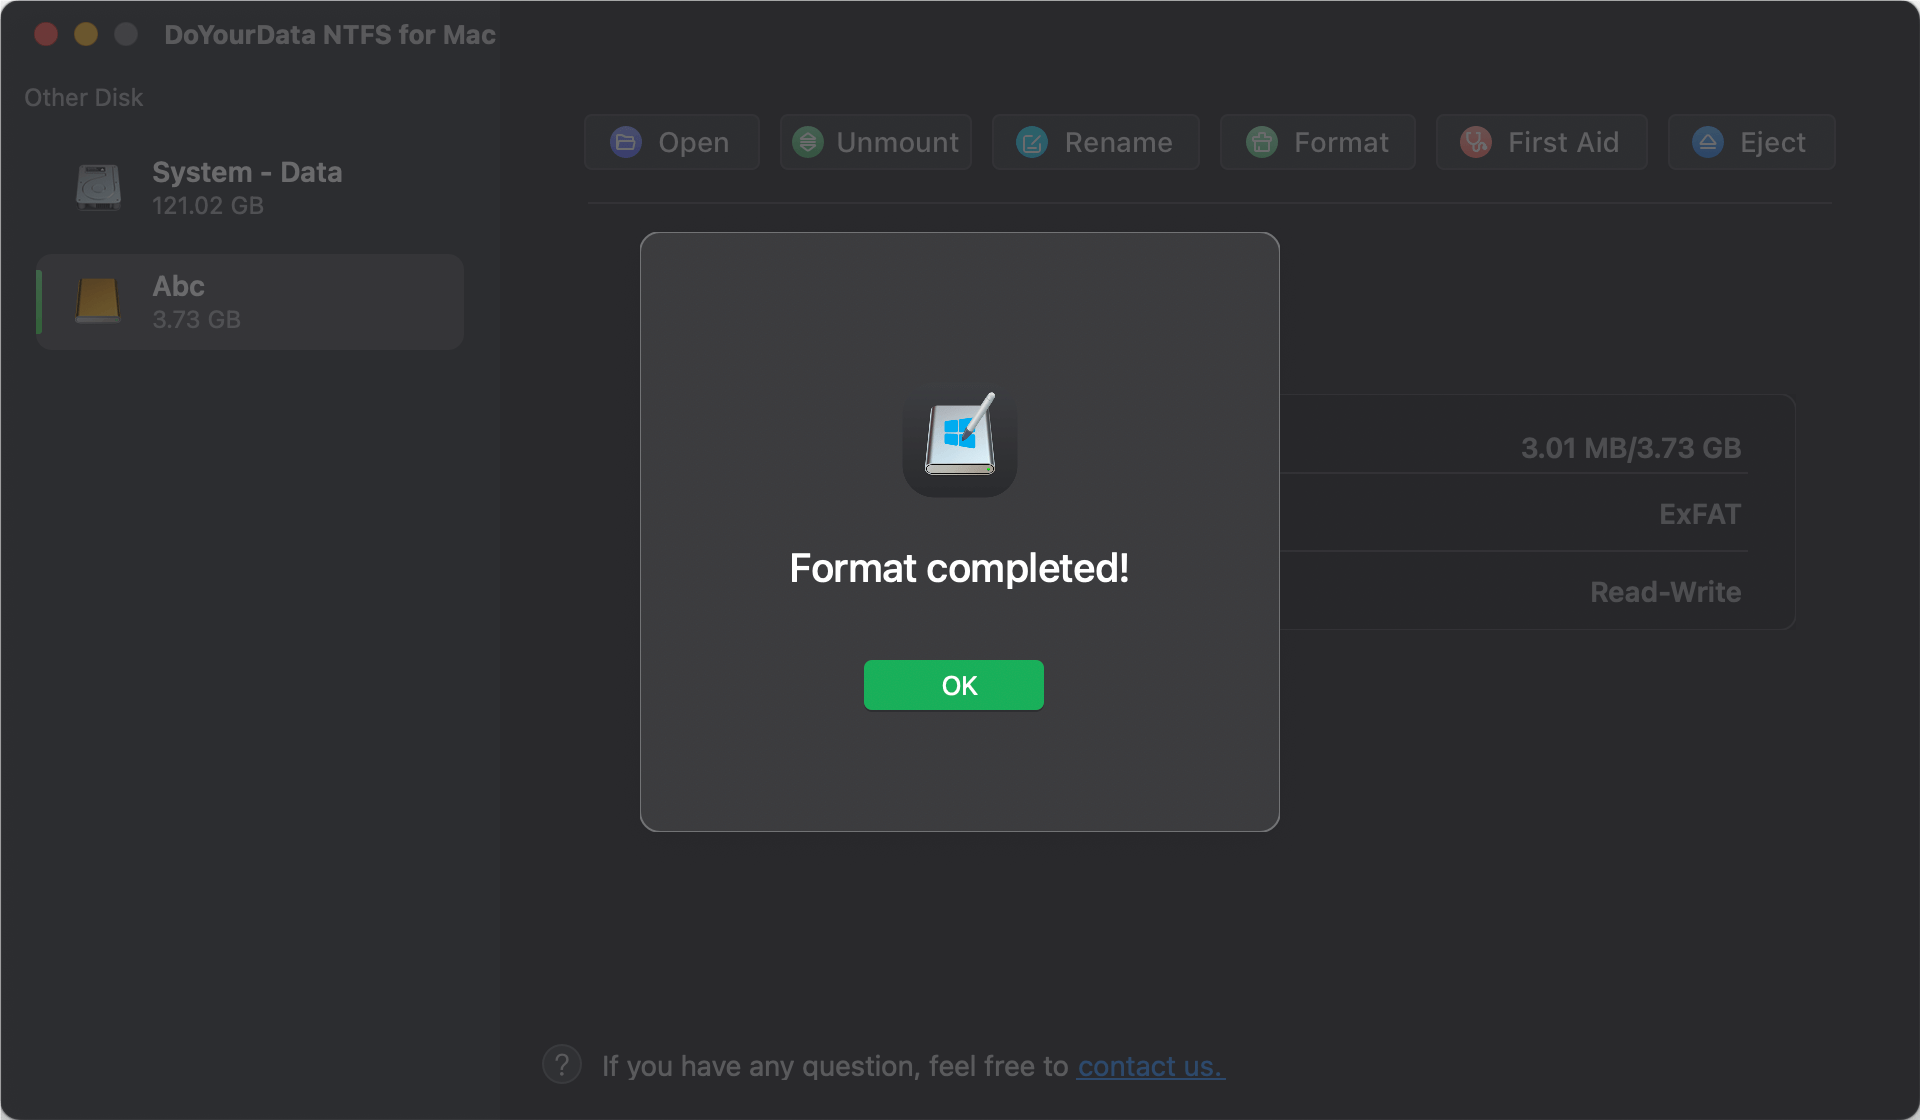
🔖 Benefits of Using DoYourData NTFS for Mac
If you have Boot Camp set up on your Mac, you can format the HDD to NTFS using the native Windows Disk Management tool.
💡 Note: The Apple Silicon Macs don't support boot camp.
Step 1: Set Up Boot Camp (If Not Already Done)
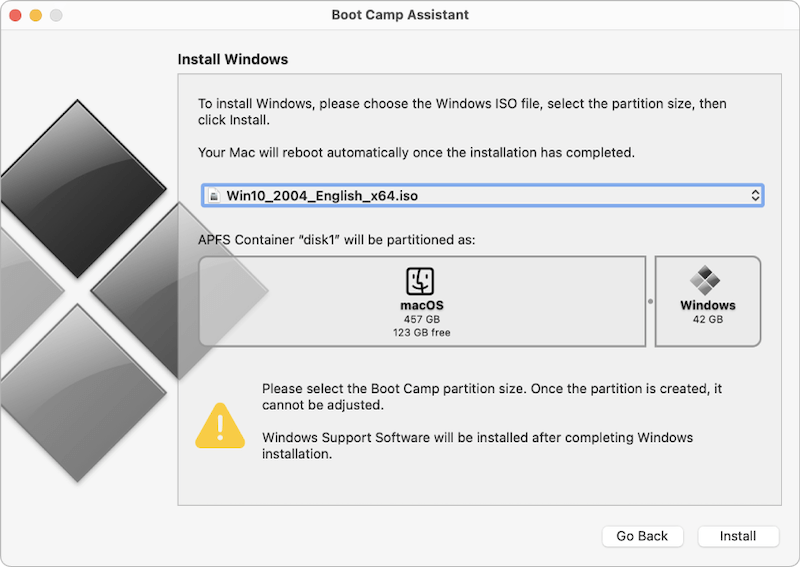
Step 2: Format the HDD in Windows
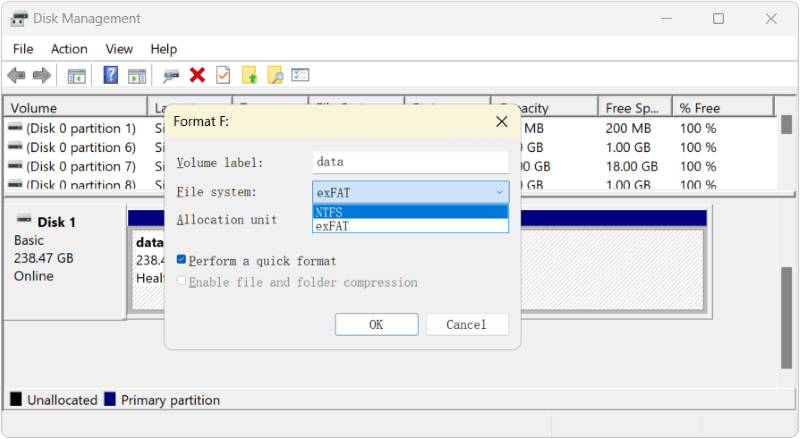
🔖 Benefits of Using Boot Camp
If you prefer not to use Boot Camp, you can use a virtual machine (VM) running Windows to format the HDD to NTFS.
Step 1: Set Up a Virtual Machine
Step 2: Format the HDD in the VM
🔖 Advantages of Using a Virtual Machine
After successfully formatting your HDD to NTFS, there are several things to keep in mind.
Before using your newly formatted NTFS drive, it's a good idea to verify that the formatting was successful.
Since macOS doesn't natively support writing to NTFS, you'll need to keep your third-party software up to date.
If you plan to use the NTFS drive on both Windows and macOS, consider how you'll manage file transfers and data integrity.
Formatting a hard drive to NTFS on a Mac may not be as straightforward as using other file systems, but with the right tools and guidance, it's a manageable task. Whether you choose to use third-party software like DoYourData NTFS for Mac, take advantage of Boot Camp, or use a virtual machine, each method offers a reliable way to achieve your goal. By following the steps outlined in this guide, you can ensure that your HDD is formatted to NTFS and ready for use with Windows systems, all while maintaining compatibility with your Mac.
DoYourData NTFS for Mac
DoYourData NTFS for Mac is a safe, powerful and easy-to-use NTFS for Mac tool. It allows macOS to read & write files on NTFS drives without any limitation. It is also a comprehensive disk management tool for Mac to mount/unmount disk, format disk, repair disk, read-write disk...on Mac.
