Quick Navigation:
- Understanding Data Wiping on Portable SSDs
- Precautions Before Wiping Your Portable SSD
- Methods to Format or Wipe Portable SSD on Windows
- Conclusion
- FAQs About Wiping Portable SSD
Wiping a portable SSD (Solid State Drive) on a Windows computer is an important step to ensure that all information and personal data on the disk is permanently wiped. Whether someone is planning to sell, donate, or repurpose your SSD, making sure that your personal or sensitive data is completely removed is essential for maintaining privacy and security. Unlike traditional hard drives, SSDs use different technology, which requires special attention during the wiping process. In this article, we will explore different ways to securely and effectively wipe a portable SSD on Windows.
If you are a Mac user, check this guide: how to wipe a portable SSD on Mac >>
Portable SSDs are widely used for storing data due to their speed, reliability, and convenience. Whether you're using an SSD for personal files, work documents, or even as a backup drive, it's important to know how to securely wipe the data when you no longer need it. Wiping the SSD means that the data is not just deleted, but erased in a way that makes it nearly impossible to recover. This is crucial when you're disposing of, selling, or giving away the SSD, as it ensures that your private information remains secure.

Understanding Data Wiping on Portable SSDs
Difference Between Deleting, Formatting, and Wiping Data:
It's important to understand the difference between deleting, formatting, and wiping data on an SSD. When you delete a file, it doesn't actually get removed from the drive; instead, the space it occupied is marked as available for new data. Formatting the SSD will erase the file structure, but the data might still be recoverable using special software. Whereas, wiping the SSD means completely erasing all data in a way that makes it very difficult or impossible to recover.
How SSD Technology Affects Data Wiping:
SSDs operate differently from outdated external disks. They use flash memory to store information, and their performance is optimized through processes like wear leveling and the TRIM command. Equal distribution of write and erase cycles among memory cells is achieved through wear leveling, while TRIM helps maintain the SSD's performance by erasing blocks of data that are no longer in use. Because of these technologies, special methods are needed to ensure that data is completely wiped from an SSD.
Why Secure Wiping is Necessary:
Simply deleting files or formatting the SSD is not enough to ensure that the data is gone for good. Sensitive data, like personal documents, photos, or financial information, could potentially be recovered if the SSD falls into the wrong hands. Securely wiping the SSD ensures that all data is overwritten and irretrievable, which is essential for protecting your privacy.
Precautions Before Wiping Your Portable SSD
Before you start wiping your portable SSD, there are a few important precautions to take:
Ensuring the SSD is Properly Connected:
Make sure that the portable SSD is properly connected to your computer using a USB cable or a compatible port. Check that the computer recognizes the SSD and that it appears in File Explorer. If the SSD is not detected, you may need to troubleshoot the connection or try a different cable.
Checking for Any Software or Firmware Updates:
Certain SSDs include firmware or software updates that might bring new capabilities or increase performance. Checking the manufacturer's website for any updates that may be available is a smart idea and apply them if necessary before deleting the SSD. This can guarantee that the wiping procedure proceeds without hiccups.
Methods to Format or Wipe Portable SSD on Windows
There are several methods you can use to wipe a portable SSD on Windows. Each method has its own advantages and can be chosen based on your needs and comfort level.
Method 1: Using Windows Built-in Tools
Windows has built-in tools that can be used to wipe your SSD. One of the simplest methods is using the Disk Management utility.
Step-by-Step Guide to Using Disk Management:
- Open Disk Management: Right-click on the Start menu and select "Disk Management." This will open the Disk Management utility, where you can see all the drives connected to your computer.
- Locate the SSD: In the Disk Management window, find your portable SSD. It will be listed along with other drives, and you can identify it by its size or label.
- Delete the Volume: Right-click on the SSD's volume (the part of the drive where the data is stored) and select "Delete Volume." This will remove the volume and make the space unallocated.
- Create a New Volume: To securely wipe the SSD, right-click on the unallocated space and select "New Simple Volume." Follow the wizard to create a new volume, but choose the option to format the drive with the NTFS file system.
- Enable the Full Format Option: During the formatting process, make sure to check the "Perform a quick format" option. While this is faster, it's not as secure as a full format, which can take longer but ensures that all data is overwritten.
- Finish the Process: Once the format is complete, the SSD will be wiped and ready for use. Keep in mind that this method does not completely erase data beyond recovery, so additional steps may be needed if you want to ensure that the data is irrecoverable.

Explanation of Diskpart for Secure Erasure:
Another built-in tool you can use is Diskpart, which is a command-line utility that allows for more advanced operations, including secure wiping of an SSD.
- Open Command Prompt: Search for "Command Prompt" in the Start menu, right-click on it, and select "Run as administrator."
- Start Diskpart: In the Command Prompt window, type diskpart and press Enter to start the Diskpart utility.
![wipe portable SSD]()
- List the Disks: Type list disk and press Enter. This will show a list of all the drives connected to your computer. Identify your SSD by its size.
![wipe portable SSD]()
- Select the SSD: Type select disk X, replacing "X" with the number corresponding to your SSD, and press Enter.
![wipe portable SSD]()
- Clean the SSD: Type clean all and press Enter. This command will overwrite every sector on the SSD with zeros, effectively wiping all data.
![wipe portable SSD]()
- Create a New Partition: After the wiping process is complete, you can create a new partition by typing create partition primary, followed by formatting the drive with format fs=ntfs quick.
- Exit Diskpart: Type exit to close Diskpart.
Please note that the formatted data is not lost forever. Data recovery software is able to quickly and completely recover deleted, formatted or lost data from your portable SSD.
Method 2: Using Third-Party Disk Wipe Software
Several third-party software tools are available that are specifically designed to securely wipe SSDs. These tools often offer additional features and customization options.
DoYourData Super Eraser is a powerful yet easy-to-use disk wipe program. It can help you securely and permanently erase all data from your portable SSD.
Step 1. Download and install DoYourData Super Eraser on your computer.
Step 2. Connect the portable SSD to your computer, then open DoYourData Super Eraser. Choose Wipe Hard Drive mode, then select the portable SSD and click on Wipe Now button.

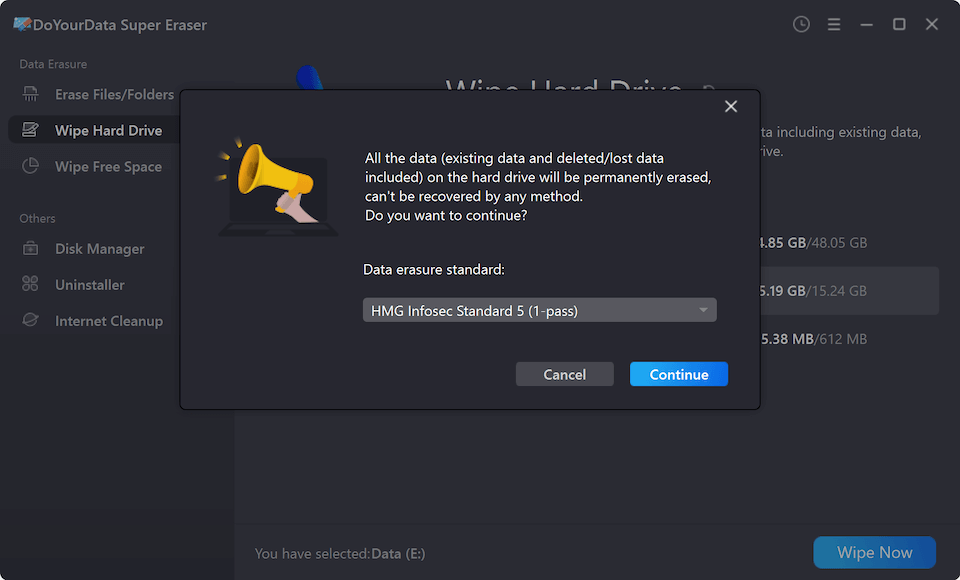
Step 3. Select a data erasure standard, then click on Continue button.

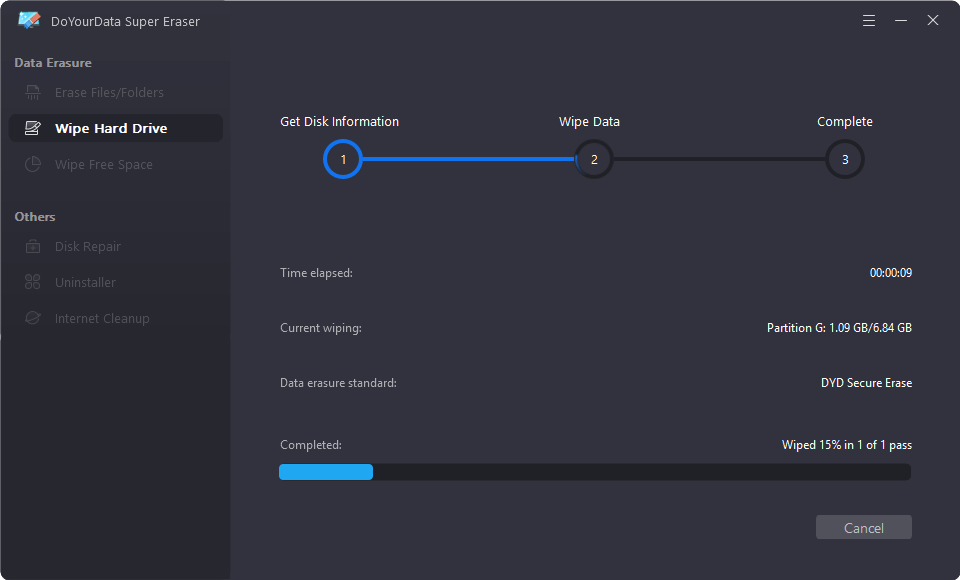
Step 4. Format/wipe the portable SSD and permanently erase all data from it.

Note: Once the data is erased by DoYourData Super Eraser, the data is lost for good, can't be recovered by any method.
Method 3: Using Manufacturer-Specific Software
Some SSD manufacturers provide their own software tools designed specifically for their SSDs. These tools are often the best option for wiping an SSD, as they are optimized for the specific hardware.
Explanation of Tools Provided by SSD Manufacturers:
- Samsung Magician: Samsung Magician is a comprehensive tool for Samsung SSDs. It includes a Secure Erase feature that can wipe the drive safely.
- Crucial Storage Executive: This tool is designed for Crucial SSDs and offers features like firmware updates, performance optimization, and secure erasure.
- Intel SSD Toolbox: For Intel SSDs, this software provides a range of tools, including a secure erase option.
Detailed Steps for Wiping Using Manufacturer's Software:
Let's use Samsung Magician as an example:
- Download and Install Samsung Magician: Visit the Samsung website and download the Magician software. Install it on your computer.
- Open Samsung Magician: Launch the software and ensure your Samsung SSD is connected.
- Select Secure Erase: In the main menu, find the "Secure Erase" option. Follow the prompts to create a bootable USB drive if necessary.
![Samsung Magician wipes portable SSD]()
- Boot from USB: Restart your computer and boot from the USB drive. The Secure Erase utility will automatically start.
- Wipe the SSD: Follow the on-screen instructions to wipe the SSD. Once complete, the SSD will be securely erased.
Considerations for SSD Wiping Methods
Quick Wipe vs. Full Wipe
A quick wipe is faster but less secure, as it only removes the file structure, making data easier to recover. A full wipe takes longer but overwrites all data, making it much harder to recover.
TRIM-Enabled SSDs
If your SSD has the TRIM command enabled, data is erased more efficiently. Ensure that TRIM is enabled by checking the SSD’s properties in Windows or using the manufacturer's software.
Conclusion
Wiping a portable SSD on Windows is a critical step to ensure that your data is securely erased. By using the procedures described in this article, you can wipe your SSD effectively, whether using built-in Windows tools, third-party disk wipe software, or manufacturer-specific programs. Remember to verify the wipe and follow best practices to keep your data safe and secure.
FAQs About Wiping Portable SSD
1. How to reformat a portable SSD on Windows?
Follow these steps to do a full format on your portable SSD:
- Connect the portable SSD to your computer.
- Open This PC, find the portable SSD and right-click it.
- Choose Format.
- Select a file system such as NTFS, exFAT.
- Uncheck Quick Format.
- Click Start to format the portable SSD.

2. How to securely wipe a portable SSD?
Disk wipe software, such as DoYourData Super Eraser can help you wipe a portable SSD:
- Download and install DoYourData Super Eraser, open it.
- Choose Wipe Hard Drive mode.
- Select the portable SSD, click on Wipe Now button.
- Select a data erasure standard, click on Continue button.
- Wipe the portable SSD.
Once the process gets finished, all data stored on the portable SSD is lost forever, cannot be recovered by any method.
3. What is the best SSD disk wipe software?
You can choose these tools to help you wipe your portable SSD:
- DoYourData Super Eraser
- DBAN
- Stellar Drive Wipe
- AweEraser
- Minitool Partition Tool
- Donemax Data Eraser

DoYourData Super Eraser
DoYourData Super Eraser, the award-winning data erasure software, offers certified data erasure standards including U.S. Army AR380-19, DoD 5220.22-M ECE to help you securely and permanently erase data from PC, Mac, HDD, SSD, USB drive, memory card or other device, make data be lost forever, unrecoverable!


