How to Format SSD on Windows 11/10/8/7 and Wipe Data Permanently?
Need to format SSD on Windows 11/10/8/7? Follow our simple, free walkthrough to prepare your drive in minutes. We also cover essential data recovery tips for accidental loss and the best methods to wipe SSD on Windows for permanent data erasure. Ensure your SSD is optimized and your privacy is protected with these professional Windows storage solutions.
![]() Updated by Shirly Chen on March 20, 2026
Updated by Shirly Chen on March 20, 2026
Quick Navigation:
- Introduction: Why Format or Wipe Your SSD?
- Critical Preparations: What to Do Before Formatting SSD?
- How to Format SSD on Windows 11/10/8/7?
- Wipe SSD on Windows: Why Formatting Isn't Enough
- Step-by-Step: Permanently Wipe SSD Data for Resale
- Troubleshooting: SSD Not Showing Up in Windows?
- Conclusion & Maintenance Tips
Looking for the safest way to refresh your drive? Whether you're setting up a brand-new internal drive or cleaning an old one, we've got you covered. This guide breaks down the simplest, free methods to format SSD on Windows 11/10/8/7 smoothly. Plus, we'll show you how to recover lost files and—if you're planning to sell your PC—how to wipe SSD on Windows permanently so your private data stays private.
Introduction: Why Format or Wipe Your SSD?
Solid State Drives (SSDs) have become the gold standard for Windows storage due to their incredible speed and reliability. However, there are several scenarios where you might need to perform a fresh format:
- Setting up a new drive: Preparing a brand-new NVMe or SATA SSD for its first use.
- Changing File Systems: Switching from NTFS to exFAT for cross-platform compatibility.
- Fixing Errors: Resolving "RAW" drive errors or file system corruption.
- Performance Refresh: Clearing out "clutter" to restore factory-level snappiness.
But there is a major difference between formatting and wiping. While formatting prepares the drive for new data, it often leaves the old data recoverable. If you are selling your PC, you need to wipe SSD on Windows to ensure your privacy is protected.
Critical Preparations: What to Do Before Formatting SSD?
Before you learn how to format SSD on Windows 11/10/8/7, follow this safety checklist:
Backup Your Data: Formatting destroys the file path to your data. Once you click "Start," your files are effectively gone. Use cloud storage or an external HDD to save your photos and documents.
Verify the Connection: Ensure your SSD is firmly seated in the M.2 slot or connected via a high-quality SATA cable.
Check Power Supply: If you are using a laptop, plug it into a power source. A sudden shutdown during a format can brick your SSD.
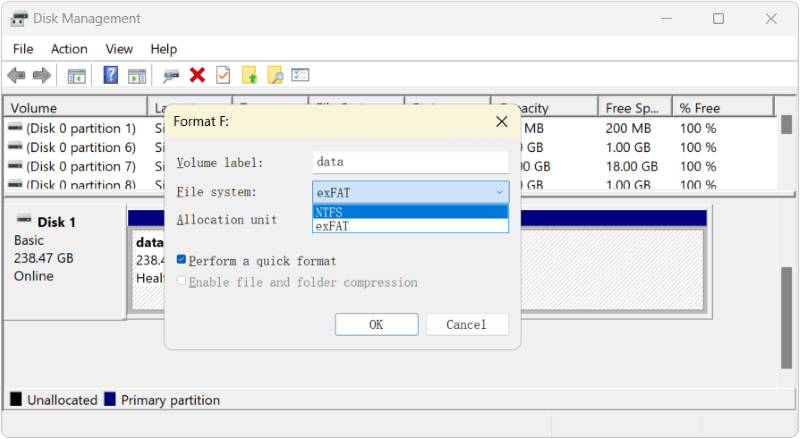
Confirm the File System:
- NTFS: Best for Windows-only systems (supports large files and security features).
- exFAT: Best if you plan to use the SSD on both Windows and Mac.
How to Format SSD on Windows 11/10/8/7?
Method 1: How to Format SSD via File Explorer (Quickest)
This is the most common method for home users. It works if your SSD already has a drive letter assigned (e.g., D: or E:).
- Press Win + E to open File Explorer.
- Go to This PC.
- Locate your SSD under "Devices and drives."
- Right-click the drive and select Format....
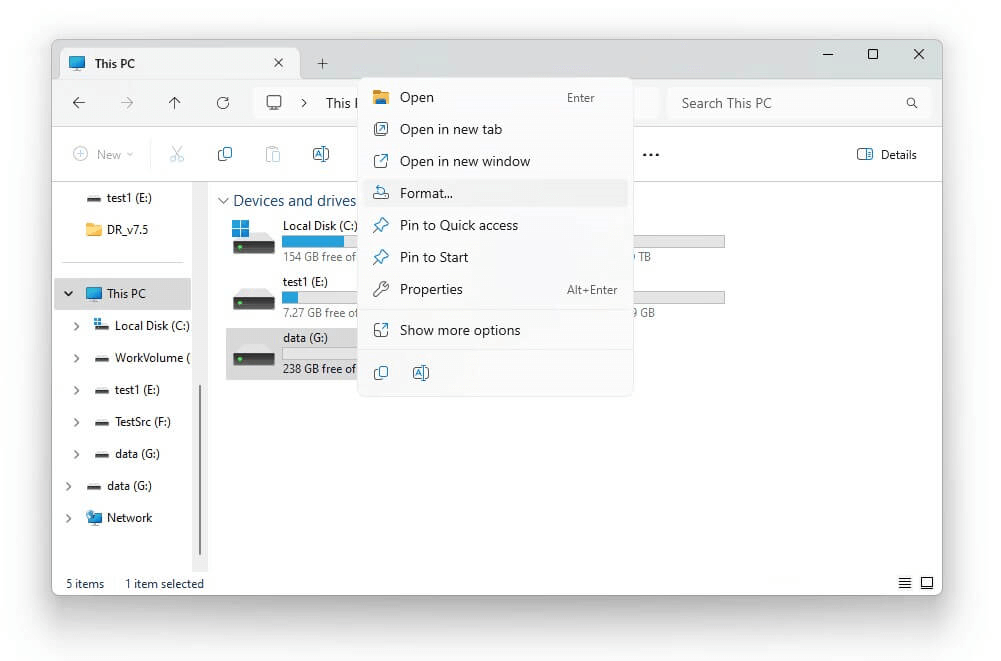
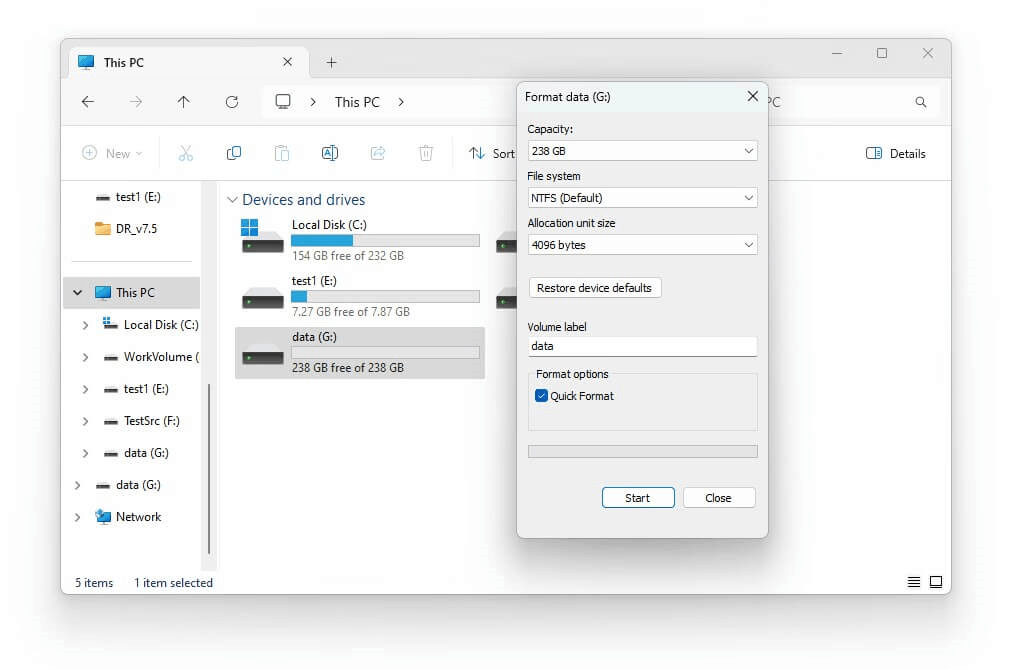
- Set the File System to NTFS.
- Enter a name in Volume Label (e.g., "Work SSD").
- Check Quick Format and click Start.
Method 2: Using Disk Management (Best for New Drives)
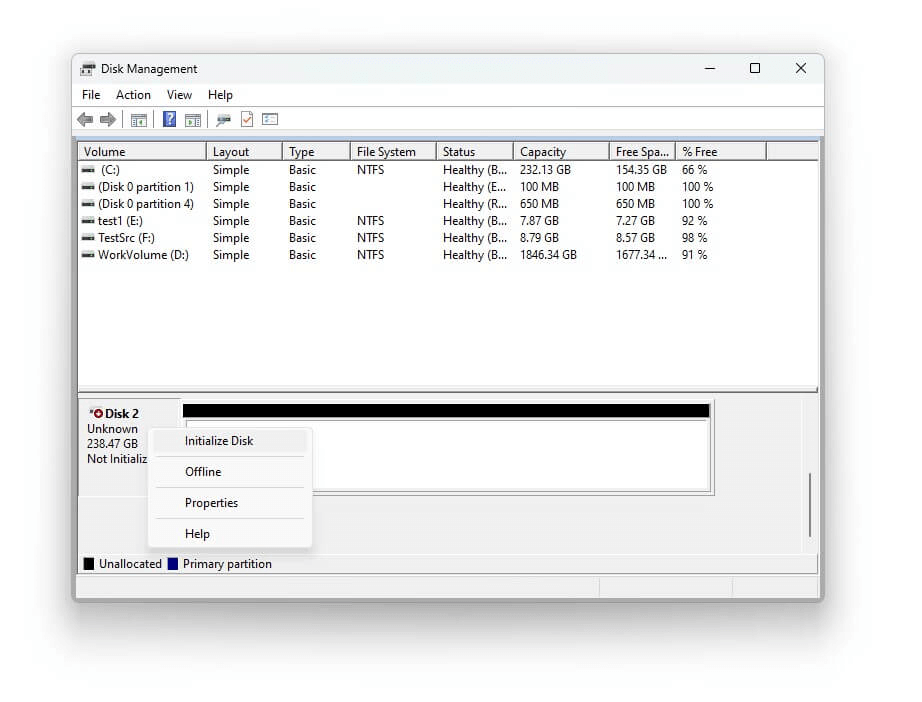
If you just installed a new SSD and it doesn't appear in File Explorer, it likely needs to be initialized.
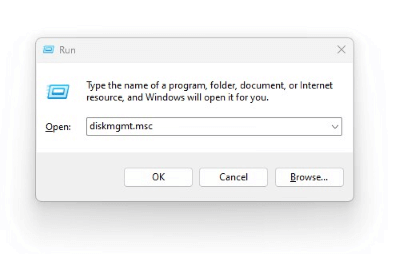
- Right-click the Start button and select Disk Management. Or you can press Win + R keys to open Run window, enter diskmgmt.msc to open Disk Management.
- Select the SSD. Check the listed disk in the Disk Management and choose the correct SSD. Right-click it and click "Format…" to continue.
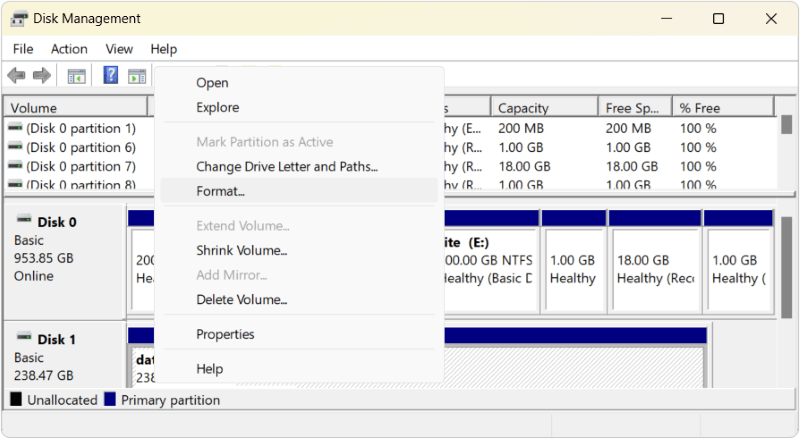
- Configure the settings. Choose the proper file system and name the volume, click the Start button to format the SSD..
Method 3: Using Diskpart Command Line (Advanced)
If Windows gives you an error like "Windows was unable to complete the format," the command line is your best friend.
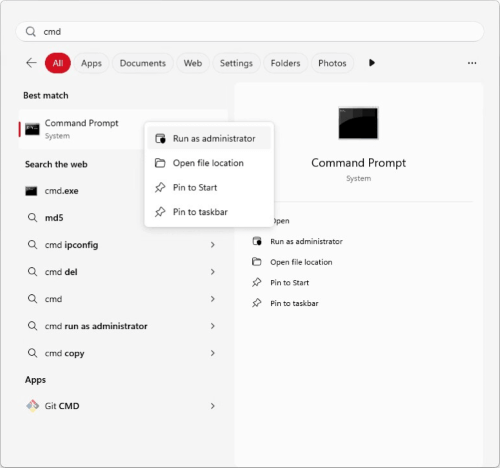
- Type cmd in the Windows search bar, right-click, and Run as Administrator.
- Type diskpart and press Enter.
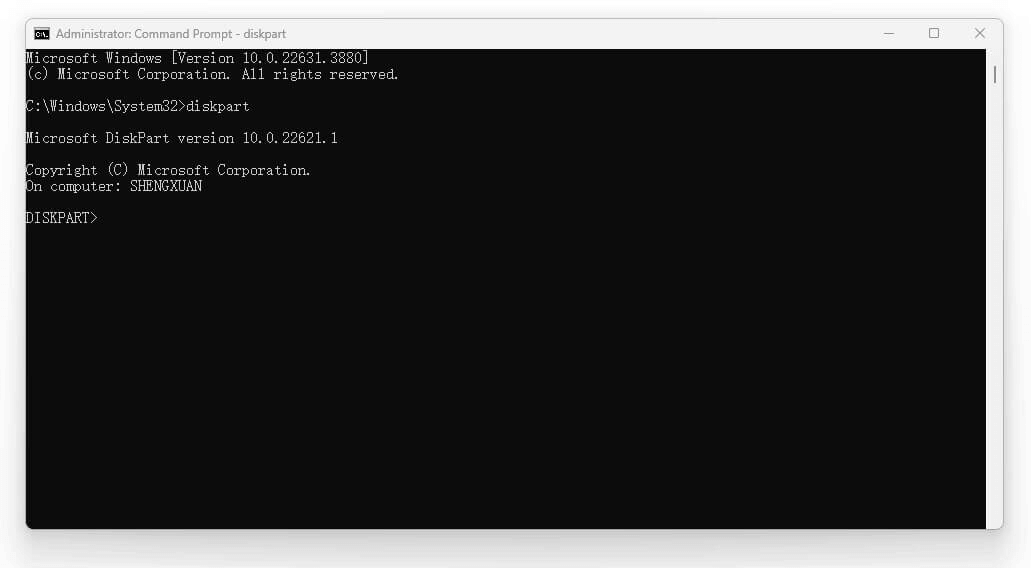
- Type list volume to see all connected drives. Identify your SSD by its size.
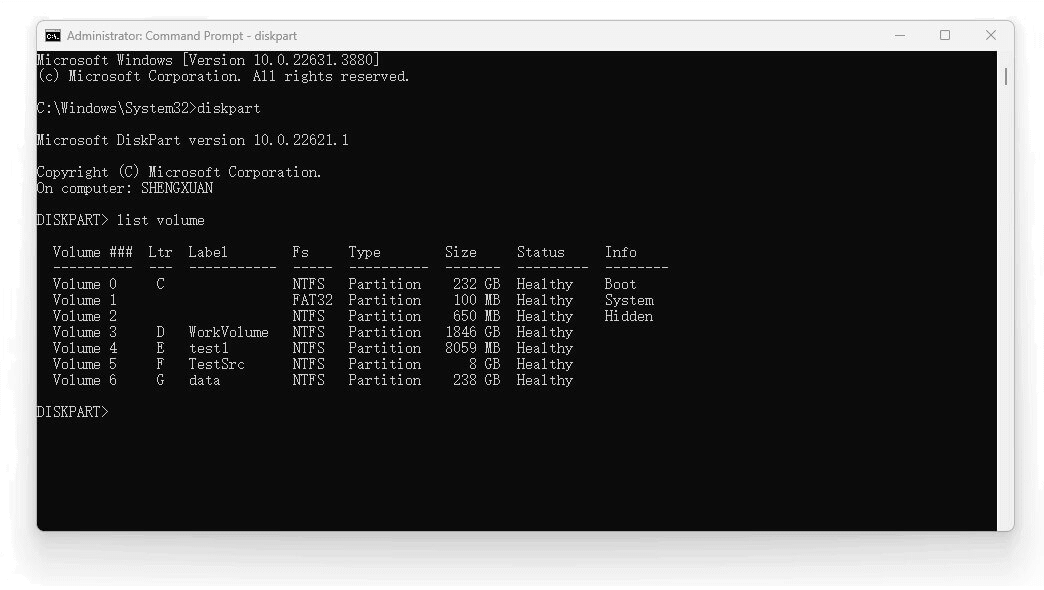
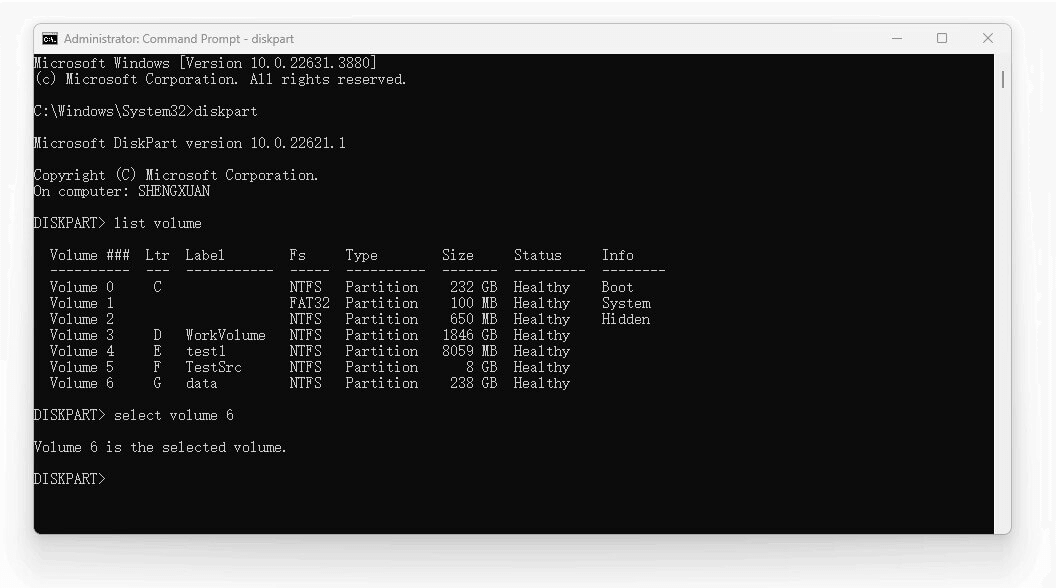
- Type select volume X (Replace X with your SSD number, e.g., select volume 6).
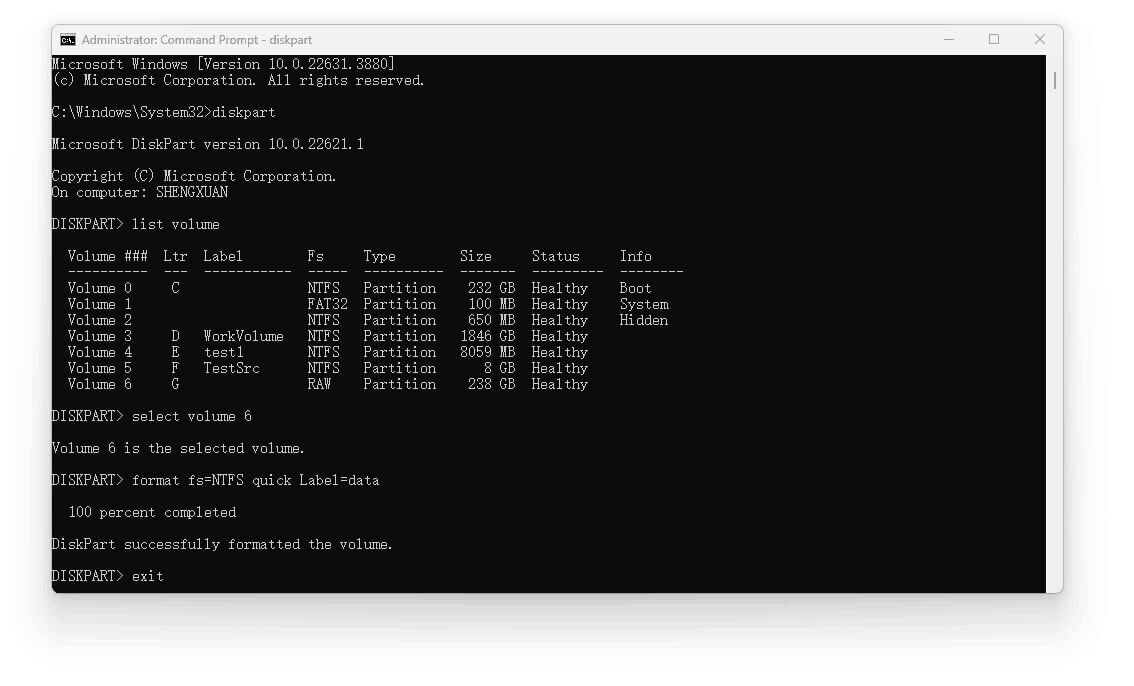
- Type format fs=NTFS quick label=data. (note that data can be any valid label) This will reformat the SSD. (Extreme caution: this deletes everything).
Wipe SSD on Windows: Why Formatting Isn't Enough
Many users ask: "Is formatting enough to delete my bank details or private photos?" The answer is No.
When you perform a "Quick Format," Windows simply deletes the "address book" of your files. The actual data remains on the NAND flash chips until it is overwritten. Data recovery software can easily bring these files back.
To wipe SSD on Windows properly, you must use a method that triggers the SSD TRIM command or uses a certified data erasure algorithm (like DoD 5220.22-M). This ensures that the electrons in the cells are actually cleared, making recovery impossible even for experts.
Step-by-Step: Permanently Wipe SSD Data for Resale
If you are preparing to sell your computer or SSD, follow this process to ensure a 100% secure wipe.
Option A: Use Manufacturer Tools
Brands like Samsung (Samsung Magician), Western Digital (Dashboard), and Crucial (Storage Executive) provide "Secure Erase" utilities. These send a hardware command to the SSD controller to flush all cells instantly.
Option B: Use Professional Data Erasure Software
If your drive manufacturer doesn't provide a tool, use a certified eraser like DoYourData Super Eraser.
DoYourData Super Eraser
- 100% safe, no damage to SSD when wiping data.
- Certified data erasure methods to ensure wiping data permanently.
- Three data erasure modes for flexible data wiping in any case.
Then you can follow the steps to start wiping SSD on Windows:
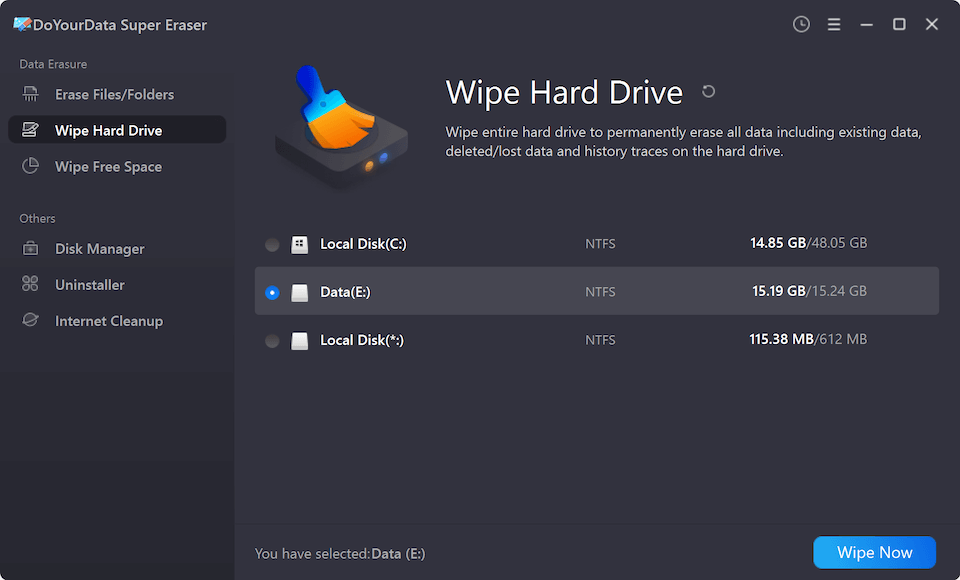
Step 1. Open the software DoYourData Super Eraser. Select 'Wipe Hard Drive': This mode targets the entire device rather than just a folder. Select the specific SSD drive you want to sanitize.
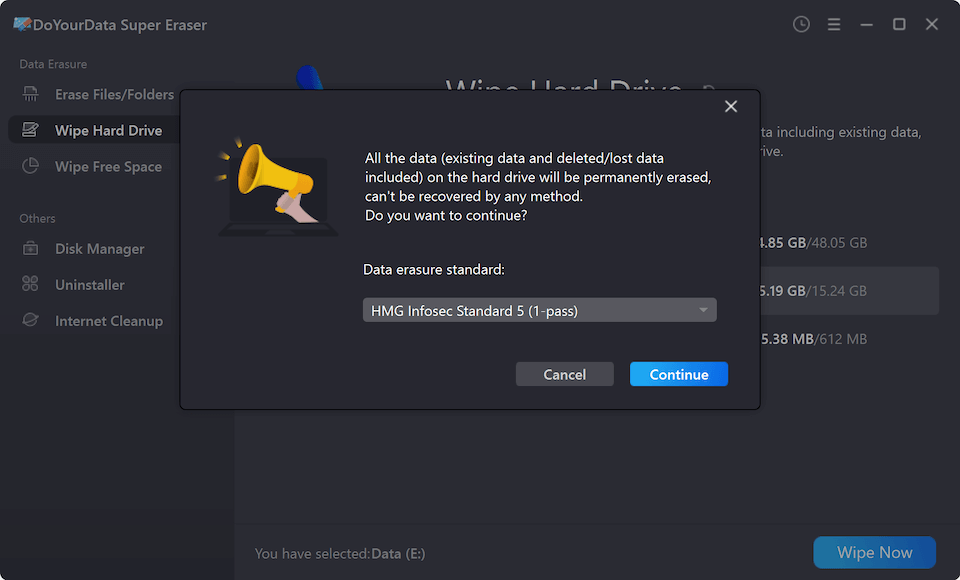
Step 2. Pick an erasure standard, like U.S. Army AR380-19 or DoD 5220.22-M. click Continue button.
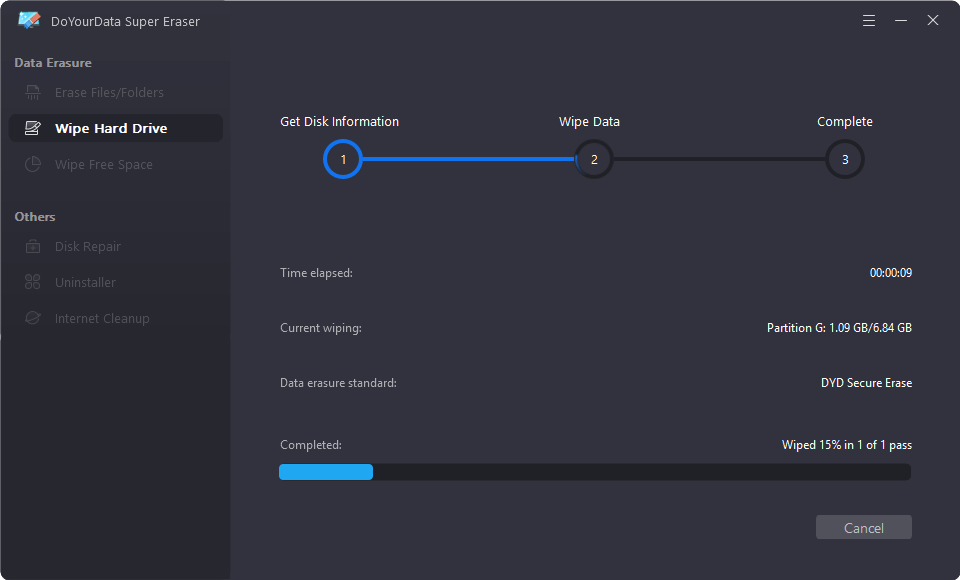
Step 3. Wait for the process to complete. Once finished, the SSD is "cleaner than new"—no software on earth can recover the previous data.
Troubleshooting: SSD Not Showing Up in Windows?
If you've tried the steps above and your SSD is missing, check these common fixes:
- The "Uninitialized" State: As mentioned in the Disk Management section, new drives must be initialized before Windows can "see" them.
- Driver Issues: Open Device Manager, expand "Disk drives," right-click your SSD, and select Update driver.
- BIOS/UEFI Settings: Restart your PC and enter BIOS (usually F2 or Del). Ensure the SATA port or M.2 slot is "Enabled."
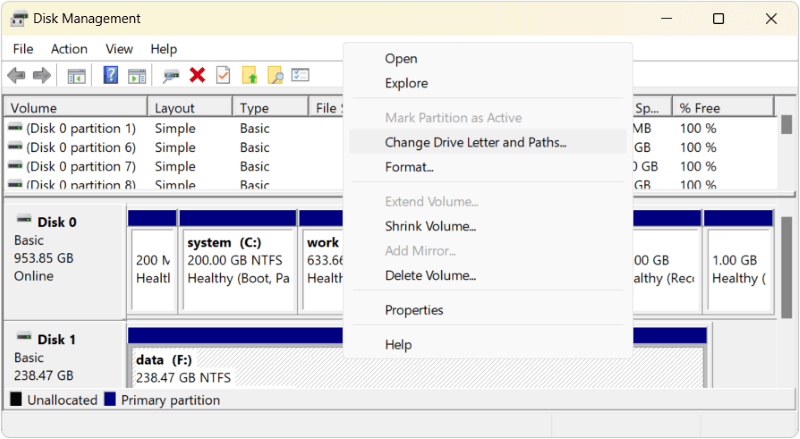
- Letter Conflict: Sometimes Windows forgets to give the SSD a letter. In Disk Management, right-click the drive and select Change Drive Letter and Paths to manually assign one.
Conclusion & Maintenance Tips
Knowing how to format SSD on Windows 11/10/8/7 is an essential skill for any PC owner. It allows you to troubleshoot errors and keep your system organized. However, remember that wiping an SSD is the only way to protect your identity when the drive leaves your hands.
Pro-Tips for SSD Health:
- Don't Defragment: Never "Defrag" an SSD. It doesn't help speed and actually wears out the drive. Windows "Optimize" (TRIM) is all you need.
- Leave 10-20% Space Empty: SSDs use "Over-provisioning" to move data around. Filling it to 100% will slow down the drive significantly.
- Check Health Regularly: Use tools like CrystalDiskInfo to monitor the "Total Host Writes" and "Health Percentage" of your SSD.
By following this guide, you can confidently manage your storage, optimize performance, and keep your personal data safe from prying eyes.
DoYourData Super Eraser
DoYourData Super Eraser, the award-winning data erasure software, offers certified data erasure standards including U.S. Army AR380-19, DoD 5220.22-M ECE to help you securely and permanently erase data from PC, Mac, HDD, SSD, USB drive, memory card or other device, make data be lost forever, unrecoverable!
Written & Updated by Shirly Chen
Shirly Chen has been writing data recovery, data erasure articles for DoYourData over 4 years. She has been working as a professional website content writer & editor for quite a long time. She also writes articles about disk clone, Mac optimization, disk backup, etc.