Quick Navigation:
- Why Clone the Time Machine Drive to the New Drive?
- Preparation for the Clone
- Methods for Cloning the Time Machine Drive
- Conclusion
- Clone Time Machine Drive To New Drive FAQs
Time Machine is a good way to back up your Mac, but what if you need more room or your drive starts to fail? Don't worry; copying your Time Machine drive to a new one is not as hard as you think. This process ensures that your important data stays safe and easy to reach, whether upgrading to a bigger drive, replacing a broken one, or just making a second copy.
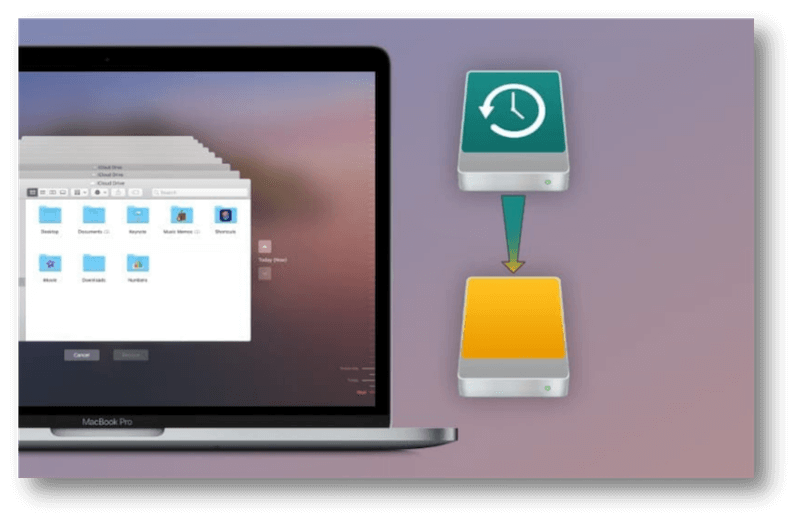
You could have peace of mind if you knew that your important files, pictures, and system settings were safely copied to a new, safe drive. We'll make cloning your Time Machine drive easy and stress-free by taking you through each step in this guide. Are you ready to improve your backup plan and keep your info safer than ever? Let's start copying your Time Machine drive to a new one.
Why Clone the Time Machine Drive to the New Drive?
Here are the reasons why you may need to clone your Time Machine drive:
![]() Upgrading to a Larger Drive
Upgrading to a Larger Drive
Your current Time Machine drive might run out of room as you add more data. You can keep backing up your data without stopping by cloning your Time Machine drive to a new, bigger drive. This process moves your current files and lets you keep adding to your backup archives without problems.
![]() Replacing a Failing Drive
Replacing a Failing Drive
Drives are made of metal and can break down over time. If your present Time Machine drive is making strange noises, running slowly, or giving you a lot of errors, you need to clone it to a new drive right away before it fails. This proactive method helps you keep your data safe and ensures you have a good backup system.
![]() Creating a Secondary Backup
Creating a Secondary Backup
Having multiple backups is a smart way to keep your info safe. By copying your Time Machine drive to a new one, you add an extra layer of security and make sure you have a copy of your data. This backup can be very helpful if one of the drives fails, something gets stolen, or something unexpected happens.
Preparation for the Clone
Here are the steps you need to take before cloning your Time Machine drive:
🔘 Selecting the Right Drive
It is important to pick the right drive to clone your Time Machine backup. Ensure the new drive can hold all your files and any new data you may add. For faster backup and repair, choose a drive with faster speeds, like a solid-state drive (SSD).
🔘 Formatting the New Drive
You must prepare the new drive so that Time Machine can work with it before you start cloning.
Open Disk Utility on your Mac, connect the new drive and pick it up from the list. Then click the "Erase" button.
Choose a file system (APFS for later macOS versions or Mac OS Extended (Journaled) for older versions) and give the drive a name. Press "Erase" to clean up the drive.
🔘 Checking the Current Time Machine Backup
Before you start the cloning process, ensure your current Time Machine file is up to date. Open the Time Machine settings and see how the last backup is going. Start a manual backup to ensure all of the most current changes are included.
Methods for Cloning the Time Machine Drive
You can clone your Time Machine drive using Disk Utility for a straightforward approach or third-party software.
🔘 METHOD 1: Clone Disk Using Disk Utility
Since it's built into macOS and is a powerful tool, Disk Utility is an easy way to copy your Time Machine drive. To use Disk Utility to make a copy of your drive, do these things:
Step 1. You should connect the old and new Time Machine drives to your Mac.
Step 2. You can open Disk Utility by going to Applications > Utilities.

Step 3. From the list on the left, choose the new drive where you will clone to. In the window, click on the Restore tab.
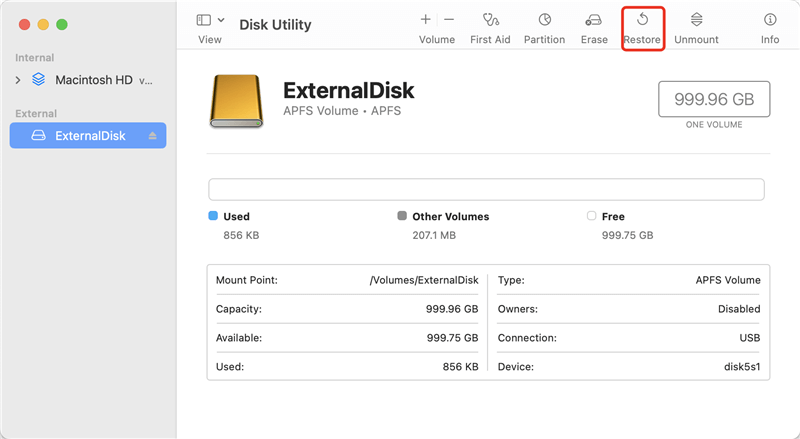
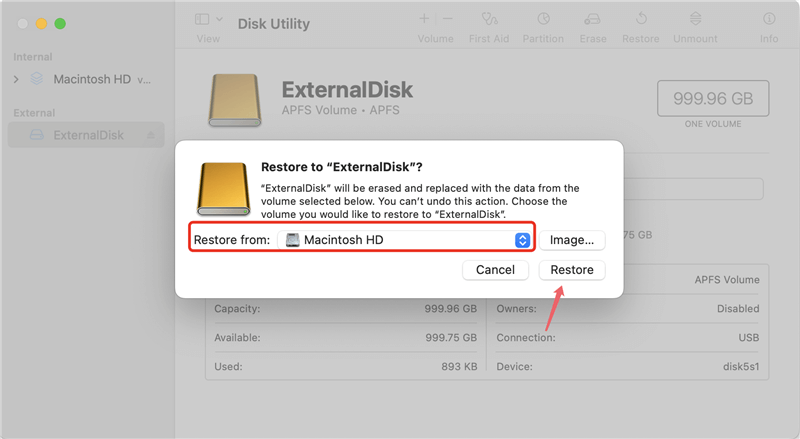
Step 4. Select your Time Machine drive from the drop-down list of Restore from field. Press Restore to start the cloning process.
🔘 METHOD 2: Third-Party Disk Cloning Software
DoYourClone for Mac is a strong third-party app created to copy and back up your macOS drives fully. It's a great choice for moving your Time Machine drive to a new one because it has flexible and advanced features. To do this with DoYourClone for Mac, follow these steps:
Step 1. Download and Install the Software.
Start by going to the DoYourData Software website and getting DoYourClone for Mac. You can install the app by dragging it into the Applications area and starting it up.
DoYourClone - Reliable Disk Clone Software
- Clone Time Machine drive to another drive easily and fast.
- Fully clone all the data from one drive to another drive.
- Support creating bootable clone for macOS system drive.
Step 2. Prepare Your Drives.
You should connect the old and new Time Machine drives to your Mac. Make sure the new drive is set up correctly and ready to copy. If you can't, use Disk Utility to format it using the right file system.
Step 3. Select Source and Destination.
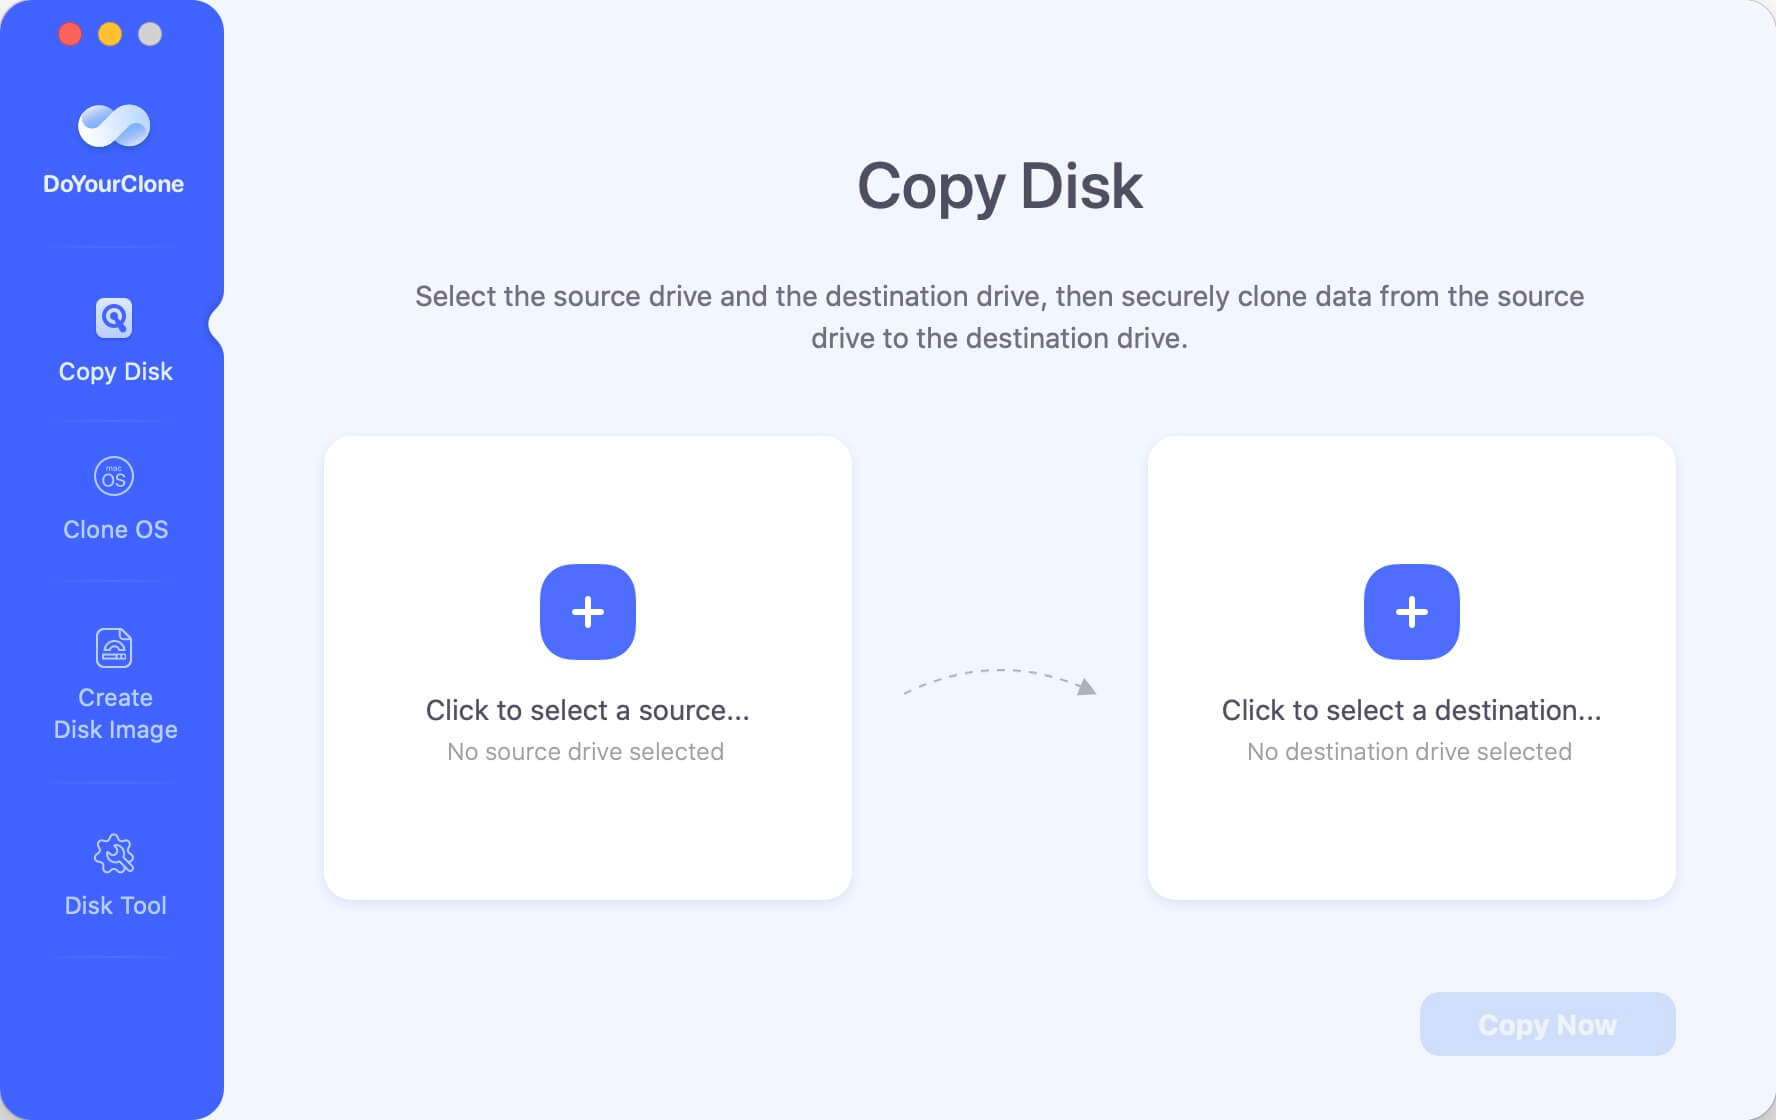
Start DoYourClone for Mac and select the Copy Disk mode. Pick the drive that you use for Time Machine as the source. Then, choose the new drive as the place to go. The application will show you the source and target drives so you can be sure.
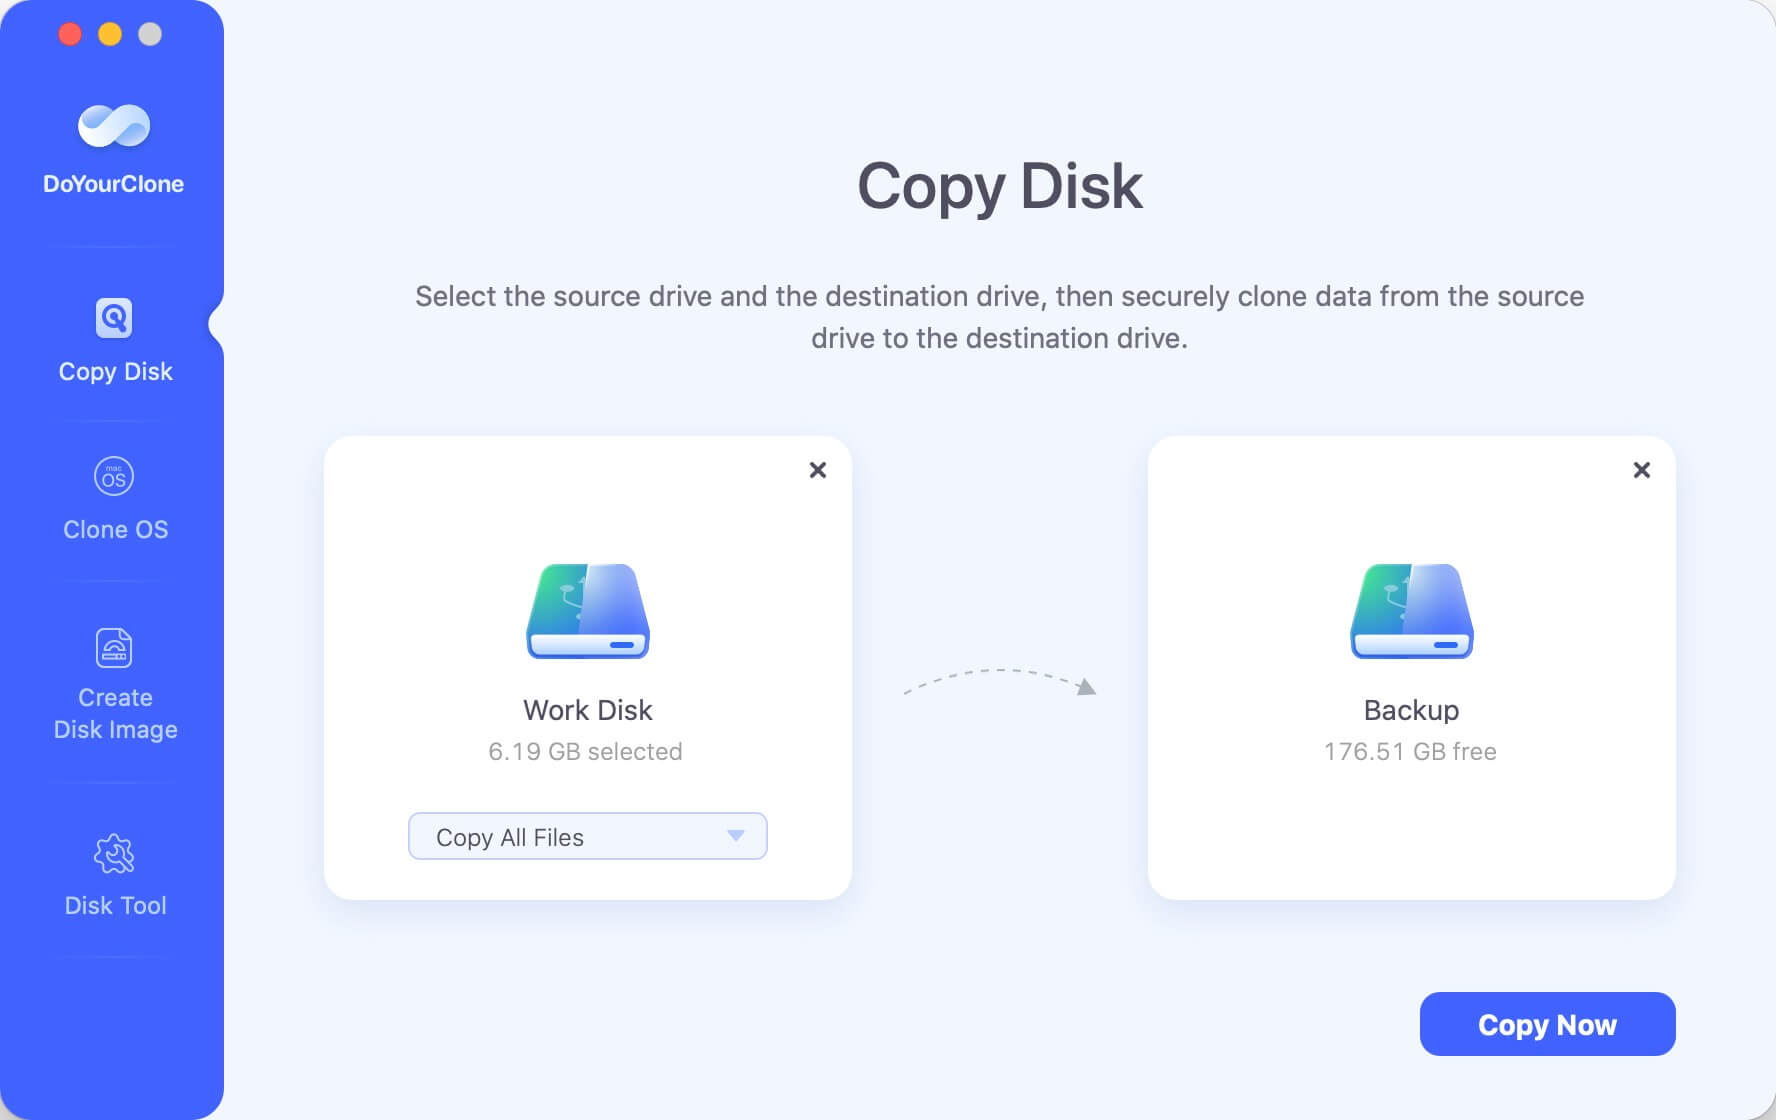
Step 4. Configure Clone Settings.
The clone software lets you change how cloning works. You can clone all files, choose which folders to copy, which files to leave out and change other settings as needed. To make an exact copy of your Time Machine backup, make sure the Copy All Files choice is chosen.
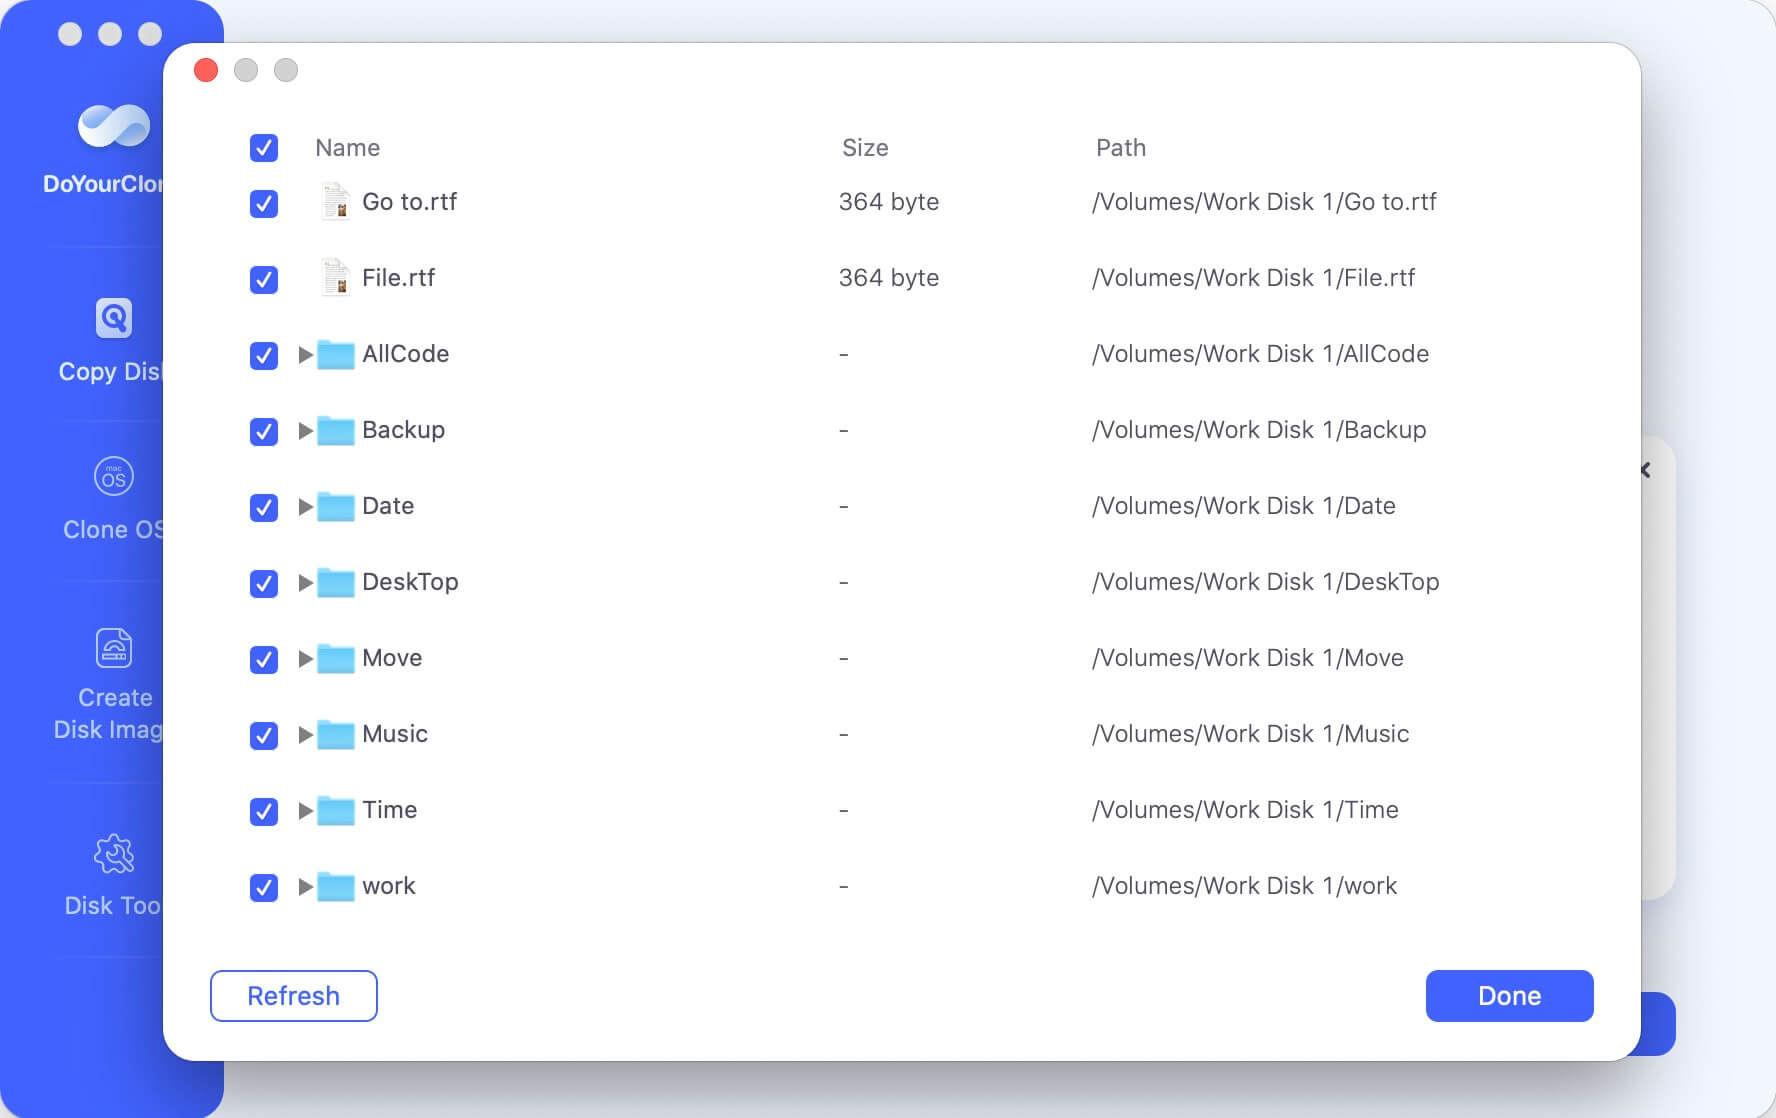
Step 5. Start the Cloning Process.
To start the process, click the Copy Now button. DoYourClone for Mac will start moving your file from Time Machine to the new drive. How long the cloning takes depends on how big your backup is and how fast your drives are.
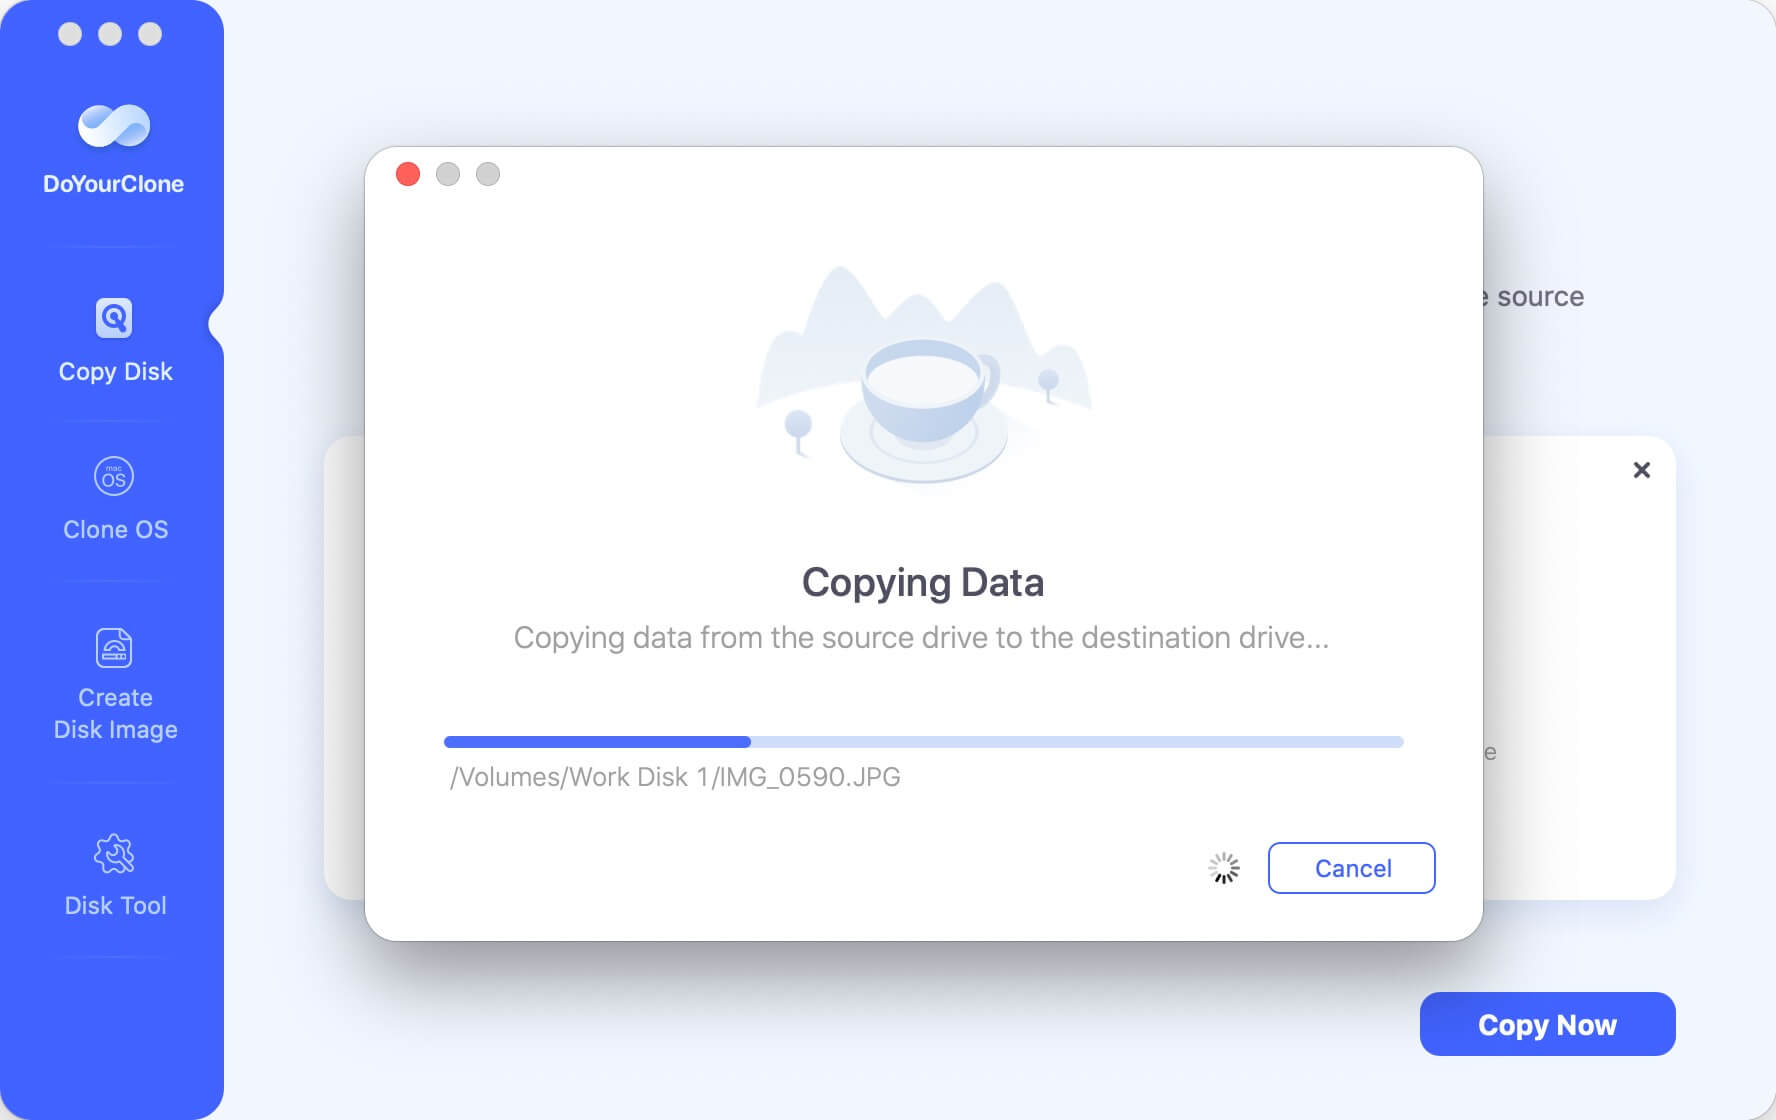
Step 6. Verify the Clone.
Once the cloning is done, check the new drive's data to ensure all the files were copied correctly. To ensure the new drive works, open Time Machine's settings and choose it as your backup disk.
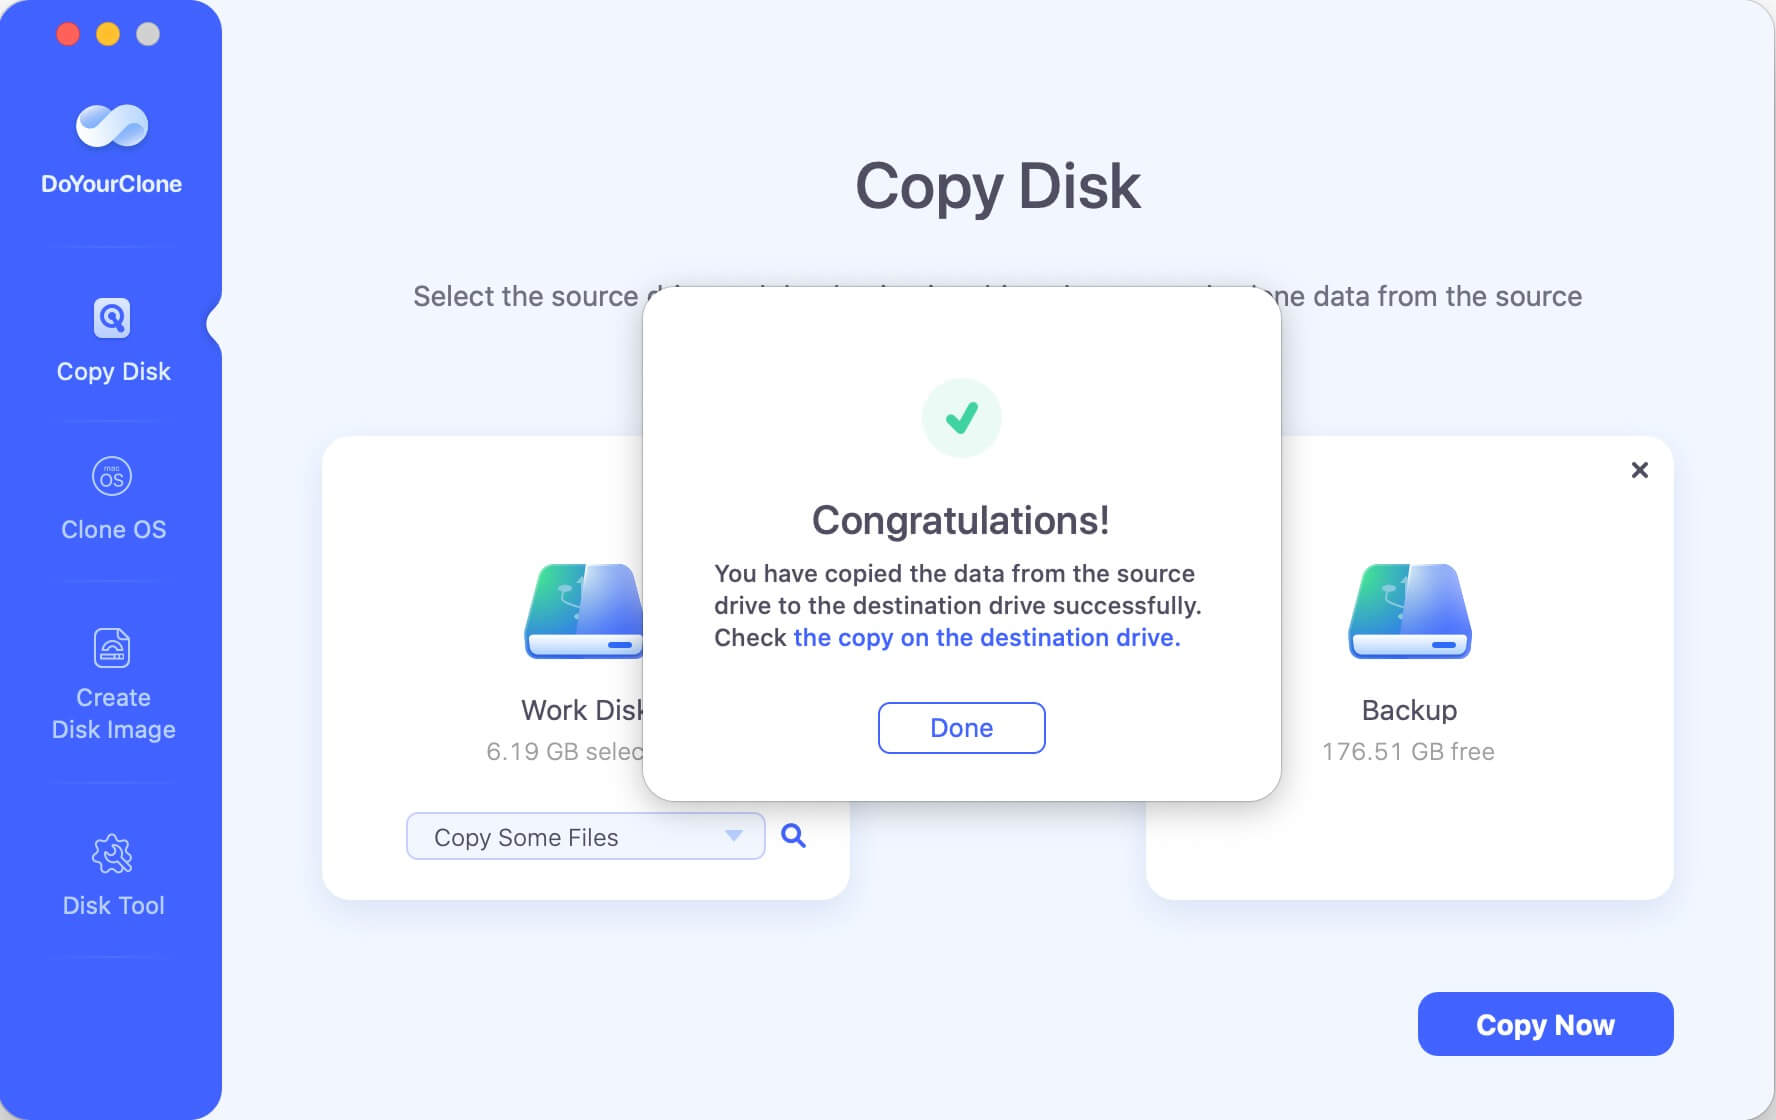
Conclusion:
A simple way to keep your files safe and easy to access is to copy your Time Machine drive to a new one. This process protects your important data and improves your backup strategy, whether adding a second copy, upgrading to a bigger drive, or replacing a failing one.
If you follow the steps for Disk Utility and third-party software like DoYourClone for Mac, moving your backups will be easy and stress-free. Updating your backup system regularly and ensuring the new drive works will give you peace and ensure your data is safe and secure.
Clone Time Machine Drive To New Drive FAQs
1. When would you need to clone Time Machine drive?
You may need to clone Time Machine drive in the following cases:
- Upgrading to a larger drive
- Replacing a failing drive
- Creating a secondary backup
2. What are the methods to clone Time Machine drive?
There are 2 main methods to clone Time Machine drive: Cloning with system built-in tool Disk Utility, or using third-party disk cloning software.
3. How to clone Time Machine drive in Disk Utility?
You can do as follows to clone Time Machine drive with Disk Utility:
Open Disk Utility from Applications > Utilities.
Select the destination drive and click Restore button.
Then select your Time Machine drive in the Restore from field.
Click the Restore button and then the cloning process will start.
4. What's the popular third-party disk cloning software for Mac?
Here are some popular third-party Mac disk clone software:
- DoYourClone for Mac
- AweClone for Mac
- AOMEI Backupper
- Acronis True Image
- Clonezilla
5. How to copy Time Machine drive using disk clone software?
The best Mac disk cloning software is DoYourClone for Mac. You can use it to copy the Time Machine drive as follows.
- Download and install the software on your Mac.
- Connect both the Time Machine drive and the destination drive.
- Start the software and choose Copy Disk option.
- Select the Time Machine drive as source, the other drive as destination.
- Click the Copy Now to start the cloning process.
DoYourClone for Mac
DoYourClone for Mac, one of the best Mac disk cloning software, can help you clone HDD, SSD, external storage device on Mac, upgrade HDD to SSD, create full disk image backup, etc. It also can clone everything from your Mac to an external HDD/SSD and create a full bootable clone backup. 100% safe and easy-to-use.