Quick Navigation:
- Understanding Cloning vs. Backup
- How to Choose Your Cloning Method
- Cloning with Disk Utility
- Clone Hard Drive to Larger Drive using use DoYourClone for Mac
- Booting from the Cloned Drive
- Additional Considerations
- Conclusion
You can add more space to your Mac by cloning a drive to a larger one. That is necessary to improve speed, keep track of your growing data, or strengthen your backups. During this process, an exact copy of your current drive is made, with all your files, programs, and system settings still present.
This guide will tell you everything you need to know, whether you use third-party software like DoYourClone for Mac or one of the tools that come with macOS, like Disk Utility. A smooth shift depends on careful planning, such as ensuring enough space and backing up data.
Following these steps, you can move your all files from Mac drive to a larger drive without problems, make the most of your storage space, and keep your Mac's environment safe.
Understanding Cloning vs. Backup
Knowing the difference between backing up and cloning your files is important before you start. A clone makes an exact copy of your source drive, including the operating system, programs, files, and even hidden settings.
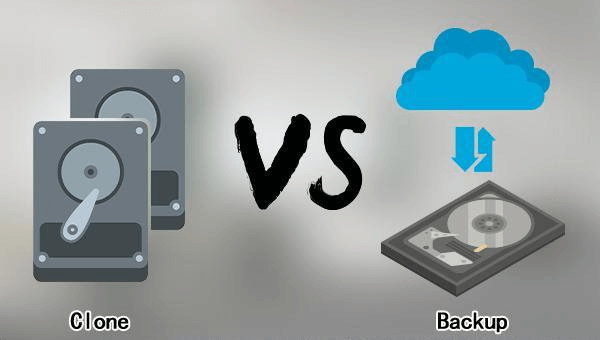
You can start your Mac from the new drive like nothing has changed. On the other hand, a backup only copies your user info and files, not the whole system. That is the best way to protect your important files and pictures, but your Mac won't be able to use the new drive immediately.
How to Choose Your Cloning Method
On macOS, there are several great programs for copying disks. Here are two well-known choices:
- Disk Utility (Built-in): A useful tool called Disk Utility comes with every Mac. It can also be used to make copies of files. It's not the most feature-packed choice but it is free and works well for basic cloning needs.
- Third-party cloning software: Several third-party programs offer advanced features such as cloning sectors individually, making schedules, and reporting progress. Carbon Copy Cloner, SuperDuper!, and DoYourClone for Mac are popular picks. These often cost money, but they may be worth it because they have more features and are easier to use.
Preparing for the Clone
Take some time to get ready before you start your cloning adventure:
- Verify Compatibility: Make sure that your Mac can handle the new file. It's always a good idea to make sure, but most new Macs use SATA or NVMe links.
- Backup Crucial Data: Even though cloning makes a full copy, having an extra copy of important files like photos or papers you can't replace is always a good idea. You might want to use cloud storage or a portable hard drive.
- Format the New Drive: Before cloning, format the new drive with Disk Utility for the best speed. Pick APFS or "Mac OS Extended (Journaled)" as the file type.
Cloning with Disk Utility
With the system built-in tool Disk Utility, you can clone your drive to a bigger one for free. Here are the steps:
- Connect both drives: Make sure that the source drive (the smaller one) and the new drive (the bigger one) are hooked to your Mac.
- Launch Disk Utility: Find Disk Utility by going to Applications > Utilities > Disk Utility.
![clone small hard drive to larger hard drive on Mac]()
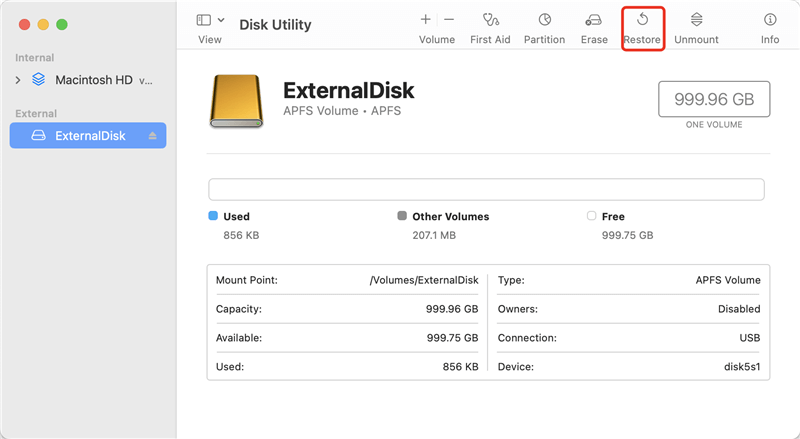
- Locate the source drive: Choose the bigger disk you want to copy from the list on the left.
- Access the "Restore" Tab: At the top of the Disk Utility window, click on the "Restore" tab.
![clone small hard drive to larger hard drive on Mac]()
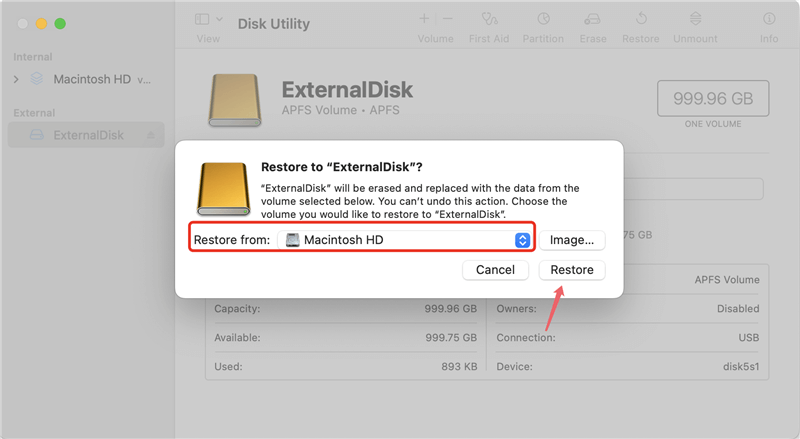
- Choose the destination drive: Choose your source drive from the "Restore from" drop-down box. Make sure you choose the right drives. You could lose your data if you clone to the wrong drive by chance.
![clone small hard drive to larger hard drive on Mac]()
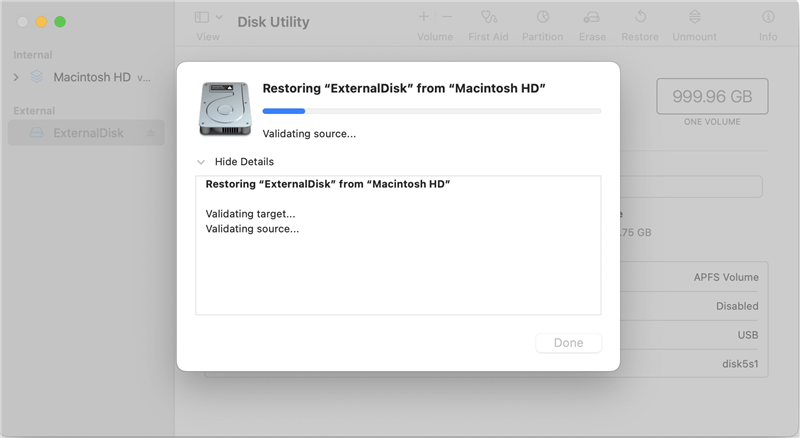
- Initiate the Clone: Click the "Restore" button in the bottom right. It will ask you to confirm your chosen source and destination drives. Check everything again, then click "Restore" to start cloning.
![clone small hard drive to larger hard drive on Mac]()
💡 Tips: Ensure to choose the right drive when cloning as the clone process will overwrite the destination drive. Otherwise, it would cause data loss.
Clone Hard Drive to Larger Drive using use DoYourClone for Mac
For new macOS systems, the disk cloning with Disk Utility is not very effective. The cloned drive would not boot up normally in some cases. If you want to create an exact and bootable copy of your Mac drive, you can try professional and reliable third-party disk cloning tool, such as DoYourClone for Mac.
It's easy and safe to use DoYourClone for Mac. Feel free to use DoYourClone for Mac whenever you need to move your system drive to a new SSD or update your HD from old to new, from small to large SSD. The software is effective to clone macOS and ensure to create a compete and bootable clone.
DoYourClone - Reliable Disk Clone Software
- Most effective disk cloning tool for macOS.
- Copy system, data, apps to a new drive and make it bootable.
- Simple to use and 100% secure for Mac disk clone.
To make a copy of your hard drive on a bigger one without having to reinstall macOS and apps, do the following:
Step 1: First, ensure to connect the new and bigger hard drive to your Mac. Then run the software and change to the mode Clone OS.
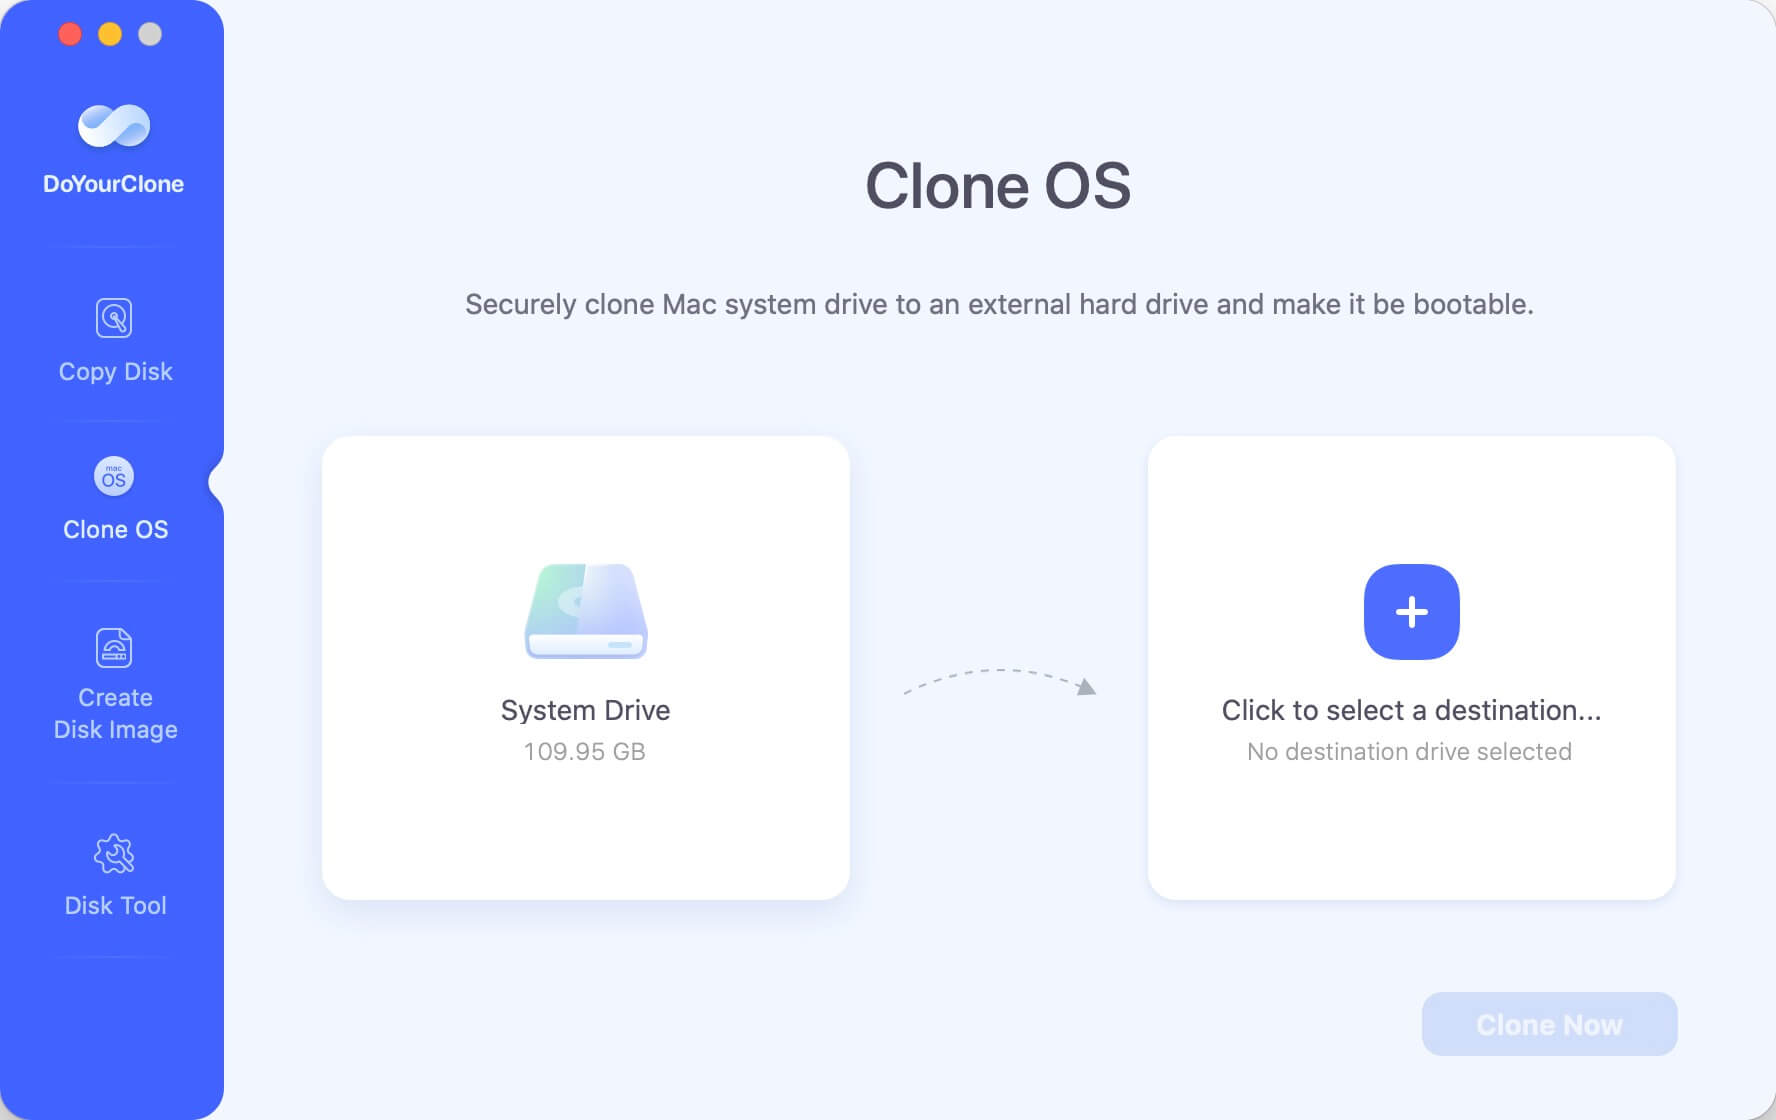
Step 2: In this mode, the system drive will be selected as source automatically. You can just select the bigger disk as destination drive.
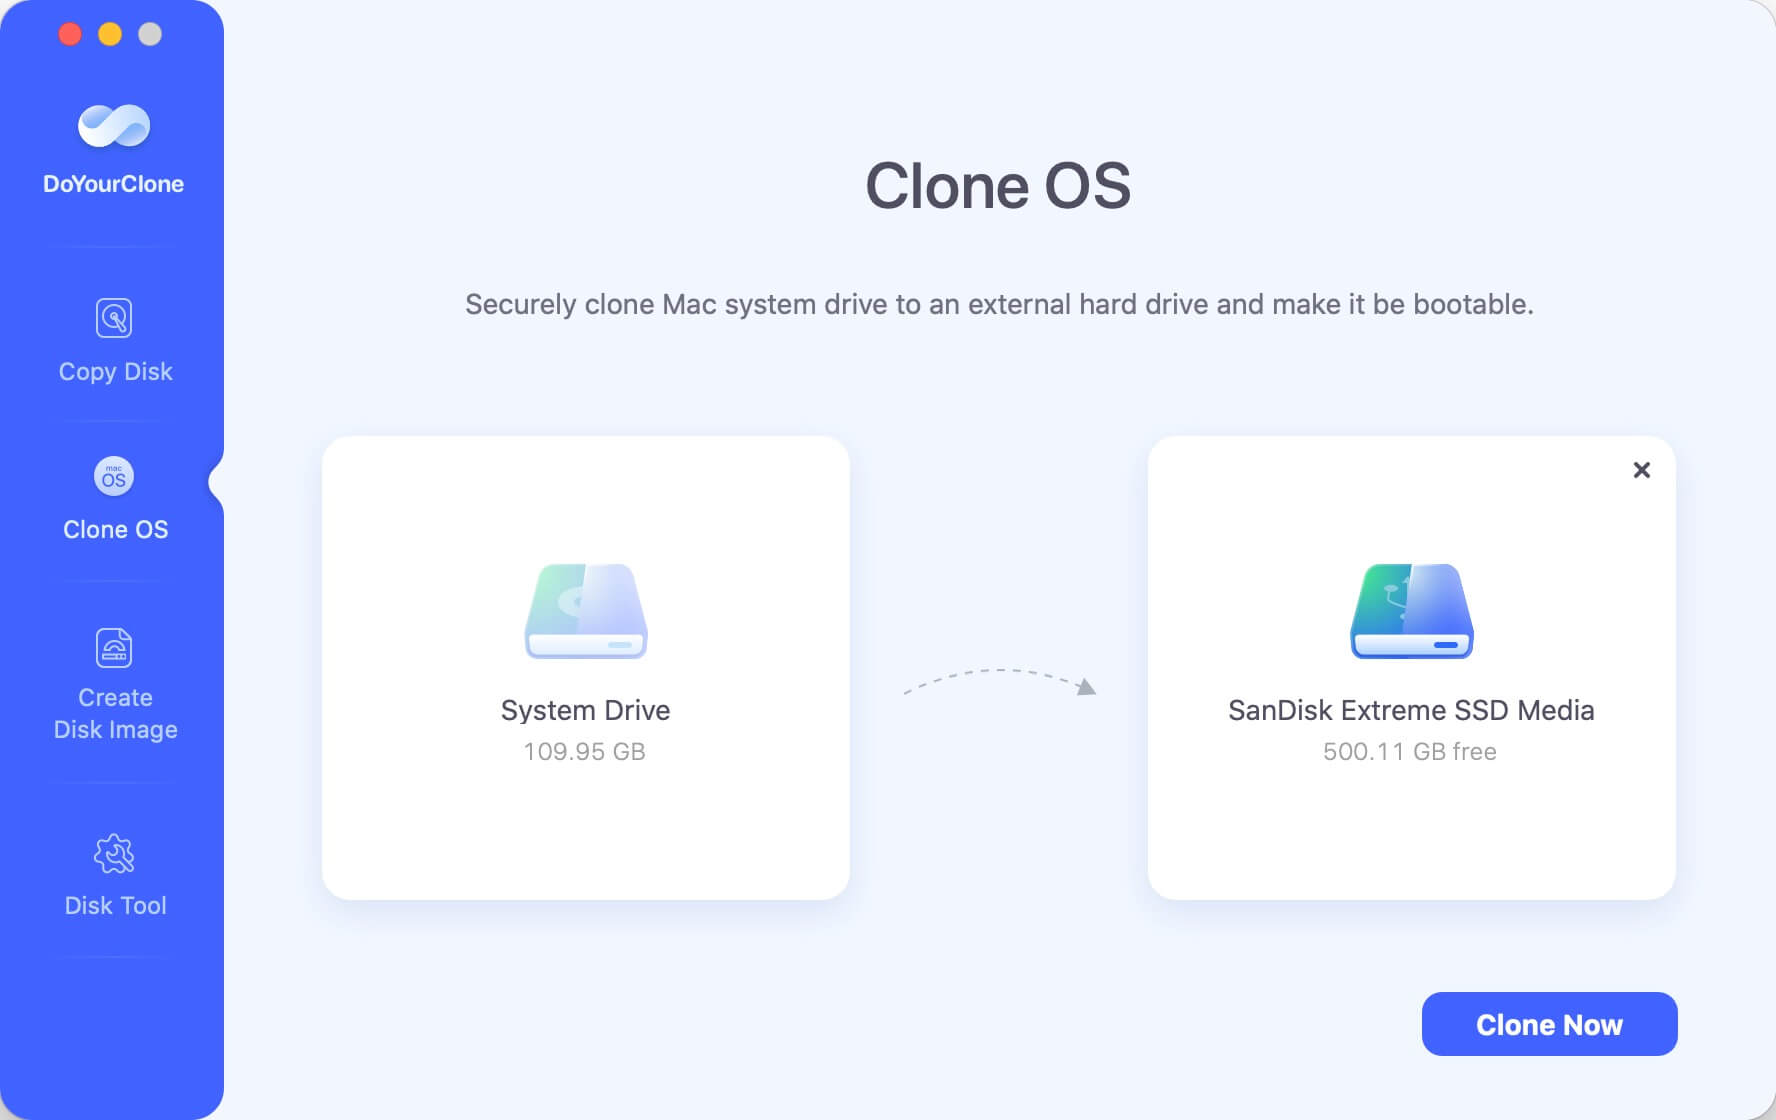
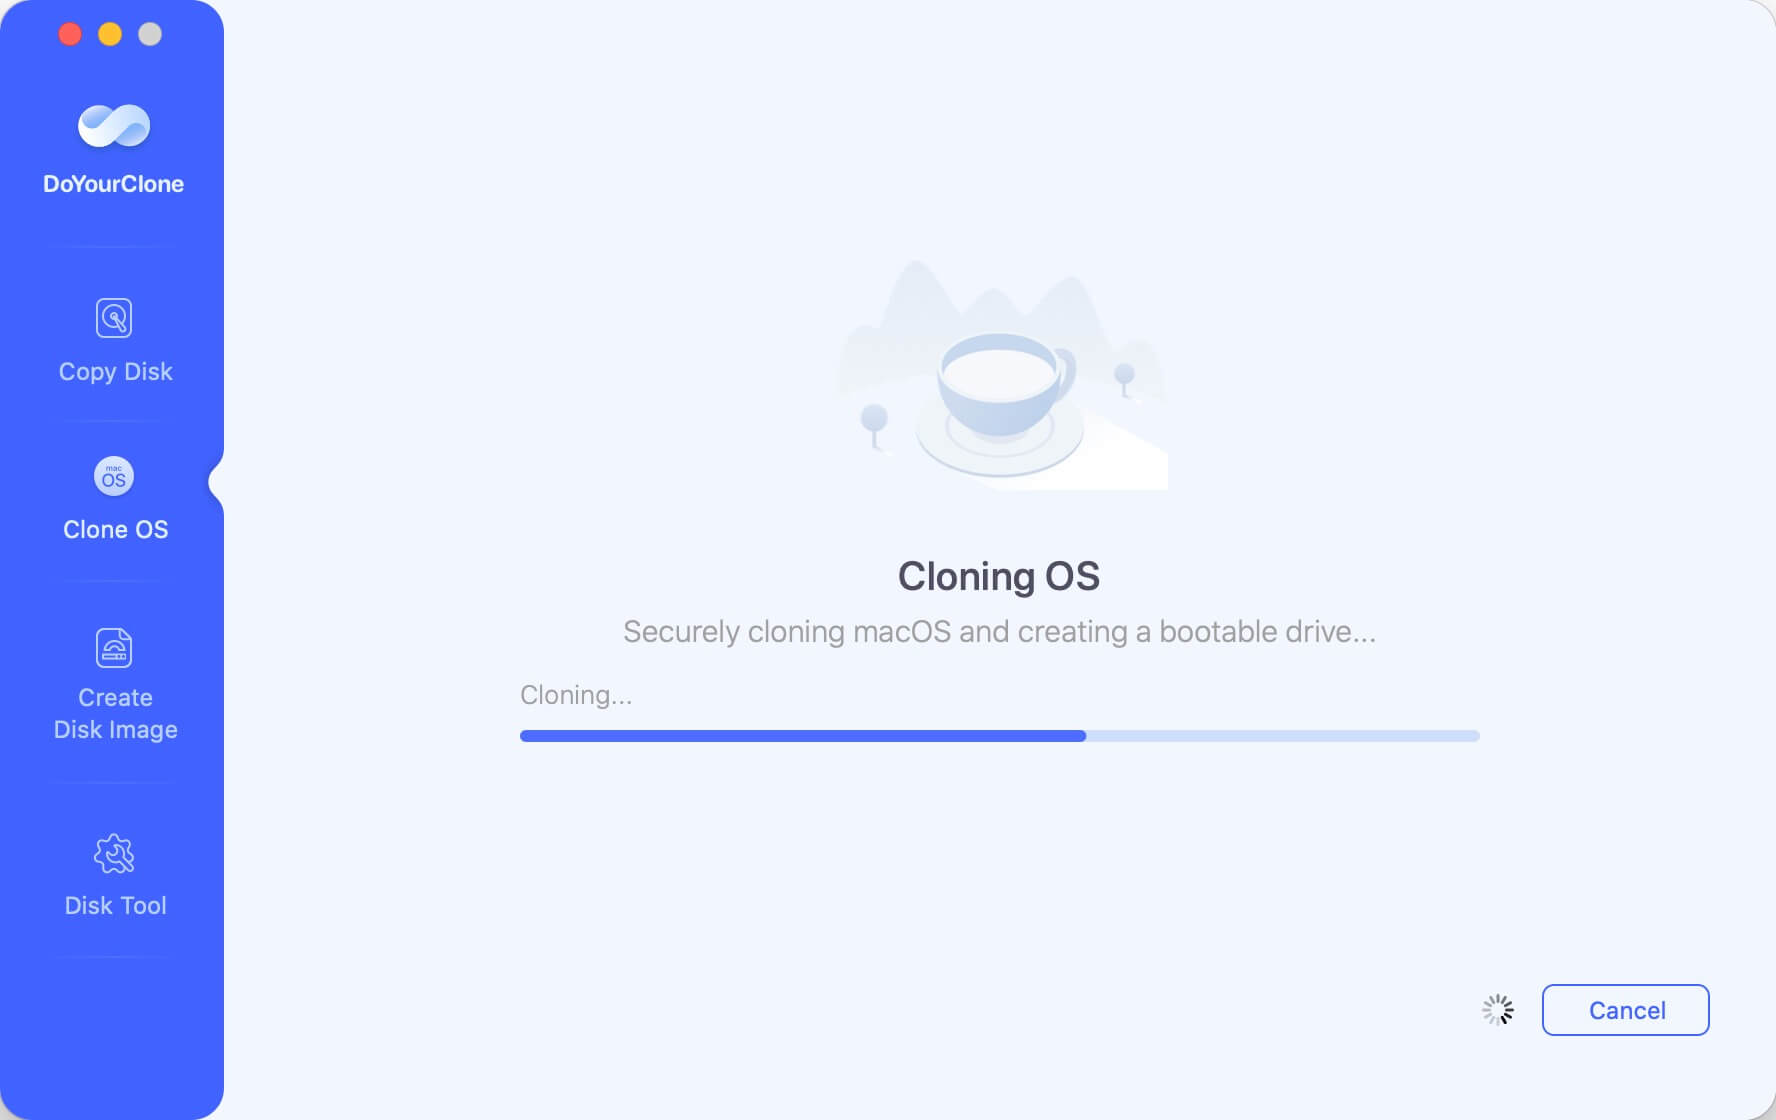
Step 3: Click "Copy Now" to move on. The software will start the clone the system drive to the bigger disk. It may take some time depending on the size of your system drive. Wait for the process to complete.
Step 4: A message will say the process is done after cloning the drive to the bigger one successfully.
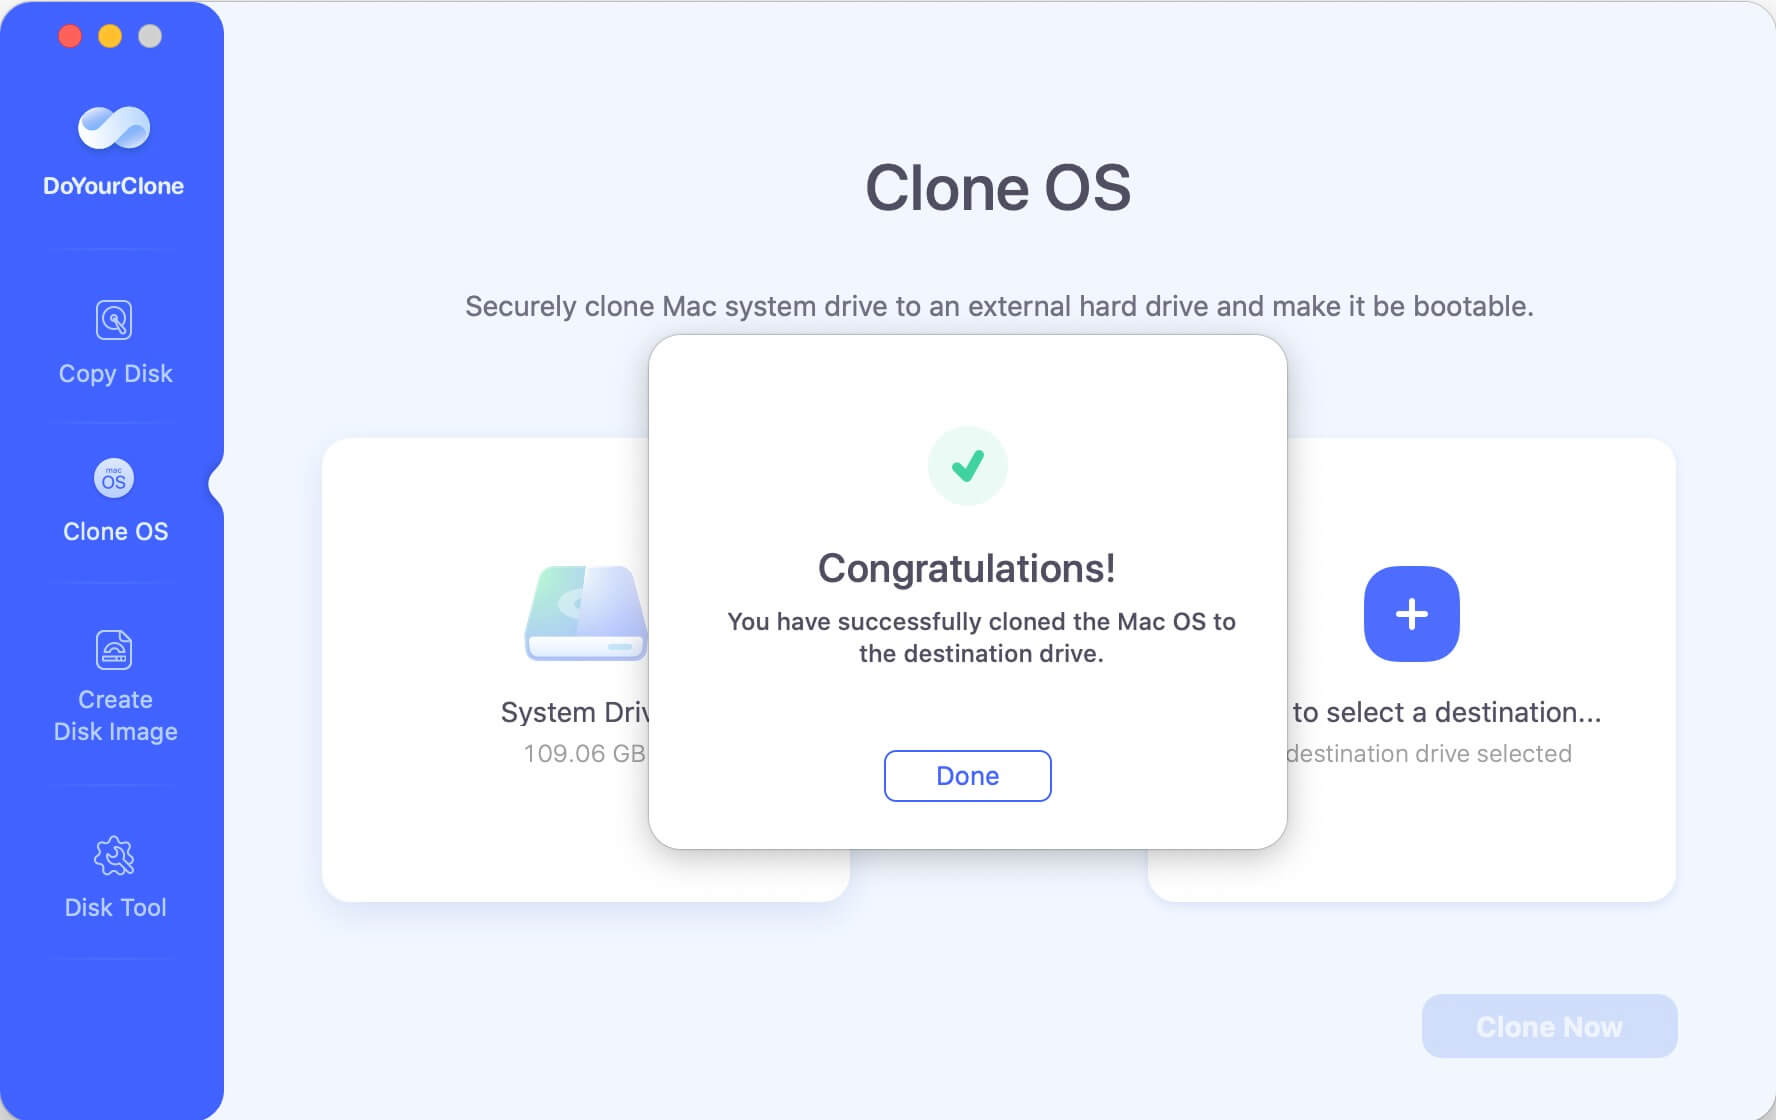
Now all the system data/settings, personal files and applications are copied to the destination drive. You can go to the destination drive to check it and also, the destination bigger drive will be bootable.
Booting from the Cloned Drive:
After cloning the Mac drive to a bigger one with DoYourClone for Mac, the bigger drive will be bootable and you can boot from the cloned drive to check if it's successful. Depending on what you want to happen, there are two main options:
Scenario 1: Starting up mostly from the new drive
- Shut down your Mac.
- Remove the source drive (the smaller one) from the computer if it is an external drive. If the source drive is internal, you can usually leave it attached, but it might be best to disconnect it to test the new drive to make sure it works right.
- Turn on your Mac.
- You're good to go if your Mac starts up from the cloned drive. The new drive will be your main store from now on.
Scenario 2: Keeping Both Drives Connected (Dual Booting)
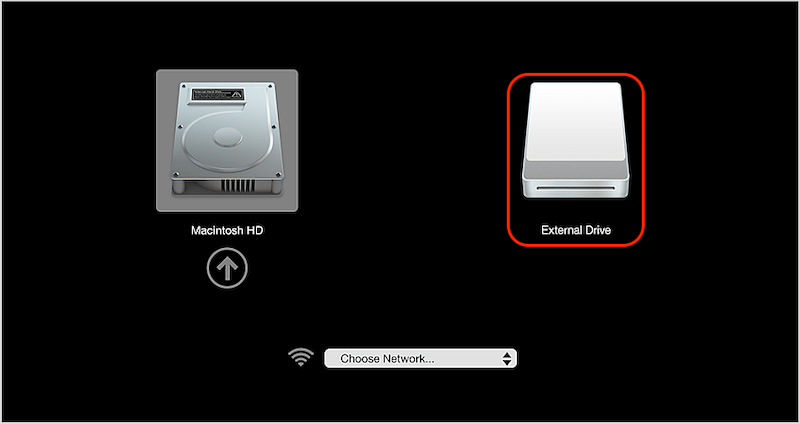
- While your Mac starts up, hold down the Power button (or Option key for Intel Mac). That will take you to the Startup Manager screen.
- Choose the cloned drive (the new, bigger drive) from the list of boot choices.
![clone small hard drive to larger hard drive on Mac]()
- Your Mac will boot from the cloned drive.
- To return to the first drive, repeat steps 1 and 2, choosing the source drive.
Additional Considerations:
- Partitioning the New Drive: You might want to split your new drive if it is much bigger than the source drive. That lets you divide the drive into different volumes, like one for your operating system and one for your files. You can divide your hard drive by disk utility.
- Data Migration Assistant: Apple's Migration Assistant might be a better choice than cloning very old Macs or moving user data and settings between systems that don't work with each other. You can access it by clicking Applications > Utilities > Migration Assistant.
![clone small hard drive to larger hard drive on Mac]()
- Choose Right Drive for Clone: When choosing the destination drive, ensure to select one which is compatible with macOS and ensure the size of the disk is enough to hold the cloned data from Mac drive.
Conclusion
If you have the right tools and are ready, cloning a small drive to a bigger one on a Mac is easy. If you follow these steps, the transition will go smoothly, and your data and settings will be saved, whether you use macOS's built-in tools or third-party disk cloning software.
Before starting, you should always back up your data, and later, you should check the cloned drive. By handling your storage upgrade correctly, you can improve your Mac's speed and ability to handle data. With this help, you should be able to successfully clone your drive, keeping your system running smoothly and efficiently.
DoYourClone for Mac
DoYourClone for Mac, one of the best Mac disk cloning software, can help you clone HDD, SSD, external storage device on Mac, upgrade HDD to SSD, create full disk image backup, etc. It also can clone everything from your Mac to an external HDD/SSD and create a full bootable clone backup. 100% safe and easy-to-use.

