What Is Fat32 File System, How to Format a Drive to FAT32?
![]() Ricky Lin updated on August 10, 2024
Ricky Lin updated on August 10, 2024
Quick Navigation:
- What Is FAT32 File System?
- When to Use FAT32 File System?
- Step-by-Step Guide for Format a Drive to FAT32 on Windows
- Step-by-Step Guide for Formatting a Drive to FAT32 on macOS
- Troubleshooting Common Issues
- How to Recover Lost Data After Formatting a Drive to FAT32
- Conclusion
The FAT32 (File Allocation Table 32) file system is one of the most enduring and widely-used file systems in the history of computing. Introduced by Microsoft in the mid-1990s, FAT32 is an enhancement of the earlier FAT16 system, designed to overcome the limitations of previous file systems. Its structure and functionality allow for greater storage capacity and improved file management.
Despite its age, FAT32 remains highly relevant in modern computing. It is supported by almost all operating systems, including Windows, macOS, Linux, and even less common ones like FreeBSD. This broad compatibility makes it a preferred choice for external storage devices such as USB flash drives and SD cards, which need to be used across different platforms. Additionally, many embedded systems and devices, including cameras, gaming consoles, and media players, rely on FAT32 due to its simplicity and reliability.
In this article, we will explore what the FAT32 file system is, discuss its advantages and disadvantages, explain when it is appropriate to use FAT32, and provide detailed instructions on how to format a USB drive/HDD/SSD or SD card to FAT32 on both Windows and macOS.
What Is FAT32 File System?
FAT32 is an extension of the older FAT (File Allocation Table) file systems, specifically FAT12 and FAT16. It was introduced with Windows 95 OSR2 to overcome the limitations of its predecessors, particularly in terms of maximum partition and file sizes. FAT32 utilizes 32-bit numbers to reference clusters on the disk, allowing for larger storage capacities and more efficient file allocation.
History and Development of FAT32:
The FAT family of file systems originated in the late 1970s and early 1980s, with FAT12 being the first iteration, used primarily in floppy disks. As storage technology evolved, FAT16 was introduced, supporting larger disks but still constrained by a 2GB maximum partition size. FAT32 was developed to address these limitations, enabling partitions up to 2TB (terabytes) and file sizes up to 4GB (gigabytes).
Key Characteristics and Features of FAT32:
- Maximum File and Partition Size: FAT32 supports individual files up to 4GB and partitions up to 2TB. This was a significant improvement over FAT16, which had a maximum partition size of 2GB.
- Compatibility: FAT32 is highly compatible with various operating systems, including Windows, macOS, Linux, and many embedded systems. This makes it an ideal choice for external storage devices like USB flash drives and SD cards.
- Simplicity: The structure of FAT32 is straightforward, making it easy to implement and manage. This simplicity also contributes to its widespread adoption.
Advantages and Disadvantages of FAT32:
Advantages:
- Wide Compatibility: FAT32 is recognized by almost all major operating systems, ensuring that devices formatted with FAT32 can be read and written by Windows, macOS, Linux, and even game consoles and cameras.
- Simplicity and Ease of Use: The FAT32 file system is relatively simple to use and understand, making it accessible for users who are not tech-savvy. Its straightforward structure allows for easy troubleshooting and repair.
- Efficient Storage Utilization for Smaller Drives: For storage devices under 32GB, FAT32 is highly efficient, offering good performance and minimal overhead.
Disadvantages:
- File and Partition Size Limitations: The 4GB maximum file size and 2TB partition size limits can be restrictive for modern applications, especially with the increasing size of high-definition videos and large software packages.
- Lack of Modern Features: Unlike more advanced file systems such as NTFS or exFAT, FAT32 lacks modern features like file permissions, encryption, and journaling, which are essential for data integrity and security.
- Performance Issues with Large Volumes and Files: As storage capacities and file sizes increase, FAT32 can become less efficient, leading to slower performance and increased fragmentation.
When to Use FAT32 File System?
Suitable Scenarios for Using FAT32:
- Cross-Platform File Sharing: FAT32 is ideal for devices that need to be used across multiple operating systems, such as USB flash drives and external hard drives.
- Older Hardware and Software: For older devices and systems that do not support newer file systems, FAT32 remains a reliable option.
- Small External Storage Devices: For USB flash drives and SD cards under 32GB, FAT32 provides efficient storage management and broad compatibility.
Cases Where FAT32 May Not Be Ideal:
- Handling Large Files: For applications requiring the storage of files larger than 4GB, FAT32 is not suitable due to its file size limitation.
- Modern Internal Hard Drives and SSDs: For internal storage in modern computers, more advanced file systems like NTFS (Windows) or APFS (macOS) are preferable due to their enhanced features and performance.
Step-by-Step Guide for Format a Drive to FAT32 on Windows
Using Windows File Explorer:
- Connect the Drive: Insert the USB flash drive or external hard drive into a USB port on your computer.
- Open File Explorer: Press Win + E to open File Explorer and locate the drive.
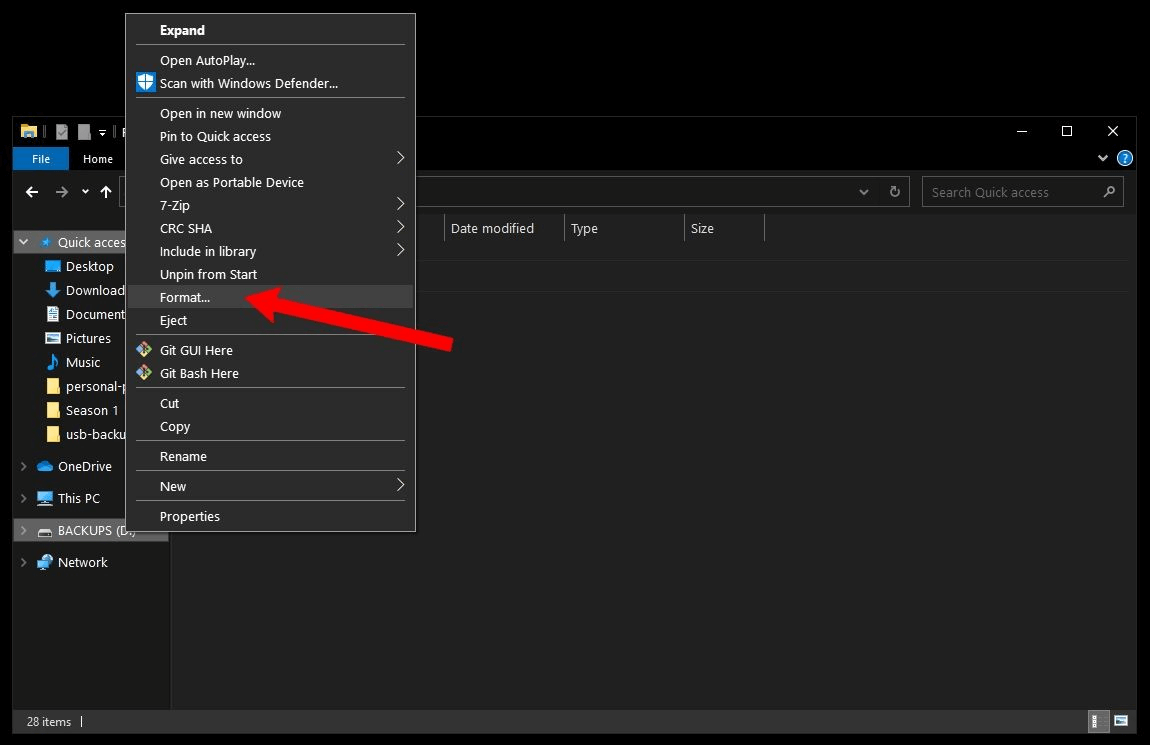
- Right-Click on the Drive: Find the drive in the list of available drives, right-click on it, and select "Format."
![Right-Click on the Drive]()
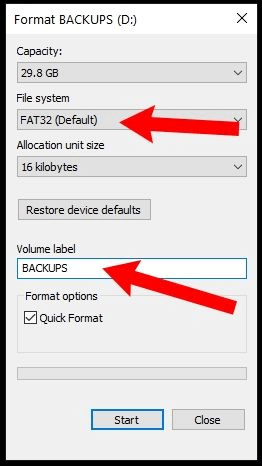
- Choose FAT32: In the Format window, select "FAT32" from the file system dropdown menu.
![Choose FAT32]()
- Start Formatting: Click "Start" to begin the formatting process. A warning will appear indicating that all data on the drive will be erased. Confirm to proceed.
After clicking "Start" to format your drive, your USB drive should now be formatted to use the FAT32 file system.
To double-check this:
- Open File Explorer.
- Right-click on your USB drive.
- Click "Properties."
A window will pop up, and you should see that the file system is now FAT32.
More tips:
- Uncheck Quick Format if you want do a full format on the drive.
- If the drive is not showing up in File Explorer, open Disk Management, right-click the drive and choose Format. Then select FAT32 as the file system, and format the drive.
- The formatted data is not lost for good and can be recovered by data recovery software.
Using Command Prompt:
- Open Command Prompt: Press Win + X and select "Command Prompt (Admin)" to open Command Prompt with administrative privileges.
- Diskpart Utility: Type diskpart and press Enter to launch the Diskpart utility.
- List Disks: Type list disk and press Enter to display all connected drives.
- Select Disk: Identify the target drive and type select disk X (replace X with the disk number) and press Enter.
- Format the Drive: Type format fs=fat32 quick and press Enter to format the drive to FAT32.
Using Rufus:
If your USB drive is larger than 32GB, you'll need to use a third-party program like Rufus to format it.
Rufus is a small and portable program, making it convenient to carry on a USB drive. You can plug it into any Windows computer to format other drives on the go.
To format your USB drive using Rufus:
- Download Rufus and double-click the .exe file to start the application.
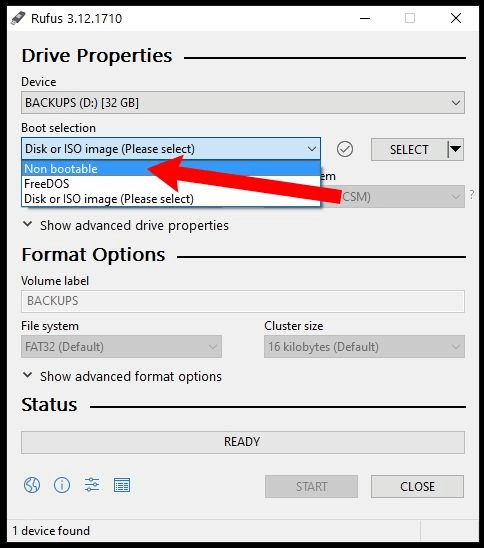
- Ensure your USB drive is selected.
- Click the "Boot selection" dropdown and select "Non bootable."
Next, click the "File system" dropdown and select "FAT32."
You can also change the name of your USB drive under "change the name of your USB drive" if you wish.
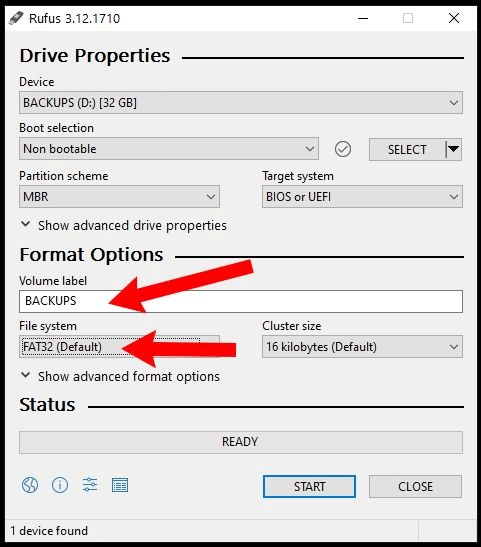
Then, click the "Start" button to begin formatting your drive. After a few seconds, your drive will be formatted to FAT32.
How to Use PowerShell to Format a USB Drive to FAT32:
While this method works with drives larger than 32GB, it can be quite slow. Formatting a 32GB drive may take up to an hour, depending on your computer's performance. However, if the previous methods are not an option for you, this method can still get the job done.
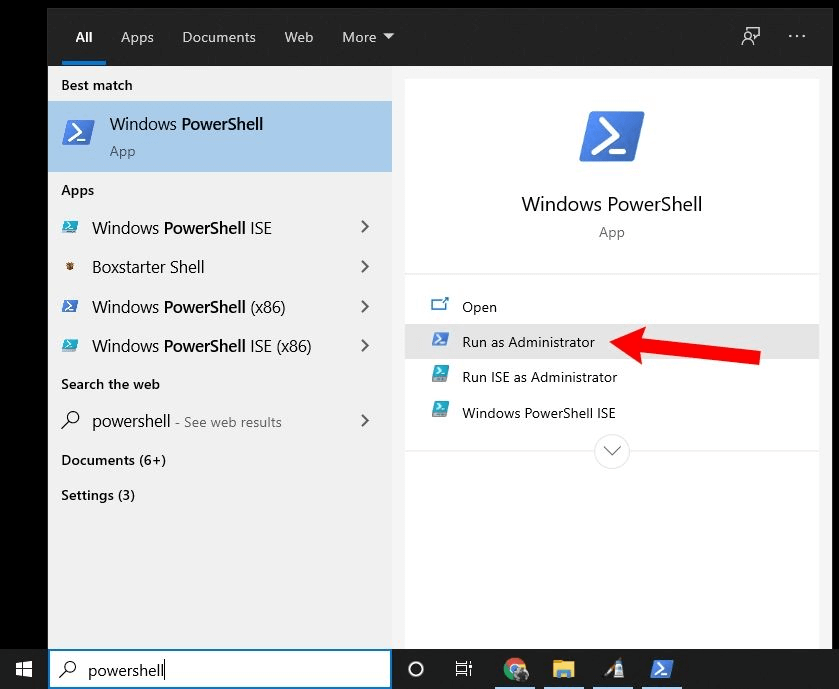
First, click on the Windows Search Bar and type in "PowerShell." Then, click "Run as administrator" to launch PowerShell with elevated privileges.
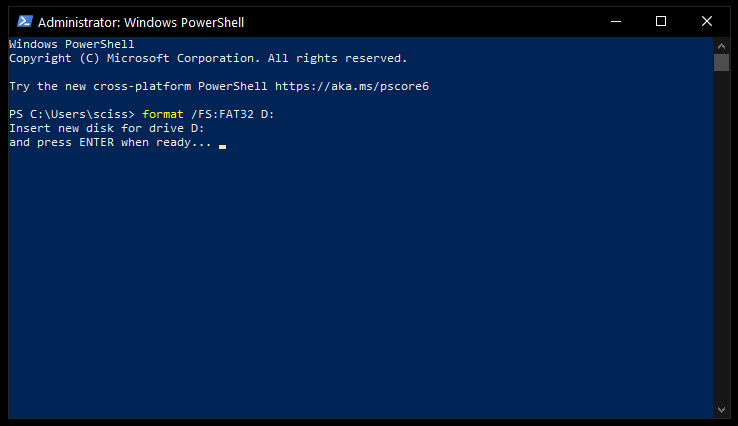
In the PowerShell terminal, enter the following command:
format /FS:FAT32 DRIVE_LETTER:
Make sure to check your drive letter using File Explorer. For example, if your drive letter is D, you would enter:
format /FS:FAT32 D:
Press Enter, ensure your USB drive is plugged in, and press Enter again to start the formatting process.
Then, go run some errands or take a break – the process will take some time.
Once the format command is finished, your drive will be formatted to FAT32.
Step-by-Step Guide for Formatting a Drive to FAT32 on macOS
Using Disk Utility:
- Connect the Drive: Insert the USB flash drive or external hard drive into a USB port on your Mac.
- Open Disk Utility: Go to Applications > Utilities > Disk Utility.
- Select the Drive: In Disk Utility, select the drive you want to format from the list of external drives.
- Erase the Drive: Click the "Erase" button at the top of the window.
- Choose FAT32: In the Erase window, select "MS-DOS (FAT)" as the format and give the drive a name.
- Confirm and Erase: Click "Erase" to format the drive. A warning will appear indicating that all data on the drive will be erased. Confirm to proceed.

Using Terminal:
Terminal, the built-in command tool, can help you securely format a USB drive, SD card to FAT32 on Mac:
1. Go to Applications > Utilities > Terminal and open this app.

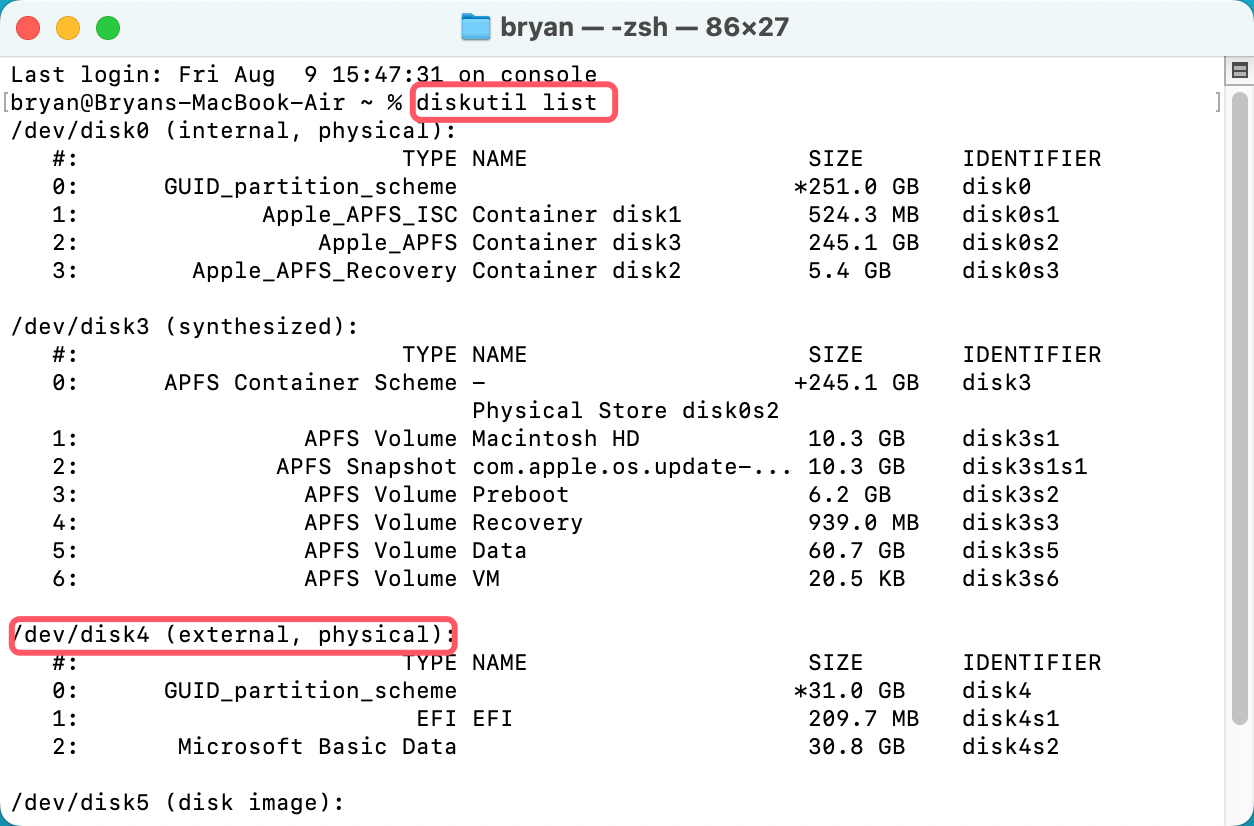
2. Type diskutil list, press Enter, it lists all drives and devices, find the drive you want to erase to FAT32.
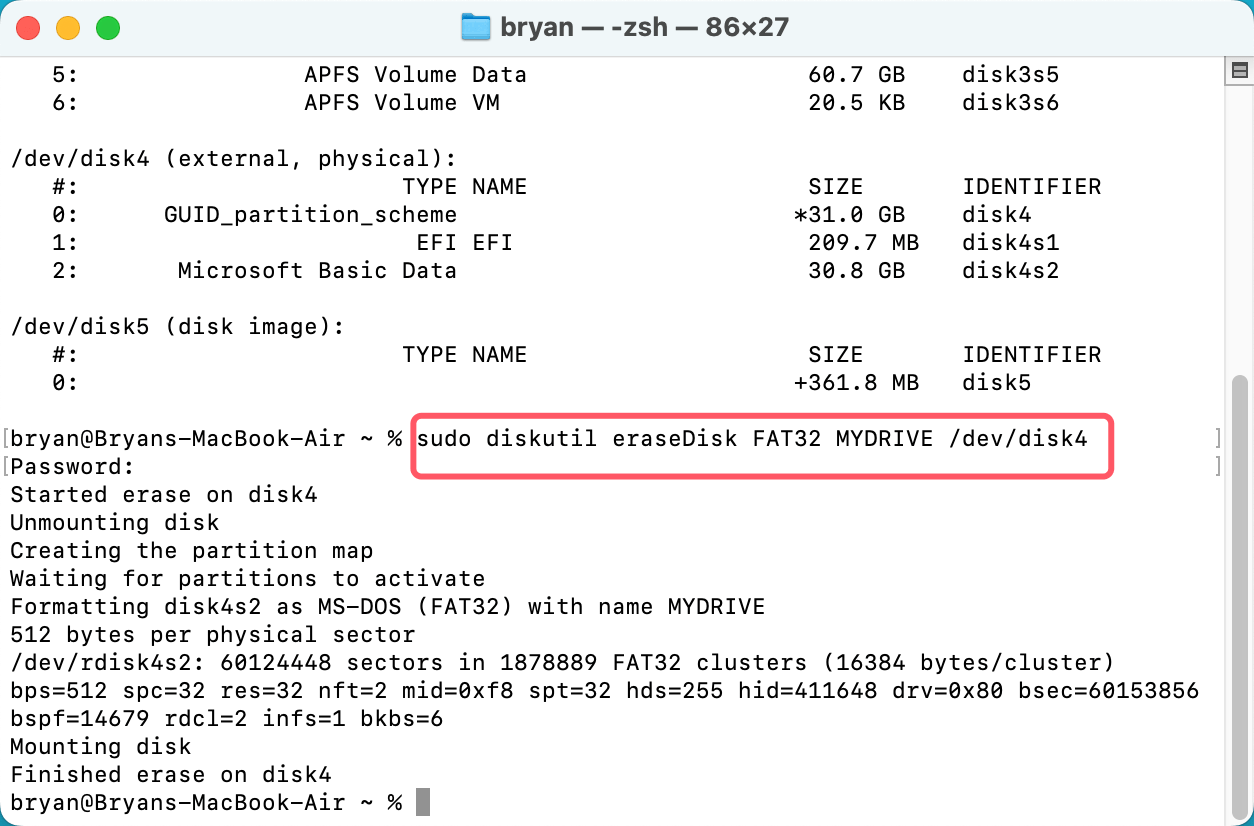
3. Type sudo diskutil eraseDisk FAT32 [Disk Name] [Disk Identifier], for example, type sudo diskutil eraseDisk FAT32 MYDRIVE /dev/disk4 and press Enter. Then enter the password of your Mac, press Enter to start formatting the drive to FAT32.
Using NTFS for Mac:
Third-party disk formatting tool - DoYourData NTFS for Mac can help you format any drive to FAT32 on Mac:
Step 1. Download and install the FAT32 formatter - DoYourData NTFS for Mac on your Mac and open this app on your Mac.
Step 2. Select the target drive, click on Format button.
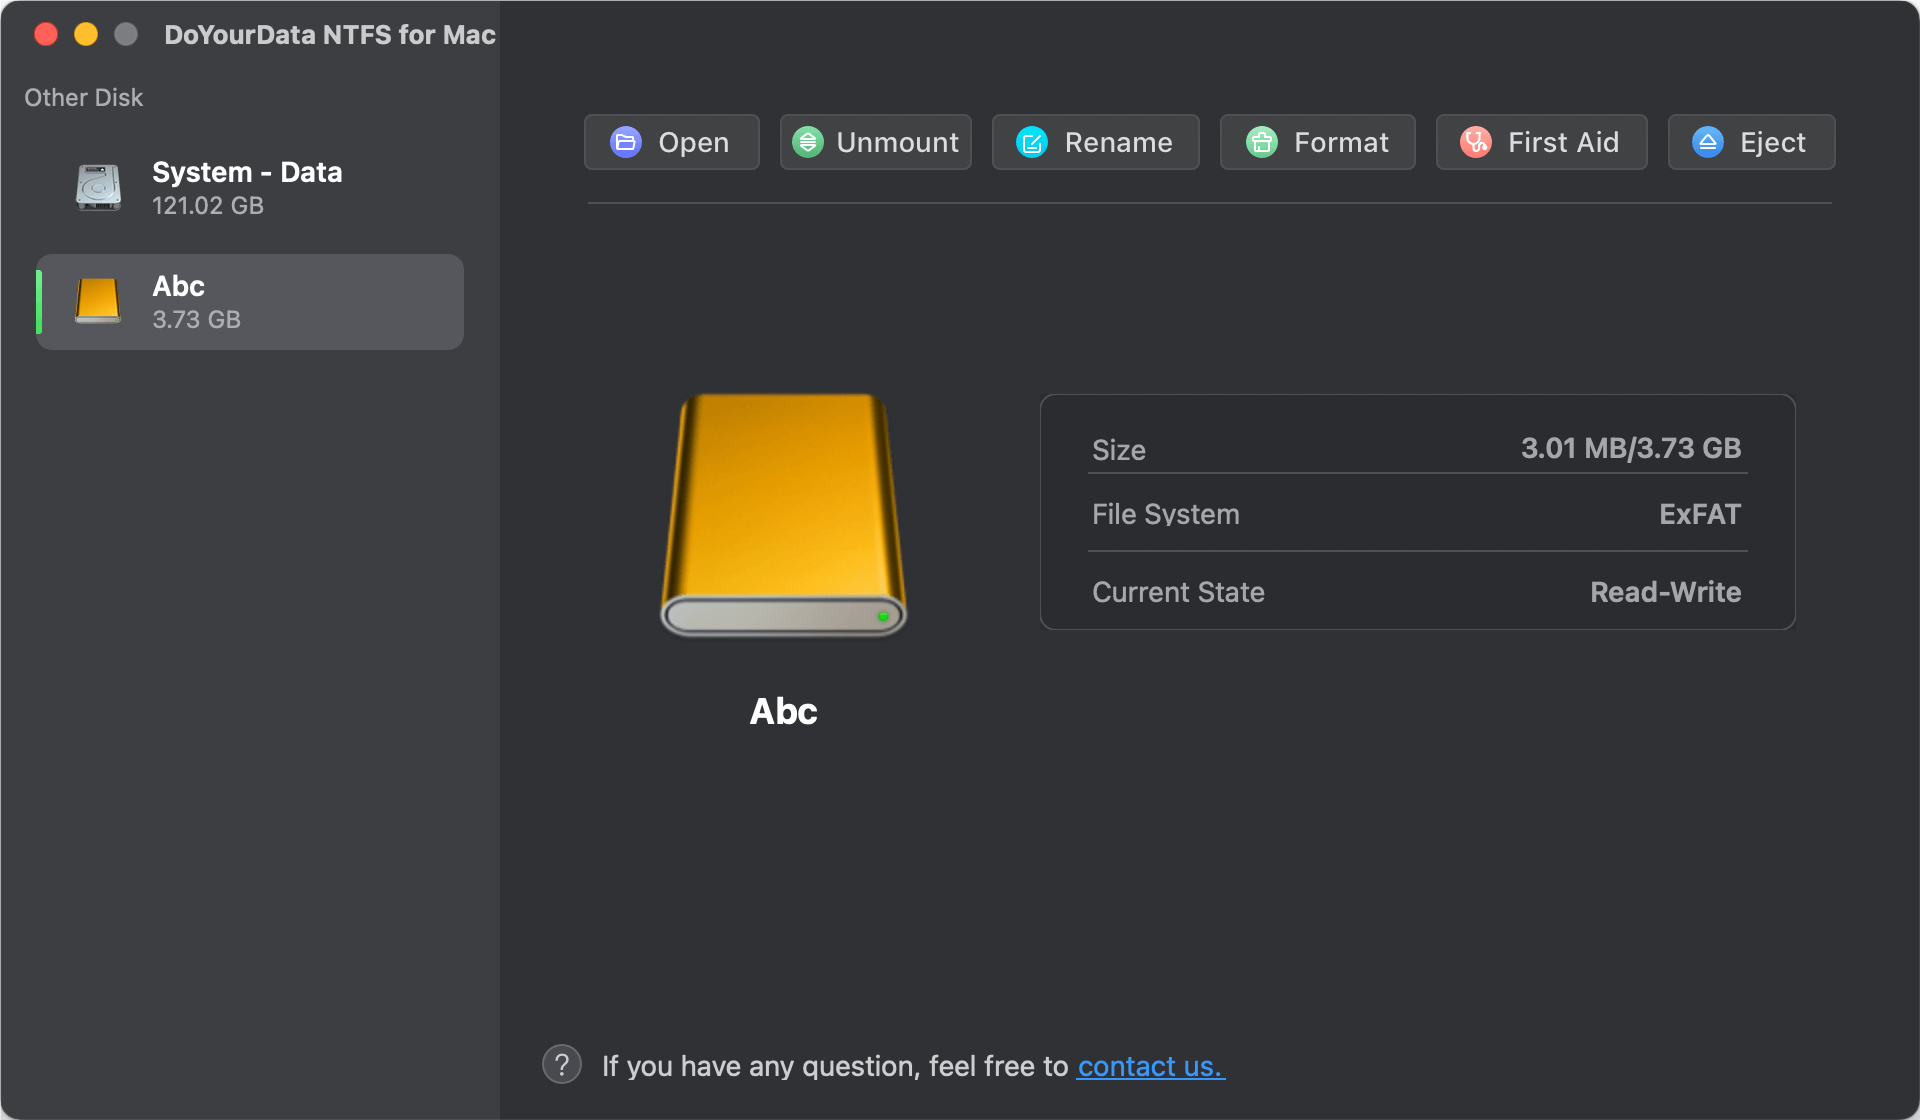
Step 3. Select FAT32 as the file system, then click on Continue button to format the drive to FAT32.

Troubleshooting Common Issues
Common Problems Encountered When Formatting to FAT32:
- Formatting Large Drives: Drives larger than 32GB cannot be formatted to FAT32 using the standard Windows formatting tools. This limitation can be overcome by using third-party software.
- Errors and Warnings: Errors such as "The volume is too big for FAT32" can occur when attempting to format large drives.
Solutions and Workarounds:
- Third-Party Tools: Use tools like Rufus, DoYourData Super Eraser, or FAT32 Format to format large drives to FAT32.
- Ensure Proper Backup: Always back up important data before formatting, as the process will erase all existing data on the drive.
How to Recover Lost Data After Formatting a Drive to FAT32
If you lose data due to formatting a drive to FAT32, you can use data recovery software to unformat the drive and get all lost data back!
Step 1. Download and install the best data recovery software - Do Your Data Recovery on your computer and connect the FAT32 drive to the Mac.
Step 2. Open Do Your Data Recovery, then select the formatted drive.

Step 3. Click on Scan button to deeply scan the formatted drive and find all recoverable files.
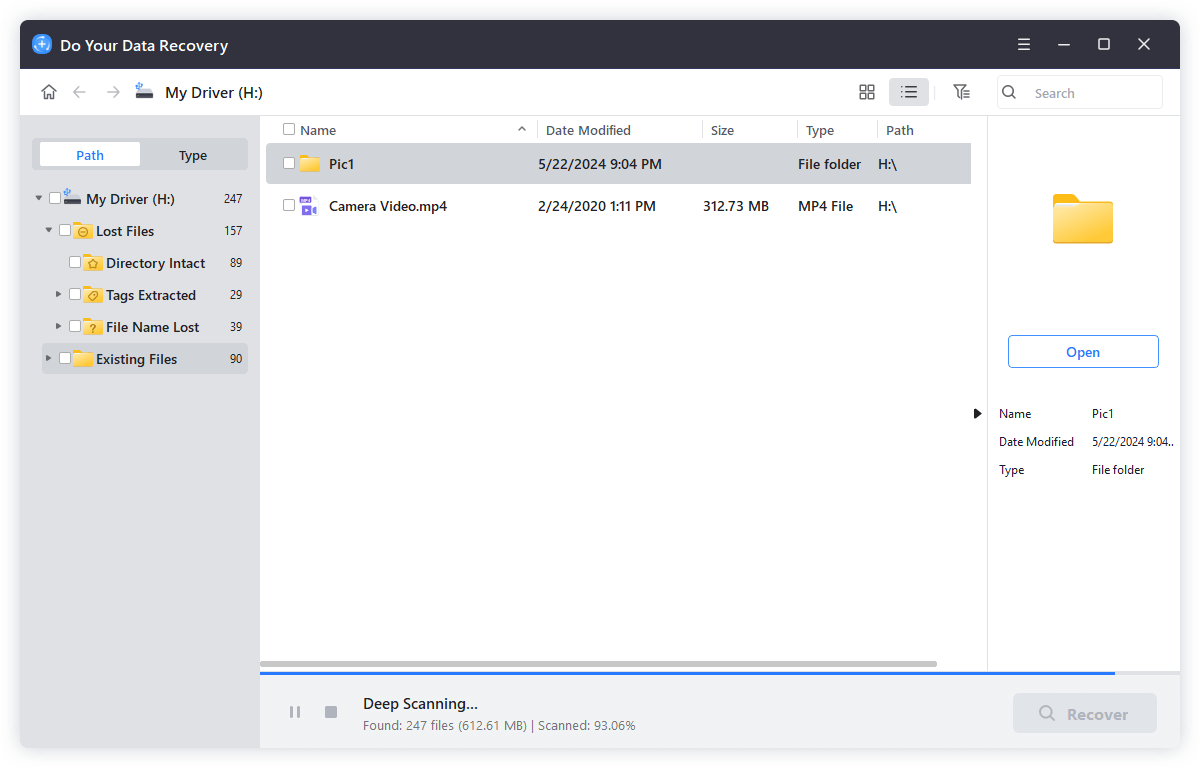
Step 4. Once the scan is completed, Do Your Data Recovery finds all recoverable files. Then select the wanted files and save them.

Conclusion
FAT32 remains a widely-used and versatile file system, especially for external storage devices and cross-platform compatibility. While it has limitations in terms of file and partition sizes, its simplicity and broad compatibility make it a preferred choice for many applications. Understanding how to format a drive to FAT32 on both Windows and macOS ensures that you can make the most of this enduring file system.
Written & Updated by Ricky Lin
Ricky Lin is an senior editor of DoYourData who lives in Adelaide, Australia. He is interested in writing technology articles related with data recovery, computer issue fixes, disk clone, iPhone data recovery, video edit, Mac optimization, etc. He Joined DoYourData in 2019 and have written 500+ articles to help both Windows users and Mac users to solve data or computer problems.