Recover Lost Data from Erased Drive on Mac
Use data recovery software to recover lost data from a drive which is erased by Mac Disk Utility.
Quick Navigation:
“Hi, I updated my macOS from Big Sur to the latest Sonoma. Everything is OK except my external hard drive is not mounting any more. Any way to fix this issue?” - Jan

After updating your favorite Mac to the newest and best version of macOS, your reliable external hard drive is now tricky. You plug it in and wait for your files to appear on the screen. Instead, all you see is silence and anger. Don't worry—you're not the only one having trouble with technology! It is a common problem many people have after updating their macOS.
We'll get into the specifics of why your external hard drive won't mount on macOS Sonoma and, more importantly, how to fix it in this repair guide. We have step-by-step instructions on how to get that external hard drive working again, no matter how experienced you are with Macs or how new you are to technology.
Ensure the external hard drive is securely plugged in before considering more complicated options. Even the most experienced users miss this step, even though it seems like a no-brainer. Check both ends of the wire again to ensure they are securely attached to the hard drive and your Mac.
A loose connection can sometimes stop the devices from talking to each other properly, which can cause growing problems. If the link seems loose, use a different cable or port to prevent hardware problems. After ensuring the physical link is safe, you can look into other possible reasons for the mounting problem.
Ensure the USB port or hub works with your computer, isn't broken, and has enough power. Some portable hard drives may need more power than others, and mounting problems can happen if you use a USB port or hub with insufficient power. Look at the USB port or hub for any damage or signs of wear.
Check whether the USB port or hub works with the external hard drive's needs, such as whether it supports USB 3.0 or Thunderbolt. If you use a USB hub, make sure it has its power source, or connect the hard drive straight to your Mac's USB port to avoid any problems with the power supply.
Check if your Mac is set up to show mounted drives on the screen. Drives may mount properly sometimes, but they may not show up on the screen because of how they are set up. If you want to see this, click on the Finder menu and choose "Settings" from there. In the "General" tab of the "Finder Settings" window, make sure that the box next to "External disks" is checked under "Show these items on the desktop."

If you don't check this box, your mounted external hard drive won't appear on the desktop, but you can still get to it in Finder. By checking this box, you can make your mounted drives obvious and easy to get to on the desktop.
Check if the NTFS file system is on the portable hard drive. macOS can read NTFS files but not write to them for some reason. It could cause mounting problems. Start Disk Utility by going to Applications > Utilities. It will show you the file system type. From the list on the left, pick out the external hard drive.
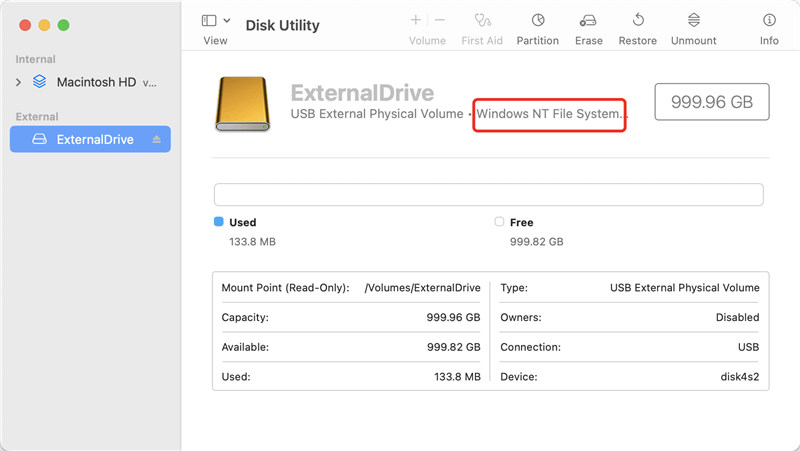
The format of the file system will be shown in the "Format" box. If it's NTFS, you should change the drive to a format that works with your Mac, like APFS, exFAT or macOS Extended (Journaled). It will ensure you can read and write to it on your Mac.
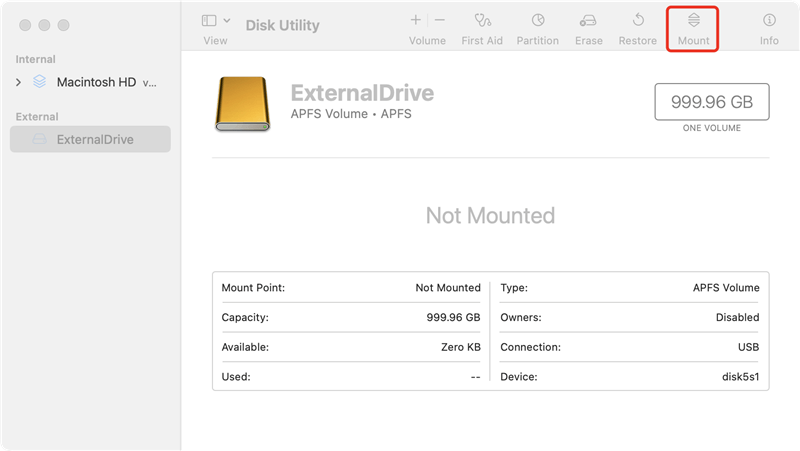
Use Disk Utility, a tool with macOS, to ensure the external hard drive can be mounted. You can look for Disk Utility in Spotlight or go to Applications > Utilities to open it. Once it's open, look in the sidebar for your portable hard drive.
Pick out the drive if it shows up, then press the "Mount" button in the menu. The drive should appear on your desktop and Finder if everything goes well. If the drive doesn't mount or is grayed out, there might be a problem with it or its link. You will need to take more steps to fix the mounting problem.
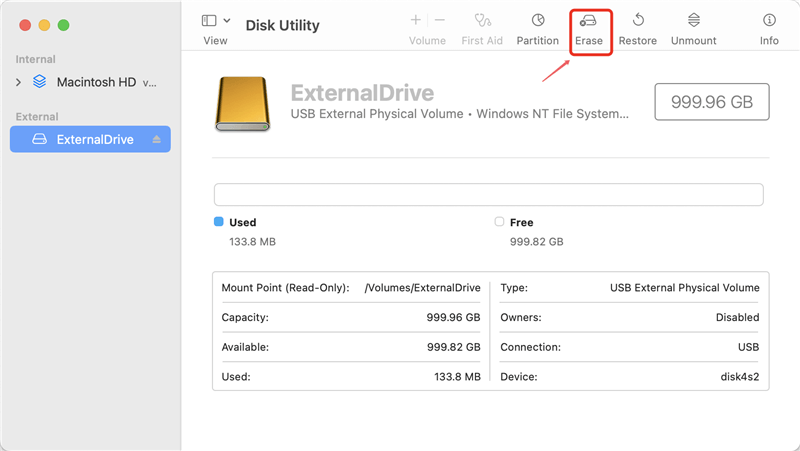
If the file system is not compatible with macOS or the drive gets crashed, just click Erase button. Then select a compatible file system, click Erase again.
Sometimes, the external hard drive gets damaged, just click on First Aid button to repair the damaged external hard drive so that it can mount again.
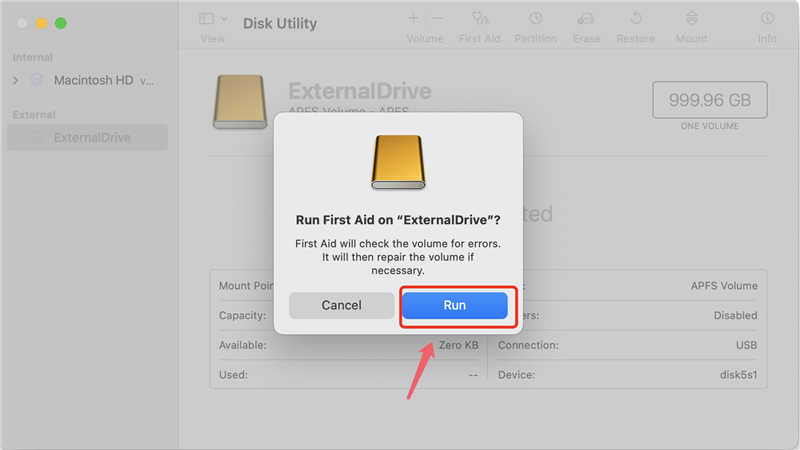
If you lost important data due to erasing the drive or running First Aid, just use a data recovery app to help you unformat the drive.
Recover Lost Data from Erased Drive on Mac
Use data recovery software to recover lost data from a drive which is erased by Mac Disk Utility.
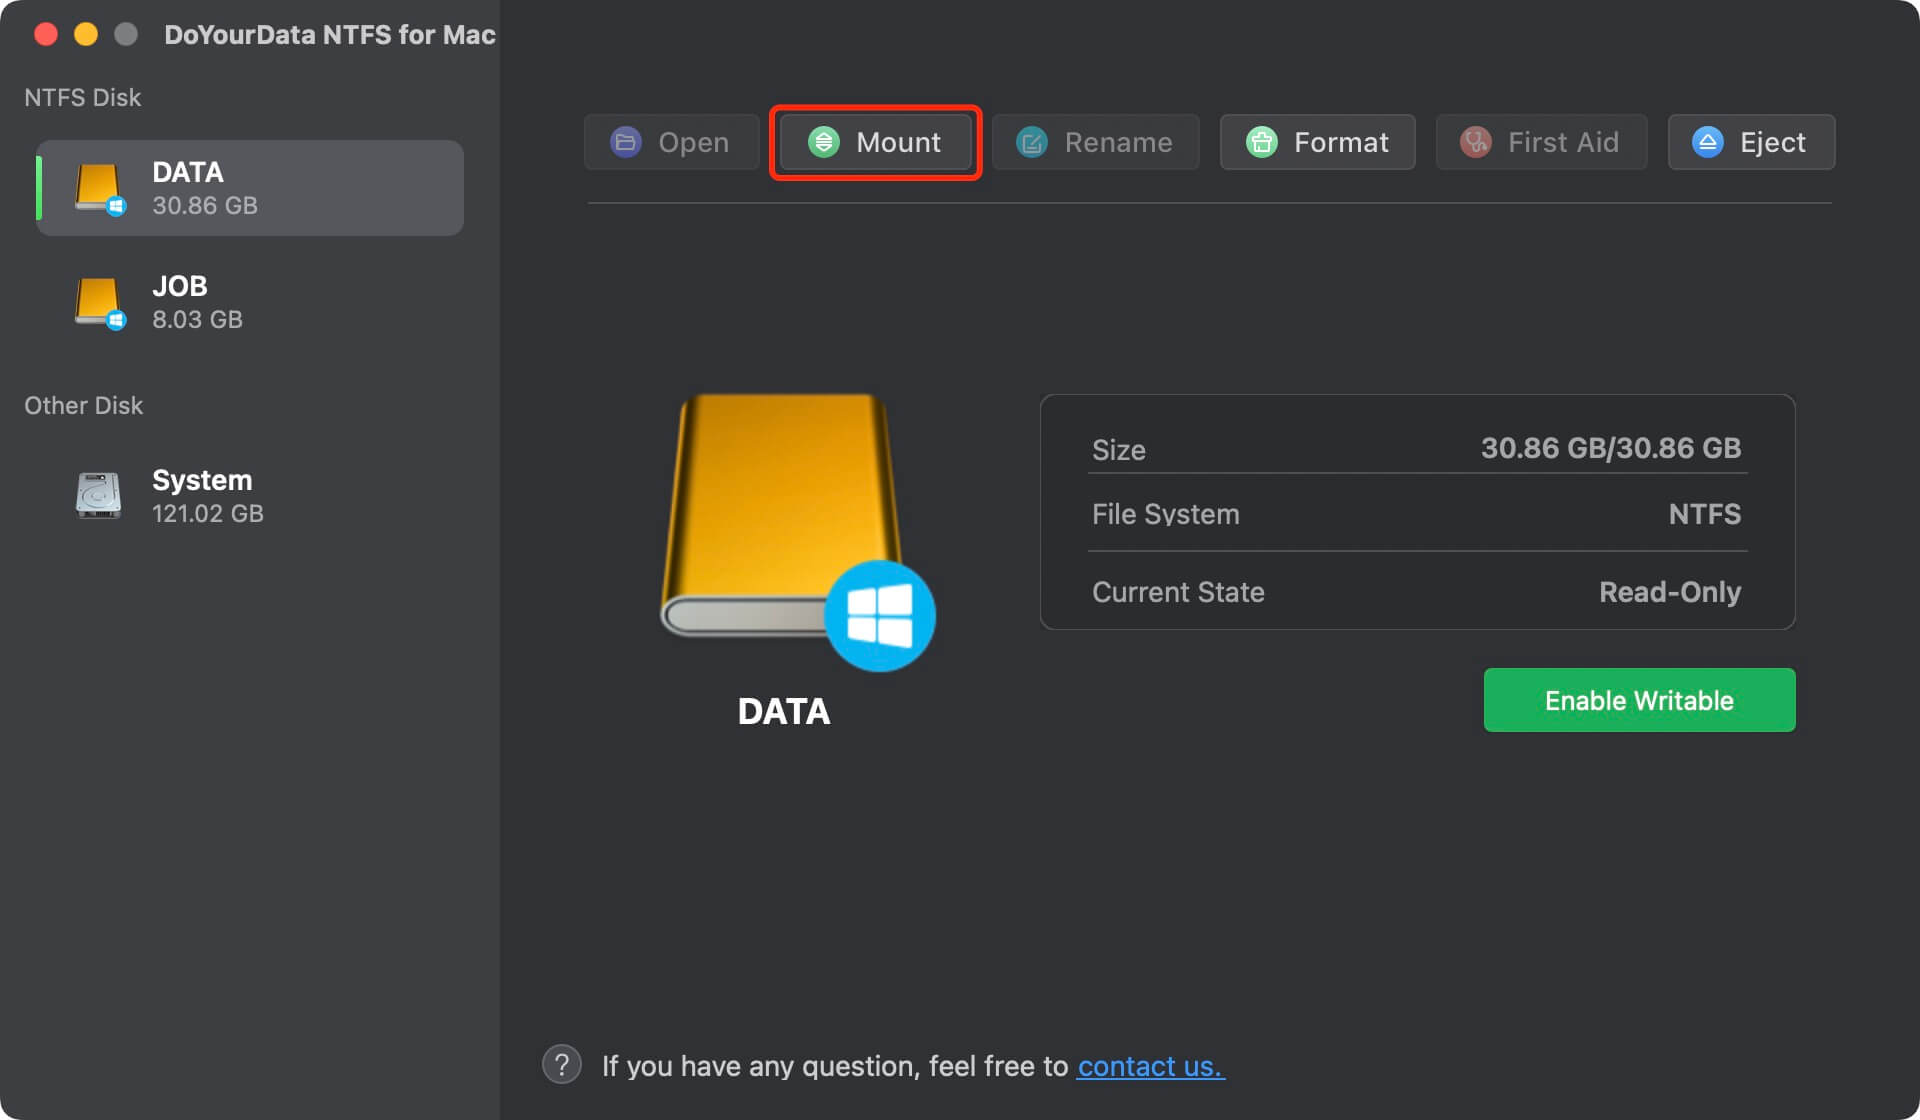
NTFS for Mac can help you force mount an external hard drive on Mac. If you find the external hard drive is not mounting after installing macOS Sonoma, just download and install this tool on your Mac.
Just open DoYourData NTFS for Mac, then find the unmounted external hard drive, click on Mount button.
In the end, there is a systematic way to fix problems where an external hard drive won't mount after the macOS Sonoma update. Users can usually fix the issue by ensuring the following issues.
But if the problem continues, you might need to get more help from technical support or look into data recovery choices. It would help if you were patient and careful as you try to fix the problem with your portable hard drive, and it should work again soon.
Hot Articles
