How to Format SanDisk Desk Drive SSD for Mac?
![]() Ricky Lin updated on July 10, 2024
Ricky Lin updated on July 10, 2024
Quick Navigation:
- Why Format Your SanDisk Desk Drive for Mac?
- How to Format SanDisk Desk Drive for Mac?
- How to Use NTFS SanDisk Desk Drive on Mac Without Formatting?
- Conclusion
"How to format SanDisk Desk Drive external SSD for Mac? You can use Disk Utility to format the damaged or incompatible SanDisk Desk Drive SSD to ExFAT, APFS, Mac OS Extended, etc. If the SanDisk Desk Drive is an NTFS drive, you can download and install an NTFS driver on your Mac, run it to enable writable for the NTFS drive. Then you can use any NTFS drive including the SanDisk Desk Drive on your Mac without any limitation."
Want to make your new SanDisk Desk Drive external SSD work with your Mac? Formatting your drive first can improve its speed, make it more compatible, and help you organize your files better. Although the job may seem difficult, it's very easy and rewarding.
This article will guide you through each stage of the formatting process, providing tips and advanced choices to meet your unique requirements. Whether new to technology or an old user, this guide will teach you everything you need to know to get the most out of your SanDisk Desk Drive external SSD.
Why Format Your SanDisk Desk Drive for Mac?
Formatting a drive means making a new file system, which is an important step before you can use it. That is why you might want to format your SanDisk SanDisk Desk Drive external for Mac:
- Compatibility: It is very important to ensure it works with macOS. If you don't format a drive properly, your Mac might not recognize it, which can cause annoying connectivity problems. By formatting, you ensure that the drive's file system works with macOS, which ensures that it works and can be accessed without any issues.
- Performance: A clean file system can make your drive run faster and more efficiently. Over time, files can get broken up and spread out, slowing down the rate at which they can be accessed and sent. Formatting changes the data structure, eliminating fragmentation and improving performance so that read and write speeds are faster.
- Organization: Formatting allows you to start over, which helps you better order your data. You can organize your storage space in a way that works best for you by eliminating old files, unused programs, and other useless stuff.
- Error Correction: If your drive has problems, like files that aren't working right or mistakes, reformatting can often fix them. By wiping and rewriting the file system, you can fix the drive's core problems and get it working at its best again, ensuring it always works.
Preparation Before Formatting:
It's important to back up any important data on your SanDisk Desk Drive before you format it. As soon as you format the drive, everything on it will be erased, so make copies of anything you want to keep.
- Backup Your Data: Move your important files to a different storage device or the cloud.
- Ensure Compatibility: Ensure your Mac and SanDisk Desk Drive work together. It's always a good idea to check, but most new SanDisk drives are.
- Download Necessary Software: Even though macOS has built-in formatting tools, sometimes software made by the maker is better. SanDisk may offer tools that add extra features or make the drive run faster.
How to Format SanDisk Desk Drive for Mac?
If you want to use your SanDisk portable hard drive with a Mac, here is a step-by-step guide:
Step 1. Connect Your SanDisk Drive to Your Mac.
Use a USB cable that connects your SanDisk Desk Drive to your Mac. Make sure your Mac recognizes the drive. The drive should show up on your desktop or in Finder. (If the SanDisk Desk Drive is not showing up, open Finder Settings, click General and Sidebar, select External disks.)
Step 2. Open Disk Utility.
You can find Disk Utility in Applications > Utilities > Disk Utility or type "Disk Utility" into Spotlight by pressing Command + Space. There is a list of drives you can use in Disk Utility. Pick out your SanDisk Desk Drive from the list on the left.
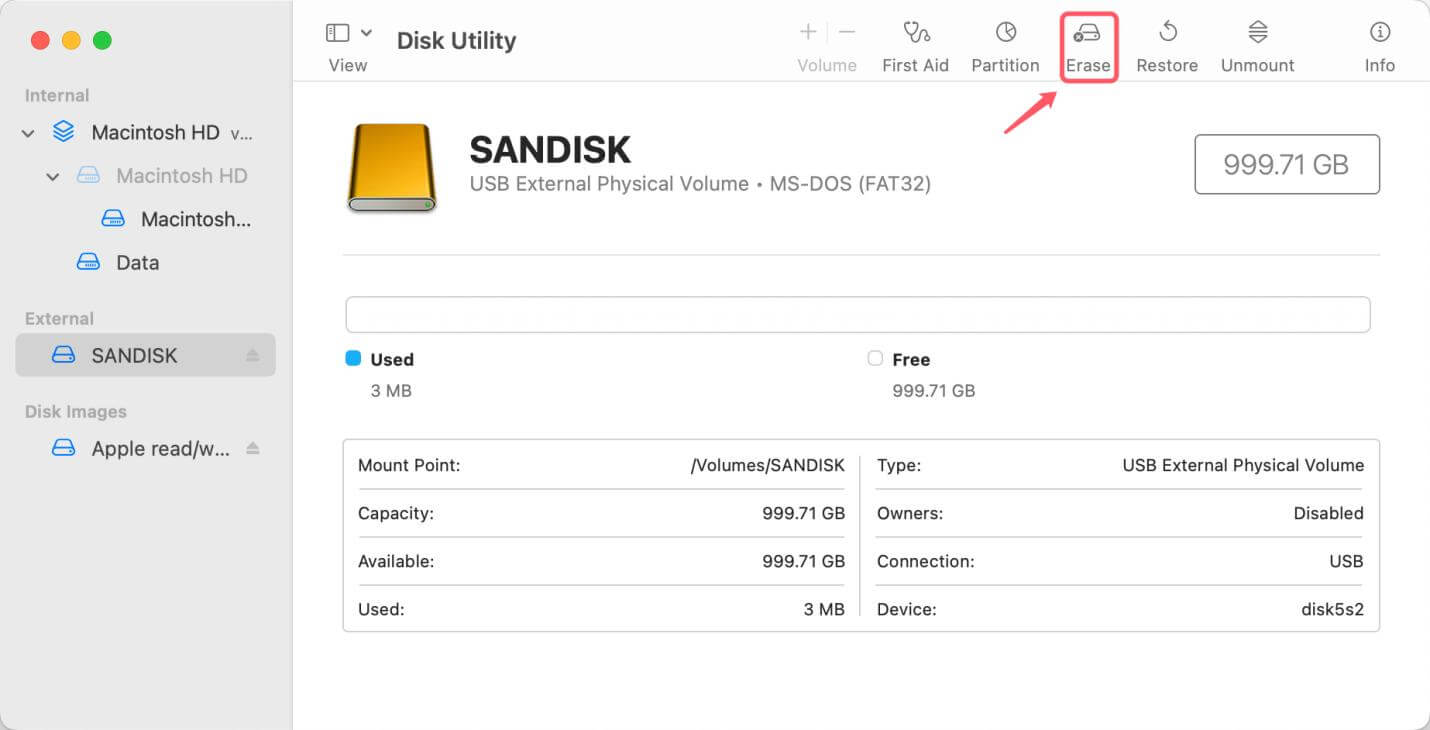
Step 3. Erase the Drive.
Click Erase: To erase your drive, pick it up and click the "Erase" button at the top of the Disk Utility window.
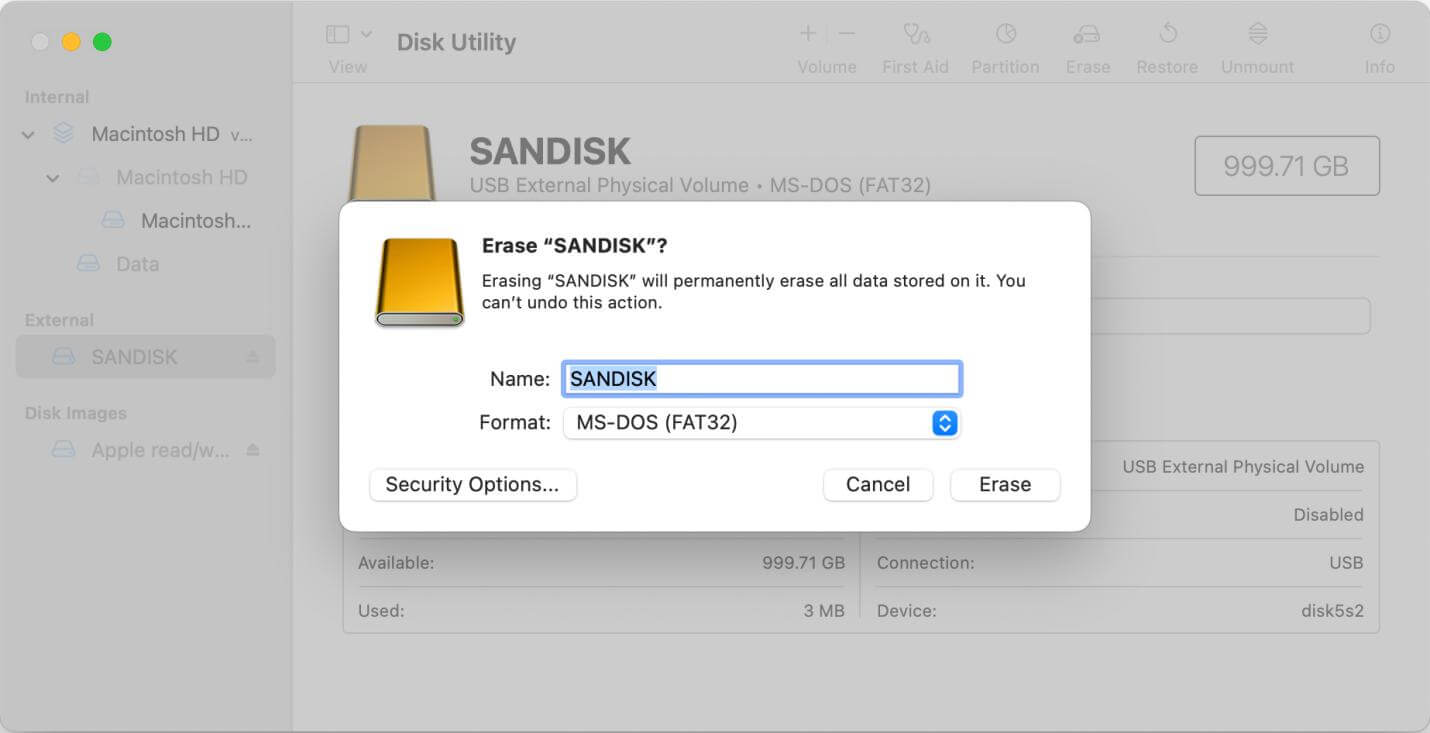
Choose a Format: A box will show up asking you to name your drive and pick a format. The most popular Mac file types are:
- APFS (Apple File System) is ideal for SSDs and modern drives. It offers advanced features like snapshots and fast directory sizing.
- Mac OS Extended (Journaled): Suitable for traditional hard drives and older macOS versions.
- ExFAT: It is compatible with both macOS and Windows and is useful if you need to use the drive with both operating systems.
- MS-DOS (FAT) is useful for compatibility with older systems and non-Mac devices but has file and partition size limitations.
Scheme Choice (optional): Pick GUID Partition Map for the scheme because it works with Intel-based and Apple chip Macs.
Security Options: Click it to select data erasure level.
Erase: Click Erase when you're done making your choices. This will start the erasing process.
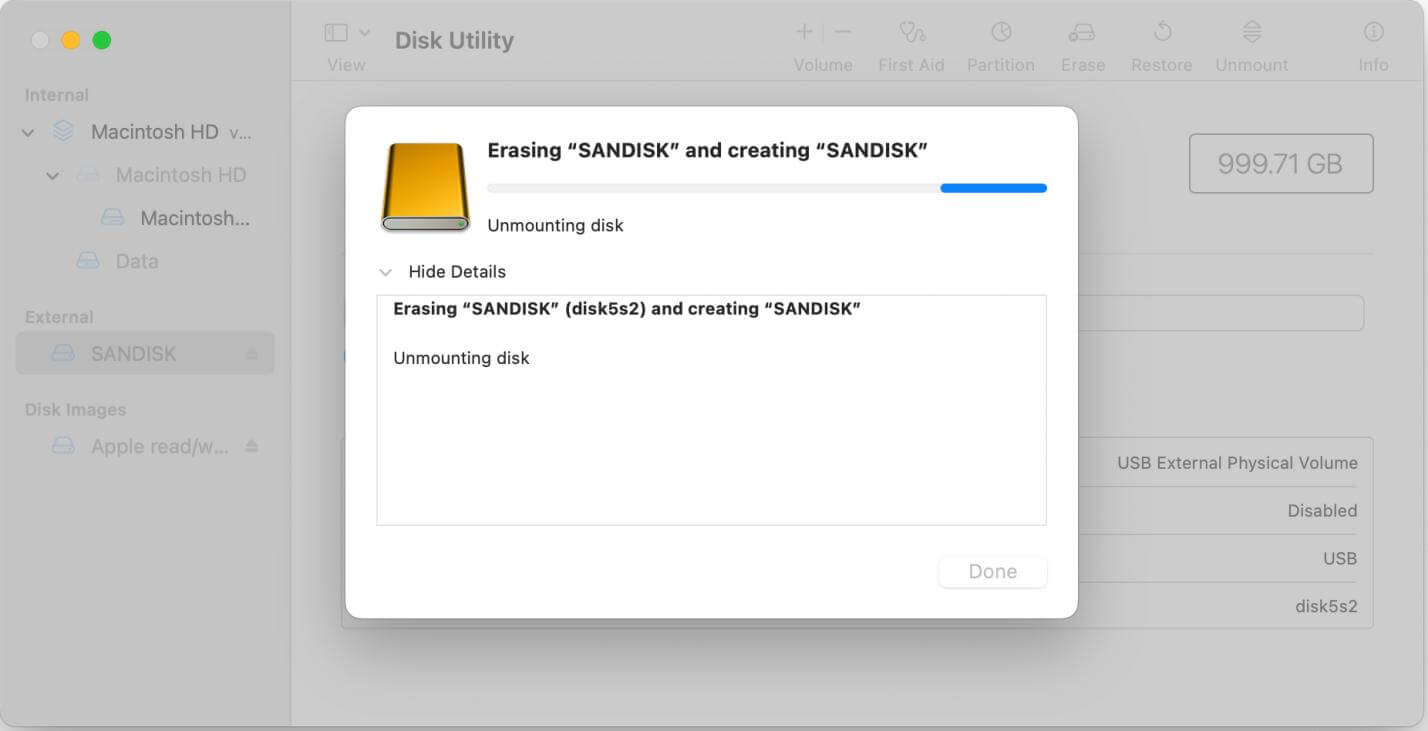
Step 4. Confirm the Erase
Disk Utility will format the SanDisk Desk Drive. When it's done, Disk Utility will let you know that the drive has been formatted properly.
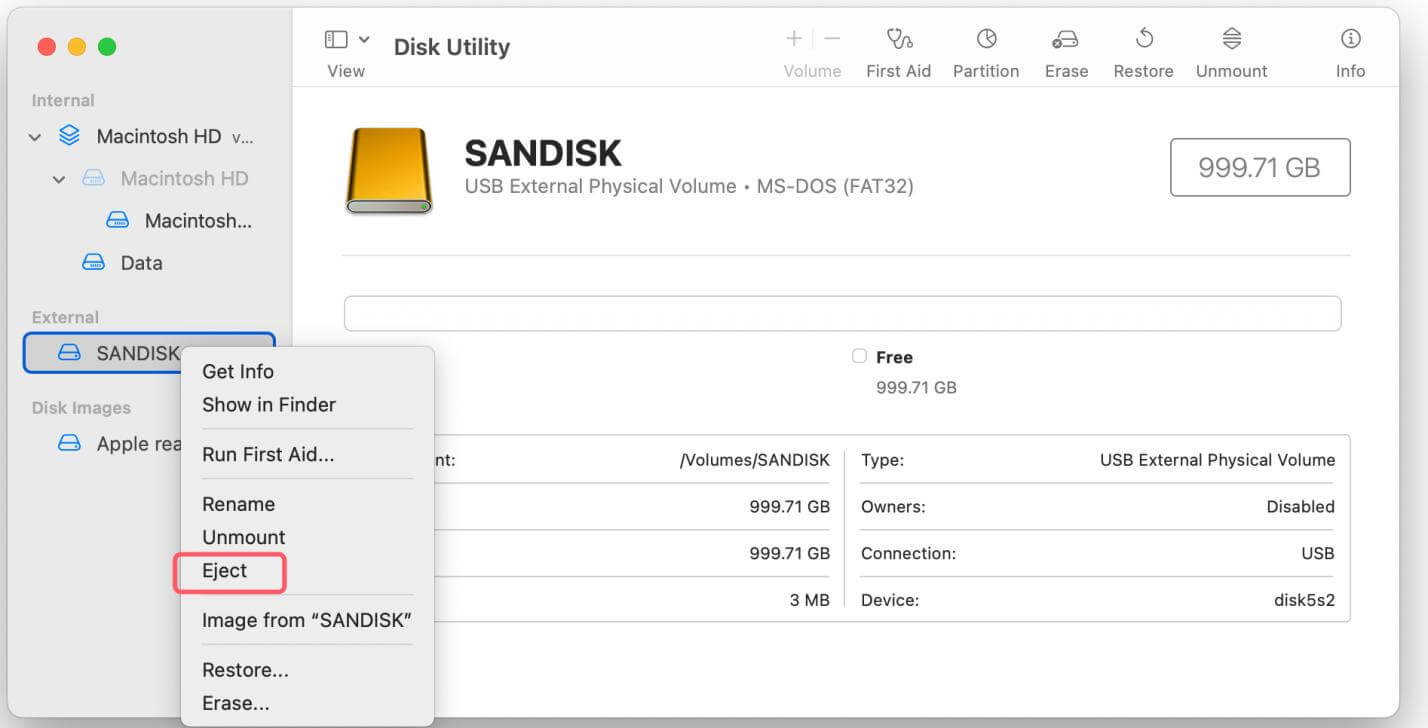
Step 5. Verify the Drive.
Once it has been formatted, move some files to ensure it works correctly. In Finder, click the "Eject" button next to the drive's name or right-click and choose "Eject" to remove the drive properly.
Maintain Your SanDisk Desk Drive on Mac:
Following some best practices after formatting your SanDisk portable hard drive is important to ensure it works well and lasts a long time. To keep your drive up, here are some important tips:
- Regular Backups: Make sure you always have copies of your important files. Set up regular and recurring backups with macOS Time Machine to ensure you always have a copy of your files in case you accidentally delete them or your hard drive fails.
- Avoid Physical Damage: If you drop or mishandle the drive, it could break mechanically. Be careful not to damage your drive when you handle it. Keep it somewhere safe and stable, and move it in a protective case.
- Keep Firmware Updated: Check SanDisk's website often for firmware changes. These changes can fix bugs, make things more compatible, and speed things up. Most firmware changes can be found on the device's maker's website.
- Eject Correctly: Ensure you always eject the drive before taking it off your Mac. Data corruption can happen when dumping is done wrong. A "Eject" button is next to the drive name in Finder. You can also right-click on the drive and choose "Eject."
- Monitor Performance: Use Disk Utility to check the drive's health and speed regularly. Use the First Aid tool to find and fix any problems with the drive so it keeps working at its best.
Recover Lost Data from Erased SanDisk Desk Drive on Mac:
If you have lost data from the SanDisk Desk Drive due to erasing or formatting, you can use a data recovery app to scan the erased SanDisk Desk Drive and get the lost data back.
Step 1. Download and install Do Your Data Recovery for Mac, then connect the SanDisk Desk Drive to your Mac.
Step 2. Open Do Your Data Recovery for Mac, select the erased SanDisk Desk Drive, click on Scan button to deeply scan the erased SanDisk Desk Drive.

Step 3. It will scan the erased or formatted SanDisk Desk Drive, find all recoverable files.

Step 4. Once the scan is completed, you can preview all recoverable files. Then select the wanted files and save them.

Wipe SanDisk Desk Drive on Mac:
Before you sell, donate or dispose of your old SanDisk Desk Drive, you should permanently wipe all data from it.
Step 1. Download and install DoYourData Super Eraser for Mac, open it.
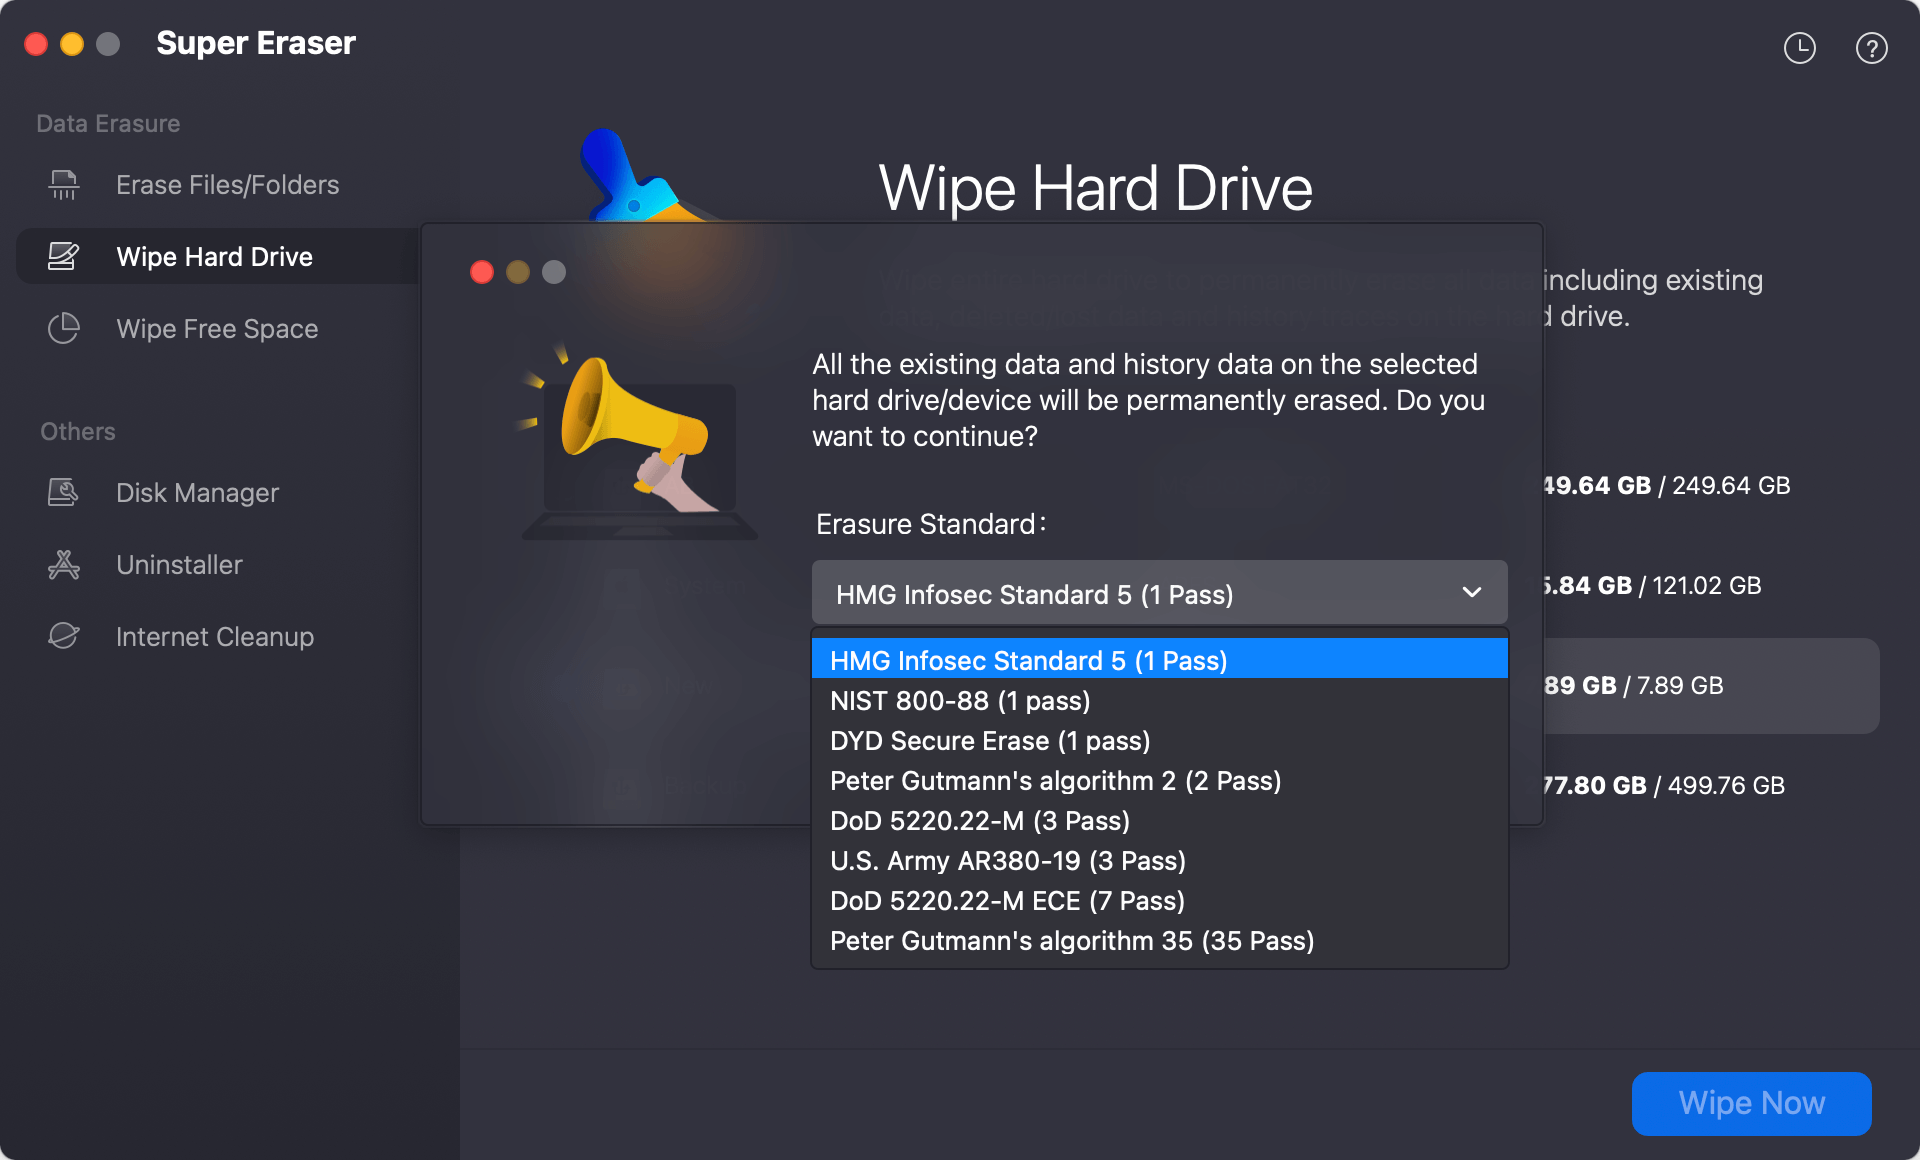
Step 2. Open DoYourData Super Eraser for Mac, then choose Wipe Hard Drive mode, select the SanDisk Desk Drive, click on Wipe Now button.

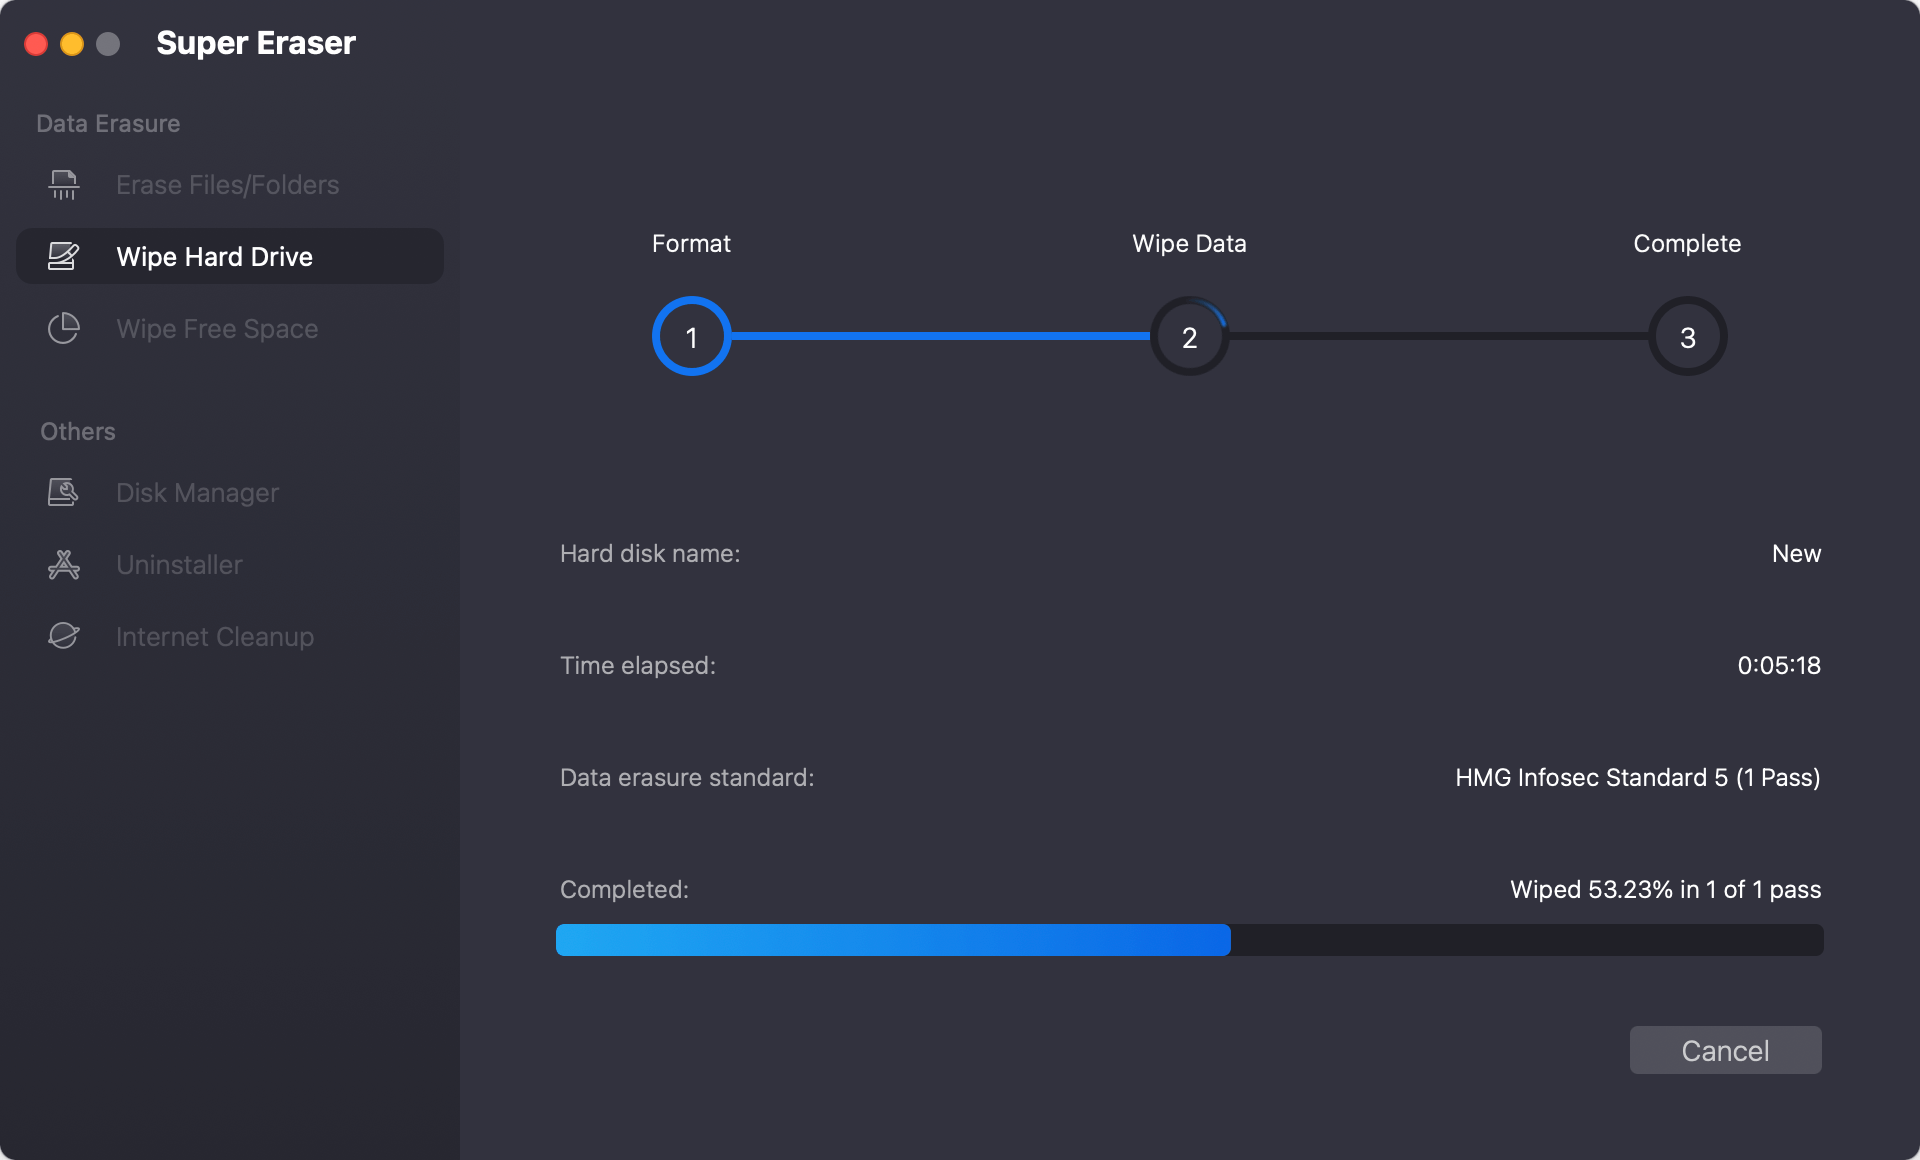
Step 3. Select a data erasure standard, click on Continue button to format and wipe the SanDisk Desk Drive.
Step 4. Permanently erase all data from the SanDisk Desk Drive. Once the data is erased by DoYourData Super Eraser for Mac, the data is lost for good, cannot be recovered by any method.
How to Use NTFS SanDisk Desk Drive on Mac Without Formatting?
If the SanDisk Desk Drive has been formatted to NTFS file system, you also can use it on your Mac without any limitation.
Step 1. Download and install DoYourData NTFS for Mac tool - a reliable NTFS driver for Mac.
Step 2. Open DoYourData NTFS for Mac, select the NTFS SanDisk Desk Drive, click on Mount button.
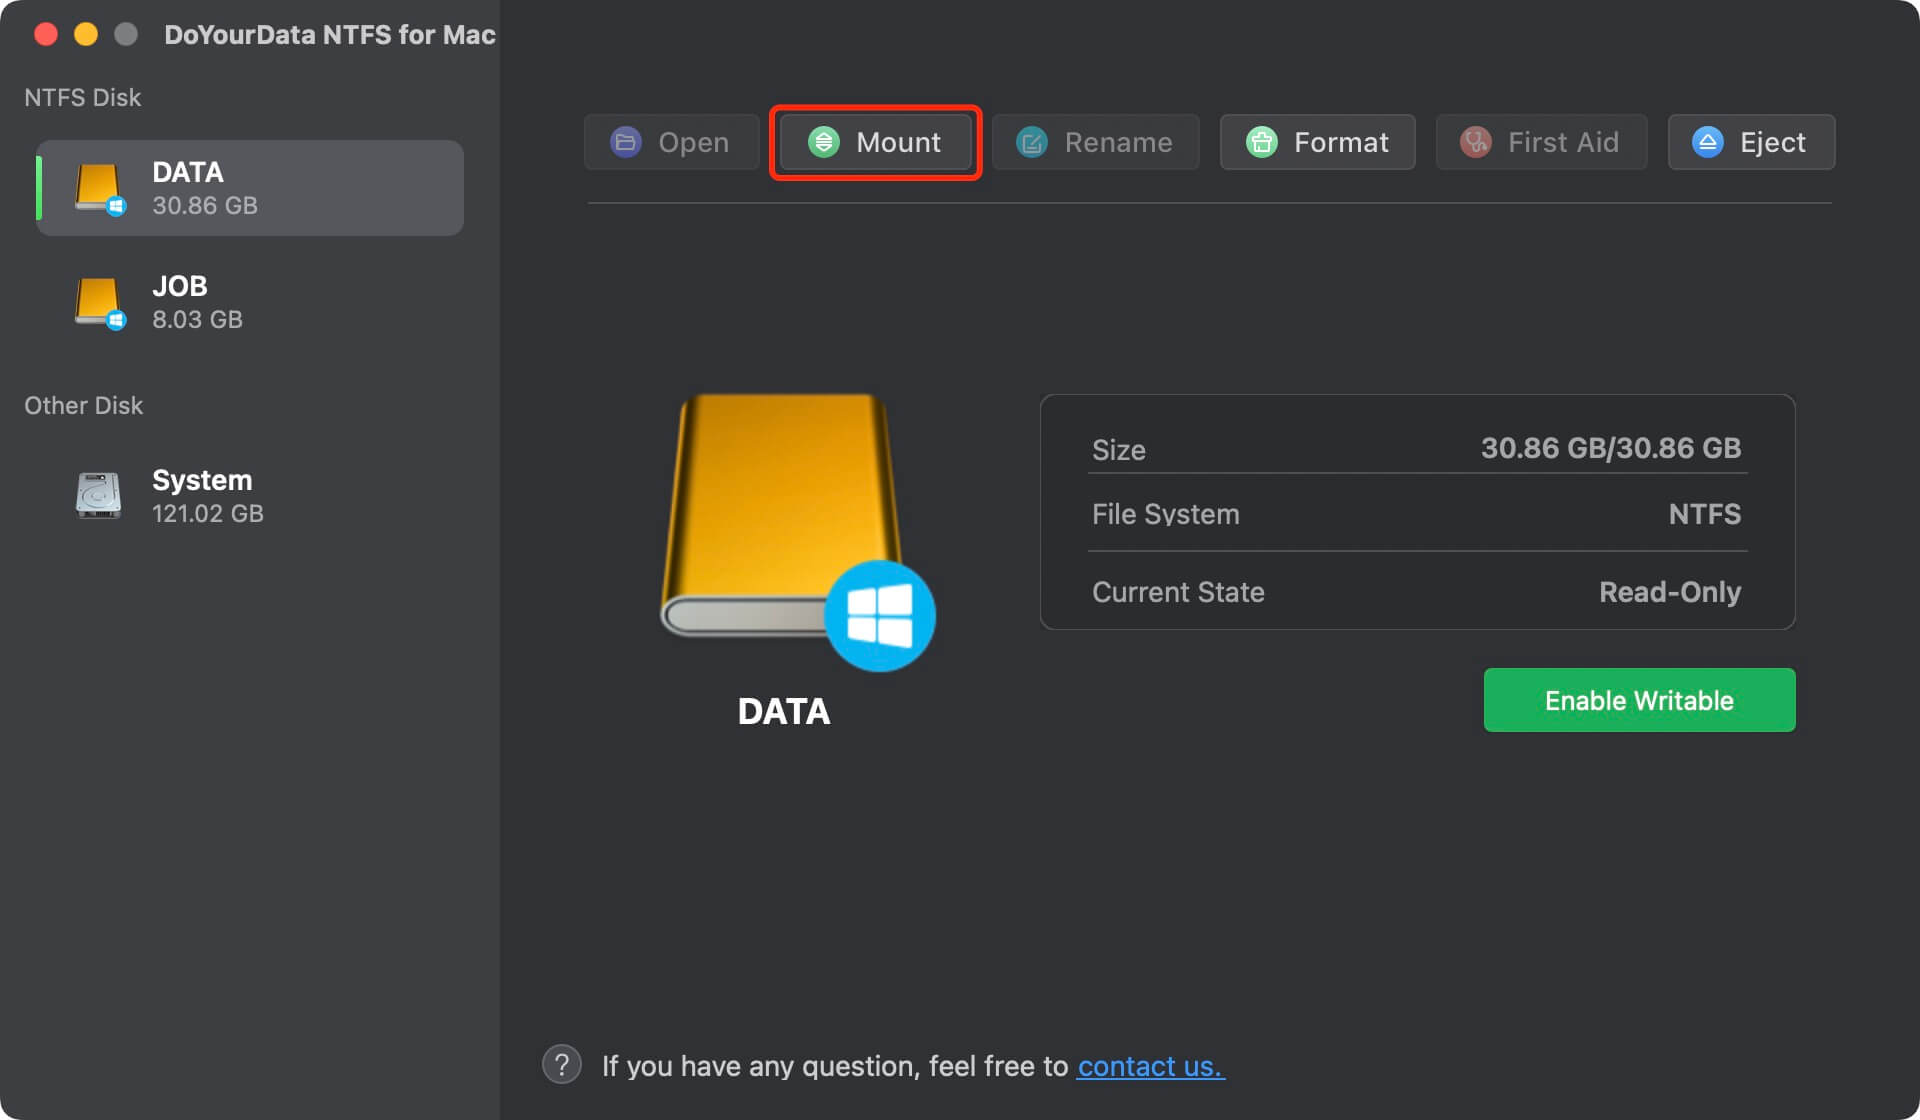
Step 3. Click on Enable Writable button to allow your Mac to read-write NTFS drive without any limitation.

Conclusion:
Formatting your SanDisk Desk Drive for Mac is important to ensure it works with your computer, improves speed, and keeps your files organized. This guide will make resetting your drive easy and keep it in good shape to work at its best.
Your drive will run smoothly and consistently if you back it up regularly, handle it carefully, keep the firmware up to date, eject it correctly, and monitor its performance. These steps will help you get the most out of your SanDisk Desk Drive external SSD, making it a smooth and efficient way to store all your files, no matter how much tech experience you have.
Written & Updated by Ricky Lin
Ricky Lin is an senior editor of DoYourData who lives in Adelaide, Australia. He is interested in writing technology articles related with data recovery, computer issue fixes, disk clone, iPhone data recovery, video edit, Mac optimization, etc. He Joined DoYourData in 2019 and have written 500+ articles to help both Windows users and Mac users to solve data or computer problems.
Hot Articles
- Fix External Hard Drive Read-Only Issue on Mac
- How to Wipe Trash Bin on Mac?
- Recover Lost Data from WD (Western Digital) External Hard Drive on Mac
- Fix External Hard Drive Not Showing Up on Mac
- How to Wipe SD Card on Mac?
- Mount and Unmount the External Hard Drive on the Mac
- Run First Aid on Mac to Repair Disks
- Fix Can't Save Files to An External Hard Drive on Mac
- (Solved) External SSD Not Detected in Disk Utility on Mac
- Why Can't Format A Hard Drive To NTFS on Mac? Can We Fix It?