Quick Navigation:

When you need it most, does your Samsung SSD (such as T3/T5/X5/T7/T9) not appear on your Mac? When you plug it in, you expect to be able to view your files or make backups without any problems. Instead, you find yourself getting more and more frustrated.

It can be hard to figure out what's wrong with your gear, whether you're a tech expert or a casual user. Don't worry! Let us help you figure out why your Samsung SSD won't mount on Mac and give you steps you can use to fix it.

We can help you with everything from quick checks and program tweaks to more in-depth looks at system management. Let's start and return to the smooth, trouble-free working experience you deserve!

Fix Samsung SSD Not Mounting on Mac

Why Won't My Samsung SSD Mount on My Mac?

The following could be the reason your Samsung SSD won't mount on your Mac:

  • Connection Problems: The SSD might not be recognized if the cords are broken, the connections are loose, or the ports are incompatible.
  • Outdated software: If the SSD's software isn't current, it might not work with macOS, making mounting difficult.
  • Errors in the File System: If the SSD's file systems get damaged, it might not be able to be mounted or viewed properly. (macOS 11 or later may not mount NTFS drive on Mac.)
  • Partition Table Corruption: If there are problems with the layout of the partition table, macOS may not be able to read the SSD.
  • Hardware Faults: If the SSD or the Mac's ports are damaged, they might be unable to connect or put properly.

How to Fix Samsung SSD Not Mounting on Mac?

If your Samsung SSD not mounting on the Mac, try these methods to fix it without losing data.

Method 1: Check Finder Settings

  • Open a Finder, then click Finder on Apple menu, choose Settings.
  • Open Finder Settings, click General and Sidebar, select External disks.
  • Then check if you can see the Samsung on Finder and desktop.

Fix Samsung SSD Not Mounting on Mac

Method 2: Update macOS and Firmware

It is important to keep macOS and SSD firmware up to date to keep them compatible and improve speed. To make changes to both, follow these steps:

Updating macOS:

  • Click Apple logo, choose System Settings.
  • macOS will look for changes when you click on General > Software Update.
  • If there are changes, click Update Now to start the process.
  • To finish the update process, follow the steps shown on the screen.

Updating SSD Firmware:

  • Go to the Samsung website and look for the "support" area.
  • Type in the model number of your SSD or pick it from the list.
  • Get the most recent file to change the firmware on your SSD.
  • To update the software, follow the steps that Samsung gives you.
  • Most of the time, this means starting an executable file that walks you through the process of updating.
  • Ensure your Mac is plugged in, and carefully follow all the on-screen instructions.

Method 3: Run First Aid in Disk Utility

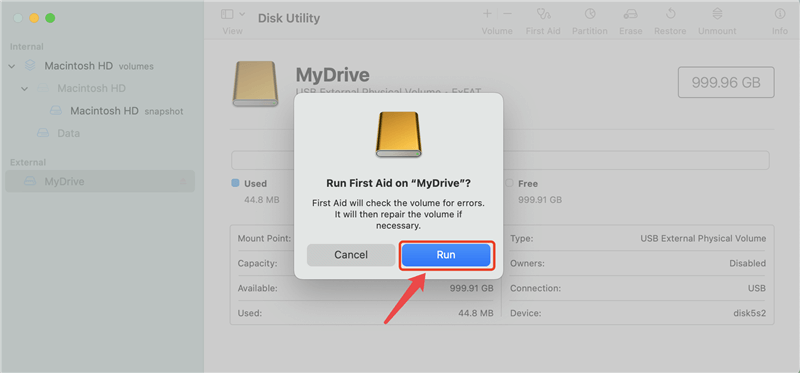
For your Samsung SSD to stay healthy and work well, run "First Aid" in Disk Utility. Here's how to do this:

  1. To open Disk Utility, go to your Applications folder, then to Utilities, and finally open Disk Utility.
  2. A list of all linked drives is on the left side of the Disk Utility window. From this list, find and choose your Samsung SSD.
  3. In the Disk Utility window, select your Samsung SSD and click on the "First Aid" in the menu at the top.
  4. A window pop-up will ask you to confirm that you want to run First Aid on the chosen drive. To move forward, click the "Run" button.
  5. Disk Utility will now review your Samsung SSD and fix any disk problems. This process could take a while, depending on how big and well your drive is.
  6. When the first aid process is done, Disk Utility will show a rundown of what was found and what was done. Check this information again to make sure that any problems have been fixed.

Fix Samsung SSD Not Mounting on Mac

Method 4: Check the File System and Format the Drive

You can fix problems with corruption or compatibility on your Samsung SSD by checking the file system and formatting it. To do these things, follow these steps:

Checking File System:

  • Find your way to the Applications folder, then to Utilities, and open Disk Utility.
  • Pick out your Samsung SSD from the list of drives on the left side of Disk Utility.
  • The "First Aid" button is at the top of the Disk Utility window. Click on it to start First Aid.
  • There will be a proof window showing up. Press "Run" to begin the First Aid process. If Disk Utility finds any problems with your SSD's file system, it will fix them.
  • When First Aid is done, Disk Utility will show a rundown of what it found and what it did. Check this information again to make sure that any problems have been fixed.

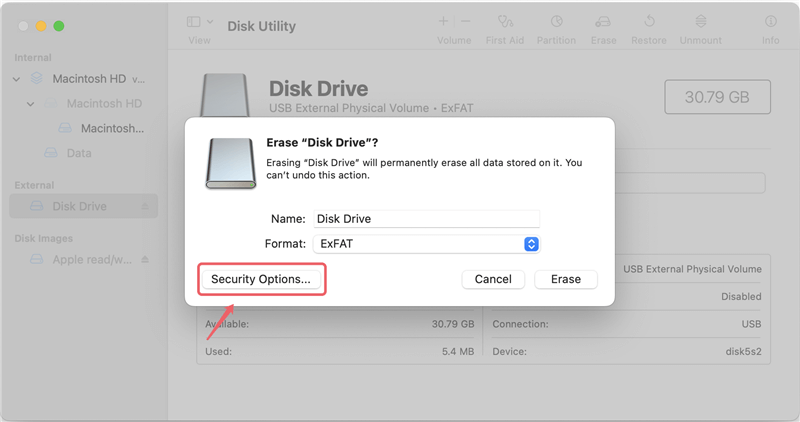
Formatting the Drive:

  • Disk Utility should be open. If it isn't already, open it from the Utilities folder.
  • In Disk Utility, look for your SSD in the list of drives on the left.
  • To delete the drive, click the "Erase" button in the Disk Utility window.
  • In the Erase dialogue box, use the Format dropdown menu to pick a format for your SSD, like APFS or Mac OS Extended, ExFAT. In the Name field, name your file.
  • Make sure you choose the right drive, format, and name a second time. To begin processing, click the "Erase" button.
  • A box will ask you to confirm that you want to format the drive. It will delete all of its files. Press "Erase" to move on.
  • Disk Utility will format your Samsung SSD when the job is done. After it's done, you can use your SSD using the new format you chose.

Fix Samsung SSD Not Mounting on Mac

Note: If you have lost data due to erasing the Samsung SSD, just use a data recovery app - such as Do Your Data Recovery for Mac to scan the SSD and get all lost data back.

How to Unformat Samsung SSD on Mac

How to Unformat Samsung SSD on Mac

Do Your Data Recovery for Mac can scan the formatted or erased Samsung SSD and quickly get all lost data back.

Method 5: Check for Hardware Issues

If software fixes haven't fixed the problem with your Samsung SSD not mounting on your Mac, it might be a hardware problem. To check for hardware issues, do the following:

🔨 Check out the SSD

Look over your Samsung SSD carefully for any signs of damage to its body. Check for dents, scratches, and other obvious flaws that could mean there is damage.

🔗 Change Cables

Connect your SSD with a different USB or Thunderbolt cord if you're using an external case. Bad cables often cause problems with the connection.

🤵‍ Get expert Help

If you think there is a problem with the hardware and can't fix it yourself, you should talk to an expert technician. They can figure out what's wrong with your Mac or SSD's hardware and fix it.

How to Mount and Use NTFS Samsung SSD on Mac?

NTFS file system is not compatible with macOS. If the Samsung SSD has been pre-formatted to NTFS, it may not mount on your Mac. You should reformat it or use an NTFS for Mac tool to add NTFS read-write support on your Mac.

DoYourData NTFS for Mac tool is one of the best NTFS for Mac tools. It can help you mount Samsung SSD and enable writable for it.

Step 1. Download and install DoYourData NTFS for Mac, connect the Samsung SSD to your Mac.

Step 2. Open DoYourData NTFS for Mac, then select the Samsung SSD, click on Mount button.

Samsung SSD not mounting on Mac

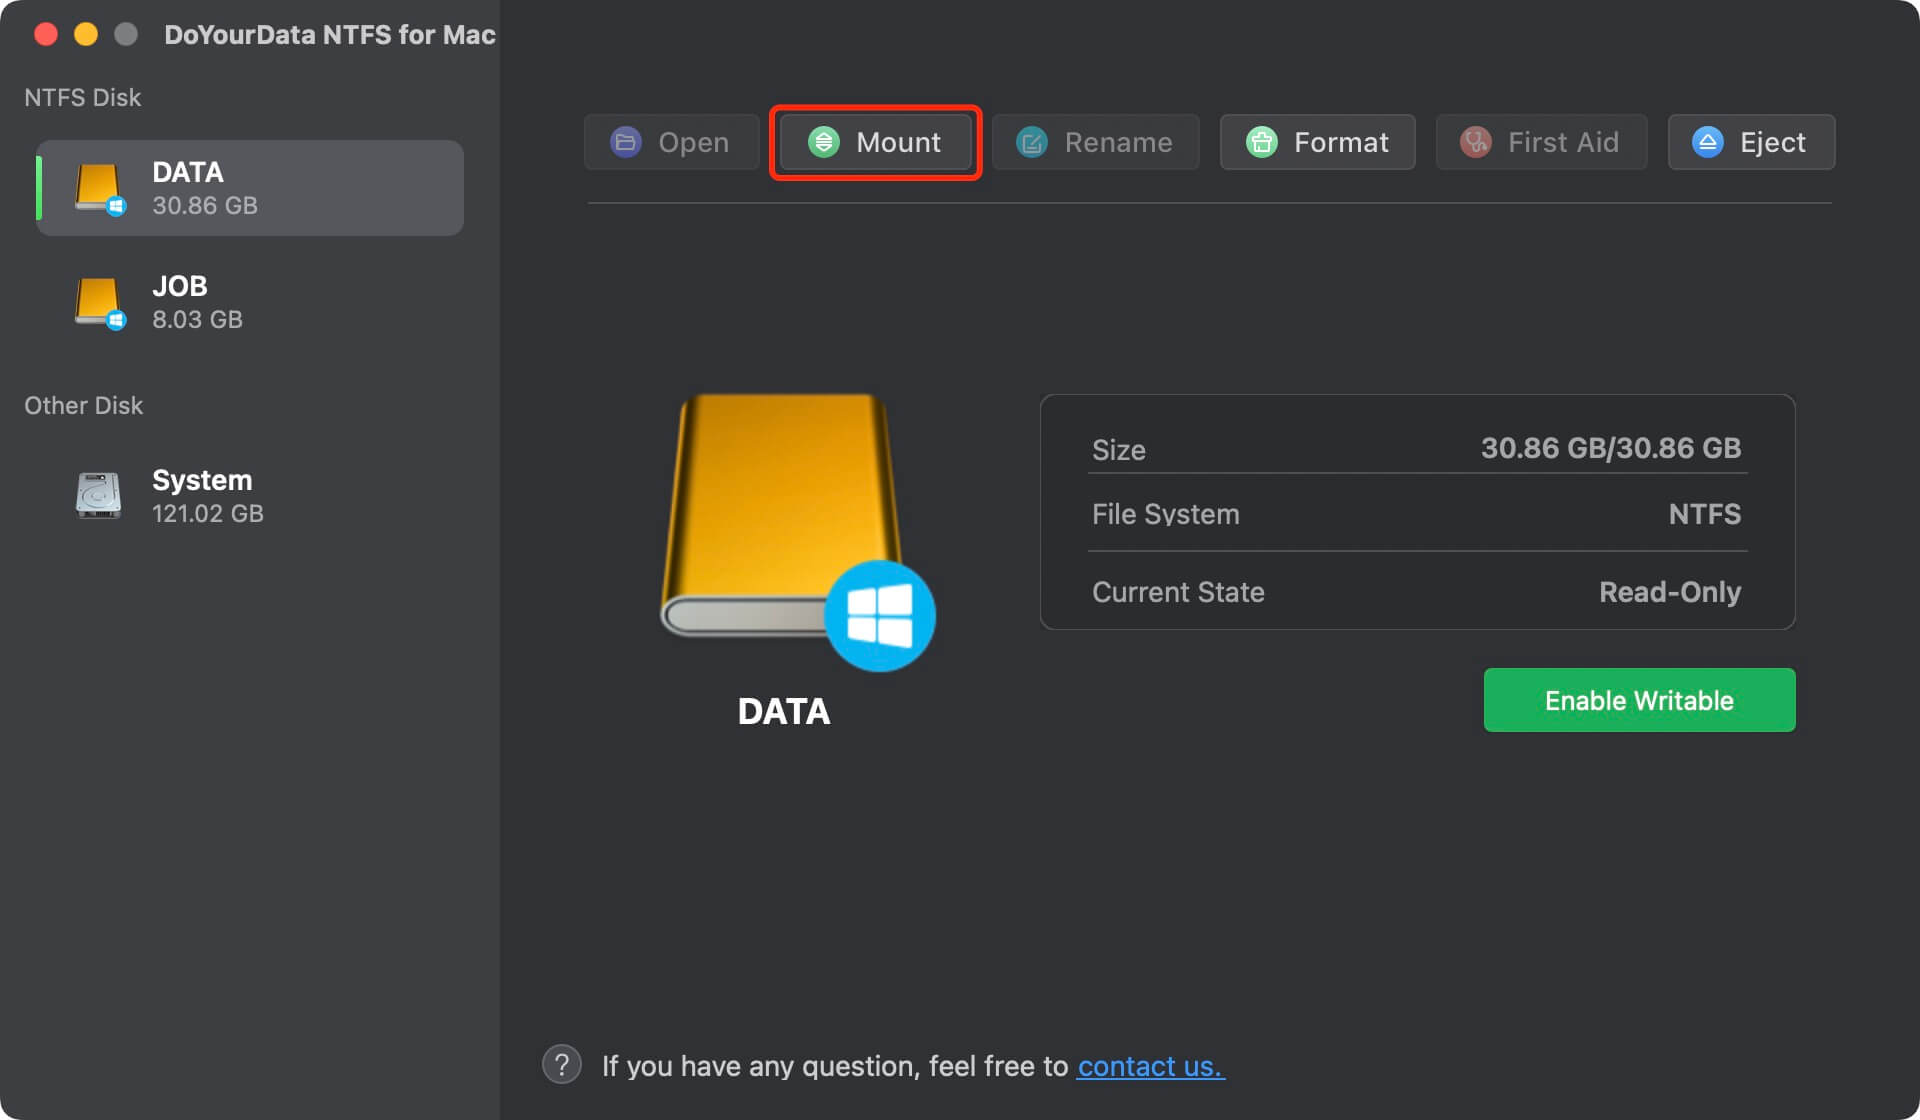
Step 3. To read-write NTFS Samsung SSD on your Mac, click on Enable Writable button.

fix Samsung SSD read-only on Mac

Conclusion:

In conclusion, fixing a Samsung SSD that won't mount on your Mac requires a series of checks and steps to address software and hardware problems. Many software problems can be fixed by updating macOS and SSD drivers, using Disk Utility's "First Aid" feature, checking file systems, and maybe even formatting the drive.

If these steps don't help, looking for physical damage and trying with different cables or cases can help figure out what's wrong with the hardware. For technical problems that won't go away, you might need help from a professional.

DoYourData Author

Written & Updated by Ricky Lin

Ricky Lin is an senior editor of DoYourData who lives in Adelaide, Australia. He is interested in writing technology articles related with data recovery, computer issue fixes, disk clone, iPhone data recovery, video edit, Mac optimization, etc. He Joined DoYourData in 2019 and have written 500+ articles to help both Windows users and Mac users to solve data or computer problems.

Read full bio