
Fix Disk Not Ejected Properly and Recover Data
If you have lost data due to unsafely unplug external hard drive on your Mac, fix it with Disk Utility and get all lost data back.
![]() Ricky Lin updated on September 11, 2024
Ricky Lin updated on September 11, 2024
Quick Navigation:
Using an external hard drive with a Mac is a common practice, whether it's for backing up data, transferring files, or expanding storage. However, safely ejecting an external hard drive is crucial to avoid data corruption and ensure the longevity of your device. This comprehensive guide will walk you through the various methods to eject an external hard drive on a Mac, along with tips to troubleshoot common issues that may arise.

Before diving into the various methods of ejecting an external hard drive on a Mac, it's important to understand why safely ejecting the device is necessary.
Data Integrity:
When an external hard drive is in use, data is continuously read and written between the drive and your Mac. If you disconnect the drive without properly ejecting it, you risk interrupting this process, leading to data corruption or loss. Safely ejecting the drive ensures that all ongoing processes are completed and that your data remains intact.
Hardware Longevity:
Sudden disconnection of an external hard drive can cause damage to the hardware, including the drive itself and the port it's connected to. This can result in costly repairs or replacement. By safely ejecting the drive, you allow the device to properly shut down, reducing wear and tear.
System Stability:
Improperly ejecting an external hard drive can cause your Mac to behave unpredictably, such as freezing, slowing down, or crashing. Ensuring a safe ejection helps maintain the stability and smooth operation of your system.
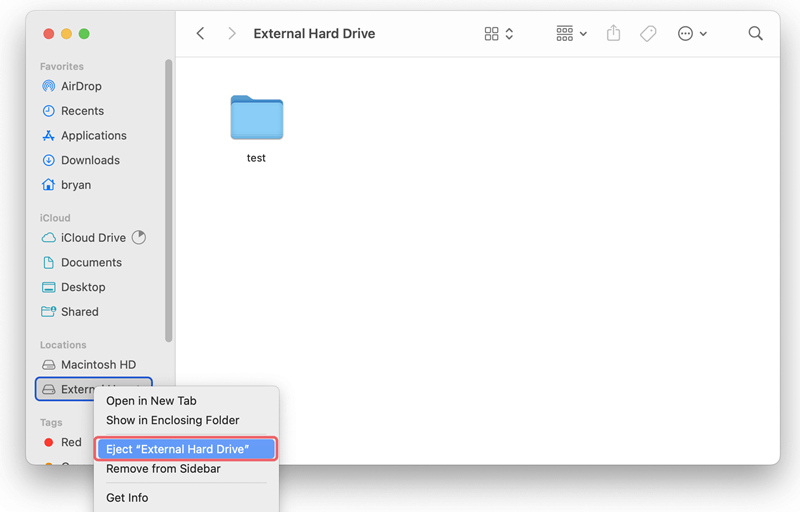
The Finder is the most common and straightforward way to eject an external hard drive on a Mac. Here's how you can do it:
Step 1: Locate the External Hard Drive
Once your external hard drive is connected to your Mac, it will appear on the desktop by default. If you don't see it on the desktop, you can find it in the Finder sidebar under the "Locations" or "Devices" section.
Step 2: Eject the Drive
To eject the drive, simply right-click (or Control-click) on the drive icon either on the desktop or in the Finder sidebar. From the context menu that appears, select "Eject [Drive Name]." Alternatively, you can drag the drive icon to the Trash. Don’t worry—the Trash icon will change to an Eject symbol as you start dragging the drive toward it.
Step 3: Wait for the Eject Process to Complete
After selecting the eject option, wait for a few seconds. The drive will disappear from the desktop and Finder sidebar, indicating that it is safe to unplug the external hard drive from your Mac.
Another simple method to eject an external hard drive is through the Menu Bar.
Step 1: Access the External Hard Drive
When the external hard drive is connected, you can see its icon in the Menu Bar at the top of your screen. It usually appears as a small icon that resembles the drive itself.
Step 2: Eject the Drive
Click on the external hard drive icon in the Menu Bar. A drop-down menu will appear, showing the option to "Eject [Drive Name]." Select this option to safely eject the drive.
Step 3: Unplug the Drive
Once the drive icon disappears from the Menu Bar, it is safe to unplug the drive from your Mac.
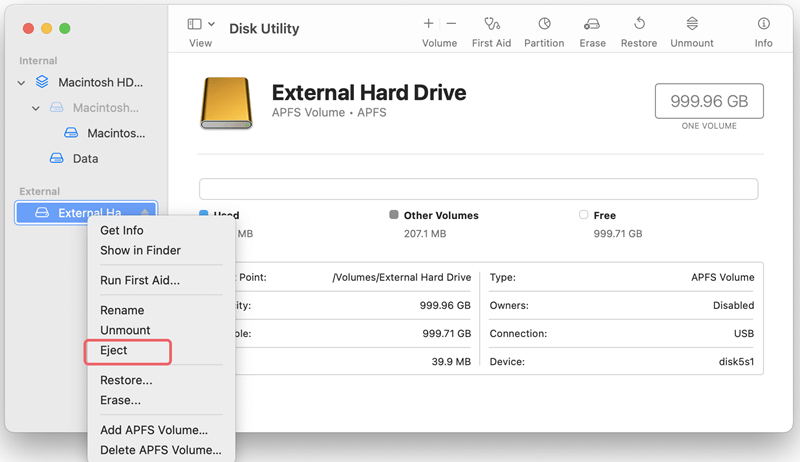
Disk Utility is a built-in macOS application that allows you to manage and format drives. It's also a useful tool for ejecting external hard drives, especially if you encounter difficulties with other methods.
Step 1: Open Disk Utility
You can open Disk Utility by searching for it using Spotlight (press Command + Space and type "Disk Utility") or Move to Applications folder, then go to Utilities and then to Disk Utility.
Step 2: Select the External Hard Drive
Once Disk Utility is open, you'll see a list of all connected drives on the left-hand side. Locate your external hard drive in this list and click on it to select it.
Step 3: Eject the Drive
With the drive selected, click the "Eject" button, which looks like a small triangle with a line underneath, located at the top of the Disk Utility window. After a few seconds, the drive will disappear from the list, indicating that it has been safely ejected.
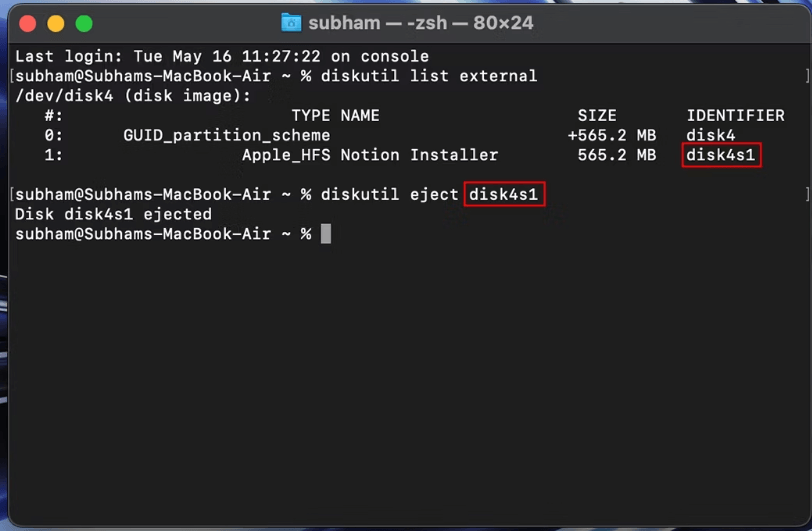
For those who prefer using command-line tools or encounter issues with the graphical methods, Terminal provides an alternative way to eject an external hard drive.
Step 1: Open Terminal
Open Terminal by searching for it with Spotlight or by navigating to "Applications" then "Utilities" and then to "Terminal."
Step 2: Identify the External Hard Drive
In Terminal, type the command diskutil list and press Enter. This will display a list of all connected drives, including your external hard drive. Locate your drive by identifying its name or disk identifier (e.g., /dev/disk4).
Step 3: Eject the Drive
Once you've identified your external hard drive, type the command diskutil eject /dev/disk4 (replace "/dev/disk4" with your drive's identifier) and press Enter. The drive should be ejected, and you can safely unplug it from your Mac.
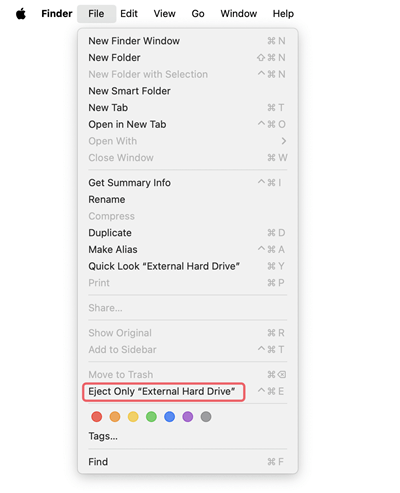
If you're a fan of keyboard shortcuts, macOS offers a quick way to eject an external hard drive without needing to click through menus.
Step 1: Select the External Hard Drive
First, make sure the external hard drive is selected in the Finder or on the desktop. You can do this by clicking on it or using the arrow keys to navigate to it.
Step 2: Use the Eject Shortcut
With the drive selected, press Command + E on your keyboard. This will instantly eject the drive, and it will disappear from your desktop or Finder sidebar.
There are many third-party software can help you safely eject an external hard drive on Mac, here are some of them:
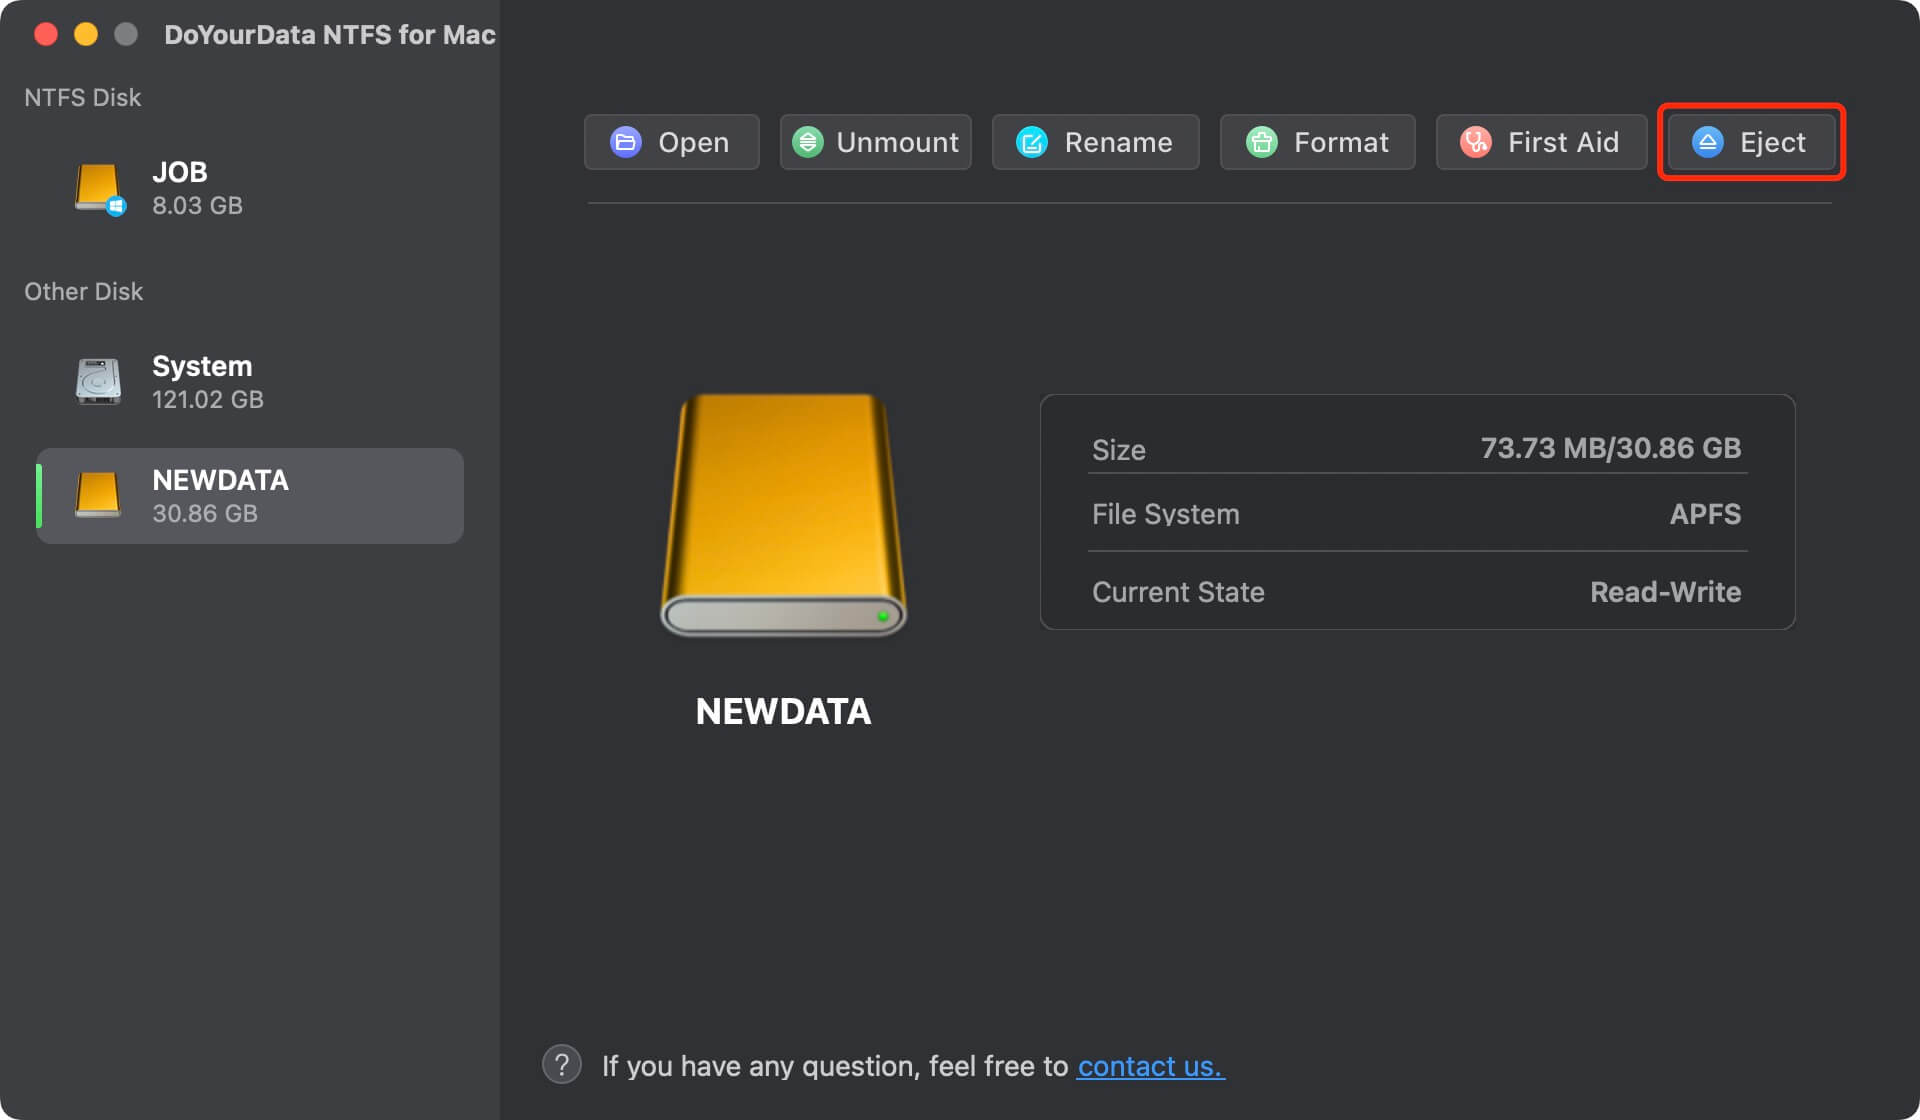
For example, you can use DoYourData NTFS for Mac to eject an external hard drive on Mac.
1. Download and install DoYourData NTFS for Mac.
2. Open DoYourData NTFS for Mac, select the external hard drive, click on Eject button.
Sometimes, despite following the correct procedure, your external hard drive may refuse to eject. This usually happens because a program is still accessing the drive or because a system process is preventing the ejection. Here are some troubleshooting steps you can take:
1. Close Any Open Files or Applications
Ensure that any files stored on the external hard drive are closed. Also, check if any applications that might be using the drive are running, and close them. This includes programs like Time Machine if you're using the drive for backups.
2. Force Eject the Drive
If the drive still won't eject, you can force eject it. Right-click on the drive icon in the Finder sidebar, hold down the Option key, and select "Force Eject." This method should only be used as a last resort, as it can potentially lead to data corruption.
3. Use Activity Monitor to Identify Problem Processes
Activity Monitor can help you identify and stop processes that might be preventing the drive from ejecting. Open Activity Monitor (found in Applications > Utilities), and look for any processes that are accessing your external hard drive. Select the process and click the "X" button to force quit it, then try ejecting the drive again.
4. Restart Your Mac
If all else fails, restarting your Mac will usually resolve the issue. After restarting, try ejecting the drive again before launching any applications.
Note: If you have lost data due to Not Safely Ejecting Your External Hard Drive on Mac, you can use a data recovery app to help you get the lost data back.
Fix Disk Not Ejected Properly and Recover Data
If you have lost data due to unsafely unplug external hard drive on your Mac, fix it with Disk Utility and get all lost data back.
To avoid issues with ejecting your external hard drive and to ensure its longevity, follow these best practices:
1. Always Safely Eject Before Unplugging
Never unplug your external hard drive without first ejecting it. This ensures that all data is properly written to the drive and that no files are corrupted.
2. Keep Your Mac's Software Up to Date
Regularly updating your macOS ensures compatibility with various external hard drives and can prevent issues related to ejecting drives.
3. Use Quality External Hard Drives
Invest in high-quality external hard drives from reputable manufacturers. Cheaper drives may have a higher likelihood of failure or compatibility issues.
4. Regularly Back Up Your Data
Always keep a backup of important data stored on your external hard drive. While ejecting the drive safely minimizes the risk of data loss, hardware failure is always a possibility.
5. Format Your Drive for macOS Compatibility
If you're using an external hard drive primarily with a Mac, consider formatting it to the APFS or HFS+ file system. These formats are optimized for macOS and can reduce issues with file transfers and ejection.
Ejecting an external hard drive on a Mac is a simple but essential task that protects your data and ensures the longevity of your storage devices. Whether you prefer the ease of the Finder, the precision of Disk Utility, or the flexibility of Terminal, macOS provides multiple ways to safely disconnect your drive. By following the steps outlined in this guide and adhering to best practices, you can avoid data corruption and keep your external hard drives in good working order. Remember, taking a few extra seconds to eject your drive properly can save you from potential headaches down the line.
Written & Updated by Ricky Lin
Ricky Lin is an senior editor of DoYourData who lives in Adelaide, Australia. He is interested in writing technology articles related with data recovery, computer issue fixes, disk clone, iPhone data recovery, video edit, Mac optimization, etc. He Joined DoYourData in 2019 and have written 500+ articles to help both Windows users and Mac users to solve data or computer problems.
Hot Articles