Back up files or clone drive on Mac.
Clone the drive as backup or back up files directly to keep your data safe. Read more >>
Quick Navigation:
You may have encountered an unexpected problem when moving files from your Mac to an NTFS drive. Windows comes with NTFS, which is the usual file system. However, macOS can only read files on an NTFS drive; it can't write to them.
You can't copy, cut, move, or drag files to NTFS drive directly on Mac. This limitation can be very annoying, especially if you often work on both macOS and Windows. Not to worry, though—there are good ways to close this that you can use.
This article will show you the best ways to allow NTFS write access on your Mac, whether you need a quick or long-term fix. You'll know how to move your files between these two systems, making your work faster and easier.
Microsoft created a new file system called NTFS for its Windows operating system. It has many advanced features, such as handling big volumes, comping files, and encrypting them. However, one of the main problems for Mac users is that, by default, macOS only supports read-only NTFS drives.
This means that you can only read and share files on an NTFS drive on your Mac. You can't change them, delete them, or add new ones. One main reason for this problem is licensing and compatibility issues. Since NTFS is a Microsoft-owned file system, Apple has decided not to fully add write support to macOS.
It's also harder to ensure that writing works reliably on macOS and NTFS because of technical differences that make data loss or corruption more likely. It can be a big problem for people who constantly move between macOS and Windows.
The lack of support between macOS and NTFS (New Technology File System) is a big problem for people who constantly switch between Windows and Mac environments. The usual file system for Windows is NTFS, which was made by Microsoft and is known for its advanced features and speed.
However, macOS only partially supports NTFS, so users can read files from NTFS drives but not write to them. People who need to move, change, or handle files across platforms may find this limitation frustrating. Compatibility is also a problem because of license issues and technical differences between the two operating systems. To solve the issue, we will show you 3 temporary and long-term solutions.
One of the best ways to give your Mac NTFS write access is to use third-party software. DoYourData NTFS for Mac is a suggested choice which is compatible with the latest macOS Tahoe. This tool lets you easily read, write, and change files on NTFS drives. To use DoYourData NTFS for Mac, follow these steps:
Step 1: Download and install software
You can get the DoYourData NTFS for Mac program from the official DoYourData website. Open the installer when the download is done and follow the on-screen directions to put the app on your Mac.
Step 2: Connect your NTFS drive to the Mac.
Once the setup is done, connect your NTFS drive to your Mac using a USB or Thunderbolt cable. Ensure the drive is turned on correctly and your system can see it.
Step 3: Launch DoYourData NTFS for Mac.
Run the DoYourData NTFS for Mac tool from Launchpad. The software will find your connected NTFS drive immediately.
Step 4: Enable write access for the NTFS drive.
Select the NTFS drive and click the click the button Enable Writable.
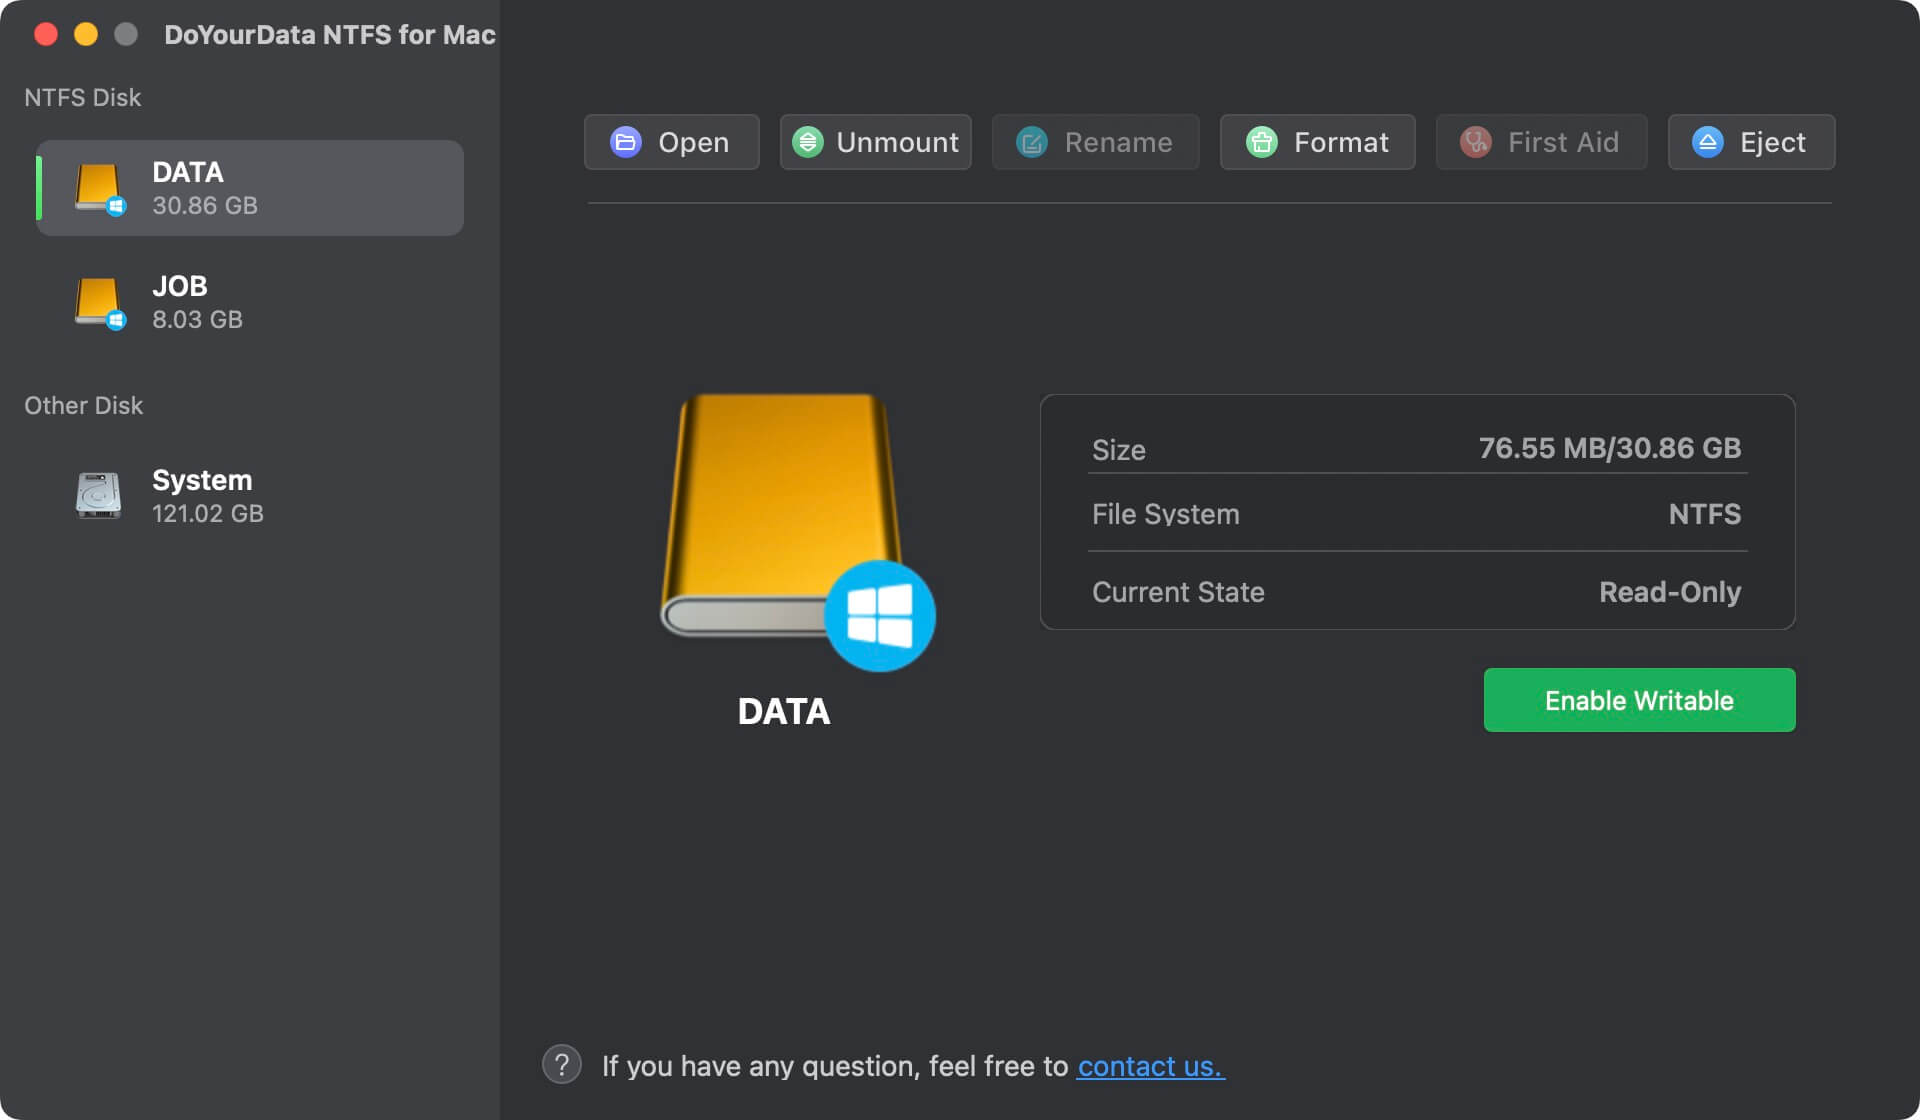
You can now handle the files on the NTFS drive since NTFS write access is now turned on. You can move, copy, cut, and drag files between your Mac and the NTFS drive like on a normal drive that works with macOS.
Step 5: Eject the drive safely.
When you're done moving files, safely remove the NTFS drive from Finder so the data isn't damaged.
This method is a long-term and stable solutions and will not change the NTFS drive format. After enabling the write access for the NTFS drive with the software, it will be mounted as writable automatically once you connect the drive to the Mac again in the future.
If you don't want to use NTFS, you can change your drive to a file system that works better with it, like exFAT. Windows and macOS both support exFAT, making it easy to move files without problems with NTFS. To set up your drive for exFAT, do the following:
Step 1: Backup your data
It's important to back up any important files on the drive before you reset it because that will delete all the files already there.
Back up files or clone drive on Mac.
Clone the drive as backup or back up files directly to keep your data safe. Read more >>
Step 2: Open Disk Utility
Go to the Applications folder on your Mac, then to Utilities, and open Disk Utility. This built-in tool will help you manage your drives.
Step 3: Select the NTFS drive
In Disk Utility, find the NTFS drive you want to format on the left side of the screen and click on it.
Step 4: Erase and format
Click the "Erase" button in the window. In the choice, pick "exFAT" as the file system. You can also name your drive if you want to. To make sure the editing is done, click "Erase" again.
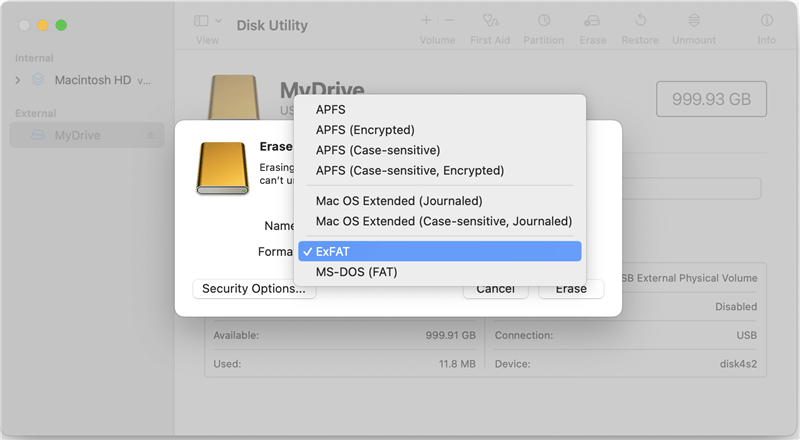
With this method, you can make the drive read and write fully in both Windows and Mac without additional tool. But you will lose the advanced features of NTFS when using the drive on Windows.
There is an temporary solution to enable NTFS drive write access using Terminal. But please note that this method is not very stable. If you only use the NTFS drive on Mac occasionally, you can choose this method.
Step 1. Connect the NTFS drive to your Mac. Open Finder > Applications > Utilities > Terminal.
Step 2. Run the following command to edit the file fstab with the nano-editor:
sudo nano /etc/fstab
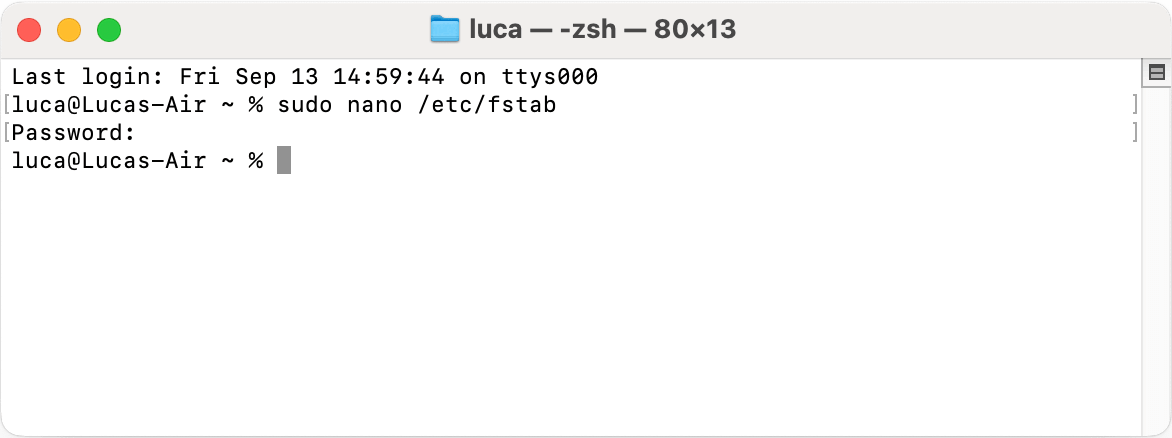
Step 3. Add the following line to specify write access for your NTFS drive:
LABEL=DRIVE none ntfs rw,auto,nobrowse
Replace DRIVE with the actual name of your NTFS drive.
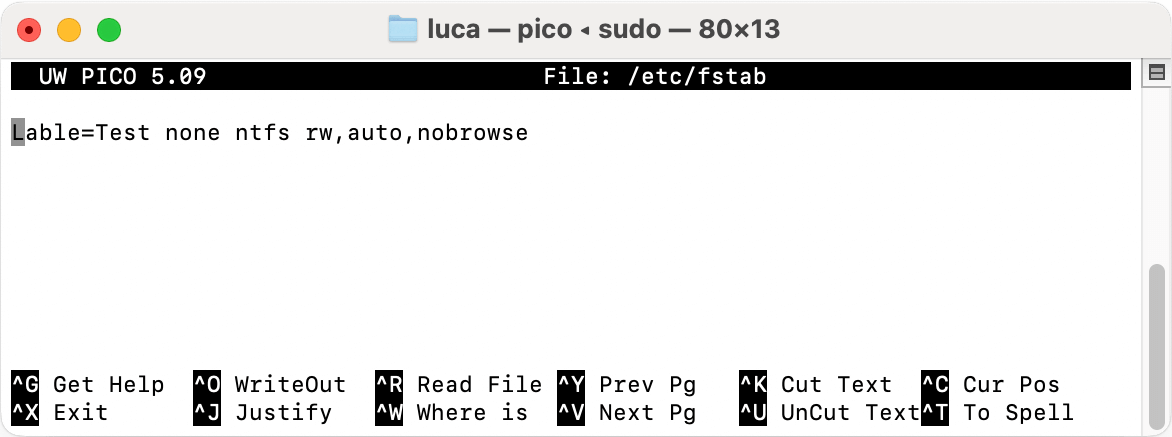
Step 4. Press Ctrl + X and "Y" to confirm the changes. Then you can edit, delete, or add data to the NTFS drive.
A few usual problems happen when you use NTFS drives on a Mac. To help you fix them, here are some fixing tips:
1. Why the NTFS drive not recognized on my Mac?
If your Mac doesn't see your NTFS drive, ensure it's plugged correctly and turned on. If that doesn't work, try a different USB port or cable and restart your Mac before connecting the drive again.
2. Why it's very slow to transfer files between the Mac and NTFS drive?
Transfer speeds that are too slow can be annoying. Use a fast USB port, like USB 3.0 or Thunderbolt, to ensure everything works correctly. Closing programs that you don't need and may use up system resources can also help speed up transfers.
3. How to reduce the data corruption risk of NTFS drive on Mac?
To lower the chance of data damage, use dependable third-party software like DoYourData NTFS for Mac. Do not use untested methods to enable NTFS write support, as they might cause data loss or make the system unstable.
4. Why there are errors while trying to transfer files from Mac to NTFS drive?
If you get errors while moving files, ensure you have permission to write to the NTFS drive. Sometimes, copying smaller files instead of bigger ones can help resolve these problems and make the move go more smoothly.
It can be difficult to work around the limitations of NTFS drives on macOS, but knowing your options can make your job much easier. You can easily move files between macOS and Windows using a trustworthy third-party program like DoYourData NTFS for Mac or change your drive to a file system that works better with both, like exFAT.
Managing your files across systems is easy if you deal with common problems and use good solutions. If you take the right steps, you won't have to deal with the pain of read-only access. It will make the process go more smoothly and quickly.
Discover how to enable NTFS write access on your Mac with DoYourData NTFS for Mac, format your drive to exFAT, or using Terminal for seamless file transfers between Mac and NTFS drives.
DoYourData NTFS for Mac
DoYourData NTFS for Mac is a safe, powerful and easy-to-use NTFS for Mac tool. It allows macOS to read & write files on NTFS drives without any limitation. It is also a comprehensive disk management tool for Mac to mount/unmount disk, format disk, repair disk, read-write disk...on Mac.
Hot Articles
