Is it possible to recover reformatted drive on Mac?
Do Your Data Recovery for Mac is effective to recover lost data from formatted drive on Mac.
When you decide to change the Time Machine drive, you may need to reformat the old Time Machine disk to an ordinary disk for reuse. Disk Utility and Terminal are common tools to reformat the drive. If you also need to wipe all data permanently from the Time Machine drive, Super Eraser for Mac is a good choice.
![]() Updated by Shirly Chen on April 16, 2025
Updated by Shirly Chen on April 16, 2025
Quick Navigation:
Since various operating systems use different file systems to handle data, you may have to reformat an external drive you purchase, such as one of our suggested desktop hard drives, portable hard drives, or USB 3.0 flash drives, before you can use it.
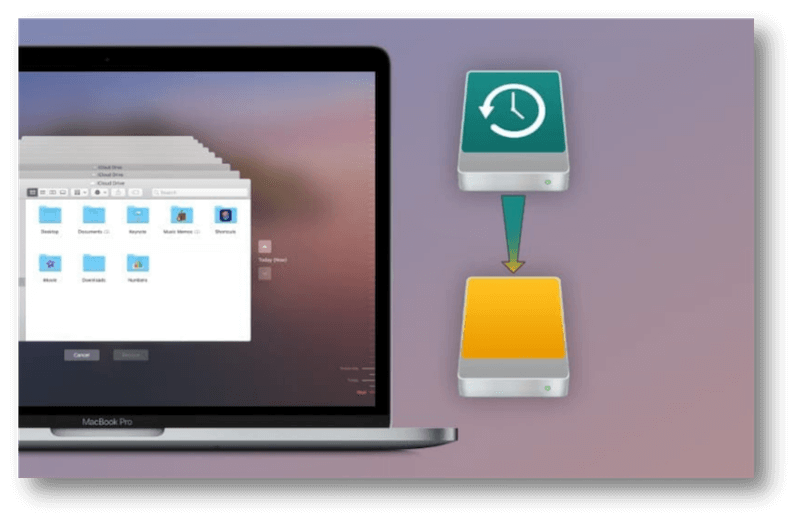
All drives work with both Windows and macOS; however, most of them are pre-formatted for Windows by default. As a Mac user, your chances of having to reformat your hard disk are greater. For example, if you want to repurpose the drive for Time Machine, you need to reformat it. But don't worry: The procedure is straightforward. This article will show you how to reformat a Time Machine disk to an ordinary disk in different ways.
APFS, NTFS, HFS+, FAT32, and exFAT are the four most used file systems on non-Linux machines. How can you know which of these four file systems is best for you?
Using the built-in Disk Utility tool, especially if your partition is encrypted, is required for this procedure. Before we begin, it's important to remember that Disk Utility should show a hierarchy of drives and volumes.
An external drive's Time Machine partition should be visible at the top of the logical volume group that represents the disk. They may have the same titles, such as "Time Machine," yet they reflect two distinct concepts.
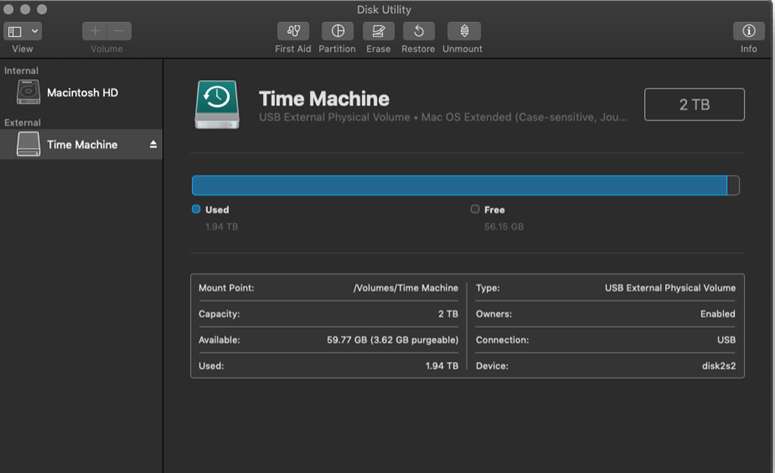
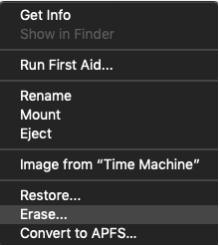
This will erase everything on your external disk, so proceed with caution. The Time Machine partition may be "Unmount" in Disk Utility.
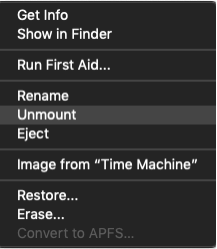
Choose Erase.. option to format the Time Machine partition. Then you will be asked to set a new name and file system for the drive if necessary.
A logical volume group, which includes the partition, must be deleted in order to remove it from the system.

If you lose important data after resetting/reformatting Time Machine drive, just use a Mac data recovery application - Do Your Data Recovery for Mac to help you get lost data back.
Is it possible to recover reformatted drive on Mac?
Do Your Data Recovery for Mac is effective to recover lost data from formatted drive on Mac.
When you are going to sell, donate or dispose of an old Time Machine drive, try DoYourData Super Eraser for Mac to help you wipe then entire Time Machine drive to permanently erase all data from it.
The software will not only format the Time Machine drive to a ordinary disk, but also wipe all data permanently to avoid data recovery. Here is how to format Time Machine drive using this tool:
Step 1. Start the data erasure tool from launchpad and ensure to connect the Time Machine drive to the Mac. Select the Wipe Hard Drive mode to format and wipe the drive.

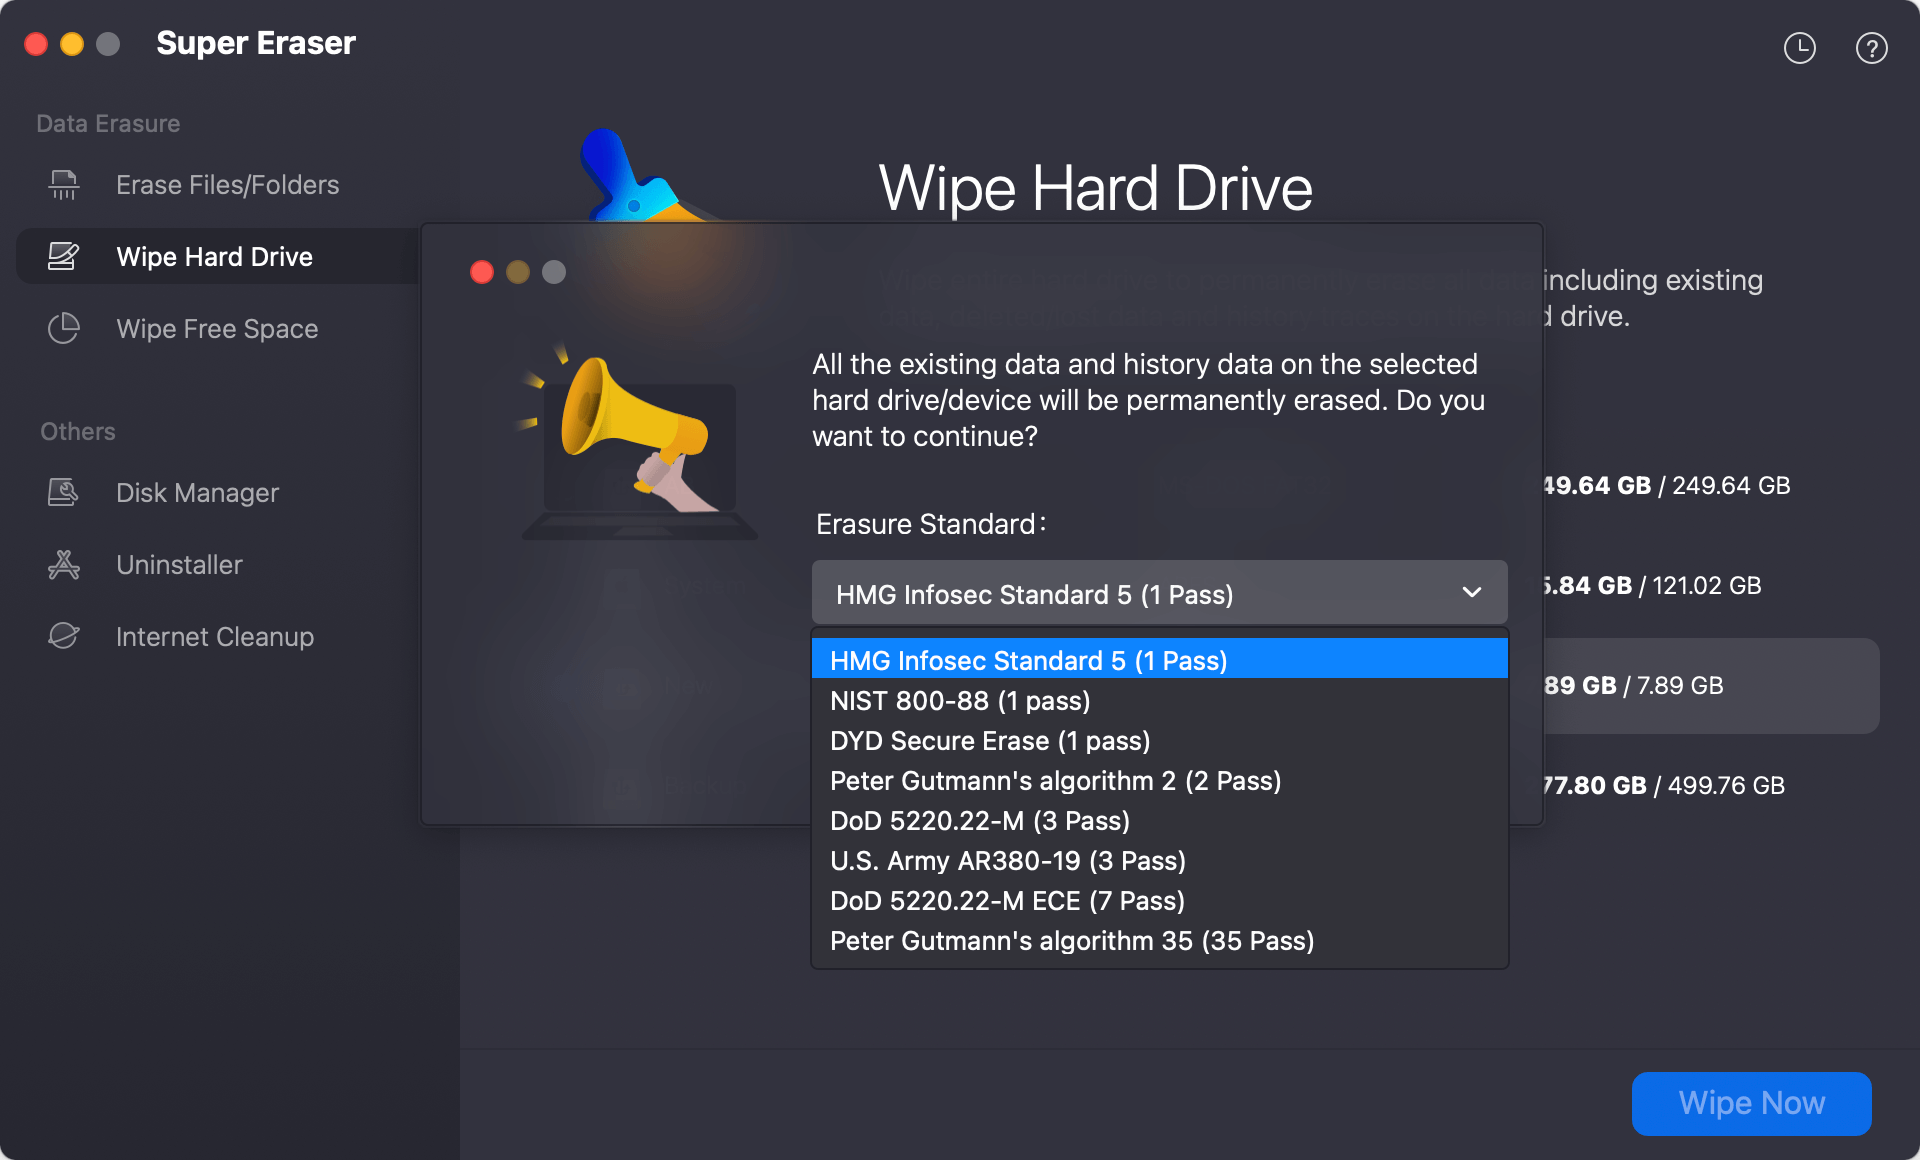
Step 2. After selecting the Time Machine drive from the list, click Wipe Now button to continue. You will be asked to choose a data erasure standard to wipe the data from the drive.
Step 3. The last step is to start the data wiping and disk formatting process. It will take a while depending on the disk size and the data erasure standard you selected.
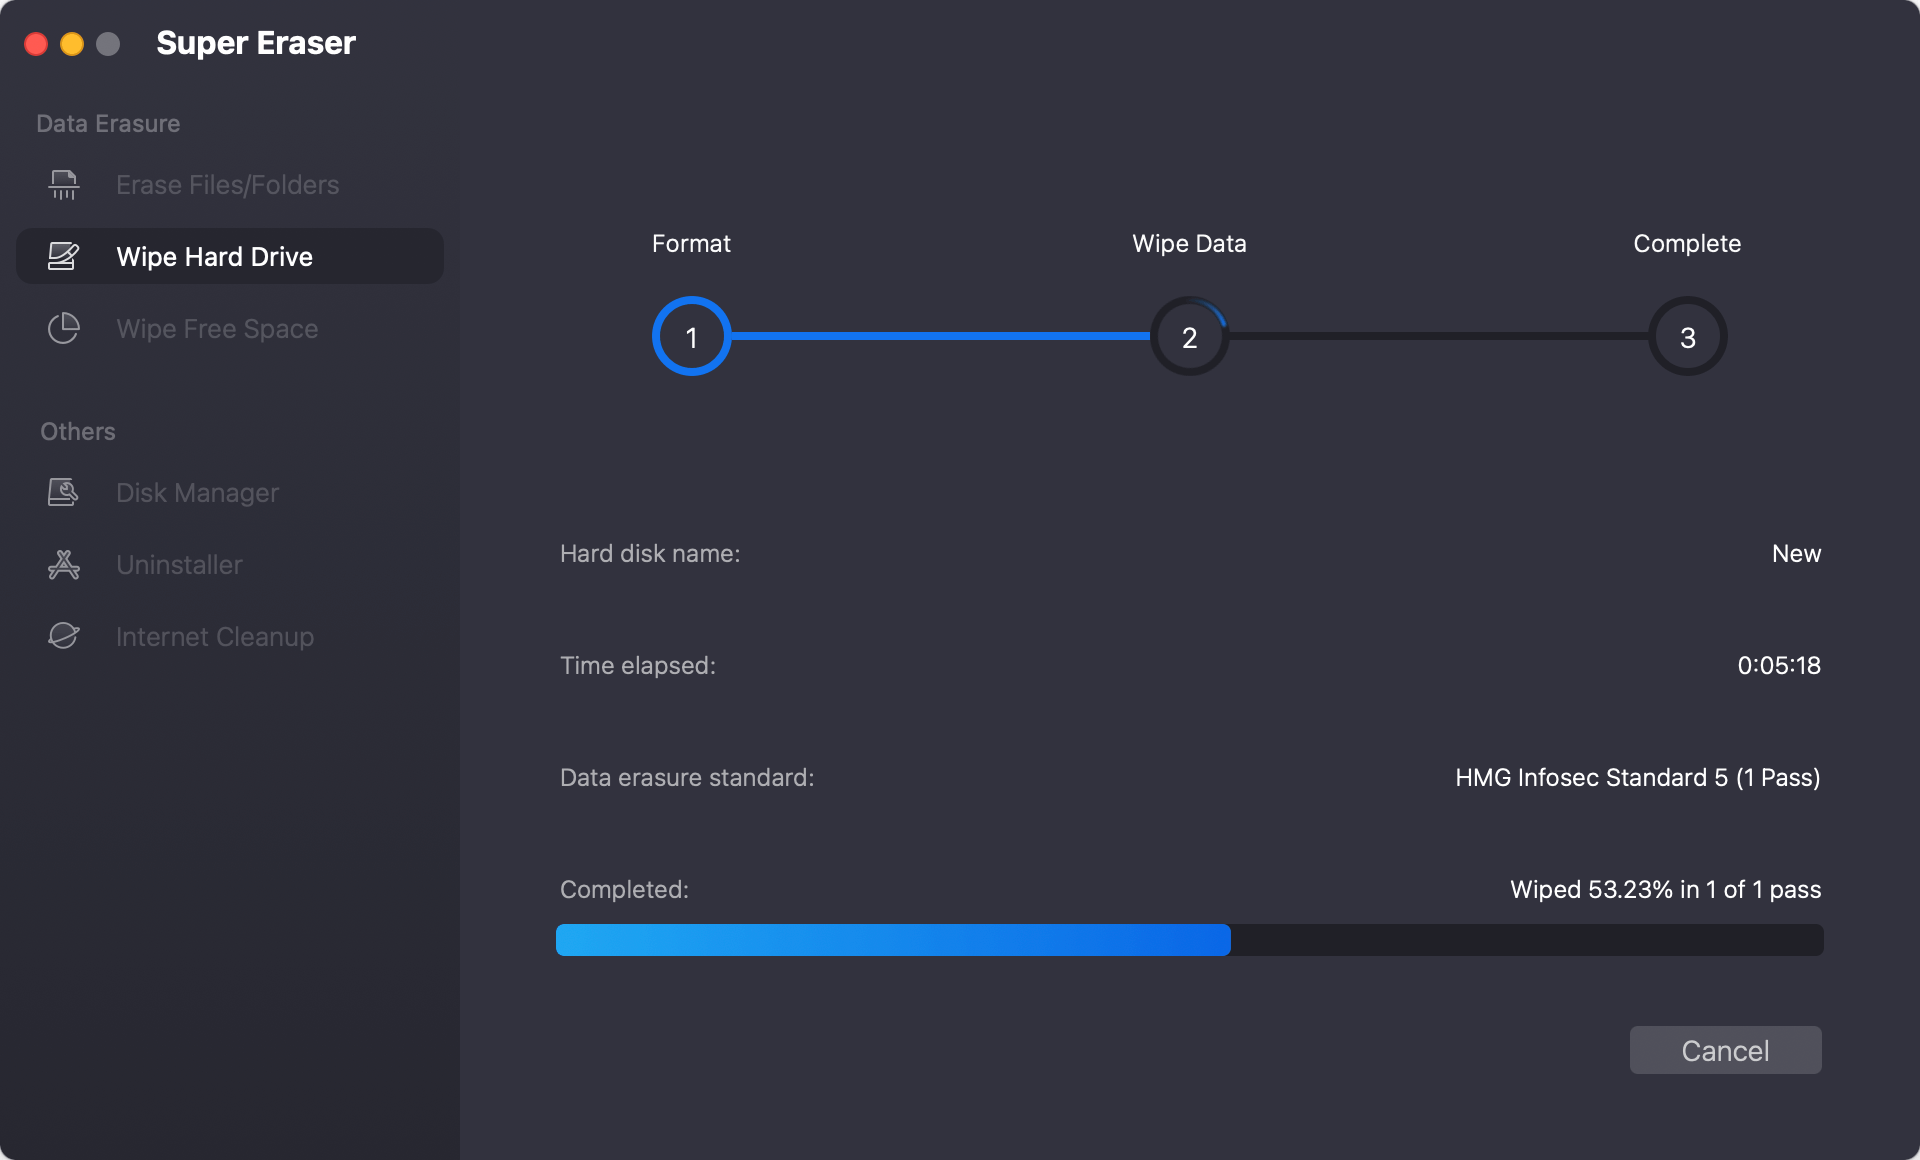
Once it's done, the Time Machine drive is reformatted to an ordinary disk and all data is gone forever. You can feel free to resell, donate or abandon the disk without worrying about data leakages.
There is another option to reformat A Time Machine disk to an ordinary disk on Mac. Terminal is a powerful tool which can accomplish different tasks with commands. If you are preferred to use commands to format the drive, here is how:
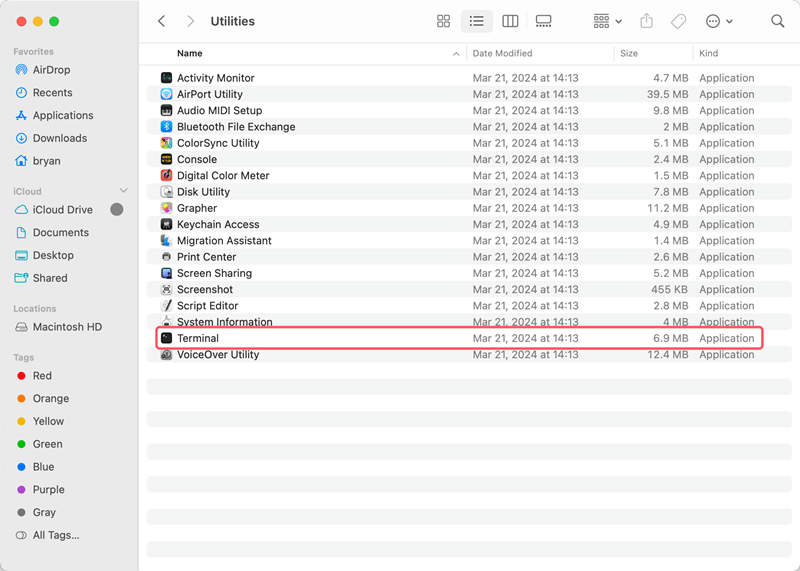
Step 1. Open Finder and then Applications folder. Locate the Utilities folder and find Terminal. Open the app by double-clicking it.
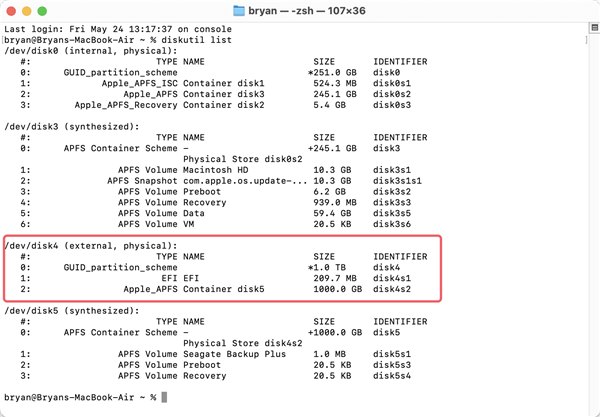
Step 2. Before you reformatting the Time Machine disk is formatted with command, you need to locate it first in Terminal. Enter the command diskutil list to list all the connected disks on Mac. Find the information for the Time machine drive.
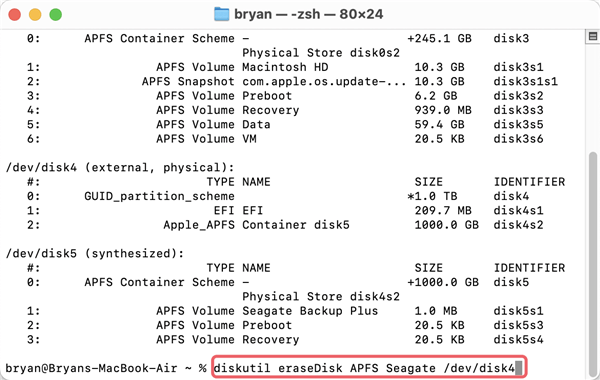
Step 3. Then you can try to reformat the Time Machine disk with the command: diskutil eraseDisk APFS Name /dev/diskX
Replace APFS with another file system if needed. X should be replaced with the right Time Machine disk information on your Mac.
It may not be enough to use the formatting options above on a disk that has data on it to keep some of that data from becoming recoverable in certain cases. Be careful to securely wipe the drive before you format it to prevent data recovery if you're giving, selling, or recycling the drive.

DoYourData Super Eraser for Mac
DoYourData Super Eraser for Mac is a 100% safe, powerful and easy-to-use data erasure program. It offers certified data erasure standards including Peter Gutmann, U.S. Army AR380-19, DoD 5220.22-M ECE to permanently erase data from Macs and external devices, making data recovery be impossible.
Written & Updated by Shirly Chen
Shirly Chen has been writing data recovery, data erasure articles for DoYourData over 4 years. She has been working as a professional website content writer & editor for quite a long time. She also writes articles about disk clone, Mac optimization, disk backup, etc.