Quick Navigation:
- Before Wiping Seagate/WD External Hard Drive on Mac
- Methods to Wipe Seagate or WD External HDD/SSD on Mac
- How to Verify the Wipe and Fix Disk Errors?
- Conclusion
In today's digital age, securely wiping external hard drives has become a crucial task to protect sensitive data from unauthorized access. Whether you are looking to sell your device, give it away, or simply want to ensure your personal information is completely erased, understanding how to properly wipe a hard drive is essential. Western Digital (WD) and Seagate are two of the most popular brands when it comes to external hard drives, and Mac users often need specific instructions to handle these devices. This article aims to provide a comprehensive, step-by-step guide on how to wipe WD or Seagate external hard drives on a Mac, ensuring that your data remains private and secure.
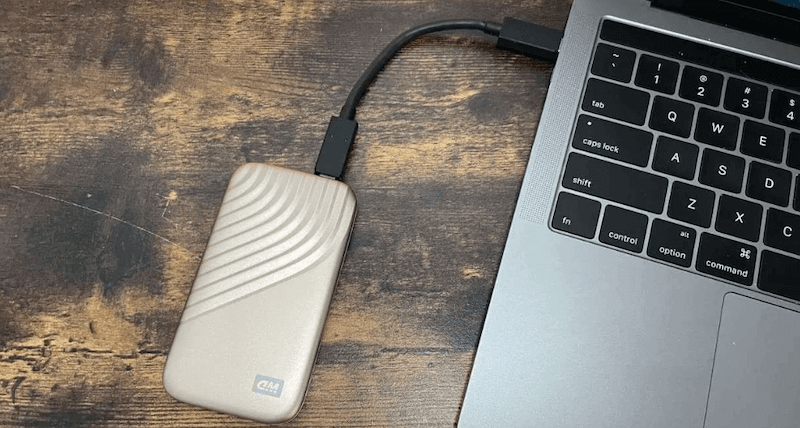
Before Wiping Seagate/WD External Hard Drive on Mac
Before diving into the process of wiping your external hard drive, it is crucial to back up any important data you may have stored on the device. Wiping a hard drive is a permanent action that will erase all data, making it unrecoverable. Therefore, taking a few minutes to secure your files can save you from potential data loss.
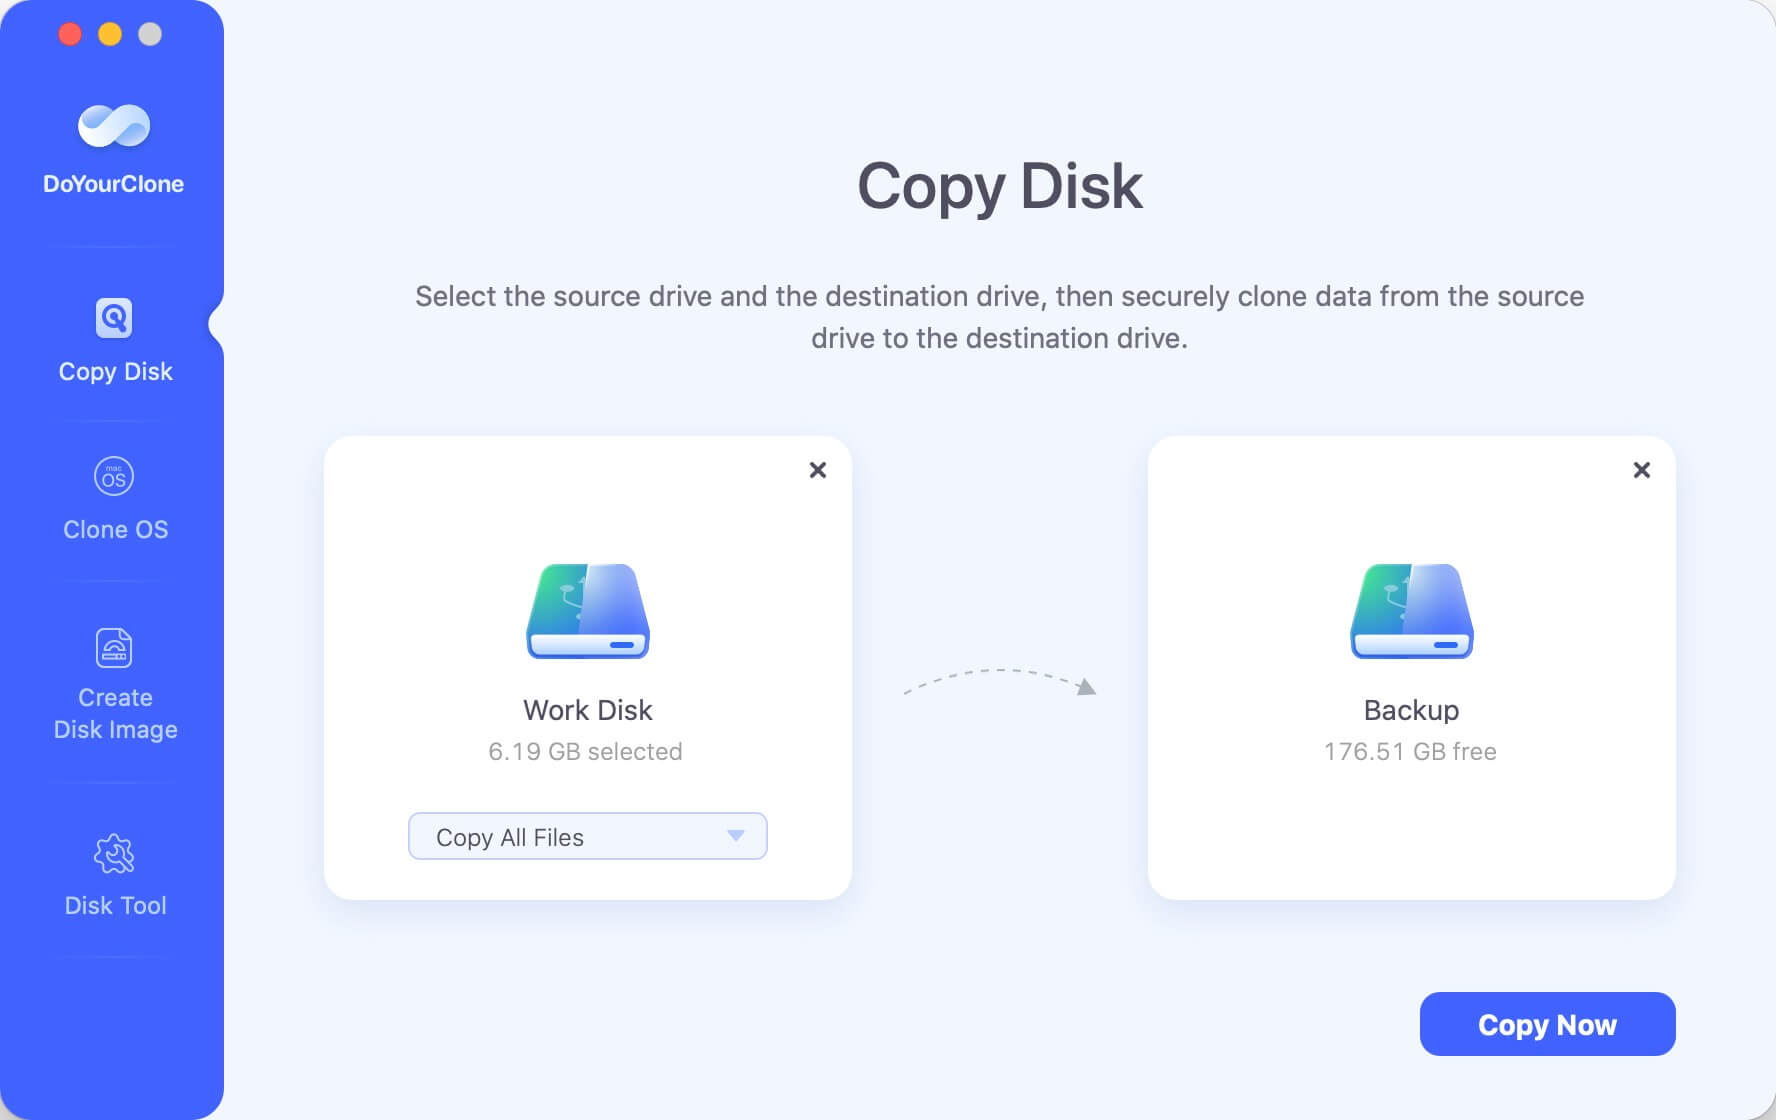
To back up the WD or Seagate external hard drive with Disk Cloning Software, follow these steps:
- Download and install a Mac clone app such as DoYourClone on your Mac.
- Open DoYourClone and make sure you have another drive connected the drive.
- Choose Copy Disk Mode, then select the WD or Seagate external hard drive as the source drive, select another drive as the destination drive.
- Click on Copy Now button to make a full backup.
If you prefer to manually back up your files:
- Connect another external hard drive or use cloud storage.
- Open Finder and navigate to your external hard drive.
- Select the files and folders you wish to back up.
- Drag and drop these items to your new storage location.
Once you have successfully backed up your data, disconnect any other external devices from your Mac to avoid confusion during the wiping process.
Methods to Wipe Seagate or WD External HDD/SSD on Mac
Solution 1: Using macOS Disk Utility to Wipe the Drive [Erased data can be recovered]
macOS provides a built-in tool called Disk Utility that allows you to manage and erase storage devices. This tool is straightforward and effective for wiping external hard drives including your Seagate or WD external hard drive. Here’s how to use it:
Step 1. It is easy to open Disk Utility from Finder, just click Finder, then go to Applications > Utilities, find and open Disk Utility.
Step 2. Then select your WD or Seagate external hard drive, click Erase.
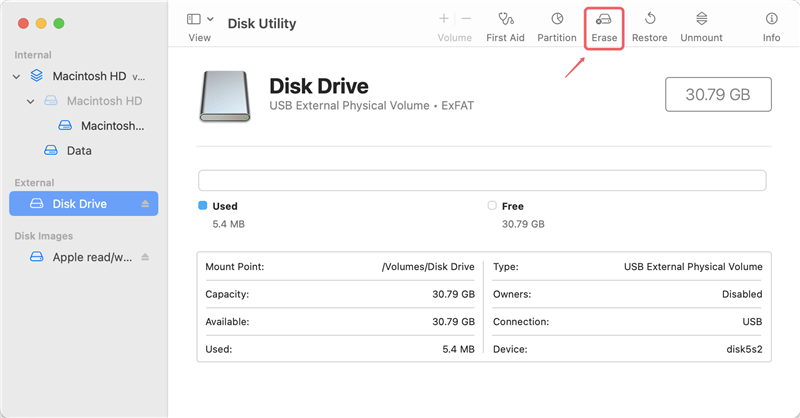
Then select a file system, give it a new name.
- APFS (Apple File System): Recommended for drives used with macOS High Sierra and later.
- Mac OS Extended (Journaled): Suitable for drives used with older macOS versions.
- ExFAT: Compatible with both macOS and Windows, ideal for cross-platform usage.

If you want to erase the WD/Seagate external hard drive many times, click on Security Options to set erasure level.
- Fastest: Performs a quick erase, leaving the data recoverable with specialized software.
- More Secure: Overwrites the data multiple times, making it significantly harder to recover.
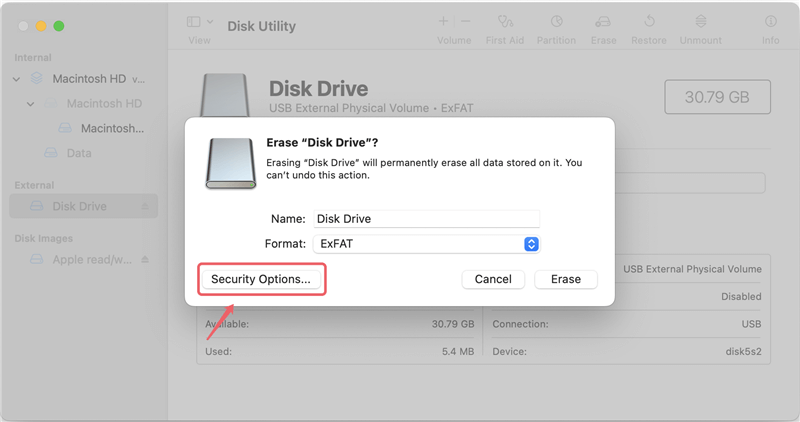
Step 3. Click "Erase" to begin the process. Disk Utility will format the drive and securely erase its contents. This process may take some time, depending on the size and security level selected.
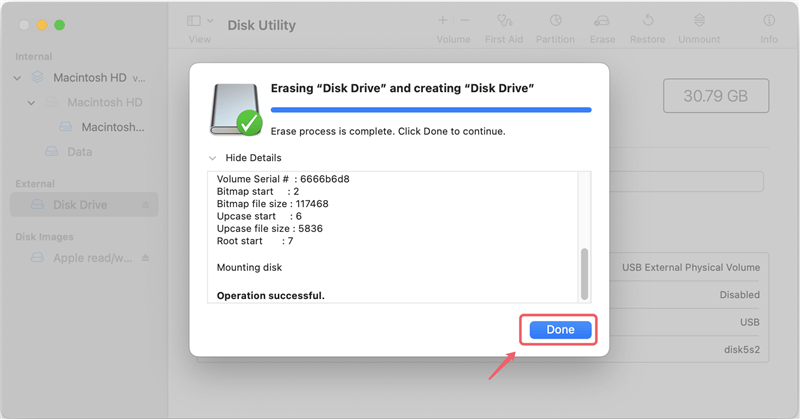
Solution 2: Using Terminal for Advanced Users [Erased data can be recovered]
For those comfortable with the command line, Terminal offers a powerful alternative to Disk Utility. Using Terminal, you can perform advanced operations and customize the wiping process to meet specific needs.
Identifying the External Drive
- Open Terminal from Applications > Utilities.
- Type the command diskutil list and press Enter.
- Terminal will display a list of all connected storage devices. Locate your external hard drive by its size and label (e.g., /dev/disk4).
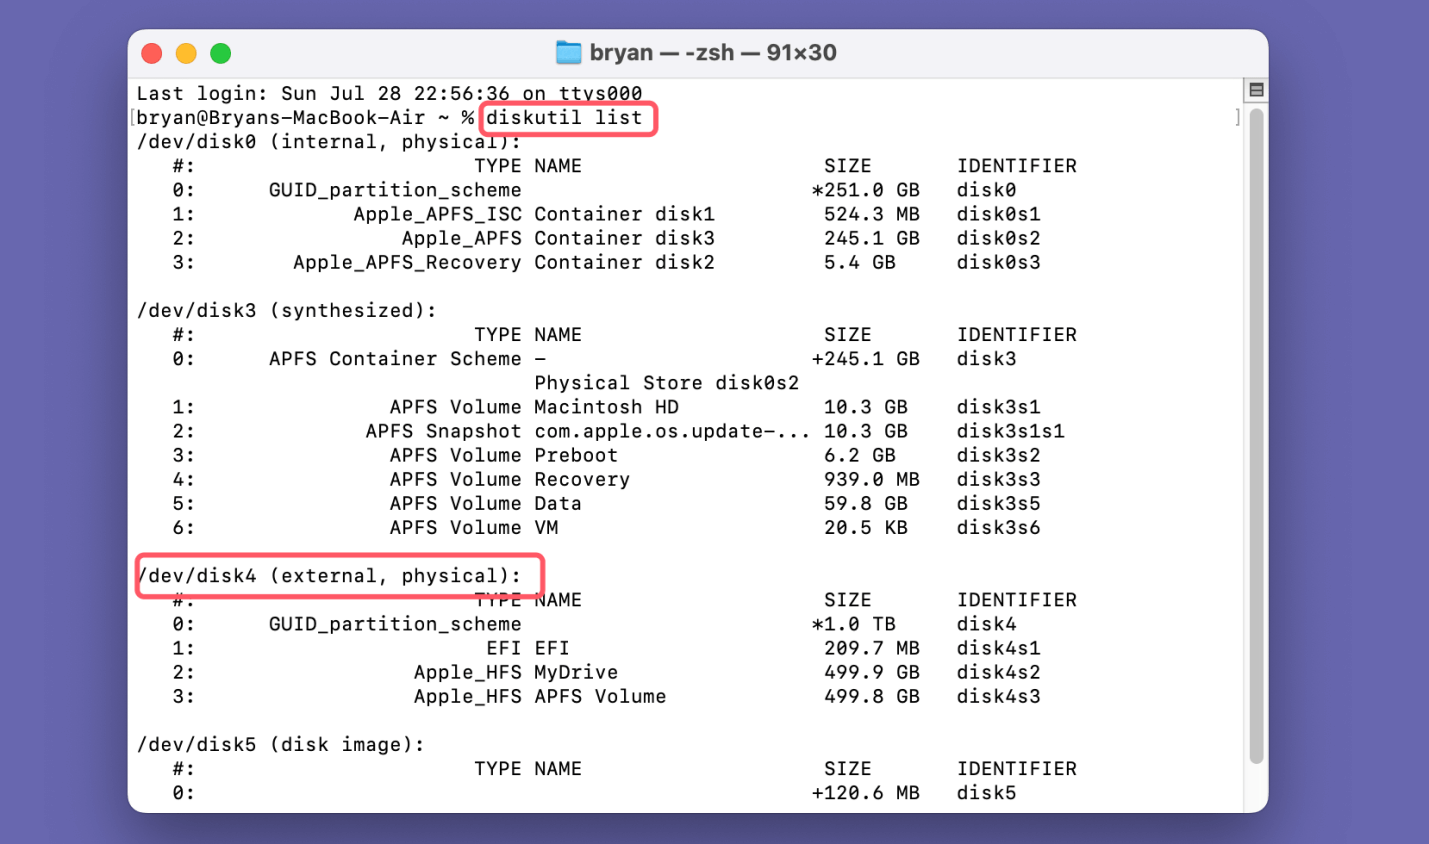
Erasing the Drive
Once you have identified your external hard drive, you can use the diskutil command to erase it. Here's a step-by-step guide:
1. Type the command diskutil secureErase followed by a security level and the drive identifier. For example, to perform a 1-pass erase on /dev/disk4, use:
diskutil secureErase 1 /dev/disk4
The security levels range from 0 to 4:
- 0: Single-pass erase with zeros.
- 1: Single-pass erase with random data.
- 2: 7-pass erase, conforming to the DoD 5220.22-M standard.
- 3: 35-pass erase, for the most thorough wipe.
- 4: Single-pass erase with zeros, followed by verification.
2. Press Enter to execute the command. Terminal will securely erase the drive based on the specified security level. This process can take a significant amount of time, especially for higher security levels.
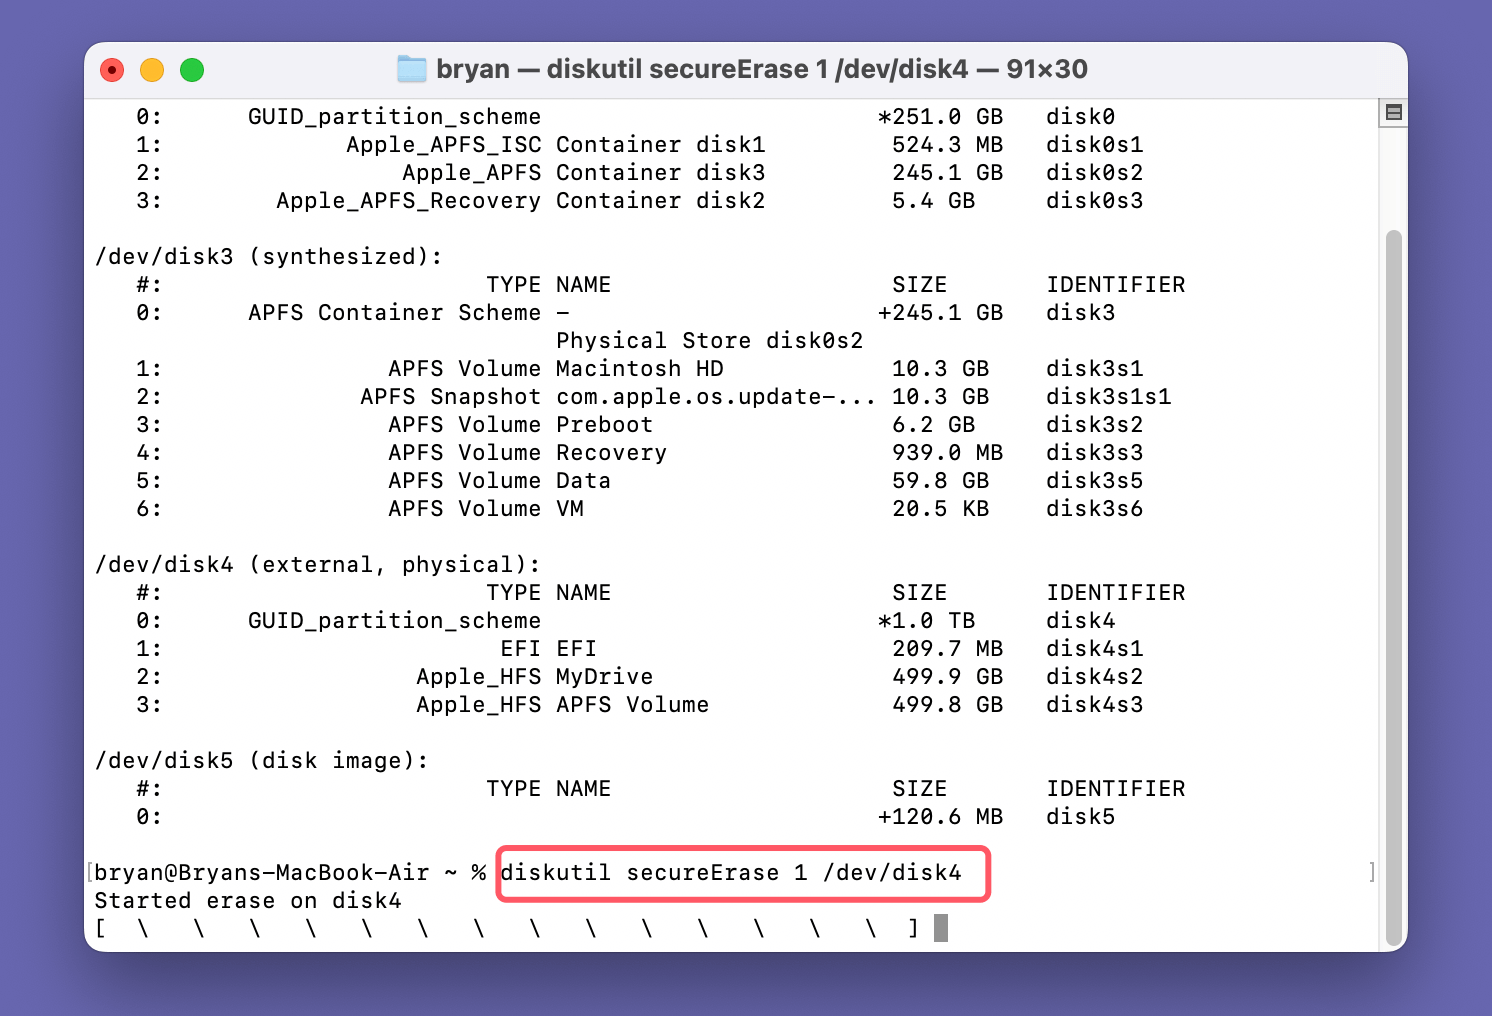
Solution 3: Using Super Eraser for Mac to Wipe All Data Permanently
When you want to permanently delete all files from your huge storage Western Digital or Seagate portable hard drive on a Mac, manually cleaning up all your data can be time-consuming and ineffective. Deleted/formatted data can often be recovered using Mac data recovery software. To permanently and completely wipe your Western Digital or Seagate external hard drive on a Mac, you need a powerful data-erasing tool.
Mac data erasing software like DoYourData Super Eraser for Mac can solve this problem efficiently. It provides a secure and straightforward way to wipe data from a hard drive on a Mac. If you have a Western Digital or Seagate external hard drive, DoYourData Super Eraser for Mac can be used to completely wipe all data from these devices. Simply download it onto your Mac and install it within seconds.
DoYourData Super Eraser for Mac offers two outstanding advantages that make data erasure easy and safe. First, it has a clean and user-friendly interface, enabling any user to effortlessly wipe data from a Western Digital or Seagate external hard drive. Second, it ensures safety by making the wiped data irretrievable; it cannot be recovered by any data recovery software or service. Therefore, if you are planning to sell, donate, or give away your Western Digital or Seagate external hard drive, DoYourData Super Eraser for Mac is an excellent option to securely destroy your data.
1-Click to Completely Wipe Western Digital or Seagate External Hard Drive Data on Mac
Advanced technology has made data recovery impossible after wiping data from a Western Digital or Seagate external hard drive. Despite this advanced functionality, the operation remains incredibly simple. Once you connect your portable hard drive to your Mac, you only need to select the drive and click the "Wipe Now" button. The software will automatically erase all the data on the Western Digital or Seagate external hard drive. See the screenshot below for a visual guide.

Please note that once the wipe process is complete, all data, including existing and previously deleted files, will be permanently erased from the Western Digital or Seagate external hard drive. Therefore, before you proceed with wiping the data on your Western Digital or Seagate external hard drive on a Mac, make sure to back up any important files to your computer.
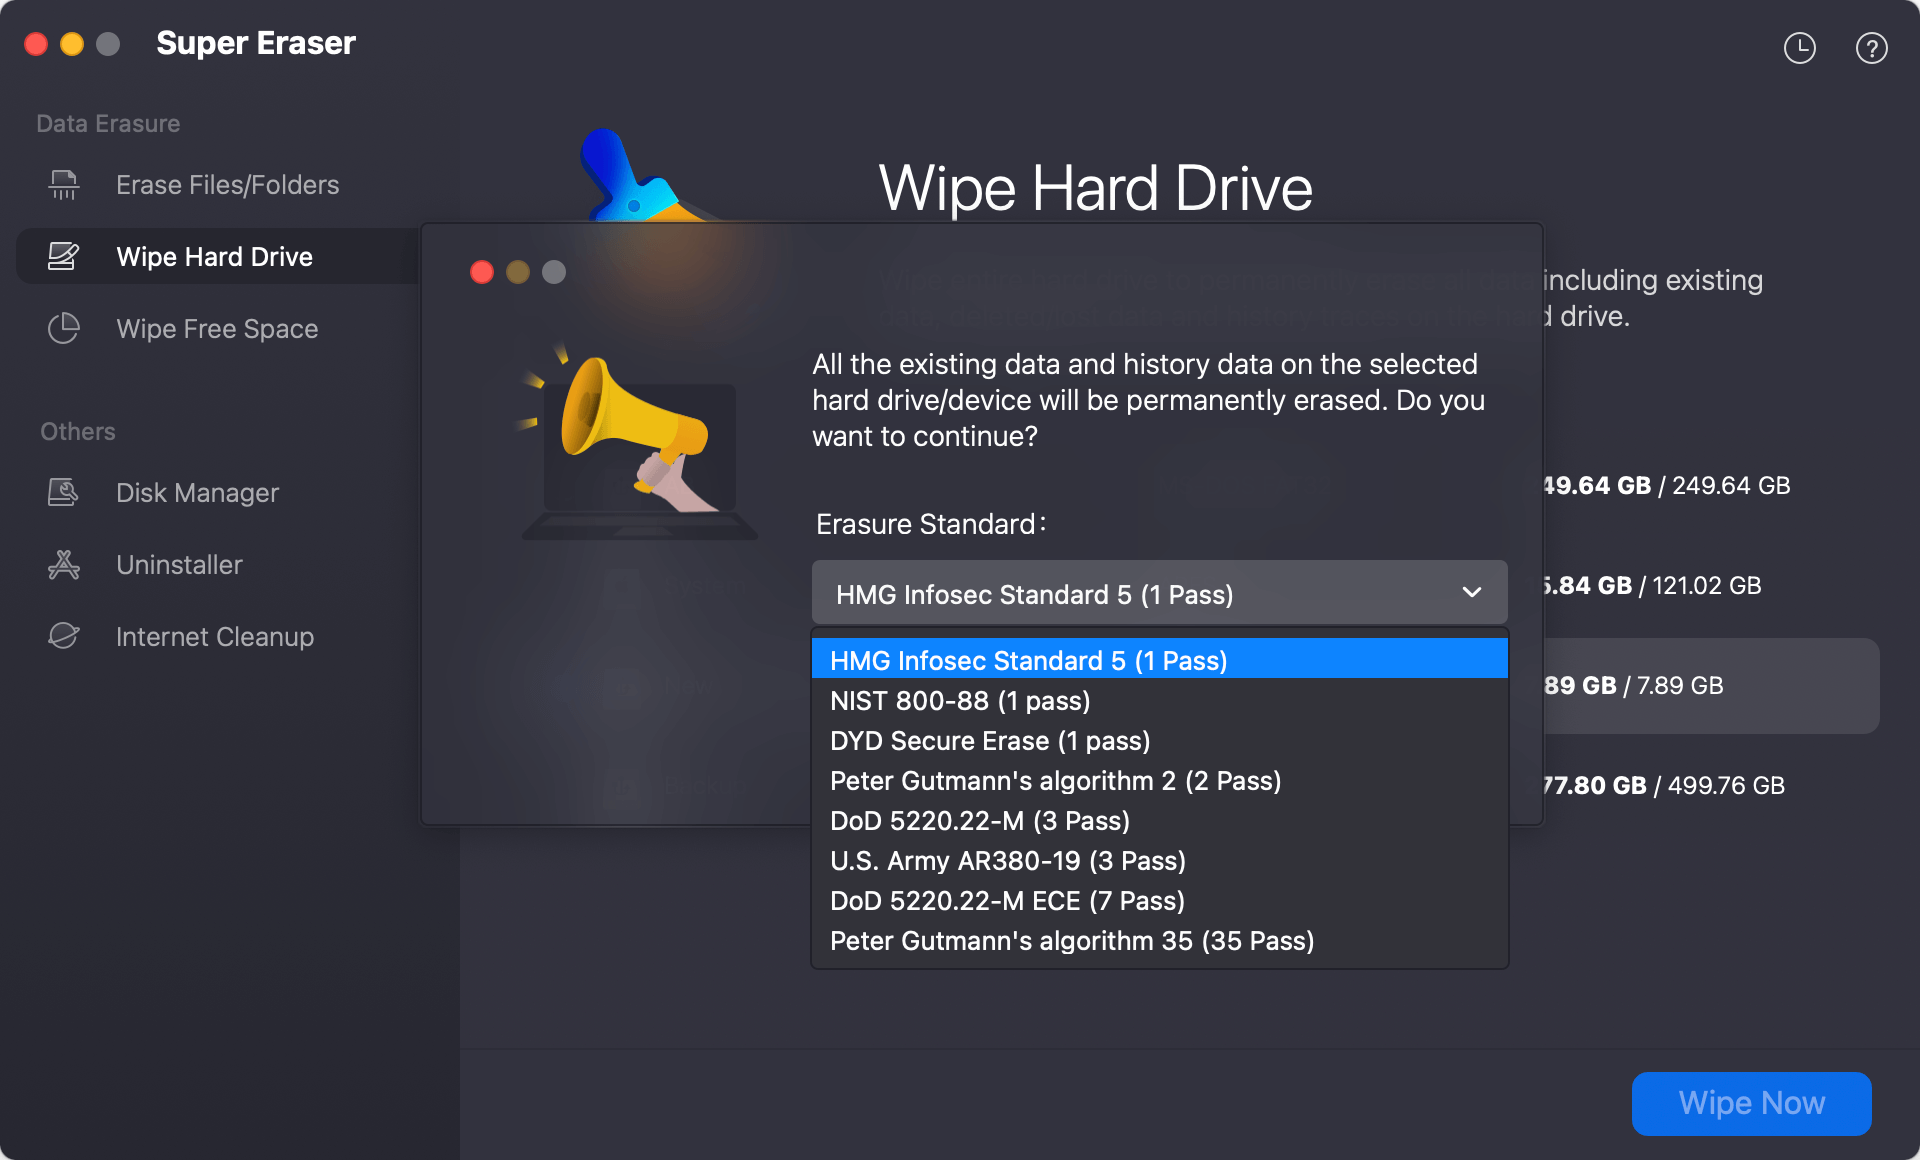
With DoYourData Super Eraser for Mac, you can easily wipe data from Western Digital and Seagate external hard drives on your Mac. It also supports wiping data from other portable hard drives, such as those from Samsung, Toshiba, Hitachi, Maxtor, IBM, and Fujitsu. As the most powerful Mac data-erasing software, it ensures complete and permanent data deletion. Before you resell, donate, give away, or lend your hard drives, use DoYourData Super Eraser for Mac to securely wipe your sensitive data.
DoYourData Super Eraser for Mac also offers different modes to handle various data-erasing needs. You can selectively erase specific files or folders, and it can wipe unused disk space to permanently remove deleted or formatted data on the hard drive.
How to Verify the Wipe and Fix Disk Errors?
Verifying the Wipe
After wiping your external hard drive, it is crucial to verify that the data has been securely erased. Here are a few methods to ensure the wipe was successful:
Using Disk Utility:
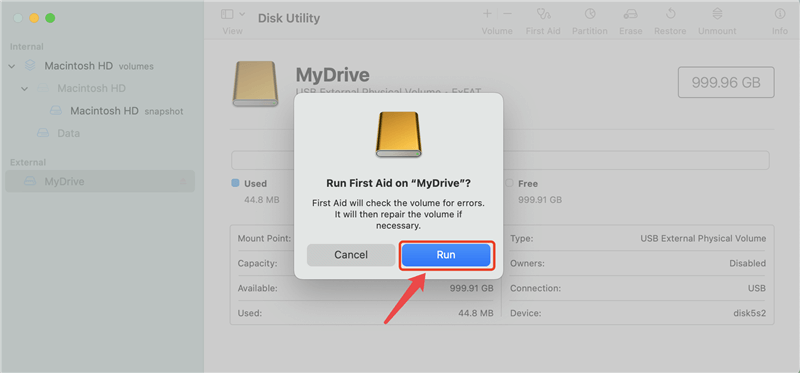
- Open Disk Utility and select the wiped drive.
- Click on "First Aid" at the top of the window.
- Run the "First Aid" process to check for any remaining data or errors on the drive.
Additional Verification Tools:
For those requiring extra assurance, consider using third-party verification tools such as:
- DBAN (Darik's Boot and Nuke): A free and open-source tool designed for securely wiping drives.
- Blancco Drive Eraser: A professional-grade software used by enterprises to verify data destruction.
- Do Your Data Recovery for Mac Free: Scan the WD or Seagate drive to check if all files are lost for good.
Troubleshooting Common Issues
While wiping an external hard drive is generally straightforward, you may encounter some issues. Here are common problems and their solutions:
Drive Not Recognized:
- Solution: Ensure the drive is properly connected to your Mac. Try using a different USB port or cable. Restart your Mac and check Disk Utility again.
Erase Process Fails:
- Solution: Close any applications that might be accessing the drive. Reboot your Mac and try the process again. If the issue persists, try using Terminal or third-party software to erase the drive.
Slow Erase Process:
- Solution: Higher security levels can significantly slow down the wiping process. Consider using a lower security level if time is a constraint. Ensure no other heavy processes are running on your Mac during the wipe.
Data Recovery Concerns:
- Solution: Use higher security levels or specialized software like DoYourData Super Eraser for Mac for more thorough wiping. Verify the wipe using additional tools as mentioned earlier.
Conclusion
Securely wiping an external hard drive is a critical step in protecting your personal information. Whether using macOS Disk Utility, Terminal, or third-party software, following best practices ensures that your data remains private and unrecoverable. Remember to back up your data before wiping your WD or Seagate drive, choose the appropriate method and security level for your needs, and verify the wipe to ensure its success. By taking these steps, you can confidently manage your external storage devices and maintain a secure data environment.

DoYourData Super Eraser for Mac
DoYourData Super Eraser for Mac is a 100% safe, powerful and easy-to-use data erasure program. It offers certified data erasure standards including Peter Gutmann, U.S. Army AR380-19, DoD 5220.22-M ECE to permanently erase data from Macs and external devices, making data recovery be impossible.