
How to Erase Startup Disk on Mac
Shut down the Mac, then turn it on, press and hold Command+R or Power button to enter into macOS Recovery mode, use Disk Utility to erase the internal HDD or SSD.
We know that the deleted or formatted data is not lost for good and can be recovered by data recovery software. If you want to prevent your data on Mac from being recovered by data recovery software, just use DoYourData Super Eraser for Mac to wipe the drive or wipe the data on your Mac. Once the existing data or deleted/lost data is erased by this Mac data erasure software, the data is lost permanently, cannot be recovered by any method.
![]() Updated by Shirly Chen on August 13, 2024
Updated by Shirly Chen on August 13, 2024
Quick Navigation:
Keeping your private information safe in today's widespread data hacks and identity theft is more important. If you want to keep your data safe, you can't just hit the delete button when you're getting a new Mac, selling your old one, or cleaning up your digital life.
Many people think that when they delete files, they are gone permanently, but copies of them can stay around and be found by sophisticated data recovery tools. This complete guide will teach you everything you need to know to keep people from recovering your lost info on your Mac.
We'll discuss the safest ways to delete files, encrypt your data, and keep your private information private. These methods include using built-in apps and third-party tools. Prepare to take charge of your online history and protect your information from possible threats.
Data recovery means returning data lost, deleted, or unavailable from hard drives, solid-state drives, USB flash drives, memory cards, and other storage devices. People often use this method when they delete files by mistake, lose them because of faulty hardware, or get damaged by software problems or virus attacks.
This method returns data that can't be seen or accessed normally using special tools and methods. Professionals or do-it-yourself software can be used for data recovery based on how badly the data was lost and how tech-savvy the user is.
Data recovery can save the day in many scenarios but also makes people worry about their privacy and safety. When private information is at stake, being able to get back deleted data can be very dangerous. People and businesses need to be aware that unwanted people could get their hands on their private information if the right steps aren't taken.
Here are some risks of incomplete data deletion:
When you securely delete data on your Mac using Disk Utility, your information is gone. To delete something completely and safely, follow these steps:
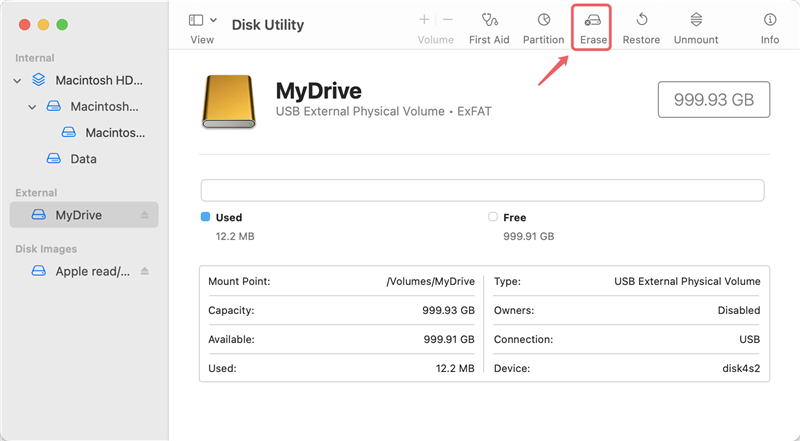
Step 1. Open Disk Utility: Use Applications > Utilities > Disk Utility. You could also use Spotlight by hitting Command + Space and typing "Disk Utility."
Step 2. Select the Disk: In the Disk Utility window, select the disk or section you want to delete from the list on the left.
Step 3. Choose Erase: At the top of the box, click the "Erase" button.
Step 4. Set Erase Options: There will be a dialogue box with options for erasing the disk. You can give the disk a new name and choose the format you want, such as Mac OS Extended (Journaled) or APFS.
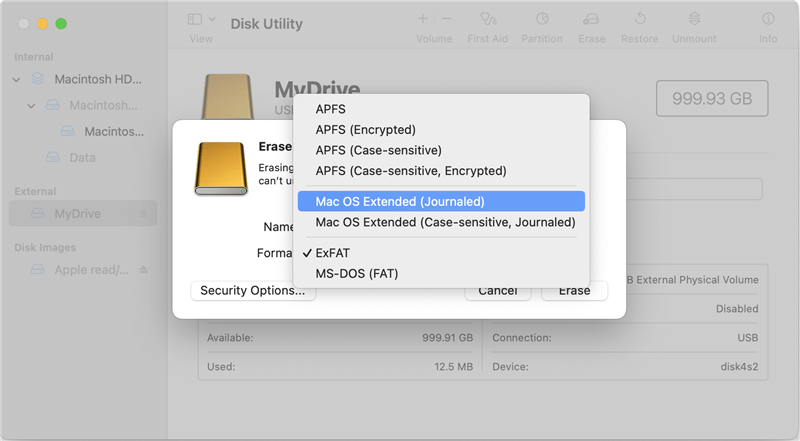
Step 5. Access Security Options: To change how safe it is to erase, click on Security Options. Slide the bar to choose how many passes you want. The deletion is safer the more times it is done. For instance, moving the slider to the right will erase the disk seven times, ensuring the delete is safe.

Step 6. Erase the Disk: When you're done setting up the protection, click OK. Last, click the "Erase" button to begin the safe delete process.
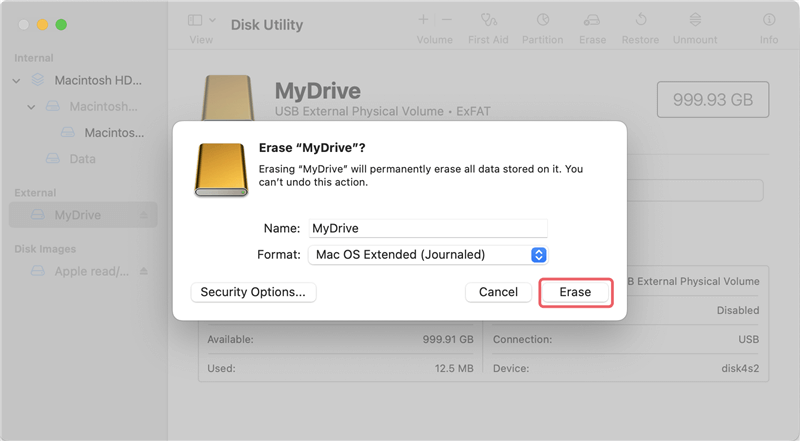
Step 7. Wait for Completion: The time it takes may depend on the disk size and the level of security you choose. When it's done, your disk will be securely erased, and you won't be able to get the info back.

Note: If you want to erase the internal SSD of the Mac, just start the Mac into macOS Recovery mode, then choose Disk Utility to erase the startup disk.
How to Erase Startup Disk on Mac
Shut down the Mac, then turn it on, press and hold Command+R or Power button to enter into macOS Recovery mode, use Disk Utility to erase the internal HDD or SSD.
In some special situations (such as will give away the Mac), the Mac users need to permanently erase all private files on their Macs to prevent any potential data recovery of deleted files, lost files. Data recovery software can even recover lost data from a drive which is erased by Disk Utility. So, if you want to permanently erase existing data or deleted/lost data on a Mac, you need special Mac data erasure software tool.
DoYourData Super Eraser for Mac is a powerful Mac data erasure tool which can help you prevent data recovery on Mac. It offers certified data erasure method to permanently erase data, wipe hard drive, wipe deleted data from your Mac internal HDD/SSD, USB flash drive, memory card, digital camera, external hard drive, etc. It offers three modes to help you permanently erase data and prevent data recovery on Mac.
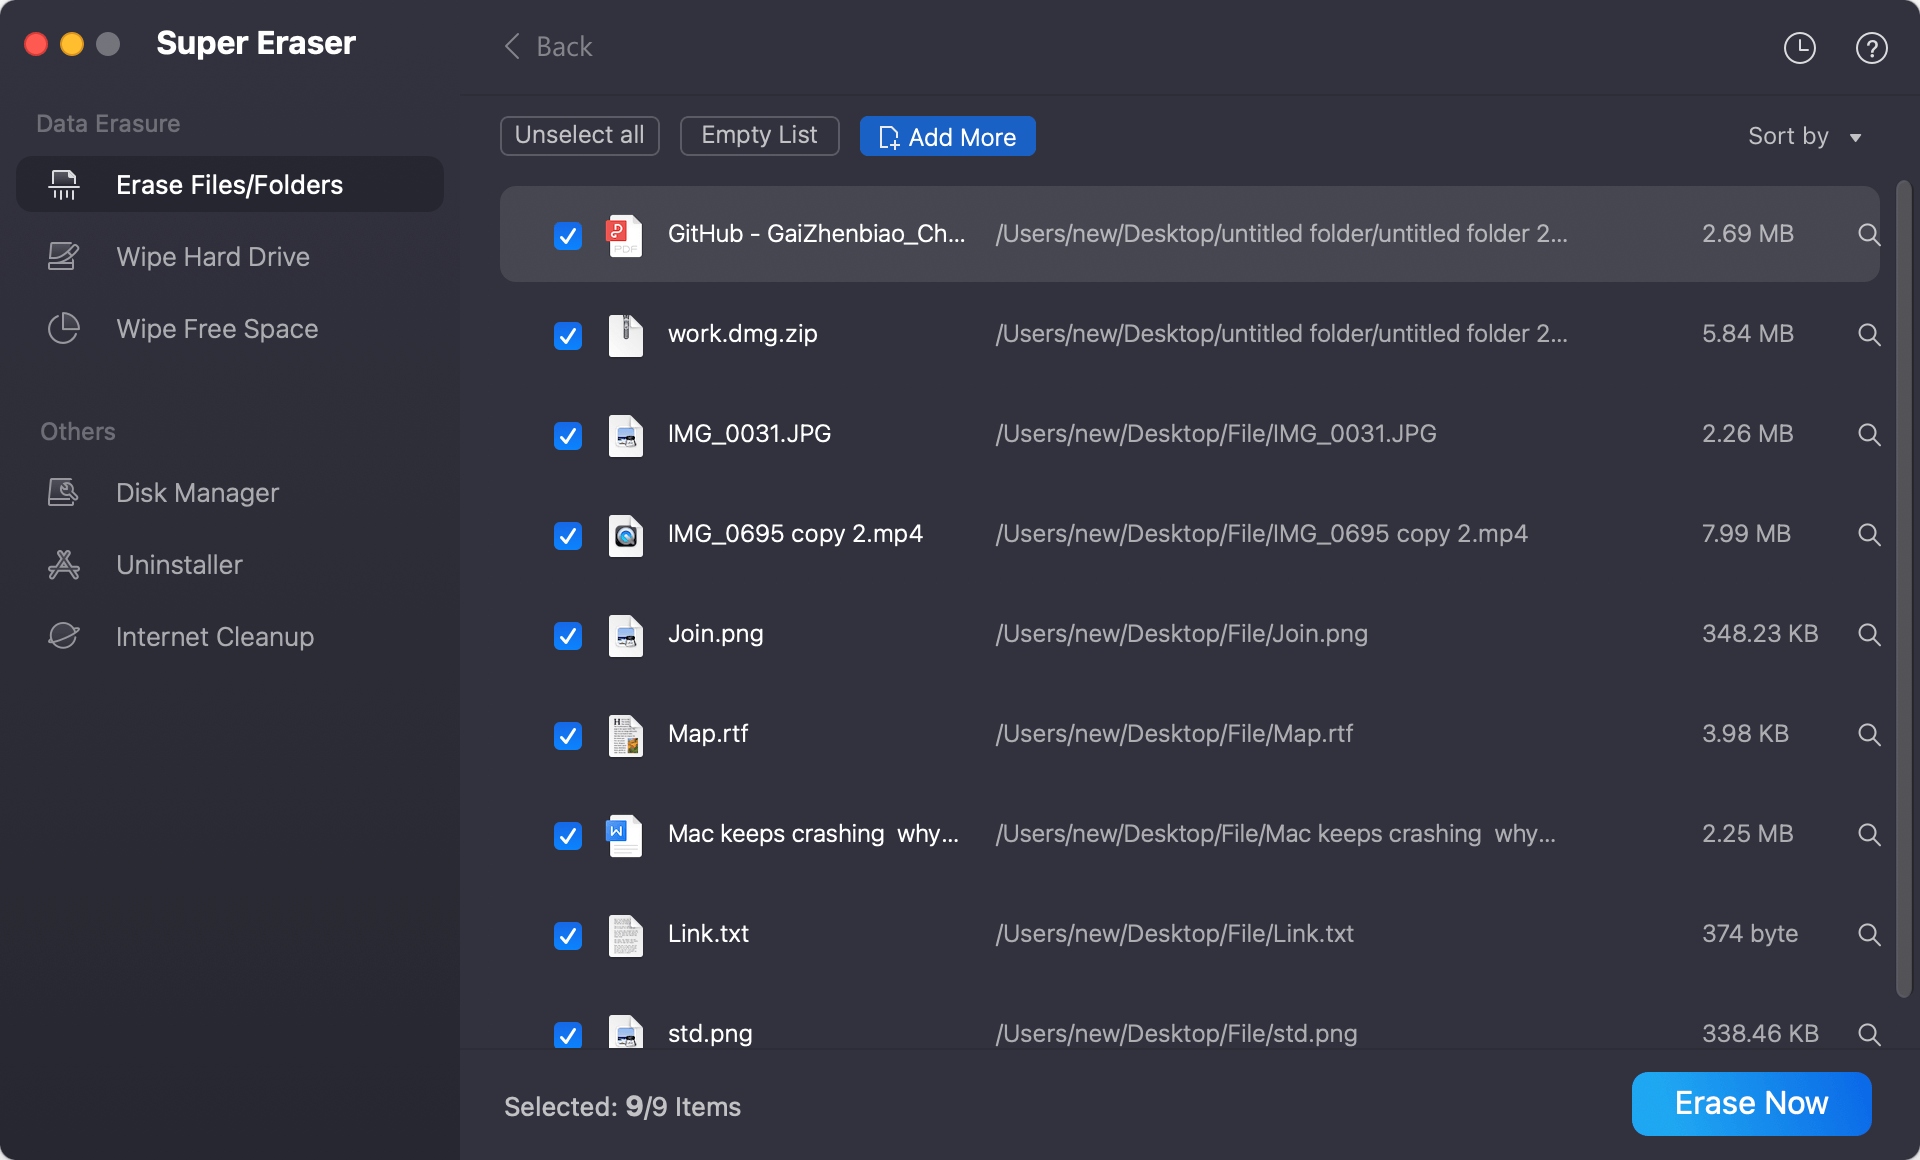
Mode 1: Permanently erase files/folders on Mac to avoid data recovery.
If you want to permanently delete some files/folders on your Mac, this mode – "Erase Files/Folders" is perfect for you. You just need to add the files/folders to the erasure list, then click on Erase Now button to securely and permanently erase the selected files/folders.
Mode 2: Wipe entire hard drive on Mac to prevent data recovery on Mac.
"Wipe Hard Drive" can help you permanently wipe an entire hard drive or external device (like USB flash drive, memory card, digital camera, etc) to permanently erase all data information from the hard drive or device. It means once the hard drive is erased by this mode, all data stored on this hard drive is erased permanently, cannot be recovered by any method.

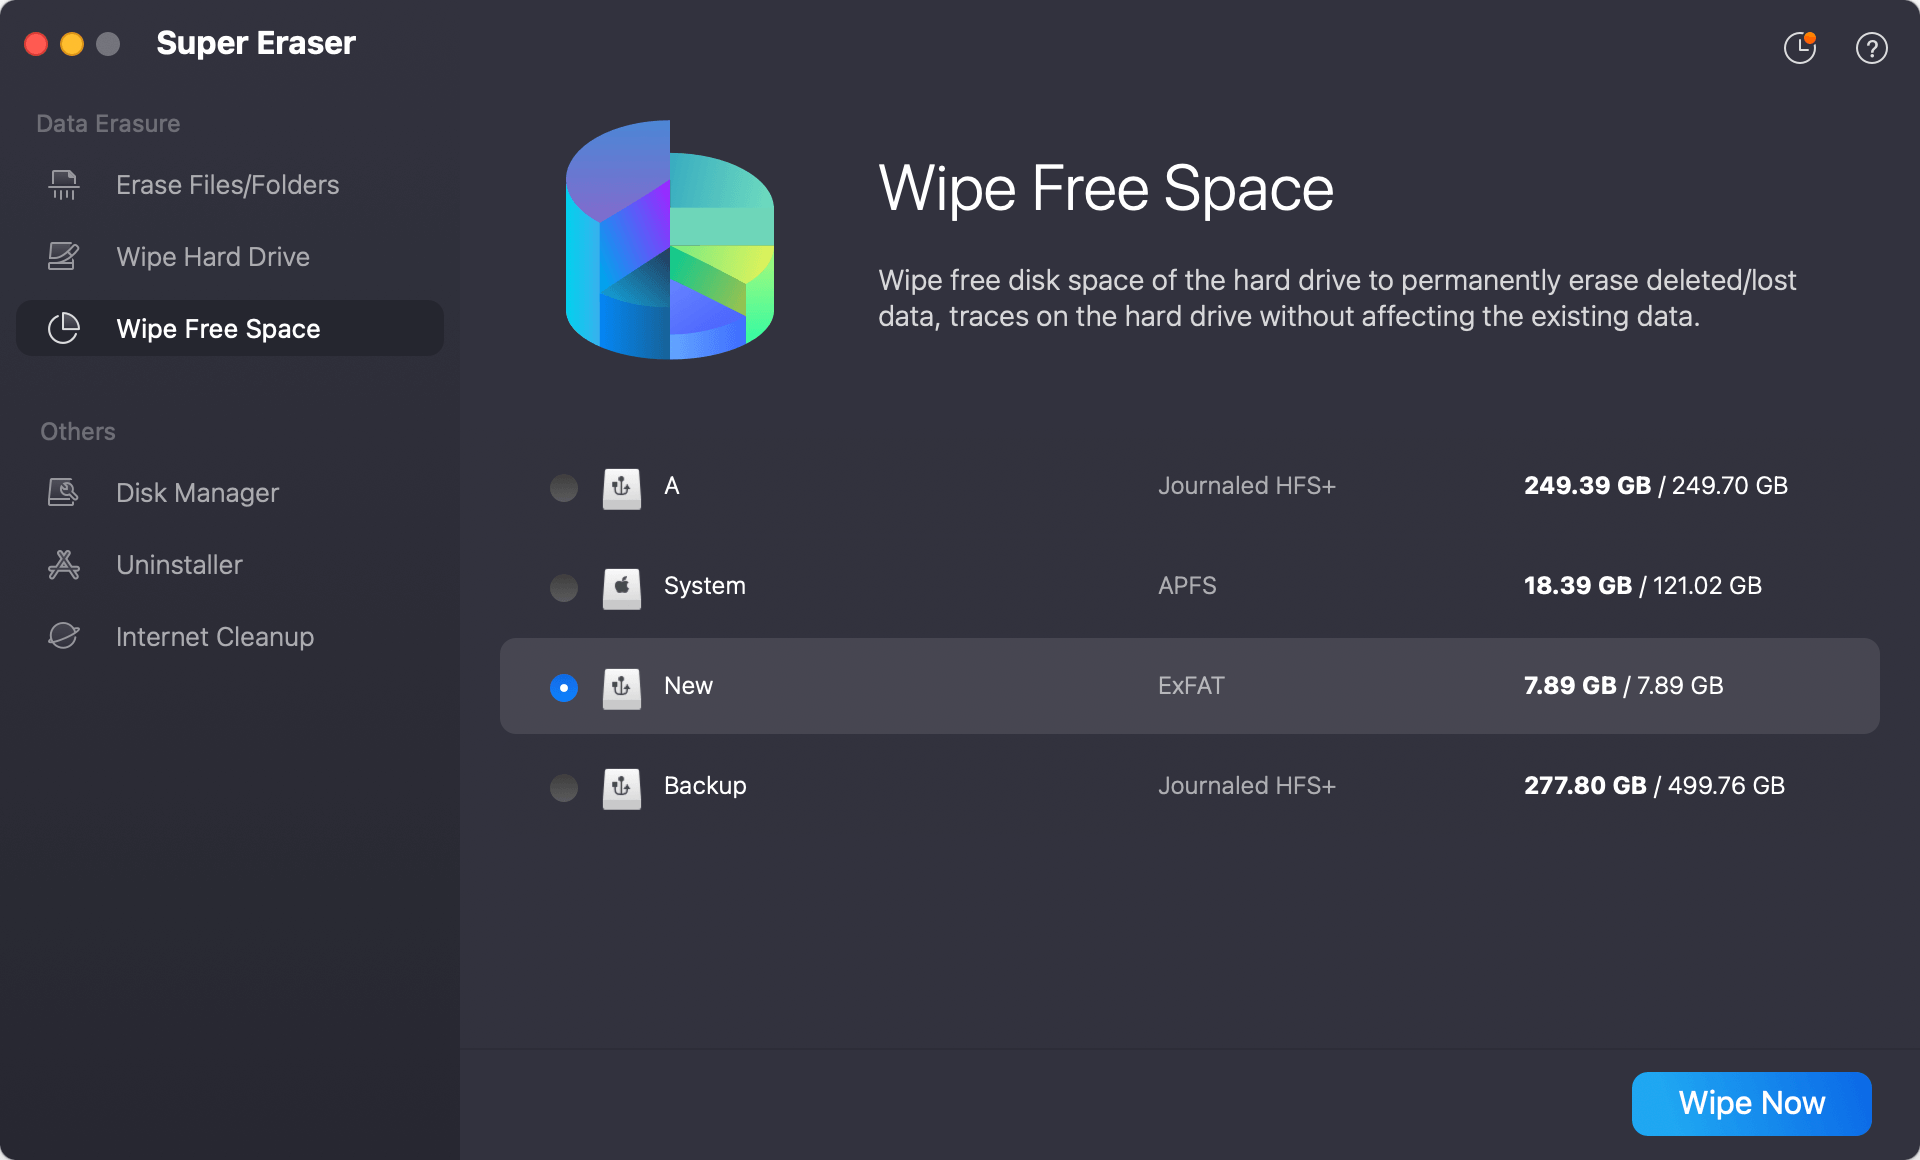
Mode 3: Prevent deleted file recovery/data recovery on Mac.
"Wipe Free Space" will help you wipe the free disk space of the hard drive to permanently erase the already deleted/formatted or lost data on this hard drive. It will not affect the existing data on your hard drive.
DoYourData Super Eraser for Mac can help you securely prevent data recovery on your Mac. From permanently deleting a file to prevent deleted file recovery on Mac. It also can help you permanently erase data from external HDD/SSD, USB flash drive, memory card, digital camera under Mac OS.
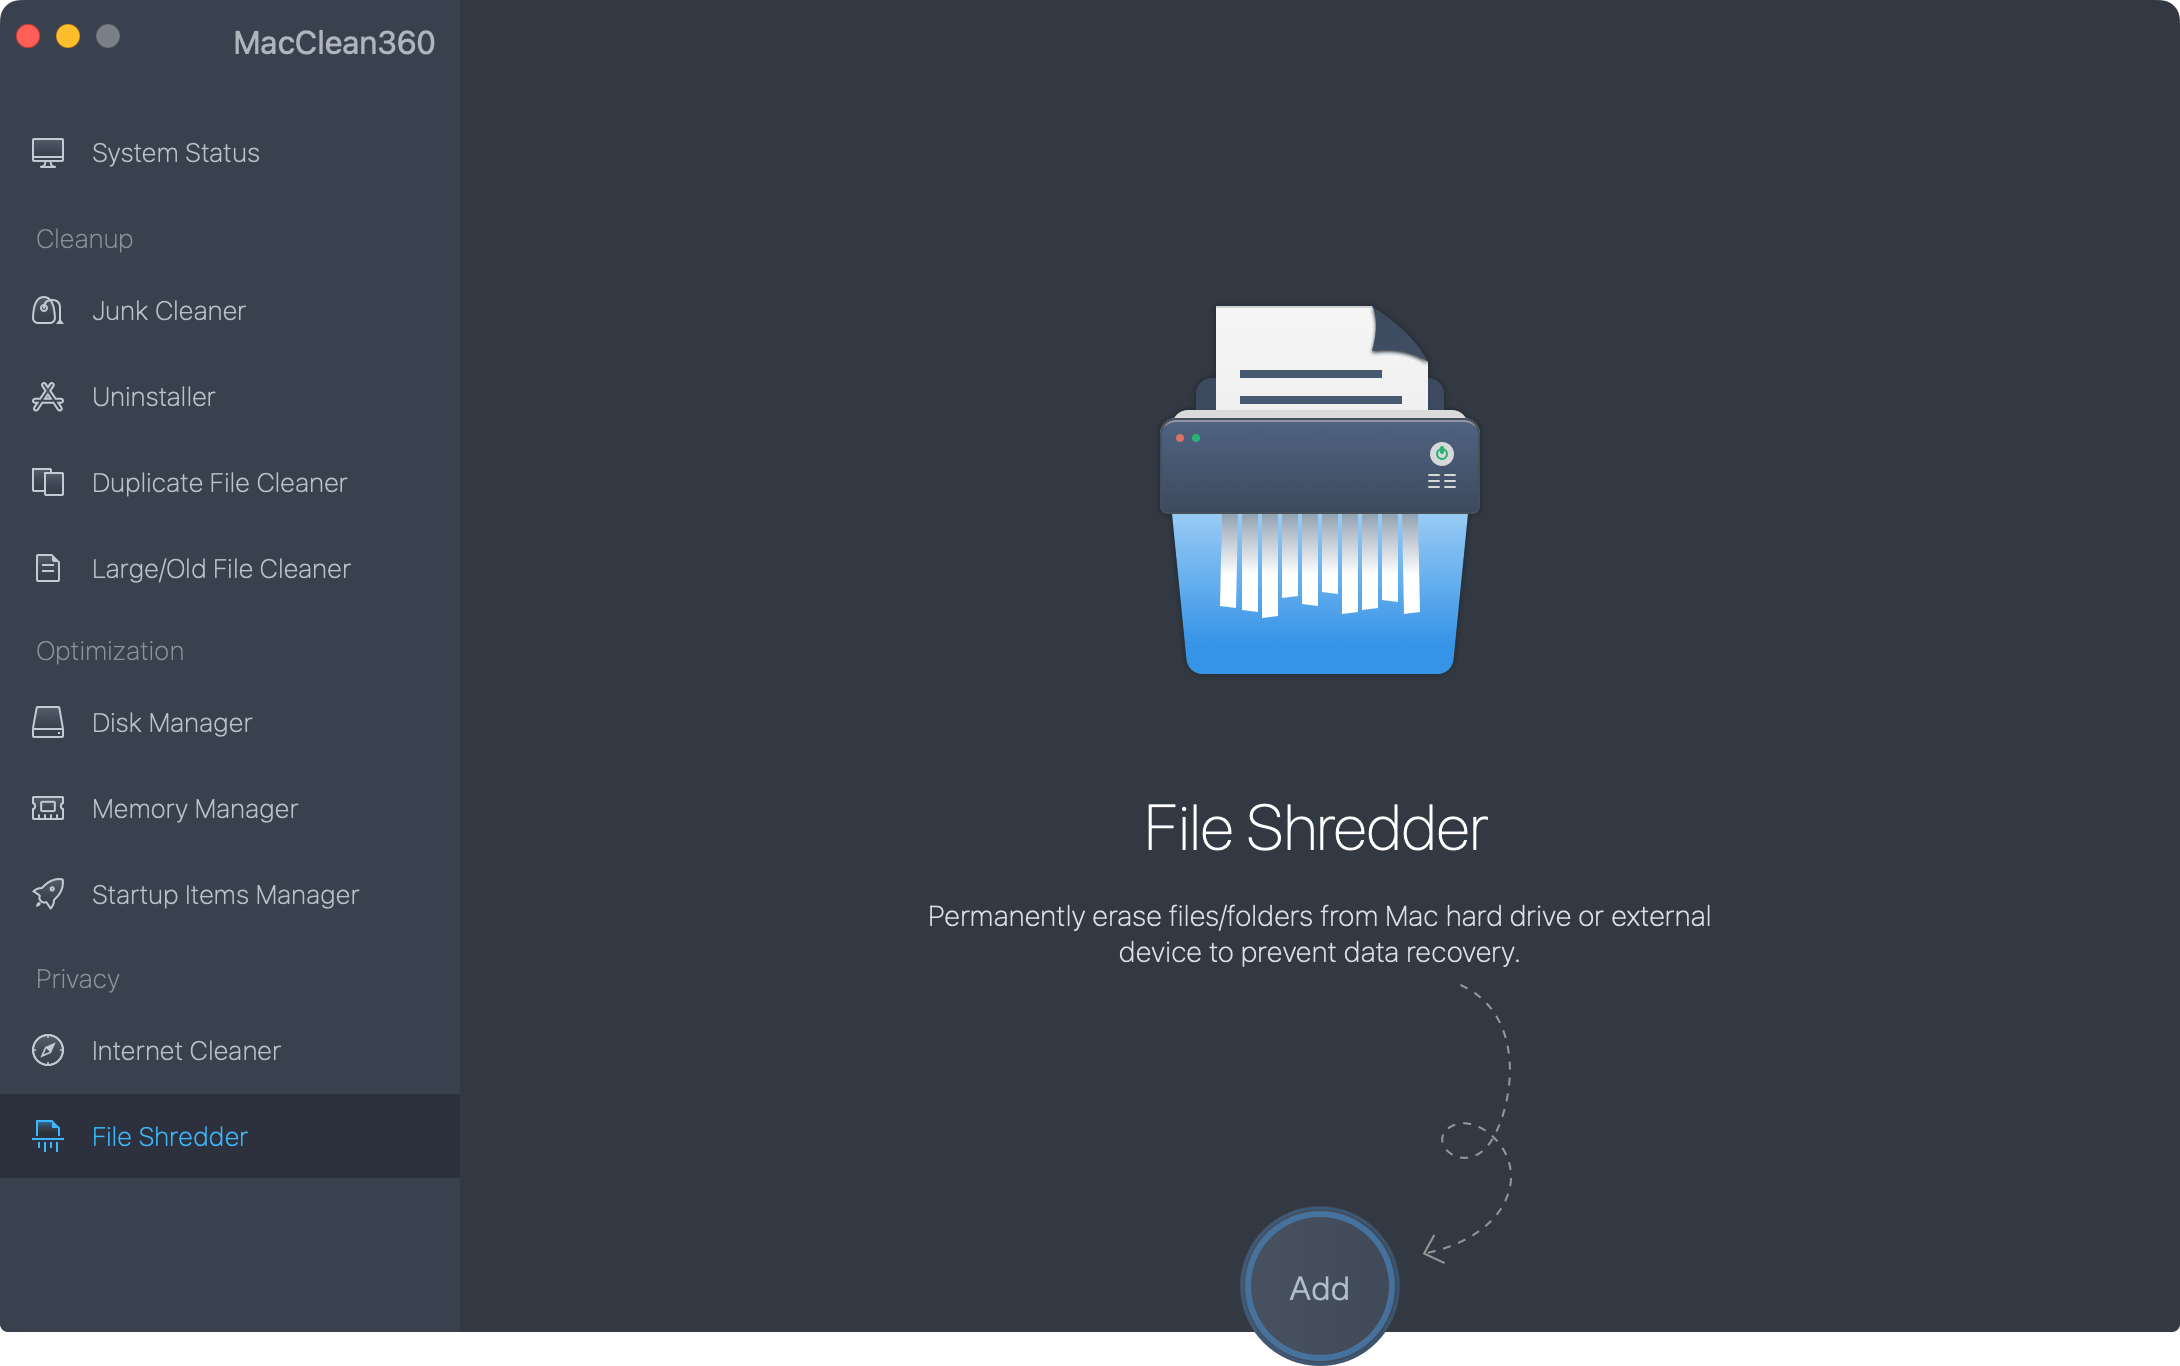
MacClean360 is an all-in-one Mac optimization tool. It offers File Shredder tool to help Mac users securely and permanently erase files and folders.
Step 1. Download and Install MacClean360.
Go to the MacClean360 page and download the installer. Then, to install MacClean360 on your Mac, open the downloaded file and follow the steps. Click Download below to download MacClean360.
Step 2. Open Software.
To start MacClean360 after installation, go to the Applications folder or press Command + Space and type "MacClean360" into Spotlight.
Step 3. Navigate to the Shredder Tool.
To find the File Shredder tool in MacClean360, go to the Privacy area on the left side of the screen.
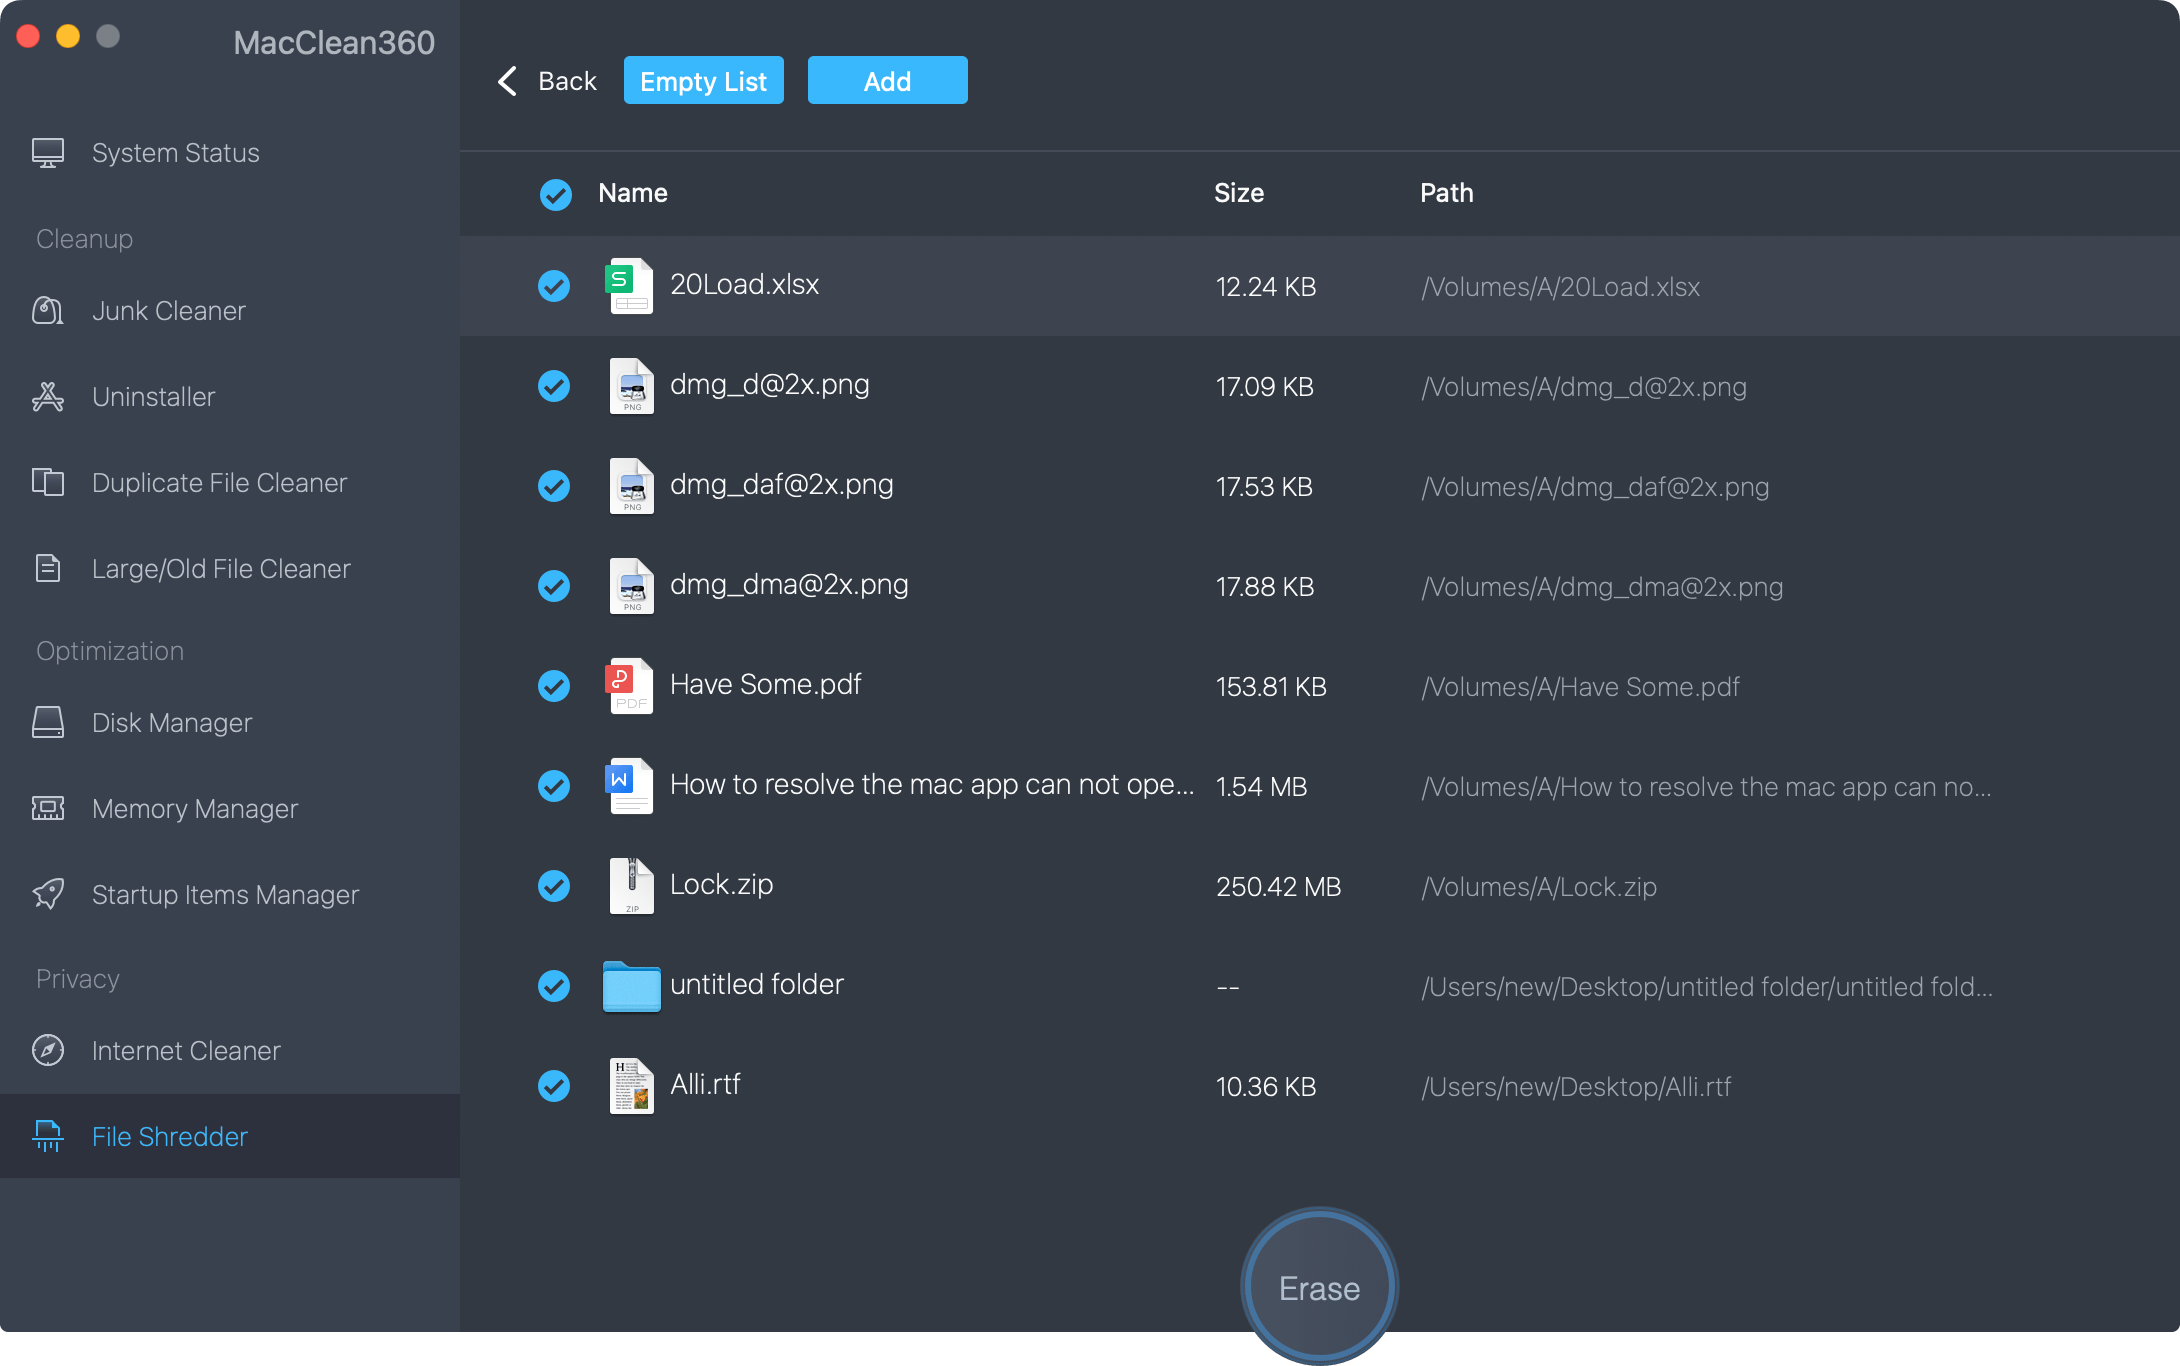
Step 4. Add Files for Erasure.
The safest way to delete files or folders is to drag and drop them into the Shredder box. You can click the Add button to hand-select items from your Mac.
Step 5. Start the Shredding Process.
To start the safe deleting process, click the "Erase" button. If asked, confirm the move.
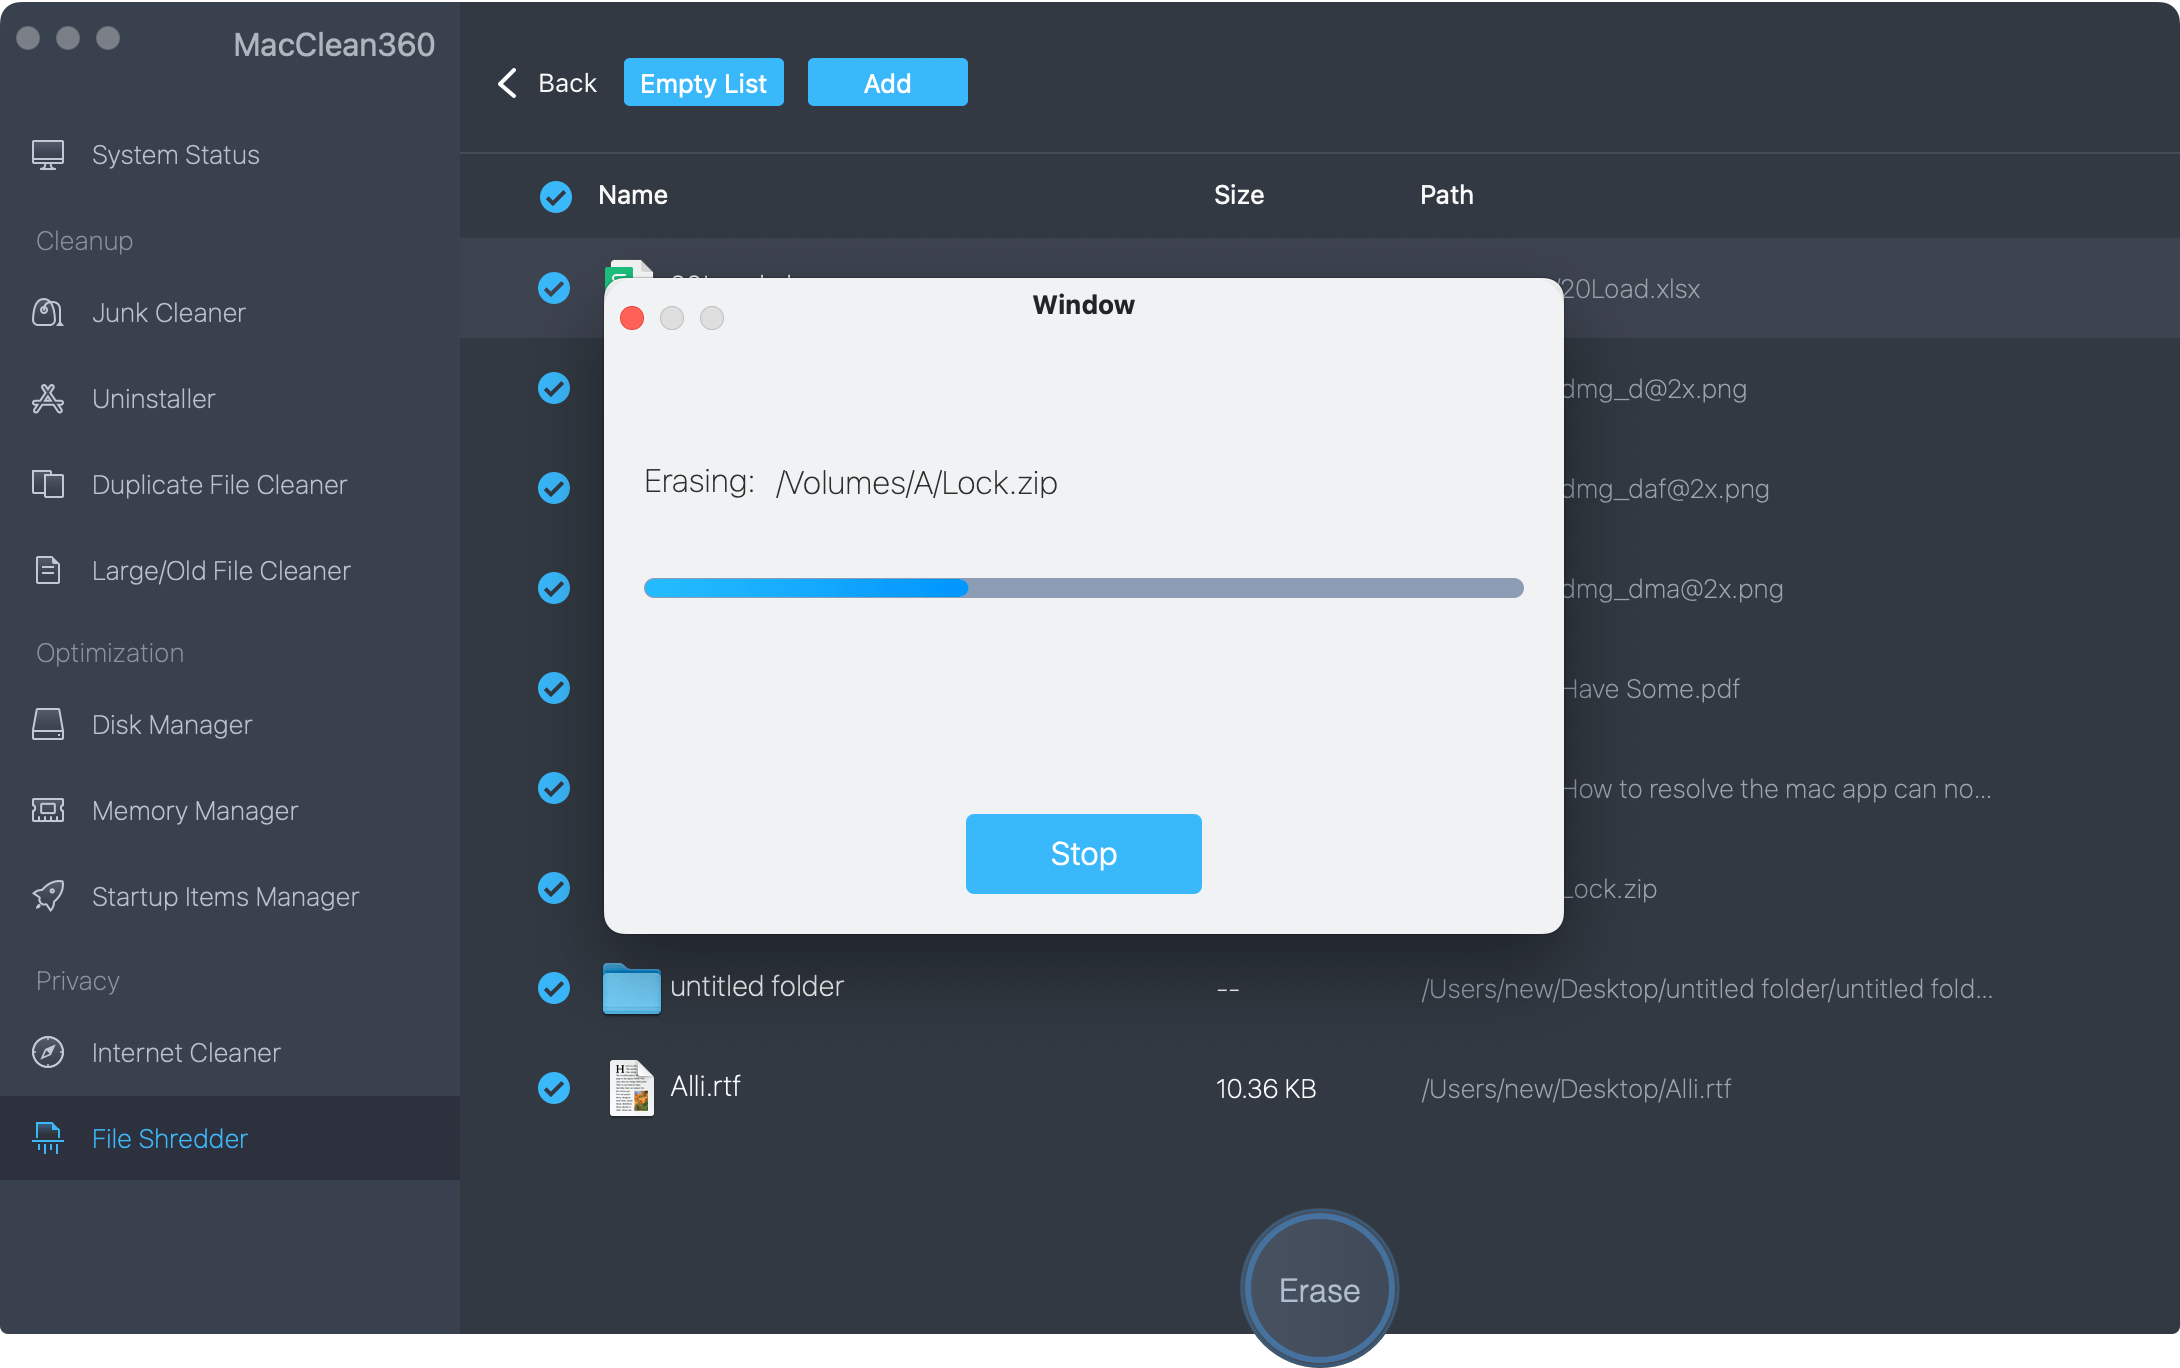
Step 6. Wait for Completion.
MacClean360 will safely delete the chosen files by overwriting them several times to ensure they can't be retrieved. How long it takes will depend on how many and how many files are being cleared.

Protecting your private information on a Mac requires more than just removing files. Protecting your privacy and security means knowing the risks of not deleting all of your data and using safe methods. Using built-in tools like Disk Utility or third-party software can delete your data in a way that can't be recovered.
It protects you from data breaches, identity theft, and illegal access. If you do these things, you can feel good about managing your digital life. Your private information will stay private, and your digital record will be safe.

DoYourData Super Eraser for Mac
DoYourData Super Eraser for Mac is a 100% safe, powerful and easy-to-use data erasure program. It offers certified data erasure standards including Peter Gutmann, U.S. Army AR380-19, DoD 5220.22-M ECE to permanently erase data from Macs and external devices, making data recovery be impossible.
Written & Updated by Shirly Chen
Shirly Chen has been writing data recovery, data erasure articles for DoYourData over 4 years. She has been working as a professional website content writer & editor for quite a long time. She also writes articles about disk clone, Mac optimization, disk backup, etc.