How to Recover Lost Data from Formatted USB Drive
Data recovery software can deeply scan the formatted USB flash drive and find all deleted, formatted or lost data.
Quick Navigation:
Formatting a USB drive is an essential skill for anyone using computers. Whether you need to remove data, change the file system, or fix issues, knowing how to format a USB drive can be incredibly useful. For Mac users, the process is straightforward, thanks to the intuitive Disk Utility application and other disk formatting tools. This guide will walk you through the steps to format a USB drive on a Mac, ensuring you can handle this task with confidence.
In today's digital age, USB drives are ubiquitous. They serve as portable storage devices, allowing users to transfer files between computers, back up important data, and even run operating systems. However, there are times when you need to format a USB drive. This could be to clear all the data, change the file system to be compatible with different operating systems, or fix errors that prevent the drive from functioning correctly. Formatting is a straightforward process, but it's crucial to understand the steps involved to avoid data loss and ensure the drive functions as intended.
Before starting to format your USB drive on Mac, it's important to prepare adequately. The first step is to back up any important data stored on the USB drive. Formatting will erase all data on the drive, and once it's gone, it's often impossible to recover. You can copy the files to your Mac's hard drive or another storage device to ensure they are safe.
Backing up data can be done in several ways:
Next, make sure your USB drive is properly connected to your Mac. Insert the USB drive into one of the USB ports on your Mac. You should see the drive appear on your desktop or in the Finder sidebar. If the drive does not appear, try reconnecting it or using a different USB port. Sometimes, a simple restart of your Mac can also help in recognizing the USB drive.
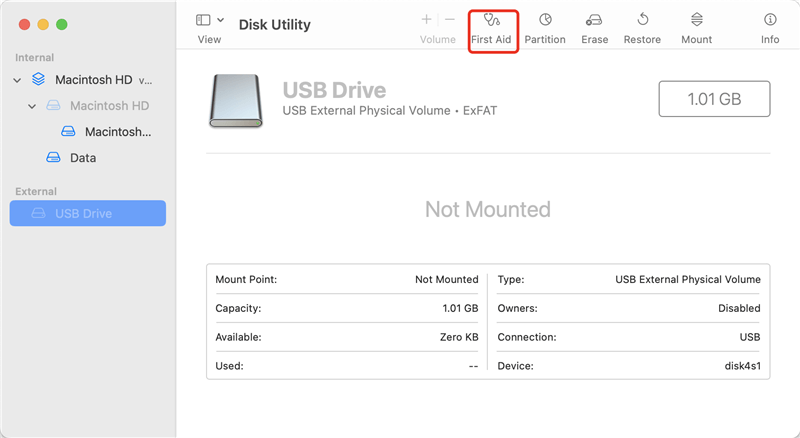
It's also a good idea to check the condition of your USB drive before formatting. In Disk Utility, select your drive and click on the "First Aid" button. This tool checks for any errors and repairs them if possible. Running First Aid ensures that the drive is in good condition and can prevent potential problems during the formatting process.
There are many methods that can help in formatting a USB drive on Mac:
Disk Utility is a powerful application included with macOS that allows you to manage your disks and volumes. It can help you securely and quickly format a USB drive on Mac:
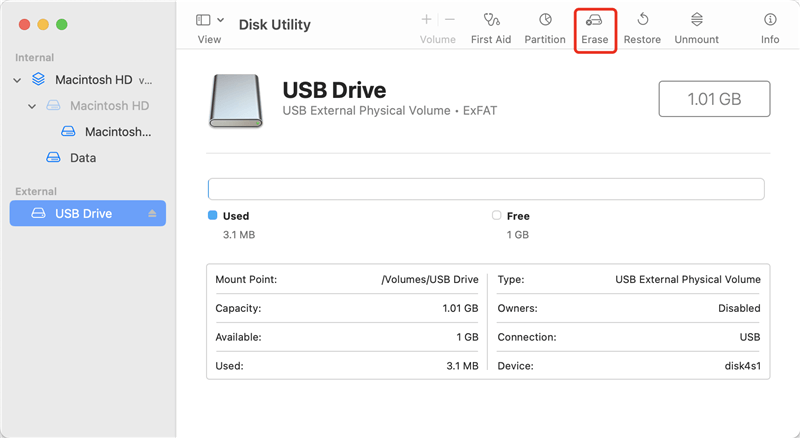
Step 1. Go to Applications > Utilities > Disk Utility, open Disk Utility. Make sure the USB drive has been connected to your Mac.
Step 2. Once Disk Utility is open, you will see a list of all the disks and volumes connected to your Mac on the left side of the window. Locate your USB drive in this list. It will typically be named something like "Untitled" or "NO NAME" unless you have previously renamed it. Then click Erase.
Step 3. When formatting a USB drive, you need to choose the appropriate file system. The file system determines how data is stored and accessed on the drive. Here are some common file systems you might consider:
Choose the file system that best suits your needs. For most users, ExFAT is a good choice for its broad compatibility, while APFS is optimal for those who only use Mac.
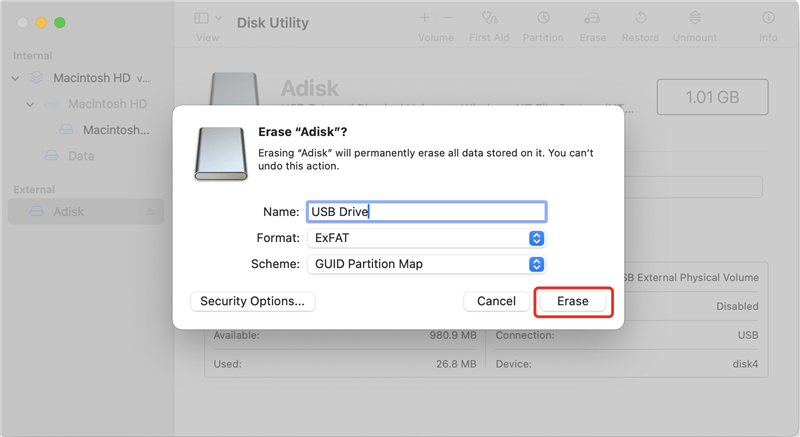
Step 4. With your file system selected, it's time to format the USB drive. Follow these steps:
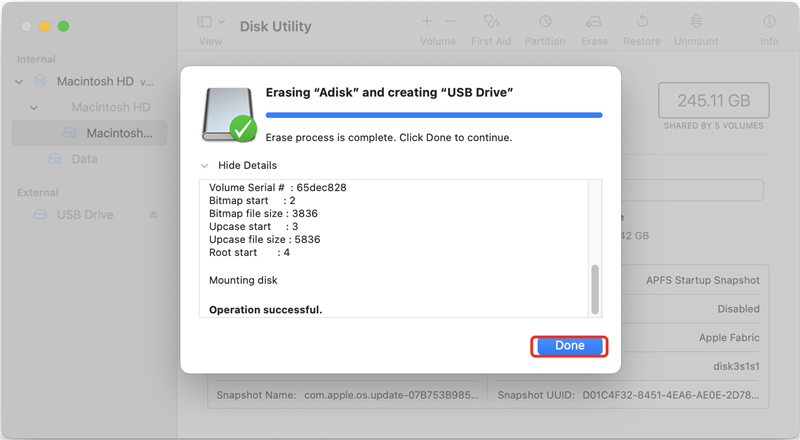
Step 5. After the formatting process is complete, it's important to properly eject the USB drive before removing it from your Mac. This ensures that all data has been written to the drive and prevents potential data corruption. To eject the drive:
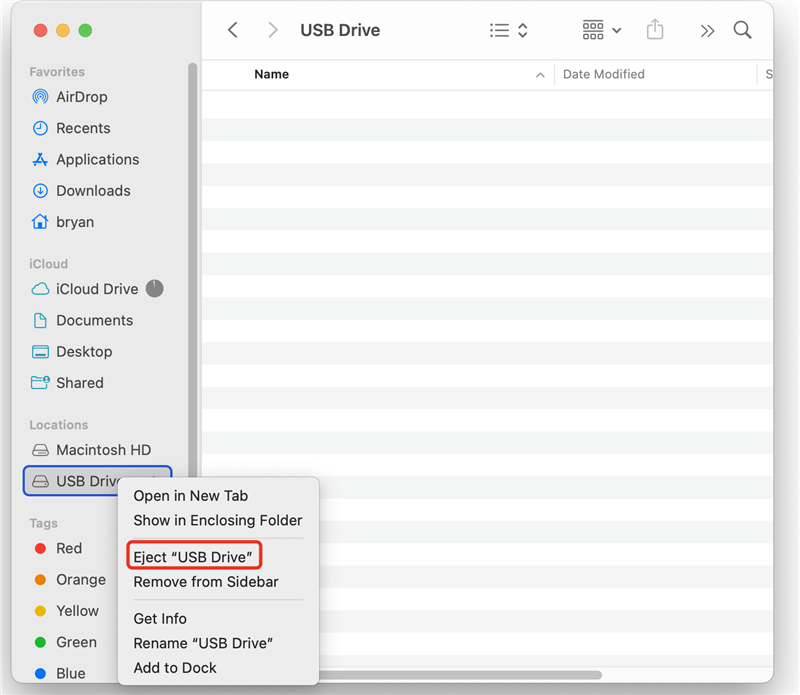
Alternatively, you can drag the drive’s icon to the Trash, which will change to an Eject symbol when you begin dragging.
Once the drive is ejected, you can safely remove it from your Mac’s USB port.
Terminal is another built-in tool can help you format a USB drive on Mac:
Step 1. Open Terminal: Go to Applications > Utilities > Terminal, open Terminal.
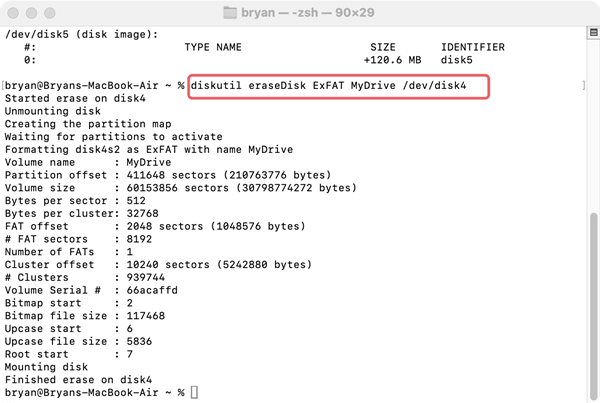
Step 2. Type in diskutil list and press Enter, it lists all drives, then find the USB drive such as /dev/disk4.
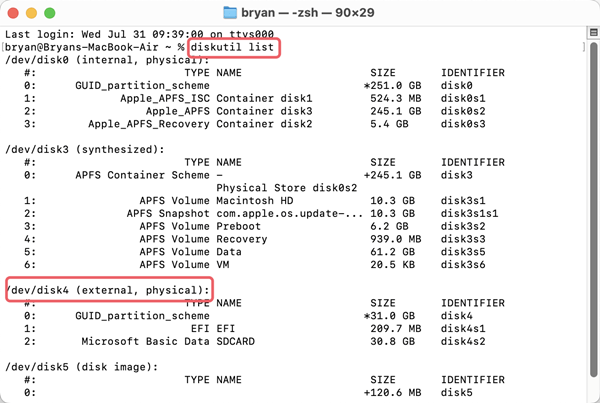
Step 3. Type in diskutil eraseDisk [File System] [Disk Name] [Disk Identifier], for example, eraseDisk ExFAT MyDrive /dev/disk4, press Enter. It will quickly format the USB drive to ExFAT.
Note: The data which is erased by Disk Utility or Terminal is not lost forever and can be recovered by Mac data recovery software.
How to Recover Lost Data from Formatted USB Drive
Data recovery software can deeply scan the formatted USB flash drive and find all deleted, formatted or lost data.
Before you sell, donate or dispose of an old USB drive, you'd better permanently erase all your private data from the drive to prevent potential data recovery. Mac disk wipe software - such as DoYourData Super Eraser for Mac can help you wipe a USB drive on Mac:
Step 1. Download and install DoYourData Super Eraser on your Mac, then connect the USB drive to your Mac.
Step 2. Choose Wipe Hard Drive mode, then select the USB drive and click on Wipe Now button.

Step 3. Select a data erasure standard such as DoD 5220.22-M to help you wipe the USB drive, then click on Continue button.

It will format and wipe the USB drive. Once the wiping process gets finished, all data stored on the USB drive is gone forever, cannot be recovered by any method.
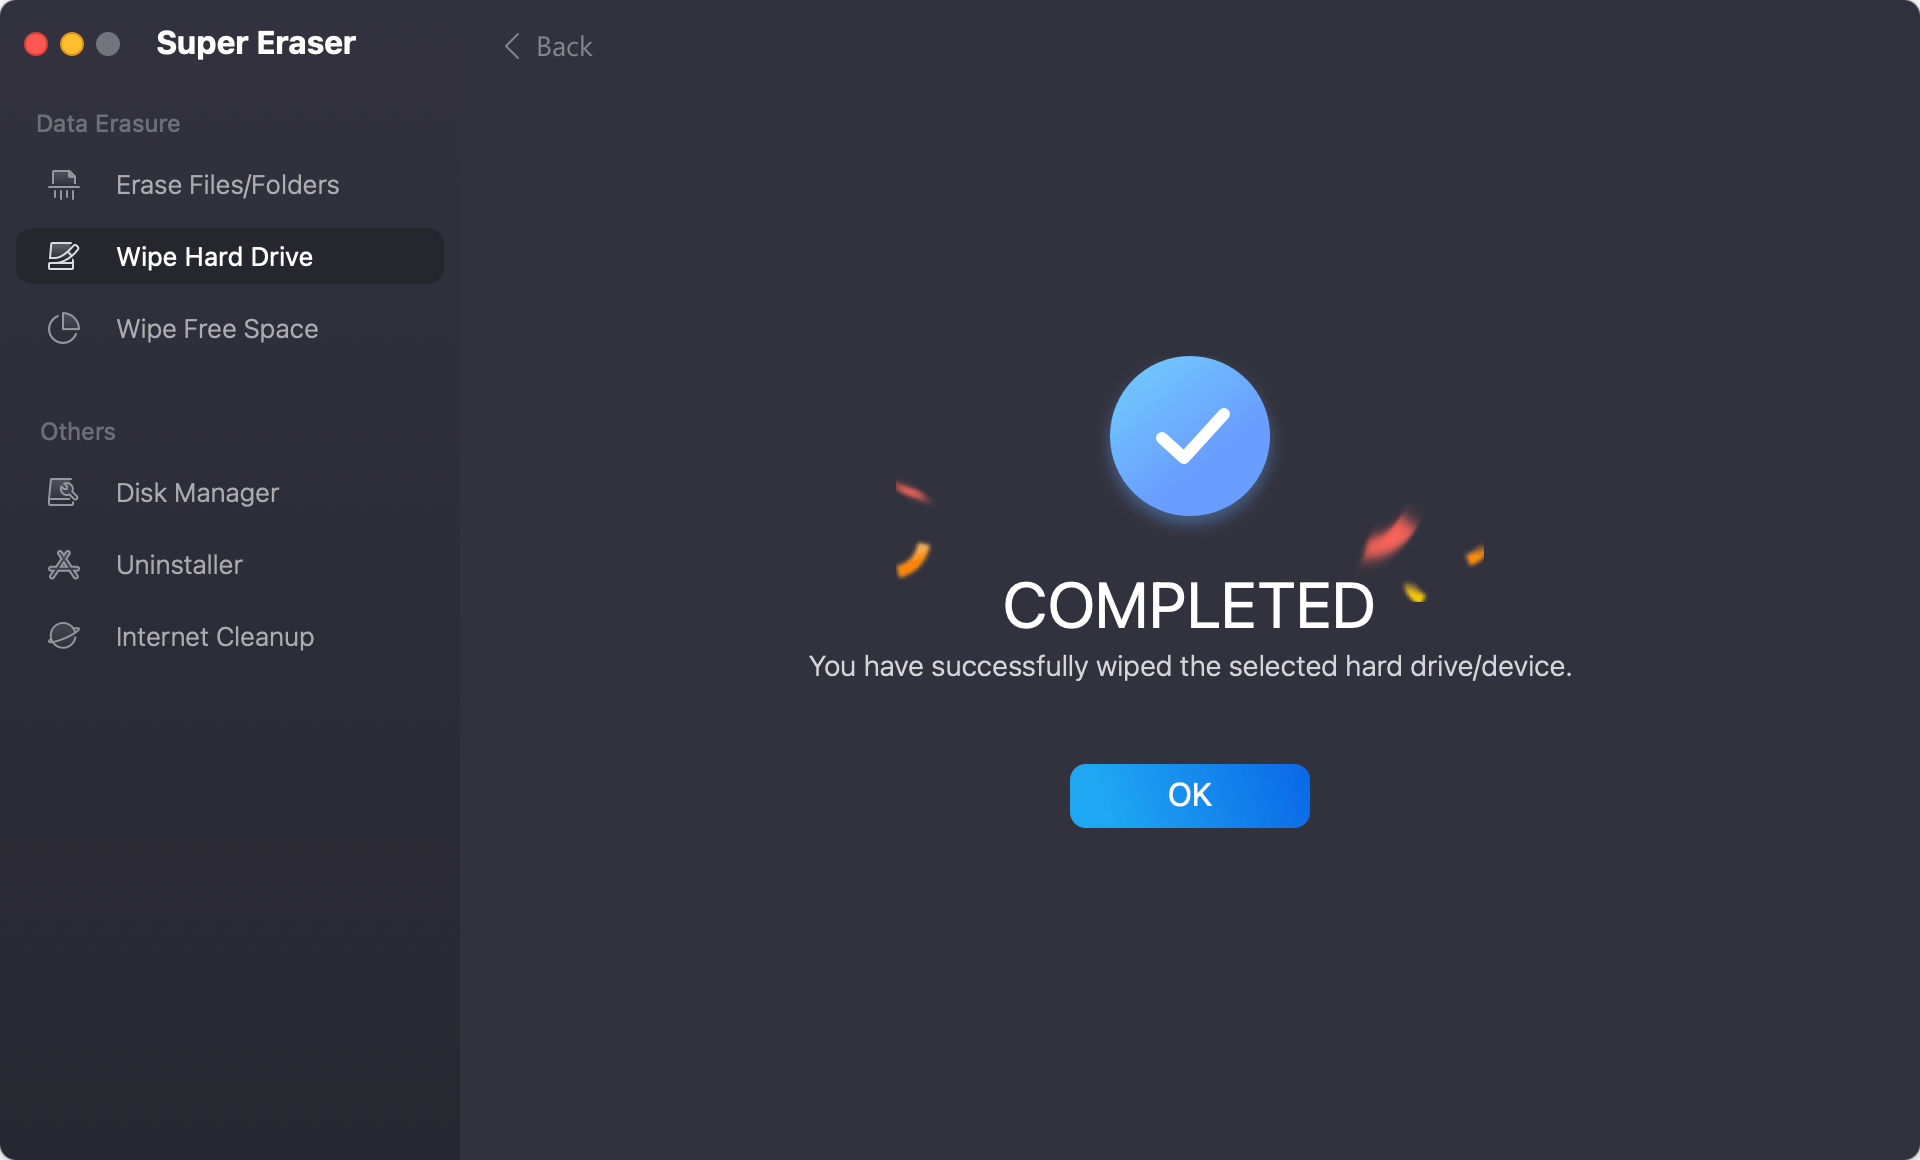
If you only need to format the USB drive on Mac, just choose Disk Manager, select the USB drive, click on Format button.
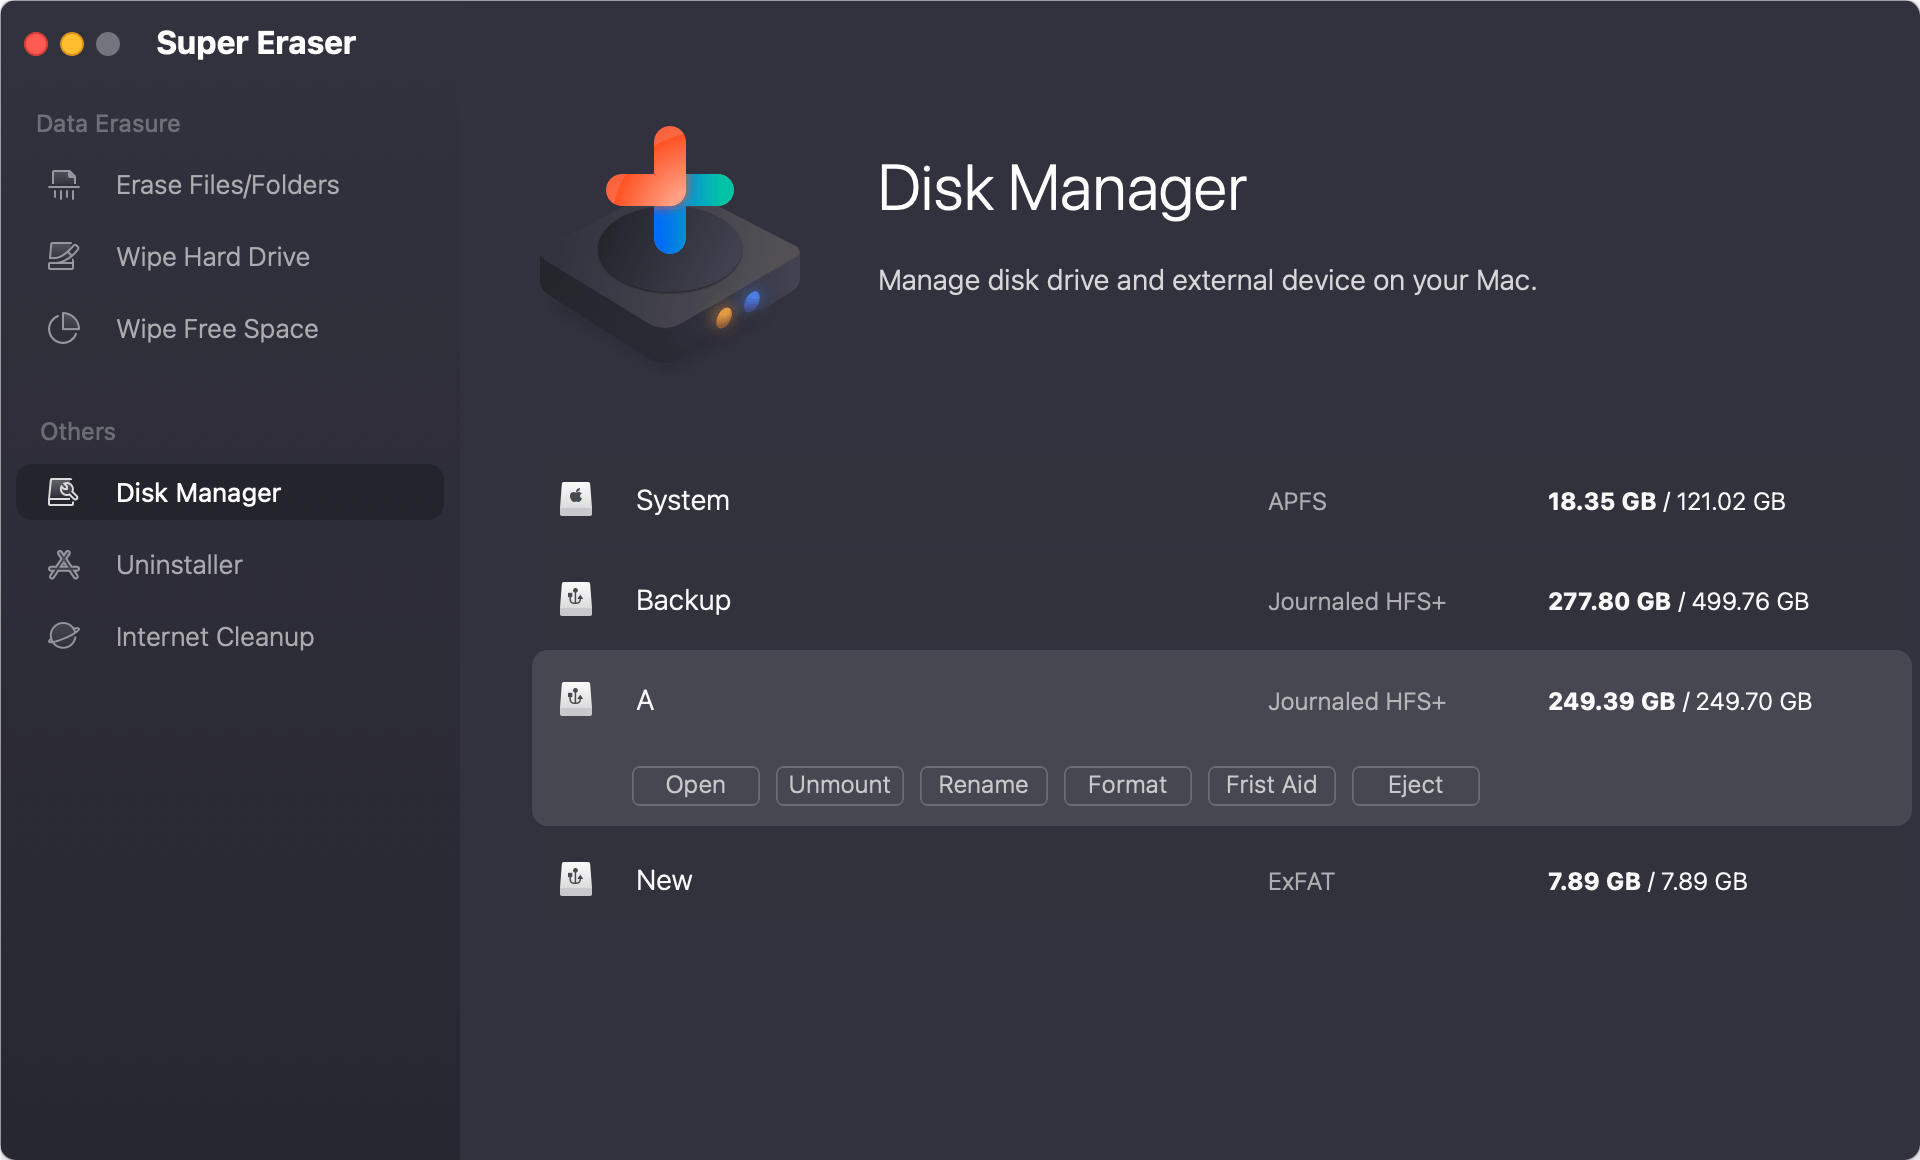
MacClean360 is a reliable Mac disk formatting tool. It offers Disk Manager to help you quickly format a USB drive on Mac:
Step 1. Download and install MacClean360 on your Mac, then open it.
Step 2. Open MacClean360, choose Disk Manager. Then select the USB drive, click on Format button. Select a file system such as ExFAT or FAT32 and format the USB drive.

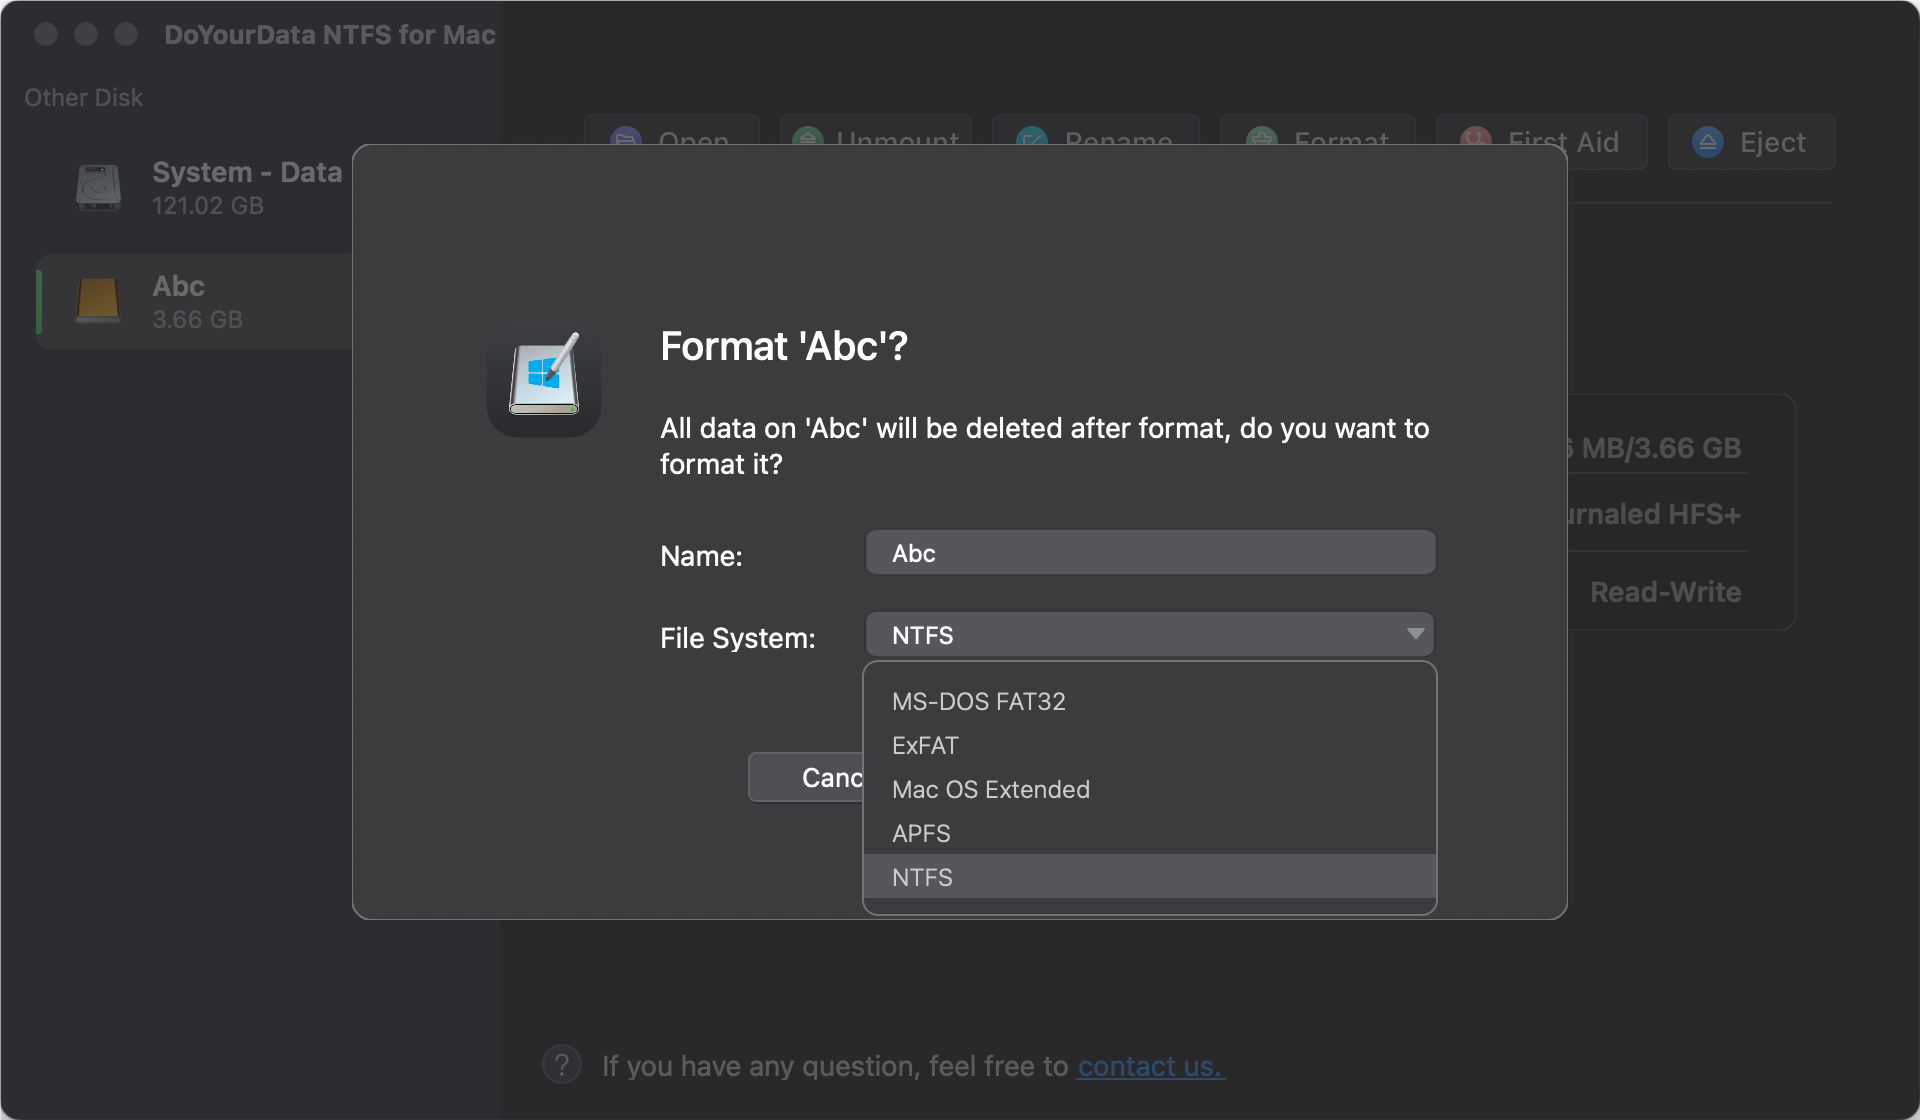
DoYourData NFTS for Mac is a powerful disk management tool. It can format a USB drive to ExFAT, FAT32, Mac OS Extended, APFS or even NTFS.
Step 1. Download and install DoYourData NTFS for Mac tool, open it.
Step 2. Open DoYourData NTFS for Mac, then select the USB drive, click on Format button.
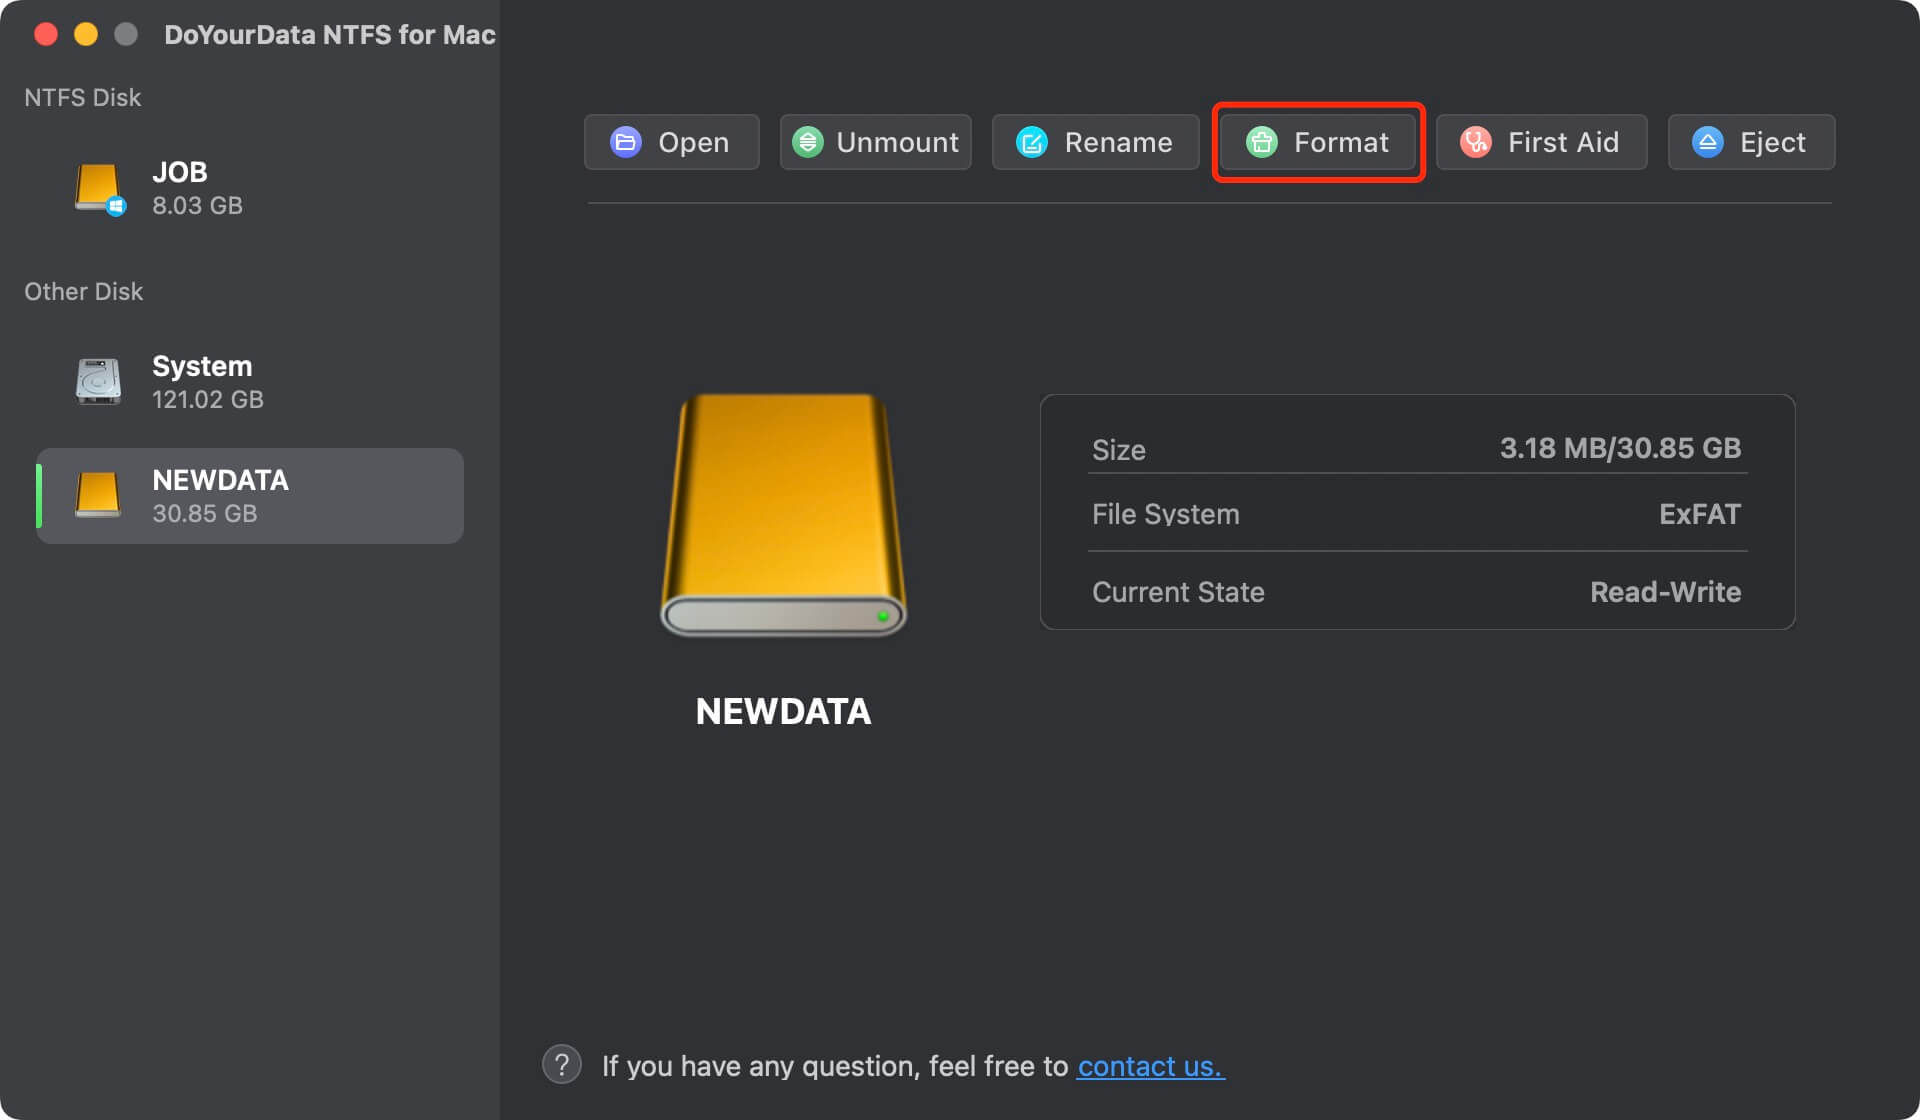
Step 3. Select a file system, then click on Continue button to format the USB drive.
Sometimes, you may encounter issues during the formatting process. Here are some common problems and their solutions:
Formatting a USB drive on a Mac is a simple process when you follow the right steps. By preparing your data, choosing the appropriate file system, and using Disk Utility or other disk formatting tools to format the drive, you can ensure your USB drive is ready for use. Remember to back up important data before formatting and to properly eject the drive to prevent data loss.
If you will sell, donate or dispose of an old USB drive, you can use disk wipe software - such as DoYourData Super Eraser for Mac to wipe the USB drive. Once the data is erased by DoYourData Super Eraser for Mac, the data is lost for good, cannot be recovered by any method.

DoYourData Super Eraser for Mac
DoYourData Super Eraser for Mac is a 100% safe, powerful and easy-to-use data erasure program. It offers certified data erasure standards including Peter Gutmann, U.S. Army AR380-19, DoD 5220.22-M ECE to permanently erase data from Macs and external devices, making data recovery be impossible.
