How to Format USB Flash Drive on Windows or Mac?
There are so many reasons behind why you should format an USB flash drive. Here, we will introduce two ways to format an USB flash drive: 1. Format the USB flash drive on Windows or macOS using built-in disk formatting tools; 2. Format and wipe an USB flash drive using data eraser before you sell or donate it.
![]() Updated by Shirly Chen on March 13, 2025
Updated by Shirly Chen on March 13, 2025
Quick Navigation:
- What Is USB Flash Drive Formatting?
- Format An USB Flash Drive with Built-in Disk Formatting Tool
- Format and Wipe USB Flash Drive Before You Sell/Donate or Dispose of It [Files Unrecoverable
- Conclusion
- FAQs About Formatting USB Flash Drive
Are you sick of your USB flash drive running slowly or giving you annoying errors? It's time to give your trusted storage friend a new lease on life! Formatting your USB flash drive is the best way to make it work better and ensure that you can store and move data without any problems, whether you're a Windows or Mac expert.
This easy guide will show you how to format your USB flash drive step by step on Windows and Mac computers. Say goodbye to too-crowded files and hello to a new start! Get ready to use your USB flash drive to its fullest and enjoy lightning-fast speeds and reliable storage like never before. Let us begin making your USB flash drive look better.
And we also will introduce a way to format and wipe the USB flash drive before you sell, donate or dispose of it. It ensures all data stored on the USB flash drive is gone for good, can’t be recovered by any method.
What Is USB Flash Drive Formatting?
Formatting an USB flash drive involves setting up a specific file system that makes it work well for storing data. On a Windows computer, you can choose from FAT32, exFAT, and NTFS. Each has its benefits when it comes to supporting and handling large files. On the other hand, Mac users can choose from FAT32, exFAT, and APFS, HFS+ (Mac OS Extended).
Choosing between these file systems depends on several things, such as which ones work with which devices, how well they handle big files, and what the drive should be used for. By knowing these little details, you can change the formatting process to fit your needs, ensuring the best speed and easy management of your data.
Format An USB Flash Drive with Built-in Disk Formatting Tool
Formatting will deletes everything from the USB flash drive. So, make sure you have backed up your important data stored on the USB flash drive, then start to format the drive on Windows or macOS with built-in disk formatting tools.
#1 Formatting An USB Flash Drive on Windows
- You must connect your USB drive to a USB port on your Windows computer.
- You can click the File Explorer button in the taskbar or press Windows Key + E to open File Explorer.
- The USB flash drive should be under "This PC" or "Computer" on the left.
- Right-click on the drive and pick "Format" from the menu to format it.
- A new window will pop up with formatting choices. Here, you can select the drive's volume name, file system (FAT32, exFAT, or NTFS), and allocation unit size.
- To speed up the formatting process, especially for bigger drives, check the "Quick Format" box.
- Press "Start" to start the coding. A message will tell you that all the data on the drive will be erased. Press "OK" to move on.
- A message will tell you that the style worked during the process. Press "OK" to close the window.

#2 Formatting An USB Flash Drive on Mac
- Use an USB port on your Mac to connect your flash drive.
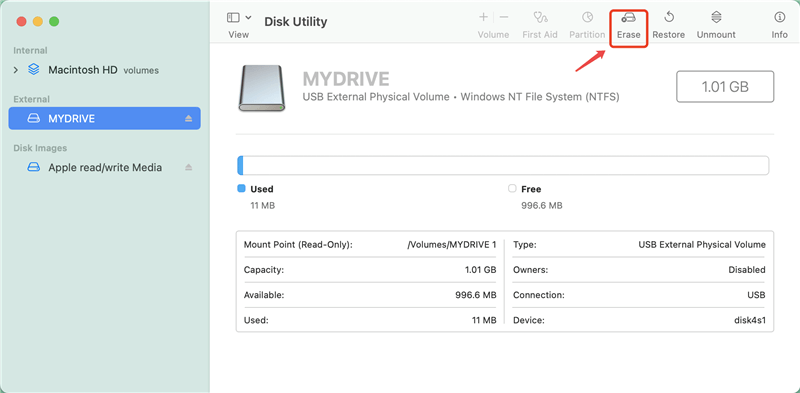
- Go to Launchpad, type in Disk Utility in search box, then find and open Disk Utility.
- Find your USB flash drive, and select it. Then click Erase.
- The new window will pop up with formatting choices. Name your drive and choose a method (Master Boot Record or GUID Partition Map). Then, choose the file system you want (FAT32, exFAT, or APFS, Mac OS Extended).
- Make sure "Format" is chosen, then click "Erase" to start the formatting process.
- After the process, you'll see a message that says the drive has been erased and formatted properly.
Formatting Tips:
- Backup Important Data
Ensure you have a backup of any vital data saved on an USB flash drive before formatting it, as formatting will delete all the data already recorded on the drive. - Select the Right File System
Depending on the compatibility requirements and file size restrictions, choose the file system that best meets your requirements. ExFAT or FAT32 is highly recommended. - Quick Format
Selecting the rapid format option may speed up the formatting process, which is especially beneficial for larger drives. - Securely Eject The Drive:
After formatting, the USB flash drive should be safely ejected to avoid data loss or corruption.
Note: The lost data which is removed from the USB flash drive is not lost forever. Data recovery software is able to easily recover deleted and formatted data from any USB flash drive.
Step 1. Download and install the powerful data recovery software - Do Your Data Recovery. It can help you quickly unformat the USB flash drive and get all lost data back.
Step 2. Open Do Your Data Recovery, then select the formatted USB flash drive to start data recovery

Step 3. Click on Scan button to deeply scan the formatted USB flash drive and it will find all lost files.
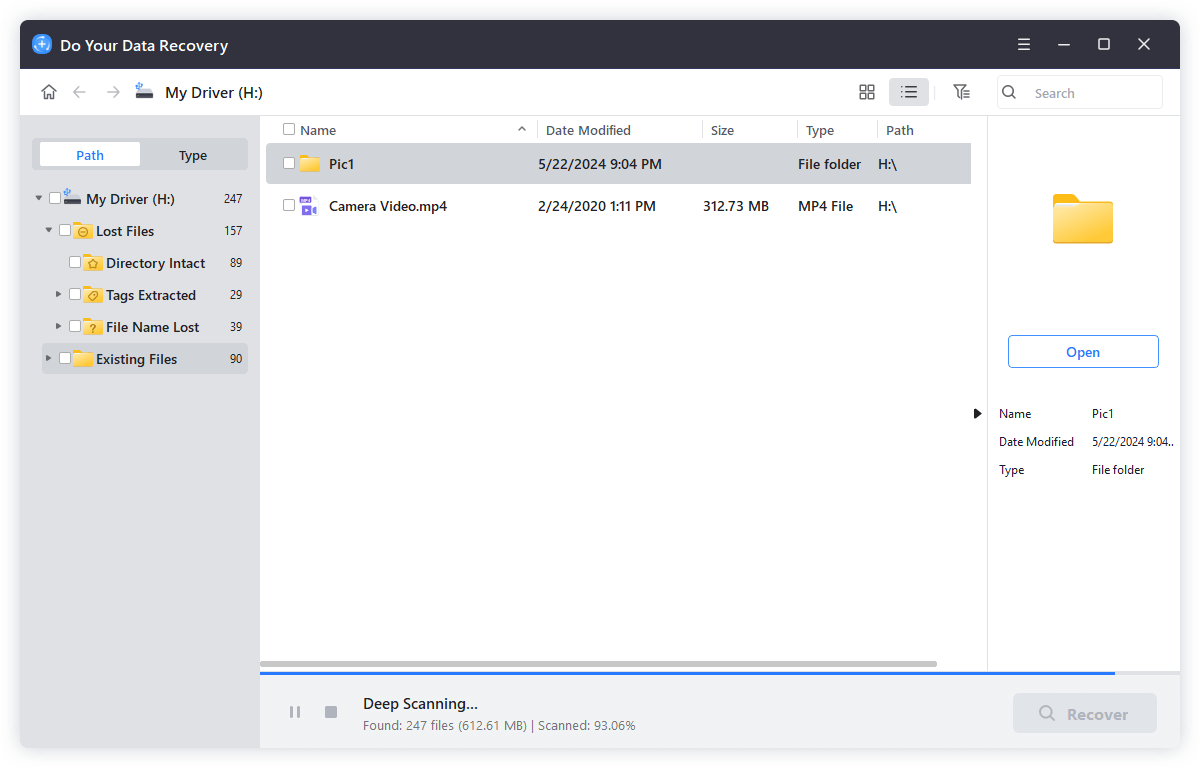
Step 4. Once the scan is completed, you can see all recoverable files. Then select the wanted files and save them by clicking on Recover button.

Format and Wipe USB Flash Drive Before You Sell/Donate or Dispose of It [Files Unrecoverable]
It is important to know that you should permanently wipe all private data off the USB flash drive before you sell, donate it or throw out it into trash. Formatting can't permanently erase data from your USB flash drive because that data recovery software is able to easily and quickly get all deleted/formatted data back.
How to permanently erase all data from the USB flash drive? Don’t worry, data erasure program can help!
DoYourData Super Eraser is a powerful data erasure & disk formatting tool for both Windows OS and Mac OS. It can help you quickly format/wipe USB flash drive and permanently erase all data from the USB flash drive. It means once the USB flash drive is formatted by DoYourData Super Eraser, all data information stored on the USB flash drive is lost for good, can't be recovered by any data recovery method. Let’s see how to use DoYourData Super Eraser to securely format and wipe the USB flash drive on Windows or macOS:
Step 1. Download and install DoYourData Super Eraser on your computer.
Step 2. Connect the USB flash drive to your computer and open DoYourData Super Eraser.
Step 3. Choose Wipe Hard Drive mode, this mode is able to format and wipe the USB flash drive, permanently erase all data from the USB flash drive, leaving no trace for data recovery.
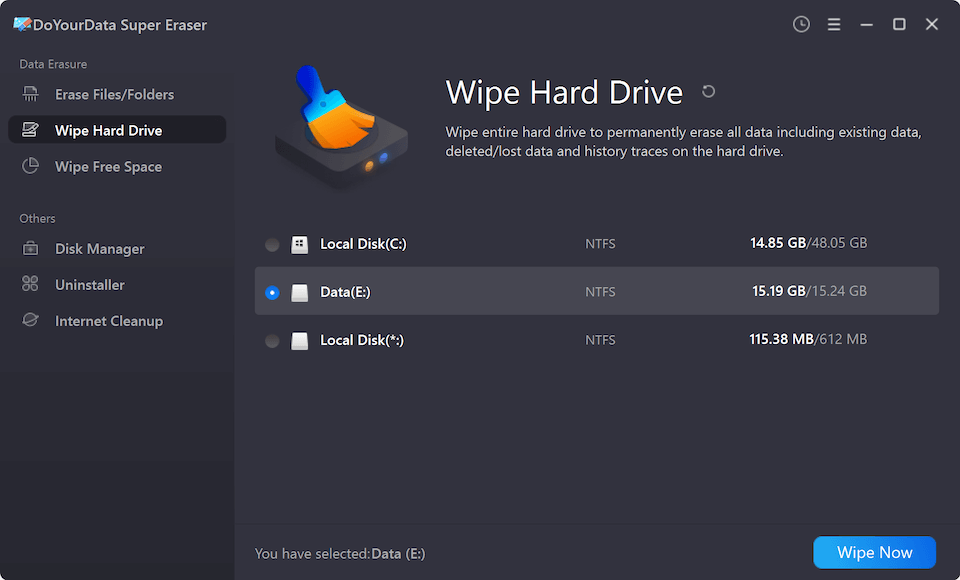
Step 4. Select the USB flash drive and click on Wipe Now button to start the wiping process.
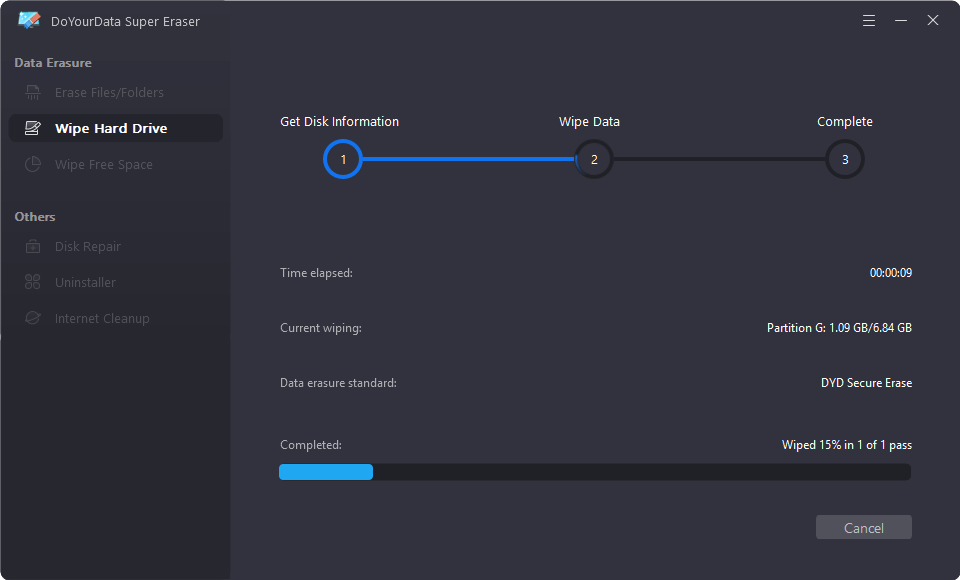
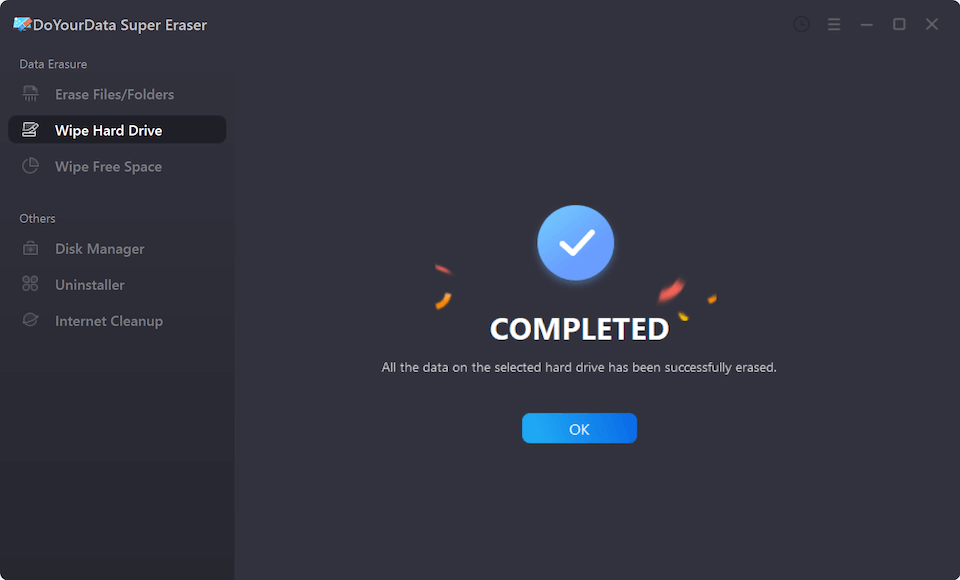
Step 5. It will securely and permanently erase all data including existing data, deleted/formatted data from the USB flash drive.
DoYourData Super Eraser also can help you reformat the USB flash drive to ExFAT/FAT32, fix corrupted USB flash drive or erase data from PC, Mac, HDD, SSD, memory card, digital camera, etc.
Conclusion:
In conclusion, formatting your USB flash drive on either Windows or Mac is an easy but necessary step to ensure it works well and is reliable. Following the steps mentioned here, you can format the USB flash drive to work faster, and your data will be easier to find.
Before you format, back up any important files and pick the right system for your needs. If you format a USB flash drive, you can say goodbye to slow performance and errors and hello to a fresh storage solution ready to help you store and move your data easily.
DoYourData Super Eraser is a powerful data erasure program. It uses certified data erasure standards, such as DoD 5220.22-M ECE, Peter Gutmann's algorithm to help in permanently destroying data, making files be unrecoverable! Before you sell or donate your USB flash drive, you can use this tool to format and wipe the USB flash drive, permanently erase all data from it to prevent your data from being recovered by others.
FAQs About Formatting USB Flash Drive
1. How to format USB flash drive?
On Windows: connect the USB flash drive to your computer, open This PC, then right-click the USB flash drive, choose Format. If the USB flash drive is not showing up in File Explorer, just open Disk Management, right-click the USB flash drive, choose Format or Initialize Disk.
On macOS: connect the USB flash drive to your Mac, then open Disk Utility. Select the USB flash drive, click Erase. Then select a file system, click Erase again to format the USB flash drive to ExFAT or MS-DOS (FAT).
Please note that the formatted data is not lost forever. With a right data recovery tool, you or anyone else can easily recover formatted data from the USB flash drive.
2. How to wipe an USB flash drive before you sell or donate it?
DoYourData Super Eraser is a reliable data erasure program. It can help you format and wipe the USB flash drive. It can securely and permanently erase all data from the USB flash drive, beyond the scope of data recovery.
- Download and install DoYourData Super Eraser on your computer.
- Insert the USB flash drive into your computer, then open DoYourData Super Eraser.
- Choose Wipe Hard Drive mode, select the USB flash drive, click on Wipe Now button.
- Wipe all data from the USB flash drive.
3. What is the best USB flash drive formatting tool?
Here are best 5 tools for you to format an USB flash drive on Windows or macOS:
- Disk Management
- Disk Utility
- DoYourData Super Eraser
- MacClean360
- Command Prompt
DoYourData Super Eraser
DoYourData Super Eraser, the award-winning data erasure software, offers certified data erasure standards including U.S. Army AR380-19, DoD 5220.22-M ECE to help you securely and permanently erase data from PC, Mac, HDD, SSD, USB drive, memory card or other device, make data be lost forever, unrecoverable!
Written & Updated by Shirly Chen
Shirly Chen has been writing data recovery, data erasure articles for DoYourData over 4 years. She has been working as a professional website content writer & editor for quite a long time. She also writes articles about disk clone, Mac optimization, disk backup, etc.