How to back up data on Mac?
Back up your Mac data with Time Machine or third-party backup tools.

Quick Navigation:
In this digital era, losing your important data is not a surprising thing. Despite various reasons, the loss of important files can have severe consequences, especially for those who rely heavily on their computers for personal or professional purposes. This is particularly true for users of older operating systems, where data recovery solutions might be less straightforward or more challenging to implement. This article focuses on free data recovery for Mac OS X 10.10, also known as Yosemite.
Before diving into the recovery process, it is important to prepare your Mac to ensure the best chances of recovering your lost data.
1. Stop Using the Affected Drive
When you realize that data has been lost, stop using the affected drive immediately. This prevents new data from being written over the lost files, which makes data recovery more difficult or even impossible. Avoid downloading or installing any software, as it could overwrite the space previously occupied by your lost files.
2. Backup Any Remaining Data
If there is still accessible data on the drive, make a backup to an external hard drive or cloud storage service. This step is crucial to prevent further data loss during the recovery process.
3. Use Built-in Tools (Time Machine)
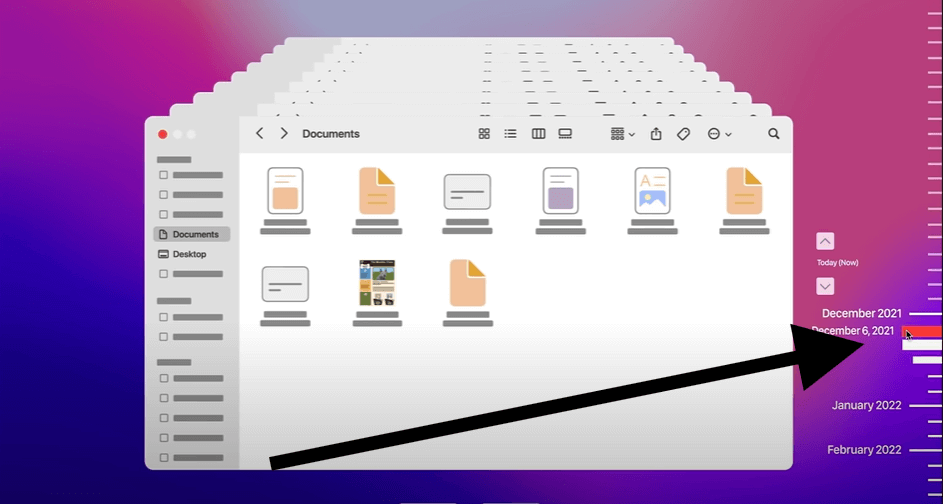
If you have been regularly backing up your Mac using Time Machine, the built-in macOS backup tool, you might be able to restore your lost files from a previous backup. However, this method only works if you have set up and regularly updated your Time Machine backups.
Mac OS X comes with several built-in tools that can help recover lost data, particularly for those who experience accidental deletions or file corruption.
Time Machine is Apple's built-in backup feature that has been available on Mac OS X since Leopard (10.5). It's an excellent first line of defense against data loss. If Time Machine has been enabled and configured, it allows users to restore files from specific points in time, essentially reverting the system to a state before the data was lost.
To recover files using Time Machine on Yosemite:


Time Machine's major advantage is that it doesn't require third-party software. However, it only works if users have enabled it beforehand. Without a Time Machine backup, users must explore other recovery options.
For those comfortable using the Terminal, some commands may help recover deleted files. The cp (copy) command can sometimes retrieve files from corrupted or hidden directories.
Example Command:
cp -R /Volumes/DiskName/FolderName/* /DestinationFolder/
This command copies all files from a specified folder on a volume to a destination folder.
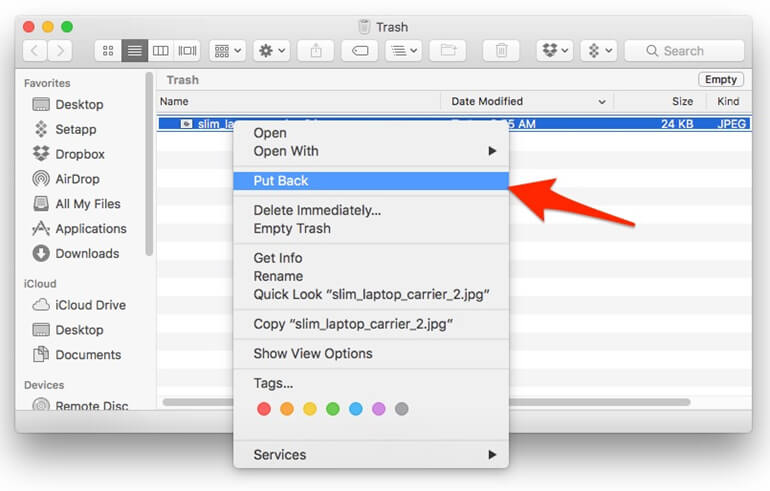
Sometimes, files might not be deleted entirely but moved to hidden folders or the Trash.
Here is how to find and restore the deleted files from Trash:

Use Terminal to check hidden folders and files:
defaults write com.apple.Finder AppleShowAllFiles true
killall Finder

This command shows all hidden files and folders, allowing you to search for your lost data.
When built-in tools are insufficient, or if the Trash has been emptied and no Time Machine backup is available, third-party software can often help recover lost data. The following free tools are particularly effective for users running Mac OS X Mavericks or Yosemite.
It is one of the most popular free data recovery tools for Mac. It offers a user-friendly interface and powerful scanning algorithms that can recover deleted files from hard drives, USB flash drives, memory cards, and more.
Pros:
Cons:
How to Use Do Your Data Recovery:
Step 1. Download and install the software on your Mac. Launch the software and select the drive or partition where you lost the data.

Step 2. Click the Scan button and the software will search for the lost files from the selected drive..

Step 3. Once the scan is complete, review the list of recoverable files and select the ones you want to recover. Click Recover to restore the files to a different location.

It is a powerful, open-source data recovery tool that works well on Mac OS X Yosemite. Although its name suggests it is designed for recovering photos, it can actually recover a wide range of file types.
Pros:
Cons:
How to Use PhotoRec:
It is another free tool from the makers of PhotoRec, is designed to recover lost partitions and make non-booting disks bootable again. It can also be used to recover files in some scenarios.
Pros:
Cons:
How to Use TestDisk:
While data recovery tools are incredibly useful, it's always better to avoid data loss in the first place. The following best practices can help prevent the need for data recovery:
1. Regular Backups
The most effective way to safeguard data is through regular backups. Time Machine is an excellent tool for this purpose, but users should also consider other backup methods, such as cloud storage or external hard drives, to create redundant backups.
2. Careful File Management
Being mindful of file management practices can significantly reduce the risk of accidental deletions. Organizing files into specific folders, double-checking before deleting anything, and using naming conventions that make it easier to identify important files can all help.
3. Disk Utility Maintenance
Mac OS X includes a built-in Disk Utility that can be used to maintain the health of hard drives and SSDs. Running regular checks with Disk Utility's "First Aid" feature can help identify and resolve issues before they lead to data loss.
4. Antivirus Software
Even though Macs are generally more secure than other operating systems, they are not immune to malware. Installing reputable antivirus software and keeping it up to date can help protect against threats that could lead to data loss.
If data loss does occur, it's essential to act quickly but carefully. The following steps can help maximize the chances of successful recovery:
Data loss can be a distressing experience, but it's not always the end of the road. Mac users running OS X 10.9 Mavericks and 10.10 Yosemite have several options at their disposal to recover lost data, ranging from built-in tools like Time Machine and the Trash Bin to powerful free third-party software such as Do Your Data Recovery for Mac Free, TestDisk, and Lazesoft Mac Data Recovery. By understanding the causes of data loss and the available recovery options, users can effectively safeguard their data and respond quickly in the event of a loss. Additionally, following best practices for data management and backups can help prevent data loss from occurring in the first place, reducing the need for recovery tools.

Do Your Data Recovery for Mac
Do Your Data Recovery for Mac, one of the best Mac data recovery software, can help you easily and completely recover deleted, formatted or lost files from Mac HDD/SSD, external HDD/SDD, USB drive, memory card, digital camera, or other storage devices.