Back up Mac data regularly
Back up your Mac with Time Machine or third-party software.

Quick Navigation:
Data loss is a stressful situation that can happen to anyone, whether due to accidental deletion, software failure, or a system crash. Mac OS X 10.7 Lion, while known for its stability and user-friendly features, is not immune to such issues. Recovering lost data is crucial for minimizing potential damage, whether for personal or professional reasons. This article will guide you through various methods and tools to recover lost data on Mac OS X 10.7 Lion, ensuring you have the best chance of getting back what you've lost.
Before diving into the data recovery process, it is important to understand how data loss can occur on Mac OS X 10.7 Lion. Data loss can be caused by various factors, including:
Mac OS X 10.7 Lion uses the HFS+ file system, which manages how data is stored and retrieved on the disk. When data is "deleted," the system does not actually remove it; instead, it marks the space occupied by the file as available for new data. Until new data overwrites this space, the original data is often still recoverable.
If you suspect data loss on your Mac, the following steps will help increase the chances of recovery:
1. Stop Using the Affected Disk: Avoid using the disk where data was lost. Any further write operation could overwrite the deleted files, making them unrecoverable.
2. Do Not Download or Install New Software: Installing new software or saving new files may overwrite the lost data.
3. Avoid Modifying or Saving New Data: Continue using the Mac without making changes to the disk. Every action could affect the recoverability of the lost data.
Mac OS X 10.7 Lion offers several built-in tools that can help recover lost data. These tools are easy to use and should be your first line of defense.
Mac OS X comes with a built-in backup capability called Time Machine that will automatically backup all of your system's data, including emails, documents, music, pictures, system files, and programs. You can easily and quickly recover deleted data if you've been using Time Machine.
A Comprehensive Guide on Utilizing Time Machine:
1. Connect the Backup disk: Attach the external disk containing your Time Machine backups to your Mac.
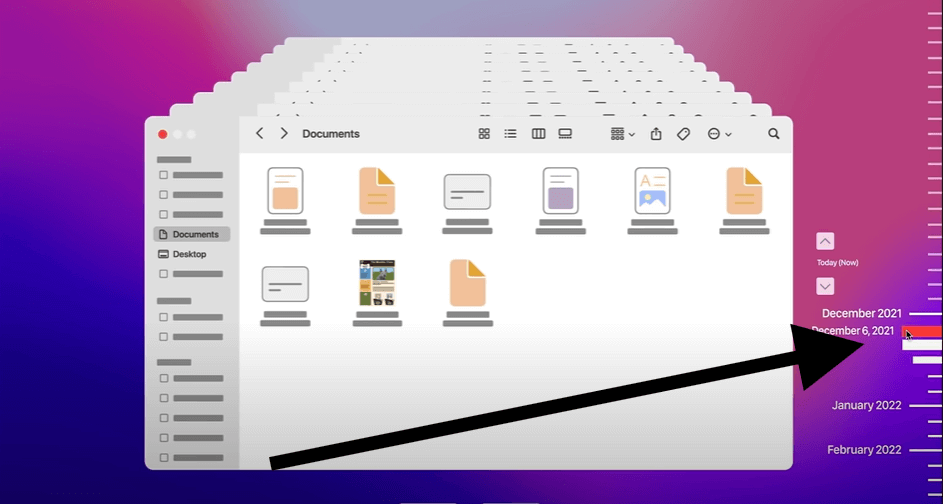
2. Enter Time Machine: To do this, click the menu bar's Time Machine symbol and choose "Enter Time Machine." This will cause the Time Machine interface to open and display a backup timeline.

3. Find the Lost Data: To find the time and date when the data you require was last known to exist, use the timeline on the right side of the screen. Additionally, you can use Time Machine's Finder window to look for files.

4. Restore the Data: After locating the necessary files or folders, pick them and press "Restore." On your Mac, Time Machine will return the files to their original locations.

5. Verify Recovery: Following data restoration, make sure all files are there and readable.
Time Machine is a reliable and straightforward method for recovering lost data, as long as you've been diligent about making regular backups.
Disk Utility is a built-in tool in Mac OS X 10.7 Lion that can help with various disk-related tasks, including data recovery.
It can be used to repair disk permissions and verify and repair disks that might be causing data loss.
How to Use Disk Utility for Data Recovery
1.Open Disk Utility: Move to Applications, then Utilities and then find Disk Utility. Or, you can use Spotlight to search for it.

2.Select the Disk: In Disk Utility, select the disk or partition where the data loss occurred.
3.Verify Disk: Click on "First Aid" and then "Verify Disk." Disk Utility will check for any errors on the disk. If errors are found, you may proceed to repair them by clicking "Repair Disk."

4.Repair Disk Permissions: If you suspect that data loss is due to permission errors, you can select "Repair Disk Permissions" under the First Aid tab.

While Disk Utility can be useful, its recovery capabilities are somewhat limited. For more severe data loss, you might need to use specialized data recovery software.
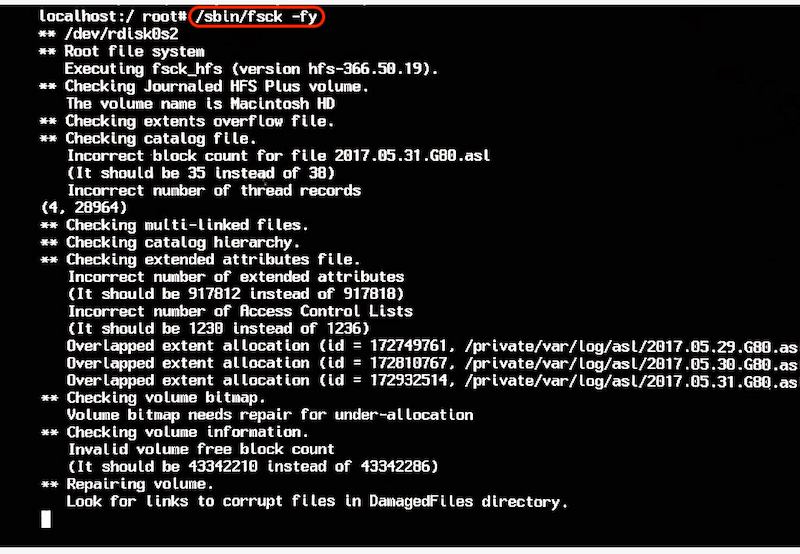
Terminal is a powerful tool in Mac OS X that allows users to run commands for various tasks, including data recovery. One of the useful commands for data recovery is fsck (File System Consistency Check).
Step 1: Move to Applications, then Utilities and then find Terminal.
Step 2: Type sudo /sbin/fsck -fy and press Enter.
Step 3: Wait for the process to complete. This command checks the file system for inconsistencies and attempts to repair them.

While this method may not recover specific files, it can help repair disk errors that could lead to data loss.
If built-in tools fail to recover your lost data, several third-party data recovery tools are available for this version. These tools are designed specifically to scan your drives and recover deleted or corrupted files.
Do Your Data Recovery for Mac Free is a popular data recovery tool for Mac that supports a wide range of file types and file systems, including HFS+ used by Mac OS X 10.7 Lion. It is a powerful data recovery software for Mac that offers deep scanning and advanced recovery options.
With the Free version of the software, you can recover up to 1GB files for free on Mac. Here are the steps to recover the lost files on Mac OS X 10.7 Lion with Do Your Data Recovery for Mac Free:
Step 1. Run the Mac data recovery software on your Mac, select the drive where you lost data.

Step 2. Click on the Scan button and then the software will start to search for the lost files from the selected drive.

Step 3. Check and locate the lost files after the scan is finished. You can also preview the files to verify if they are recoverable.

Step 4. Select all the wanted files and click Recover button to save the files to another drive.

Aside from built-in and third-party tools, there are some manual recovery techniques that you can try to retrieve lost data.
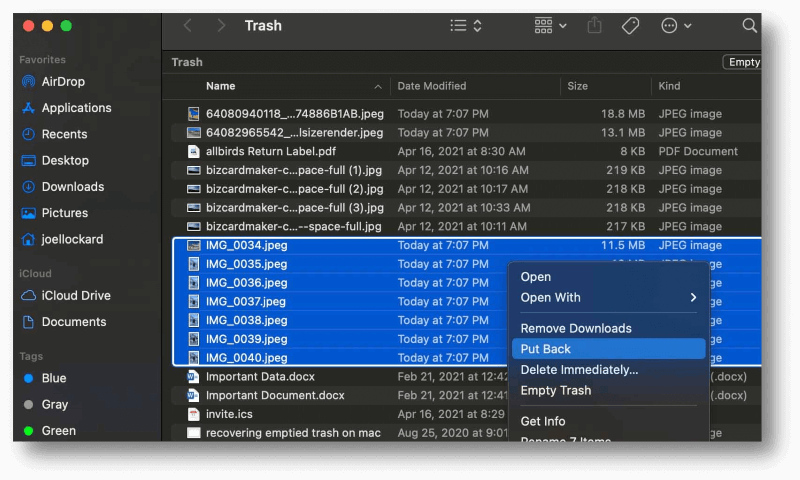
One of the simplest methods for recovering lost data is to check the Trash Bin. Often, files that are accidentally deleted are moved to the Trash Bin.

If you regularly send important files via email or use cloud storage services, you might be able to recover your lost data from these sources.
This can be your best bet if everything else fails. These services recover data from corrupted or damaged drives using specialist tools and methodologies.
When to Consider Professional Data Recovery Services:
What to Expect from Professional Services:
Choosing a Reputable Service Provider:
Consider the following preventive measures to avoid future data loss.
Regular Backups: Regularly create backups using Time Machine or other backup tools.
Data Protection: Use antivirus software to protect against malware and regularly update your system.
Safe Data Handling: Avoid storing critical data on volatile storage and use reliable storage media.
Data loss on Mac OS X 10.7 Lion can be a daunting experience, but with the right approach, there is a good chance you can recover your lost files. Start with built-in tools like Time Machine and Disk Utility, and consider third-party data recovery software for more complex cases. In critical situations, professional data recovery services may be your best option. Always remember that prevention is better than cure—regular backups and safe data practices are essential to protecting your data.

Do Your Data Recovery for Mac
Do Your Data Recovery for Mac, one of the best Mac data recovery software, can help you easily and completely recover deleted, formatted or lost files from Mac HDD/SSD, external HDD/SDD, USB drive, memory card, digital camera, or other storage devices.