Clone to back up your Mac
Create a full and bootable copy of your Mac as backup with DoYourClone for Mac.

Quick Navigation:
If you've ever faced the frustration of deleting a file on your Mac only to find it missing from the Trash, you're not alone. This common issue can occur due to various reasons and often leaves users scrambling to recover their lost data. Fortunately, several methods exist to recover files that aren't in the Trash. In this article, we'll explore why files might bypass the Trash, immediate steps you can take, and different recovery techniques using built-in tools and third-party data recovery software.
Before diving into recovery methods, it's essential to understand why deleted files may not appear in the Trash. Here are some common scenarios:
Use of Specific Keyboard Shortcuts
Sometimes, files are permanently deleted without going to the Trash because of specific keyboard shortcuts. For example, using Command + Option + Delete bypasses the Trash and permanently deletes the file. Additionally, pressing Shift + Command + Delete while the Trash is open will empty it immediately, removing all files without further notice.

File Deletion from External Drives or Network Locations
Files deleted from external drives, network storage, or USB devices connected to your Mac do not go to the Trash. Instead, they are directly removed from the drive, making it seem like they disappeared instantly.
Deletion via Terminal
If you delete files using Terminal, they often bypass the Trash altogether. Terminal commands like rm (remove) permanently delete files and do not move them to the Trash. This approach is common among advanced users or those trying to fix issues via command-line tools.
Auto-Deletion Due to Trash Size Limits or System Settings
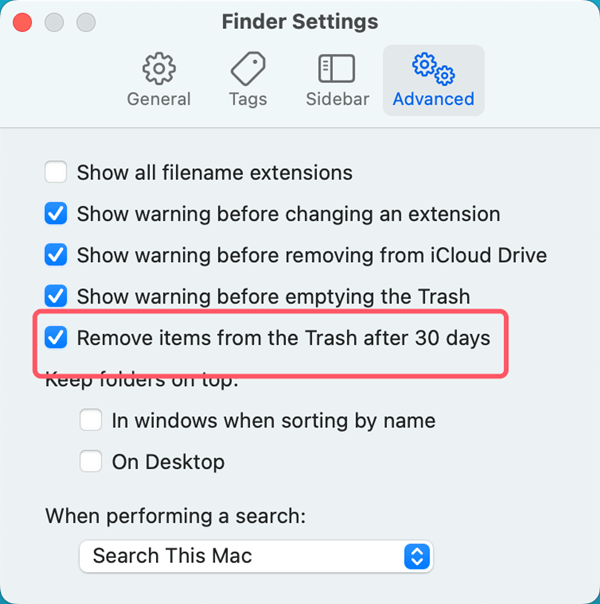
macOS has certain settings that automatically empty the Trash when it reaches a particular size or after a set period. If these settings are enabled, files may be permanently deleted without warning once the Trash is emptied.
If you find that your files are not in the Trash, there are some immediate steps you can take to try and locate or recover them.
👨🔧 a. Check Other Locations
Sometimes, files are accidentally moved to other locations. Here's how to check:/

👨🔧 b. Verify if the File is Hidden
On occasion, files may be hidden rather than deleted. To see hidden files in Finder:
Hidden files should now appear in Finder windows, and you may find the missing file among them.
If you've emptied the Trash on your Mac and the deleted files were stored in iCloud, you might still be able to recover them using iCloud's built-in recovery features. Here's how:
👨🔧 a. Check iCloud Drive for Recently Deleted Files
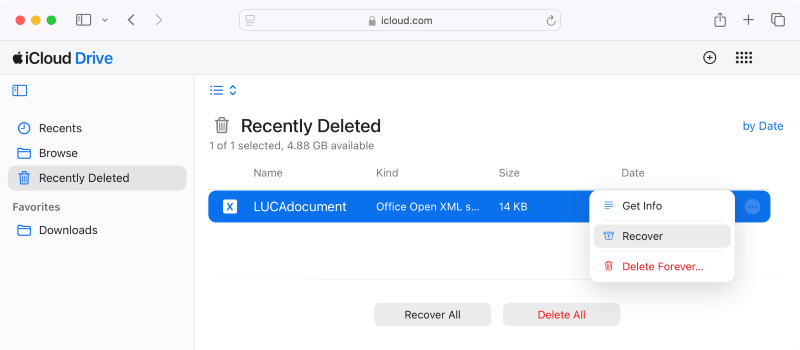
iCloud Drive has a "Recently Deleted" section where files are stored temporarily after deletion, allowing you to recover them within a specific timeframe (usually 30 days).
👨🔧 b. Recover Deleted Files from Other iCloud Services
iCloud also offers recovery options for other services, such as Photos, Notes, and Contacts:
For Photos:

For Notes, Contacts, and Calendars:


If you haven't been using iCloud, other backup solutions might have saved your files. Here's how to check for other backup options:
👨🔧 a. Use Third-Party Cloud Backup Services
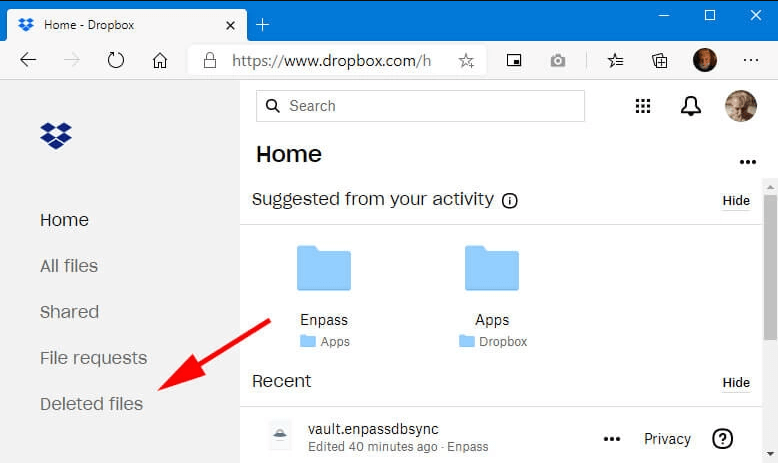
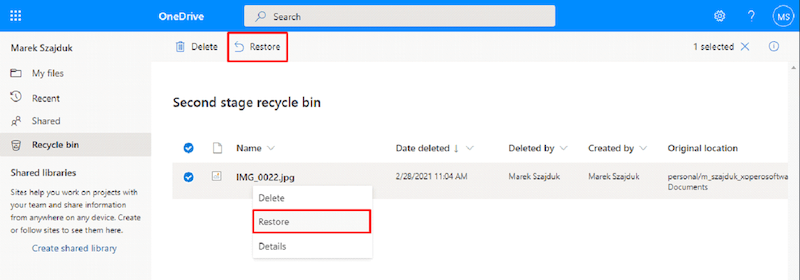
Many users rely on third-party cloud backup solutions like Google Drive, Dropbox, or OneDrive. Each of these services offers its recovery process:
Google Drive:

Dropbox:
OneDrive:
👨🔧 b. Utilize External Backup Solutions
If you regularly back up your Mac using external drives, you might have copies of your deleted files stored there. Solutions like DoYourClone for Mac, Carbon Copy Cloner, or SuperDuper! can help recover data:
Clone to back up your Mac
Create a full and bootable copy of your Mac as backup with DoYourClone for Mac.
If the immediate steps don't help, there are several built-in tools in macOS that you can use to recover your files.
👨🔧 a. Spotlight Search
Spotlight is a powerful tool that can help locate misplaced or hidden files. To use Spotlight:
👨🔧 b. Terminal Commands
If the file is hidden or has been moved to an obscure directory, Terminal commands can help:

To reverse the process and hide files again, replace true with false in the command above.
👨🔧 c. Restore files using Time Machine
If you regularly back up your Mac using Time Machine, you might be able to recover your missing files from a backup.
macOS comes with a built-in backup feature called Time Machine that copies your stuff to an external device automatically. It maintains weekly, daily, and hourly backups that you can use to recover files from a certain moment in time.
Steps to Restore Files from Time Machine:


If the file was included in a recent backup, this method would effectively restore it to its original location.
If the above methods do not yield results, third-party data recovery software can be a powerful alternative.
Several reputable software options are designed to recover deleted files on macOS. These tools work by scanning your Mac's storage for remnants of deleted files that have not yet been overwritten by new data.
Do Your Data Recovery for Mac is renowned for having a user-friendly UI and strong recuperation powers. It can retrieve information from both internal and external storage and supports a large variety of file formats. It offers a comprehensive scanning algorithm and support recovery for different type of files.
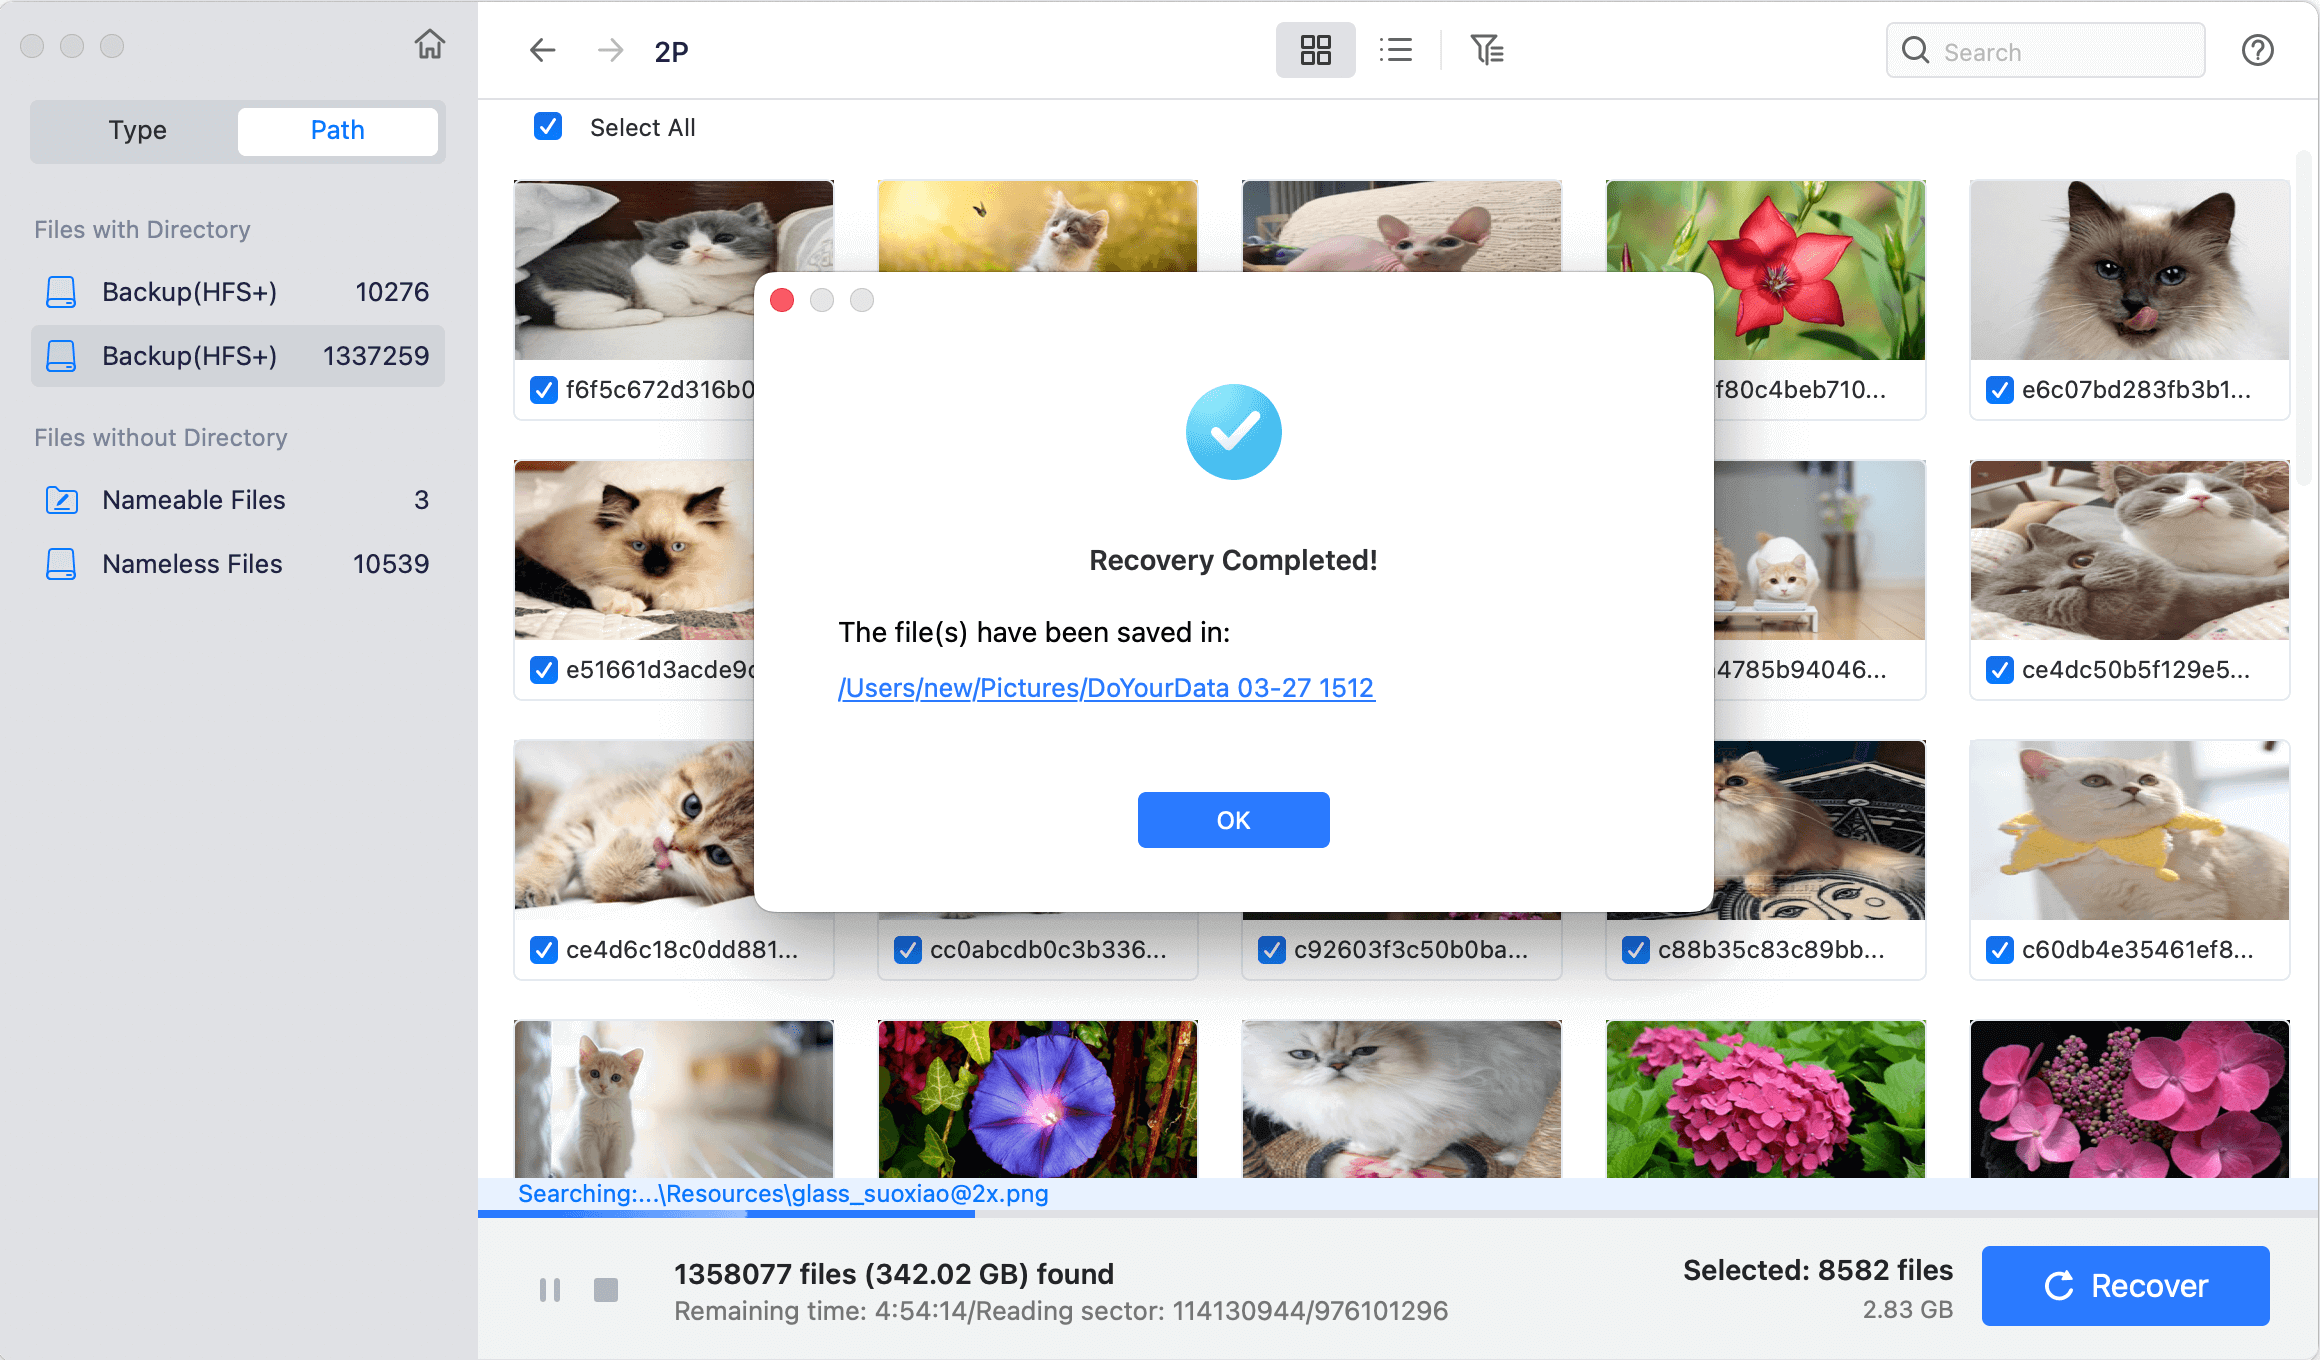
How to use the data recovery tool? Let's walk through using Do Your Data Recovery for Mac to recover files under macOS:
Step 1. Open the application and select the drive where the file was located.

Step 2. Click "Scan" to begin scanning and it will deeply scan the drive to search for lost files from the drive.

Step 3. Examine the list of files that can be recovered and choose the ones you wish to have restored.

Step 4. Click "Recover" and choose a location to save the restored files.
Losing files that aren't in your Mac Trash can be a frustrating experience, but there are several methods to recover them. Start with immediate checks and built-in tools, then move to advanced techniques and data recovery software if needed. To avoid future file loss, ensure you have regular backups and manage your files carefully. With these steps, you can minimize the risk of permanently losing important data.
Do Your Data Recovery for Mac
Do Your Data Recovery for Mac, one of the best Mac data recovery software, can help you easily and completely recover deleted, formatted or lost files from Mac HDD/SSD, external HDD/SDD, USB drive, memory card, digital camera, or other storage devices.
