Quick Navigation:
- What Happens When You Press Command + Delete?
- Method 1: Restoring Files Directly from the Trash
- Method 2: Using Time Machine
- Method 3: Using Data Recovery Software
- Preventing Future Data Loss
- Conclusion
If you're used to quickly hitting 'Command + Delete' to get rid of junk on your Mac, removing important files by accident can make you freak out immediately. You might think that files you don't want are gone after using this useful tool to move them to the Trash.

So don't worry—you might not lose your files permanently. There are several ways to get back files you deleted by mistake, whether they are important work documents, photos, or project files.
This guide will show you step-by-step how to restore files deleted by pressing 'Command + Delete', even if you have already emptied the Trash. You'll not only know how to get your files back but also how to prevent them from happening again. Take a deep breath, and look at the best ways to restore your files before you give up.
What Happens When You Press Command + Delete?
When you press 'Command + Delete' on your Mac, the file or folder you choose goes straight to the Trash. However, it does not fully delete the file; instead, it puts it somewhere temporary until you empty the Trash. The file is still on your computer, and getting it back to where it was easy.
With this shortcut, it's easy to eliminate things you don't need, but remember that they won't be gone until you empty the Trash. If you understand this process, you won't have to worry about losing something important by accident because you can still get it back.
However, if the Trash was emptied after deleting files, the files will not be restored easily from Trash. In such a case, you can only check if you have backup for the deleted file on other drive or places, or try to retrieve the lost data for free with a Mac data recovery freeware.
Method 1: Restoring Files Directly from the Trash
Restoring files from the Trash is the simplest and most direct way to get back files you destroyed by pressing 'Command + Delete' keys. You can get into Trash to check and find the deleted files and restore them directly. Here is how to do it:
1. Open the Trash: To open the Trash, click on the button in the Dock.
2. Find the File: Find the file or folder you want to get back by looking through the Trash list.
3. Restore the File: Then, right-click on the file and choose "Put Back" from the menu. This will restore the file to its original state.
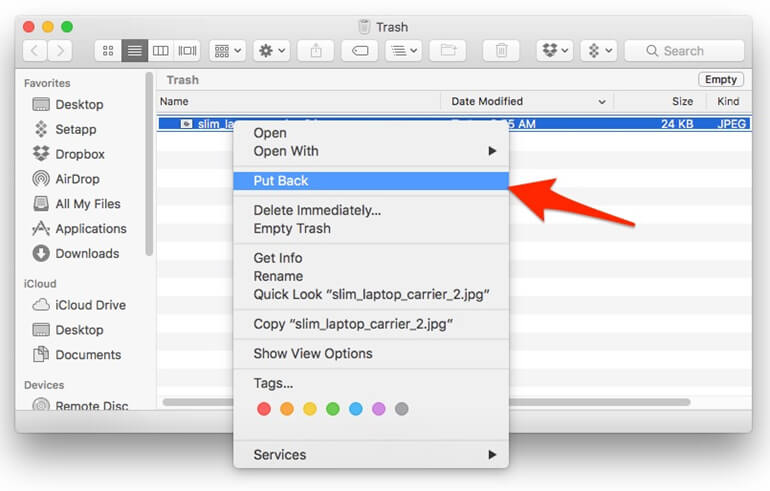
This method will work if you haven't emptied the Trash and the file you need is still there.
Using the Finder Sidebar
The Finder tab is another way to get back files from the trash:
- Open Finder: Click on the Dock icon that looks like a book.
- Select Trash: To see what's in the trash, click "Trash" in the Finder's menu.
- Drag and Drop: To move the file, drag it from the Trash to where you want it to go on your Mac.
This way is great if you like to see what you're doing when you're recovering files. However, this way can only work if the deleted files are still in Trash. If the Trash was emptied, then you can only try other methods to recover the deleted files.
Method 2: Using Time Machine
Returning your files after you've emptied the trash is harder. You might still be able to get back your lost files, though, if you regularly back up your Mac with Time Machine:
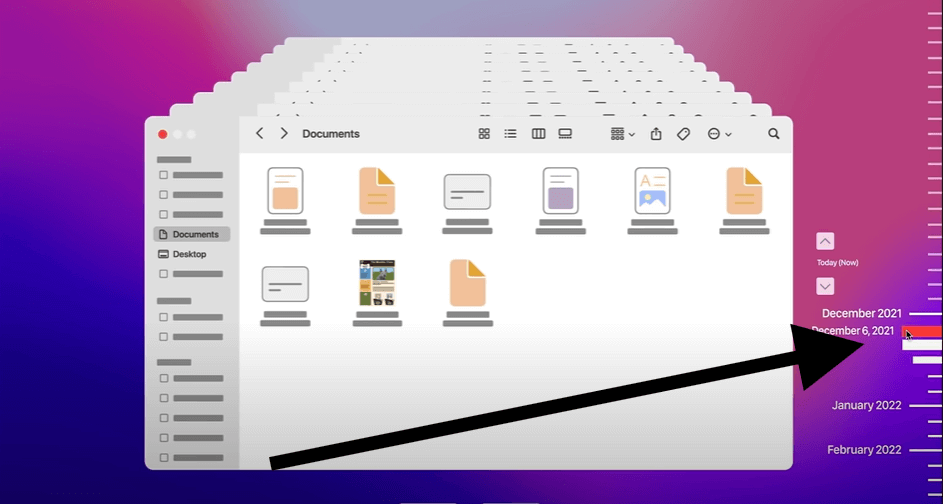
- Open Time Machine: Go to the menu bar and click the Time Machine button to open Time Machine. Then, choose "Browse Time Machine Backups."
![recover command + delete lost files from Mac]()
- Navigate to the Backup: The timeline on the right can be used to find a backup of the files made before they were removed.
![recover command + delete lost files from Mac]()
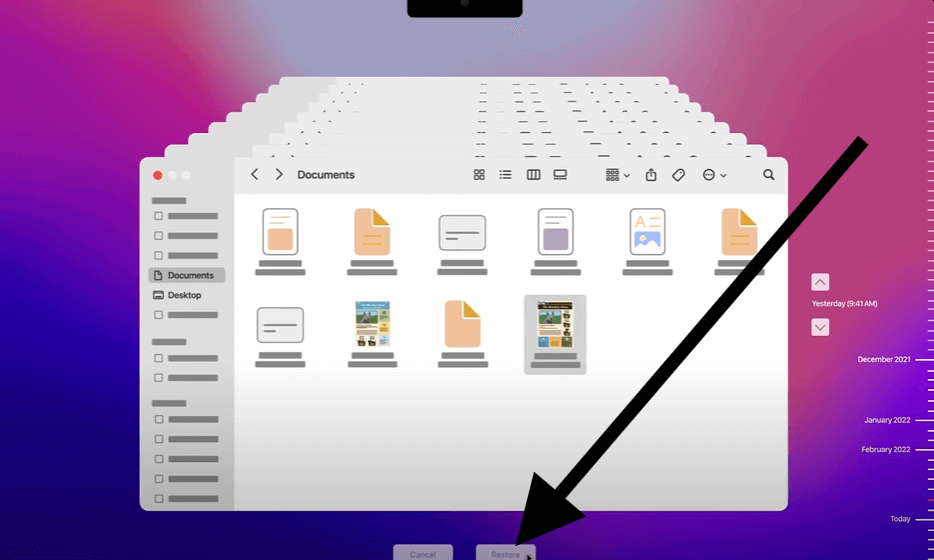
- Restore the Files: Select the files you need, then click "Restore." The files will be restored to their original location.
![recover command + delete lost files from Mac]()
Times Machine is a strong tool that can protect your files if you have a current copy. If the deleted files were not backed up before with Time Machine, the method will not work for you. Don't worry, there is still hope to get back the deleted files even if you don't have backup for the files.
Method 3: Using Data Recovery Software
Data recovery software is very important for returning lost data after destroyed files and the trash cleared. The Do Your Data Recovery for Mac Free option is one of the most common and useful ones. This strong software is just for Mac users and has an easy-to-use interface and advanced recovery features.
Do Your Data Recovery for Mac is famous for scanning and restoring many files, such as photos, videos, documents, etc. Do Your Data Recovery for Mac can find and return your files, even if you accidentally deleted them, lost them because of a system crash, or removed them after formatting a drive. It can get data back from internal hard drives, portable drives, USB flash drives, and memory cards, among other storage devices.
Step 1. Download and Install: To get and set up Do Your Data Recovery for Mac, first download the software. Once you've got it, follow the installation steps to set it up on your Mac.
Do Your Data Recovery for Mac Free
- Free to recover deleted pictures, videos, documents and other files on Mac.
- Recover deleted, formatted, or other lost data.
- Data recovery for HDD, SSD, SD card, pen drive, etc.
Step 2. Launch Do Your Data Recovery for Mac: Open Do Your Data Recovery for Mac from Applications or launchpad. The software will show you all the connected hard drives. Check and ensure to choose the drive or storage device where the deleted or lost files were stored.

Step 3. Scan for Deleted Files: Click the "Scan" button to start scanning. Do Your Data Recovery for Mac will start looking for recovered files deeply on the drive you chose. The scan's length depends on the size of the drive and the amount of data saved.

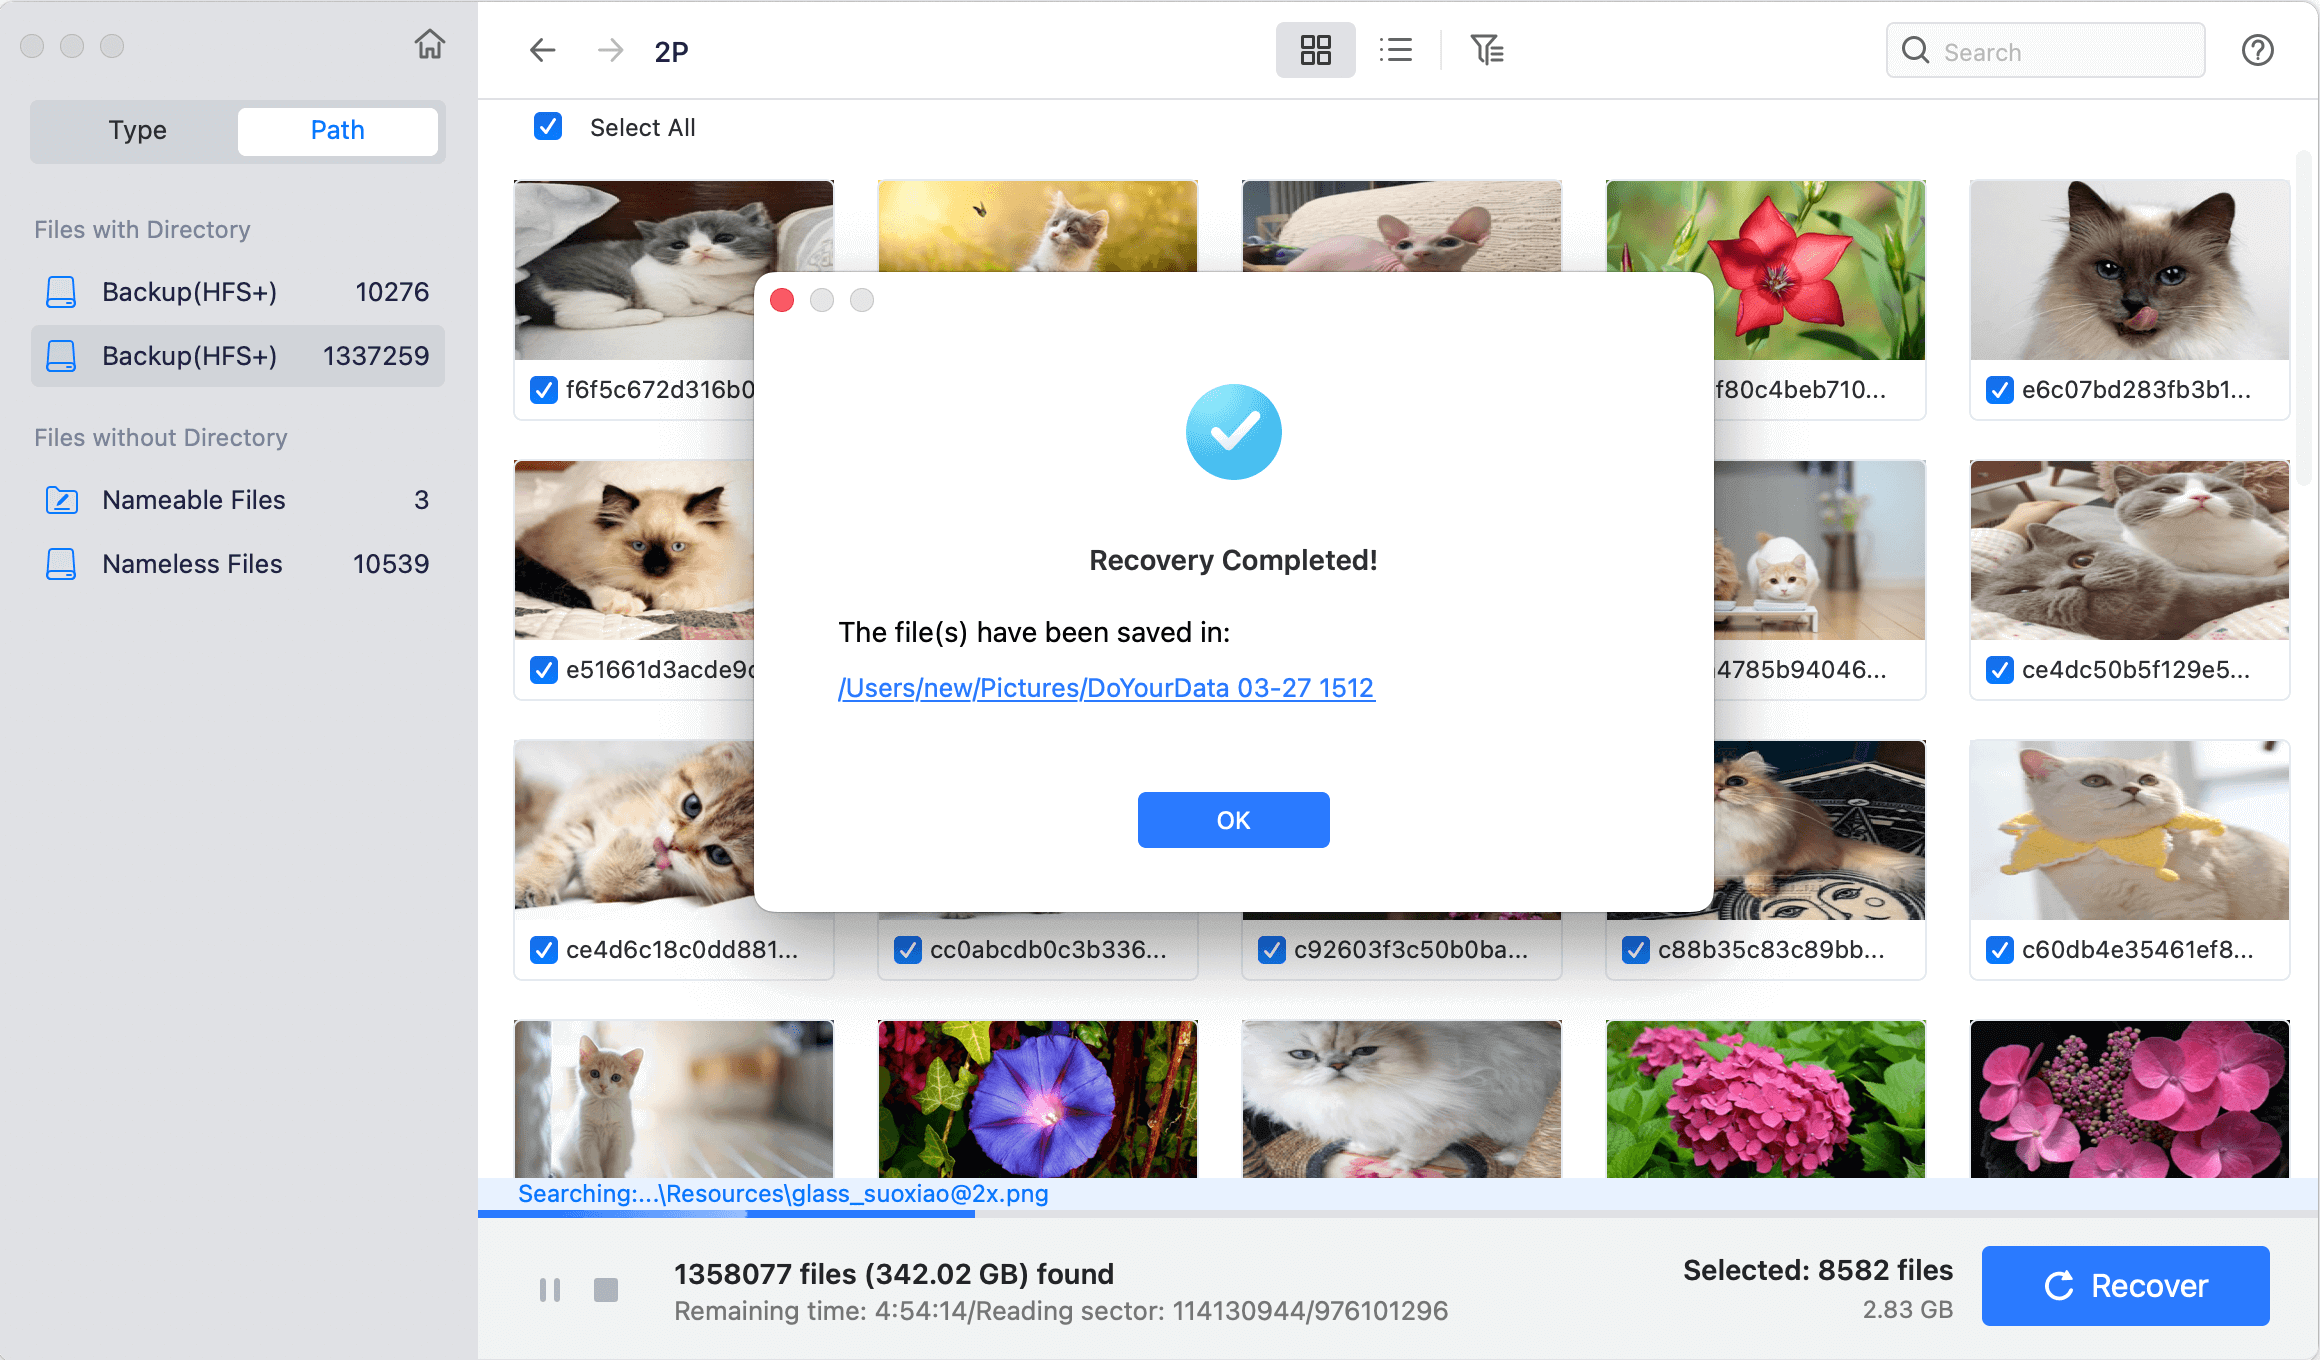
Step 4. Locate and Preview Files: Once the check is done, Do Your Data Recovery for Mac will show you a list of files that can be recovered. You can look at these files first to ensure they are the deleted ones you want to recover. You can also double-click a file to preview the content and confirm if it's wanted or recoverable.

Step 5. Recover the Deleted Files: At last, choose all the files you want to keep and click "Recover" button to save them safe on your Mac or an external hard drive. Ensure to save to another drive instead of the original drive to avoid data damage.
Preventing Future Data Loss
Some times, if the lost data was overwritten and damaged, there will be no chance to get back the deleted or lost files back successfully in any way. If you want to keep your Mac files from getting lost, read these tips:
- Regular Backups: To make regular copies of your files, use Time Machine or another backup program. It ensures you can get back filees you lost or deleted by accident.
- iCloud Drive: iCloud Drive lets you sync your important files so that you can view them from any device. The "Recently Deleted" folder is often a good place to find deleted files.
- Enable Finder Warnings: Go to "Finder" > "Settings" > "Advanced" and turn on the warning message before clearing the Trash. This extra step can keep you from accidentally deleting something forever.
- Avoid Immediate Trash Emptying: Leave files in the trash for a few days before clearing them so you have time to decide what you want to delete.
- Use File Management Tools: To add an extra layer of security, think about using file management software with features like version control and automatic backup.
Conclusion
Do not worry if you accidentally delete files on your Mac using Command + Delete. You can get them back. You can get back lost files using the right tools, such as recovering from the Trash, Time Machine backups, or data recovery software like Do Your Data Recovery for Mac Free.
Precautions like making regular saves and turning on Finder warnings can also prevent data loss in the future. Remember that these steps and staying calm can mean the difference between losing important data and getting it back. Take care of your important things so you don't have to worry about them later.
Do Your Data Recovery for Mac Free
Do Your Data Recovery for Mac, one of the best Mac data recovery software, can help you easily and completely recover deleted, formatted or lost files from Mac HDD/SSD, external HDD/SDD, USB drive, memory card, digital camera, or other storage devices.

