Quick Navigation:
- Common Causes of Photo Loss on Mac
- Understanding Mac Photo Recovery
- 4 Reliable Methods to Recover Lost Photos on Mac
- #1 Recover deleted photos from Trash
- #2 Use Time Machine to get back photos on a Mac
- #3 Get back deleted photos on your Mac from iCloud?
- #4 Recover lost photos on Mac with data recovery software
- Conclusion
- Mac Photo Recovery FAQs
"Hi, my MacBook runs very slow, so, I erase the startup disk and reinstall macOS. However, after erasing the startup disk in macOS Recovery mode, all data is gone, thousands of photos are lost. They are important for me. Is there any way to get the lost photos back?"
Have you ever felt terrible when accidentally losing essential photos on your Mac? Don't worry! Our guide will show you how to easily and quickly restore lost photos on your Mac. Think of it as a digital mission to save your most important moments. We'll discuss why people lose photos, explain how recovery works, and give you simple steps to recover deleted/lost photos/images/pictures on Mac.
We'll help you if something goes wrong, like accidentally deleting something or writing it wrong. Let's go on this guide together to ensure your Mac is once again a safe place to store your photos. Are you ready to remember those times?
Common Causes of Photo Loss on Mac
Before looking into photo recovery tools, it's essential to know why people lose photos on their Macs in the first place:
- Accidental deletion: One of the main reasons people lose photos is that they make a mistake. You could lose essential memories if you click the delete button or pick the wrong files when you're cleaning up.
- Formatting Drives: If you format a storage device, like an SD card or external hard drive, without a backup, you will lose all of your data, including pictures, forever.
- Corrupted Storage Devices: If your storage device becomes corrupted due to problems with the software or hardware, you might not be able to access your pictures.
- System Crashes or mistakes: Photos can be lost when the system crashes, mistakes happen, or data transfer is interrupted.
Understanding Mac Photo Recovery
Knowing how recovery works is essential to getting lost pictures on your Mac. In simpler terms, here's what it means:
- Data Residuals: Data isn't completely erased when pictures are deleted or a drive is formatted. The system then marks the space as free for new information. You can return to the original files until new data fills in these gaps.
- File Systems: HFS+ and APFS are two types of file systems that Macs use to store and organize data. Photo recovery tools look at these file types to find lost files and put them back together again.
- Fragmented Data: Photos are often saved in pieces all over the recording device. Recovery tools put these pieces back together to make the whole file again.
4 Reliable Methods to Recover Lost Photos on Mac
No matter what the data loss reason is, you still have the chance to get the lost photos back. Mac photo recovery solutions are able to find and recover lost photos on Mac even the trash is emptied, the drive is erased by Disk Utility. Here are 4 proven ways to help you recover deleted, erased or lost photos on Mac.
#1 Recover deleted photos from Trash
After deleting photos on Mac, the photos will be removed to Recently Deleted folder or Trash.
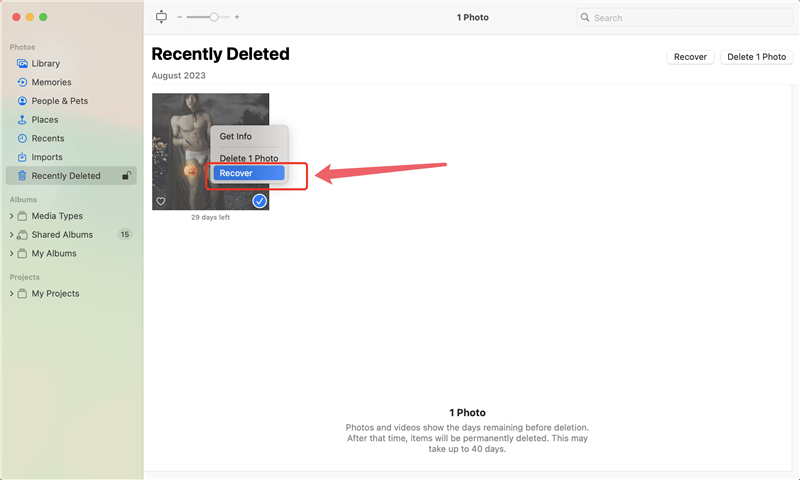
Step 1. Open Photos app on your Mac, click Recently Deleted folder.
Step 2. Select the photos you want to restore, then click on Recover button.
If you cannot find the lost photos in Photos app, just recover them from Trash.
Step 3. Open Trash.
Step 4. Find the photos or images you want to get back and drag them to the desktop. You can also right-click on the pictures and choose "Put Back" to get them back from the Trash. The photos will go back to where they came from.

#2 Use Time Machine to get back photos on a Mac
Time Machine is an accessible data backup program for every Mac computer. If you turned this feature on before you lost data, you can use it to restore photos you deleted or lost. Here are the steps you need to take to get back deleted photos on a Mac using Time Machine:
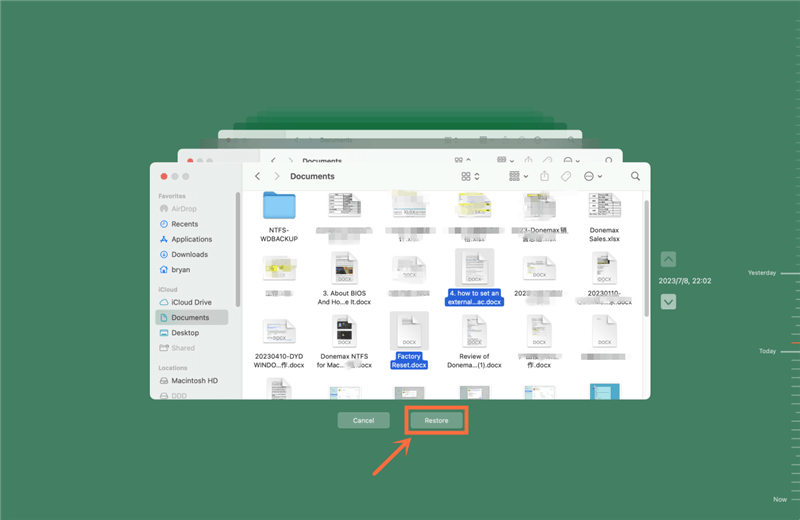
Step 1. Connect the backup to your Mac and open the Status menu. Click on the "Time Machine" button. You may also click "Finder" and launch the "Time Machine" app.
Step 2. Scroll through the Timeline at the bottom and right of your Mac screen to find the date you backed up your photos.
Step 3. To find the correct copy, click the up arrow next to the Time Machine. You can double-click on a picture or photo to see if it's one of your lost ones.
Step 4. Choose the photos to restore and click "Restore" to return the old versions of the erased pictures.
#3 Get back deleted photos on your Mac from iCloud?
Most people back up their Macs to iCloud, storing digital files like pictures and calendars. iCloud Photo can save all the images you load from a memory card onto your Mac. It can then send these pictures to your other devices so you can view them anywhere.
How to get photos back from iCloud on a Mac:
Step 1. Open any browser and go to iCloud.com. You may need to sign in.
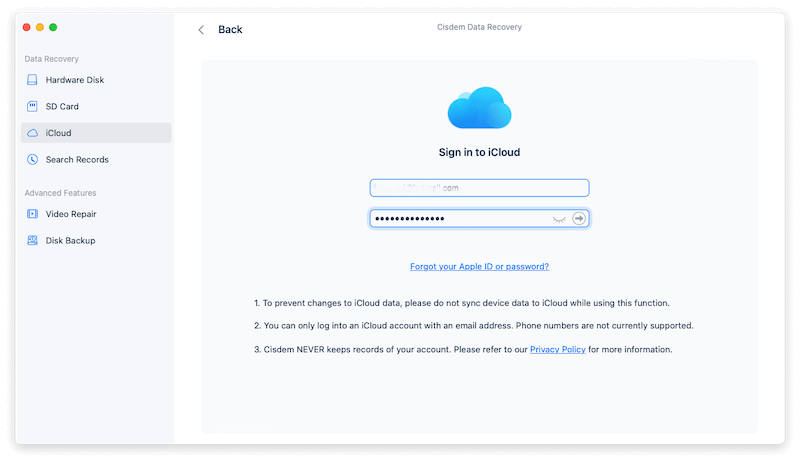
Step 2. Click on "Photos". Pick "Albums" from the list at the top.
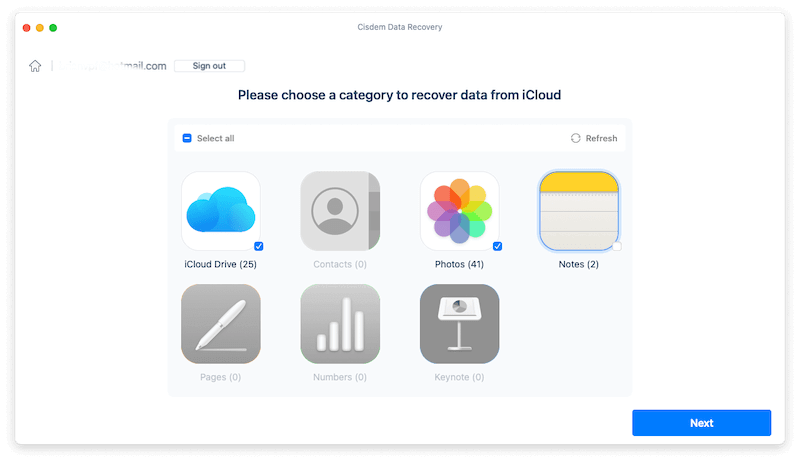
Step 3. Click the album that says "Recently Deleted."
Step 4. Select the pictures to restore and click "Recover."

#4 Recover lost photos on Mac with data recovery software
If you’ve tried the three methods listed above and still cannot recover the lost photos, you can try Mac data recovery software. In most cases, Mac data recovery software is able to help get all lost data back even the drive which contains the data has been already erased by Disk Utility.
The reliable Mac photo recovery software - such as Do Your Data Recovery for Mac is able to help you recover all missing photos, videos and other files from Mac HDD/SSD or external hard drive, memory card, USB flash drive, digital camera, etc.
Do Your Data Recovery for Mac
- Recover permanently deleted photos on Mac.
- Recover lost photos after emptying Trash.
- Recover lost photos from formatted or erased drive.
- Recover lost photos from inaccessible drive or corrupted file system.
You don’t need any backup, just use this software to scan the drive where you delete the photos, then it will help you quickly find and recover the lost photos. Check the steps below:
Step 1. Download and install Do Your Data Recovery on your Mac, then open it from Launchpad. First of all, select the drive where you delete or lose the photos. For example, if you want to recover lost photos on Mac, just select the Macintosh HD or the Mac startup disk to start data recovery.

Step 2. After selecting the drive, just click on Scan button. It will deeply scan the drive and find all recoverable files including the lost photos.

Step 3. Once the scan is completed, it will list all the files by Path or Type. You can preview the photos, then select the wanted ones and save them by clicking on Recover button.

With Do Your Data Recovery for Mac, you can easily recover lost photos from Mac internal disk or from external HDD/SSD, USB drive, memory card, digital camera, etc. It also supports to recover lost videos, audio files, documents, emails and more on Mac.
Conclusion:
Losing essential pictures on your Mac can be unpleasant, but you can usually get them back with the proper knowledge and tools. You can improve your chances of getting back your treasured memories by learning about the most common reasons people lose photos, how to recover pictures, and by following the steps in this guide. To protect your photo collection, move quickly, pick trustworthy recovery software, and prioritize regular backups.
Mac Photo Recovery FAQs
1. How to recover lost photos on Mac?
Here are four efficient ways to help you recover lost photos on Mac:
- Open Trash, select the deleted photos and choose Put Back.
- Find the Time Machine backup which contains the deleted photos, select the photos and click on Restore.
- Recover deleted photos from iCloud.
- Recover lost photos on Mac with data recovery software.
2. How to recover permanently deleted or formatted photos on Mac?
Mac photo recovery software - such as Do Your Data Recovery can help you deeply scan the hard drive and find the deleted or formatted photos.
- Download and install Do Your Data Recovery for Mac.
- Open this Mac photo recovery software, then select the hard drive where you lose the photos.
- Click on Scan button to deeply scan the hard drive.
- Recover and save the photos after scanning.
3. What is the best Photo Recovery Software for Mac?
Here is list of best Mac photo recovery software:
- Do Your Data Recovery for Mac
- Donemax Data Recovery
- Magoshare Data Recovery for Mac
- PhotoRec
- Stellar Data Recovery for Mac
- Disk Drill
- iBeesoft Data Recovery for Mac
4. How to recover deleted Mac photos from iCloud?
- Open iCloud.com and login into your account.
- Click Photos and choose Recently Deleted album.
- Select the photos you want to recover, then click on Recover button.
Please note that the deleted photos will disappear from iCloud in 30 days. If you want to recover photos which were deleted 30+ days ago, just use Mac photo recovery software to scan the hard drive and then recover them.
5. How to prevent the deleted photos from being recovered?
If you will sell or donate your Mac, you should permanently wipe all data from the startup disk to prevent your data from being recovered by the next owner. Data erasure software such as DoYourData Super Eraser for Mac can help you permanently erase data on Mac.
You can use this data erasure tool to wipe free disk space of the Mac and it will permanently erase all deleted data including the deleted photos. Once the erasure process gets finished, the deleted photos and other deleted files are gone forever, cannot be recovered by any method.

Do Your Data Recovery for Mac
Do Your Data Recovery for Mac, one of the best Mac data recovery software, can help you easily and completely recover deleted, formatted or lost files from Mac HDD/SSD, external HDD/SDD, USB drive, memory card, digital camera, or other storage devices.