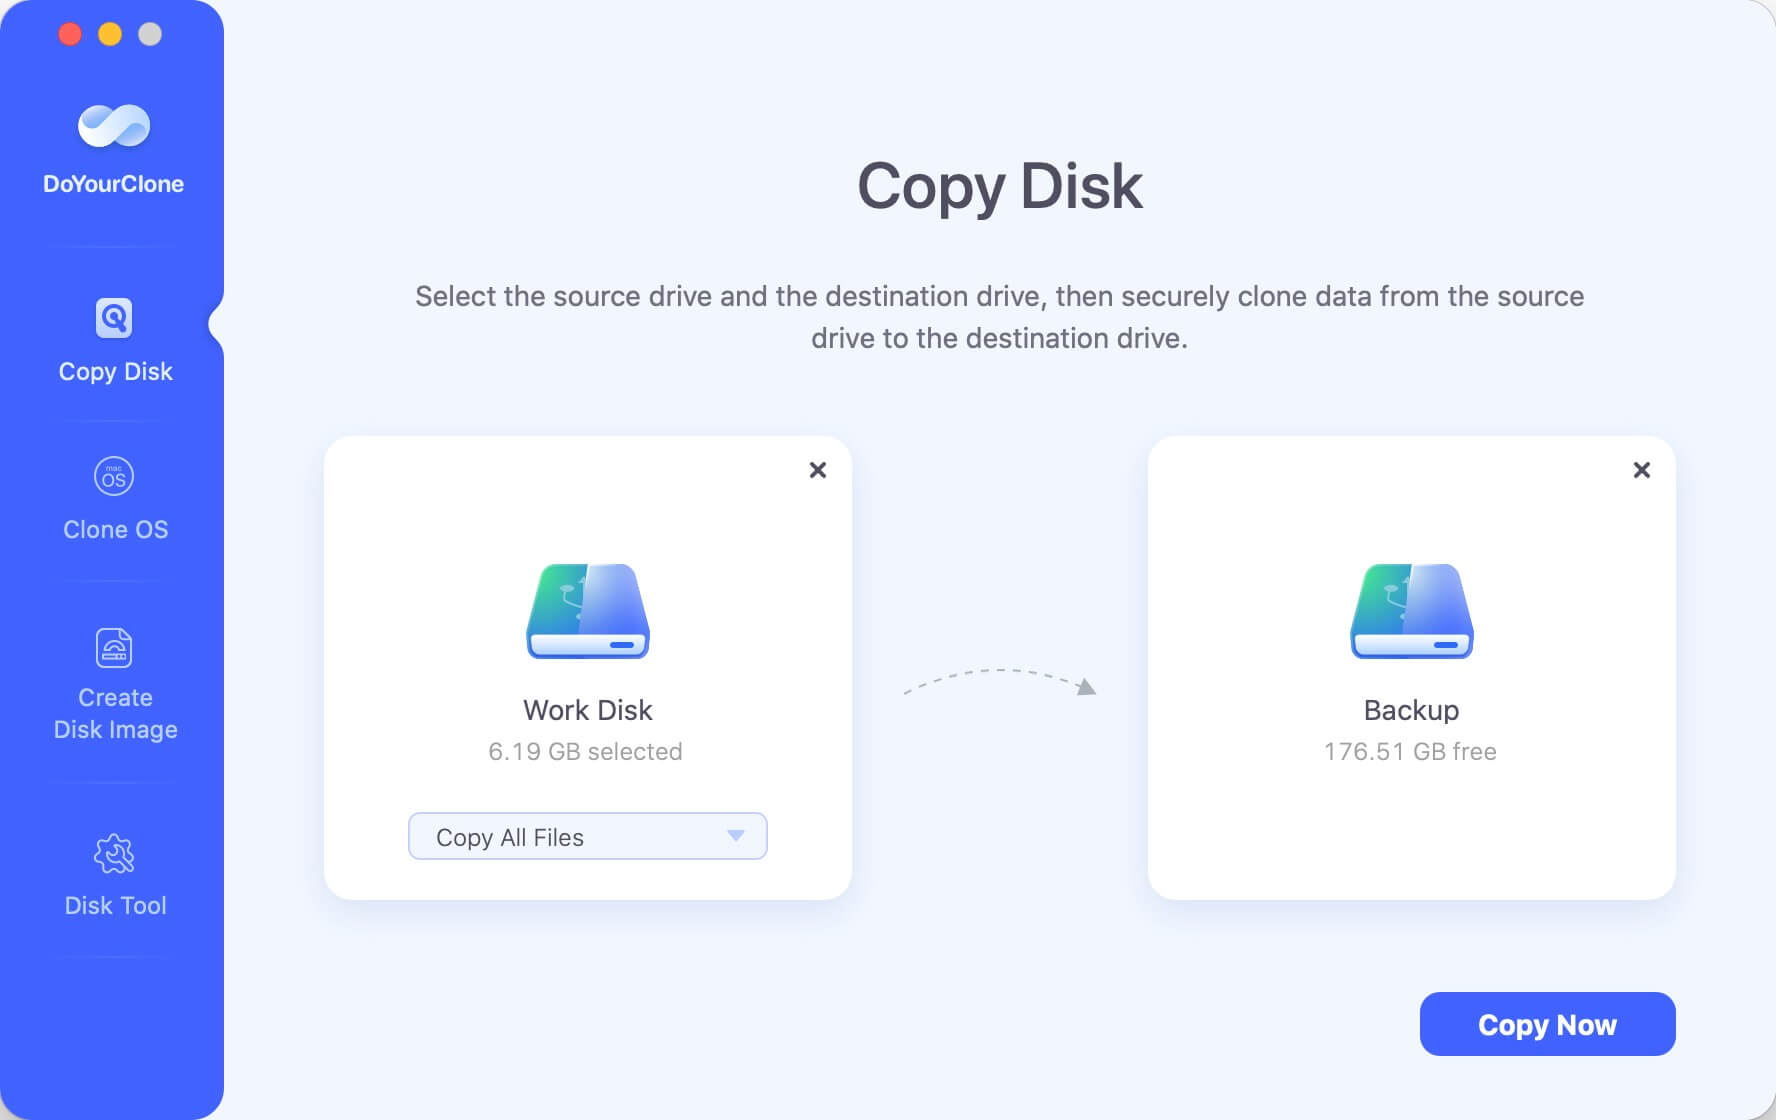
Back up FAT32 drive before formatting it
Copy FAT32 drive with DoYourClone for Mac to back up the data, then you can format the drive from FAT32 to NTFS.
Quick Navigation:
When dealing with external drives and partitions, file system compatibility can often pose a challenge, particularly when switching between different operating systems. For Mac users, one common issue is the need to convert FAT32 file systems to NTFS. While NTFS (New Technology File System) is the default file system for Windows, FAT32 (File Allocation Table 32) is an older file system that is still frequently used for compatibility across a wide range of devices and operating systems. It offers advanced features and greater reliability.
In this article, we will have a look at how to convert FAT32 to NTFS on a Mac, exploring the reasons for such a conversion, the tools available, and step-by-step instructions to ensure a smooth transition.
 FAT32 (File Allocation Table 32) is an older file system that has been around since the mid-1990s. It is widely supported by almost all operating systems, including Windows, macOS, and Linux. However, it comes with some significant limitations:
![]() NTFS (New Technology File System), on the other hand, is a more modern file system developed by Microsoft. It is the default file system for Windows NT and later versions. NTFS offers several advantages over FAT32:
NTFS (New Technology File System), on the other hand, is a more modern file system developed by Microsoft. It is the default file system for Windows NT and later versions. NTFS offers several advantages over FAT32:
However, NTFS has limited native support on macOS, which can be a challenge for users who need to write data to an NTFS-formatted drive from a Mac.
Prior moving to the conversion procedure, it is important to understand why you might need to convert a FAT32 drive to NTFS. Here are some key reasons:
🙅 File Size Limitations: FAT32 has a maximum file size limit of 4GB. If you need to store larger files, such as high-definition videos or extensive datasets, NTFS is a more suitable choice as it supports larger file sizes.
🛡️ Improved Security: NTFS offers advanced security features like file encryption, access control, and disk quota management, which are not available with FAT32.
🚀 Enhanced Performance: NTFS includes features that improve performance and reliability, such as journaling and better handling of metadata.
![]() Compatibility with Windows: NTFS is the local file system for Windows. If you frequently exchange files between a Mac and a Windows PC, converting to NTFS can streamline the process.
Compatibility with Windows: NTFS is the local file system for Windows. If you frequently exchange files between a Mac and a Windows PC, converting to NTFS can streamline the process.
Before converting a FAT32 drive to NTFS, there are several preparatory steps you should take:
1. Backup Your Data: Converting file systems involves reformatting the drive, which will erase all data on it. You have to make sure that you have created a safe backup of important files to another storage device or cloud service.
Back up FAT32 drive before formatting it
Copy FAT32 drive with DoYourClone for Mac to back up the data, then you can format the drive from FAT32 to NTFS.
2. Check Disk Integrity: Verify that the FAT32 drive is functioning properly and does not have any physical or logical errors. Use disk utility tools to check for and repair any issues before proceeding with the conversion.
3. Ensure Adequate Space: Make sure you have enough space on your Mac to hold the data from the FAT32 drive temporarily during the conversion process.
Converting FAT32 to NTFS on a Mac isn't as straightforward as it is on Windows. macOS natively supports reading NTFS drives, but it does not allow writing to them without third-party tools. This lack of native support for NTFS writing adds an extra layer of complexity when trying to convert file systems on a Mac. Additionally, macOS does not provide a built-in tool to convert FAT32 to NTFS directly. Instead, you'll need to use external methods, such as third-party software or by utilizing a Windows environment, to perform the conversion.
While macOS does not natively support converting FAT32 to NTFS directly, there are several third-party tools and methods available for this purpose:
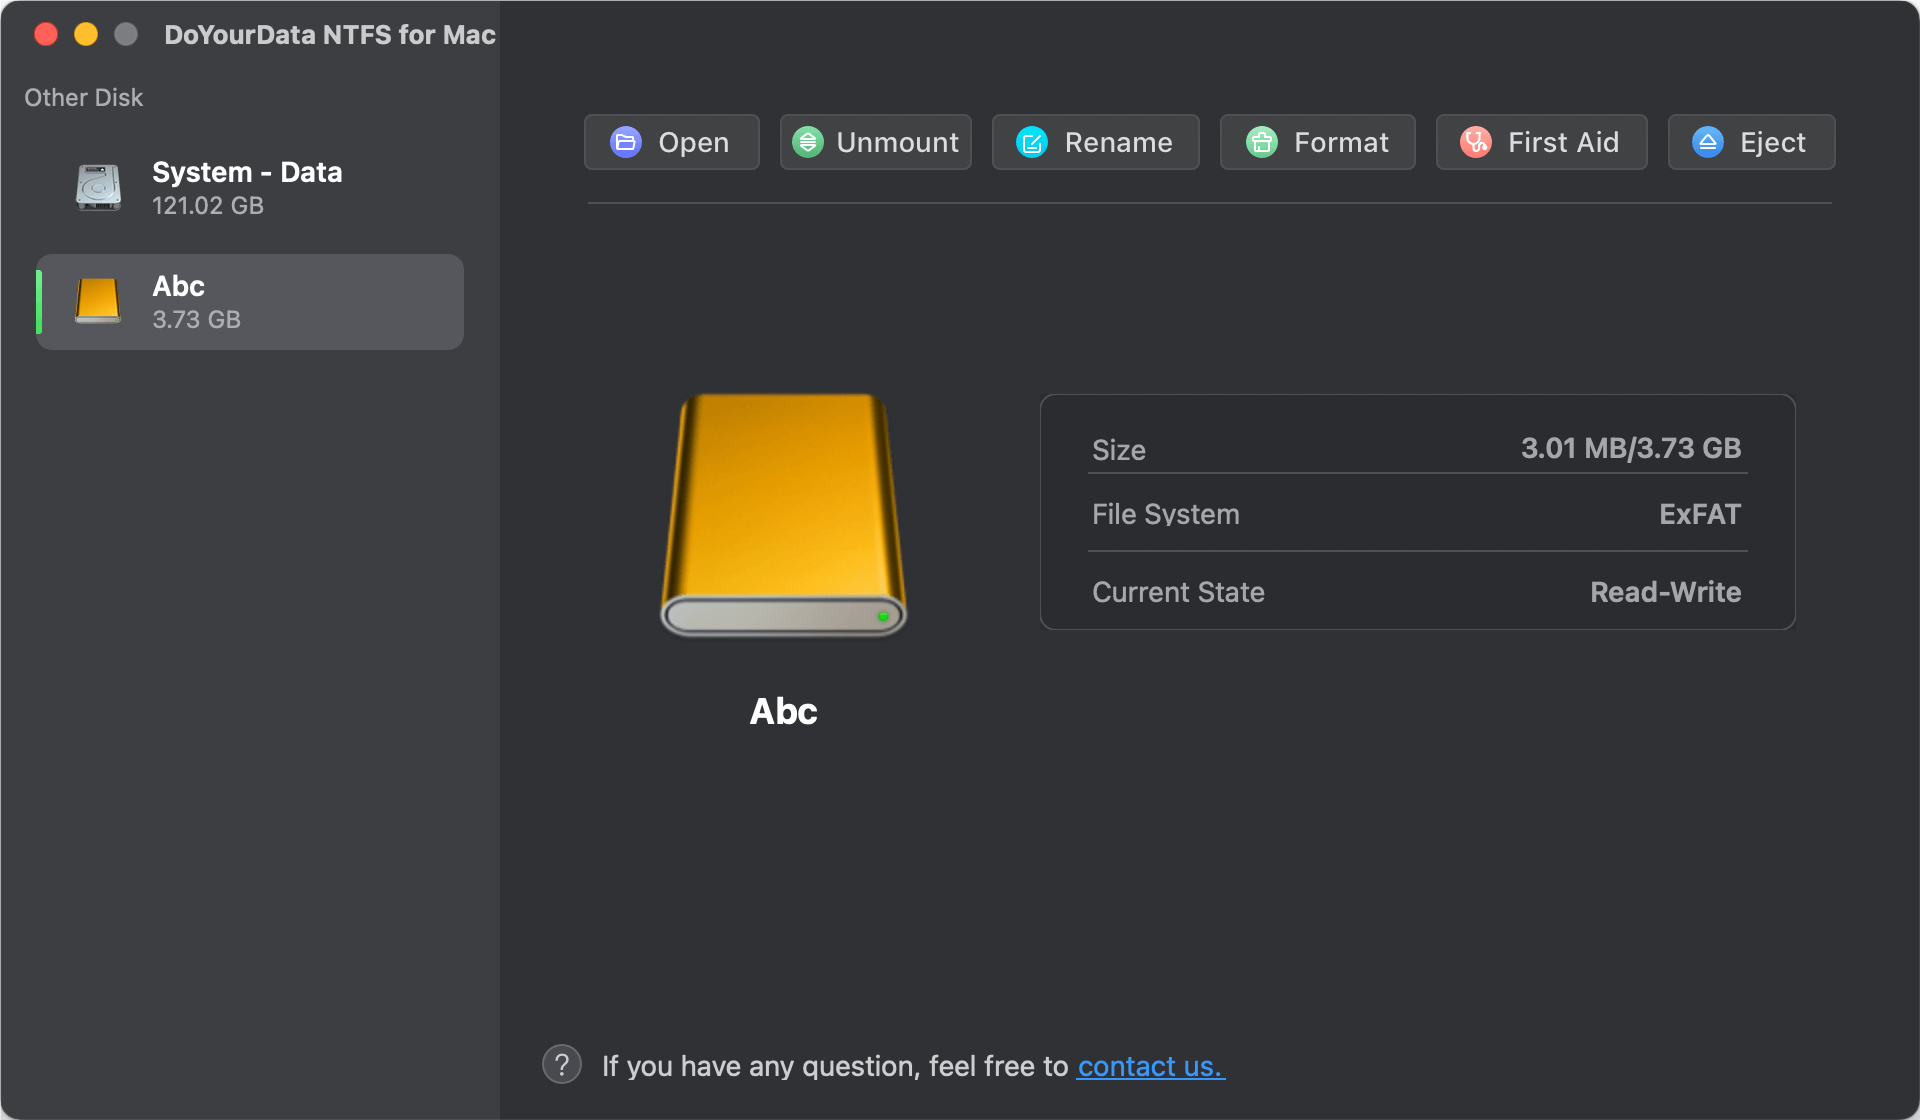
1. DoYourData NTFS for Mac: This paid software provides full NTFS support on macOS, including the ability to format drives to NTFS.
2. Boot Camp: If you have a Windows installation through Boot Camp, you can use Windows tools to format the drive.
3. Virtual Machine Software: You can also install a Windows operating system on Mac via a virtual machine software, like Parallels, VMware or others.
Here we will show you how to convert FAT32 to NTFS with 3 different methods on a Mac machine:
Here is a detailed, step-by-step guide using a third-party tool like DoYourData NTFS for Mac:
Step 1. Install DoYourData NTFS for Mac:
Download and install DoYourData NTFS for Mac from the official website. Follow the installation instructions to complete the setup.
Step 2. Connect the FAT32 Drive:
Plug the FAT32 drive into your Mac using an appropriate USB or external connection.
Step 3. Launch DoYourData NTFS:
Open the DoYourData NTFS application from your Applications folder.
Step 4. Select the FAT32 Drive:
In the DoYourData NTFS interface, locate the FAT32 drive you wish to convert.
Step 5. Format the Drive:
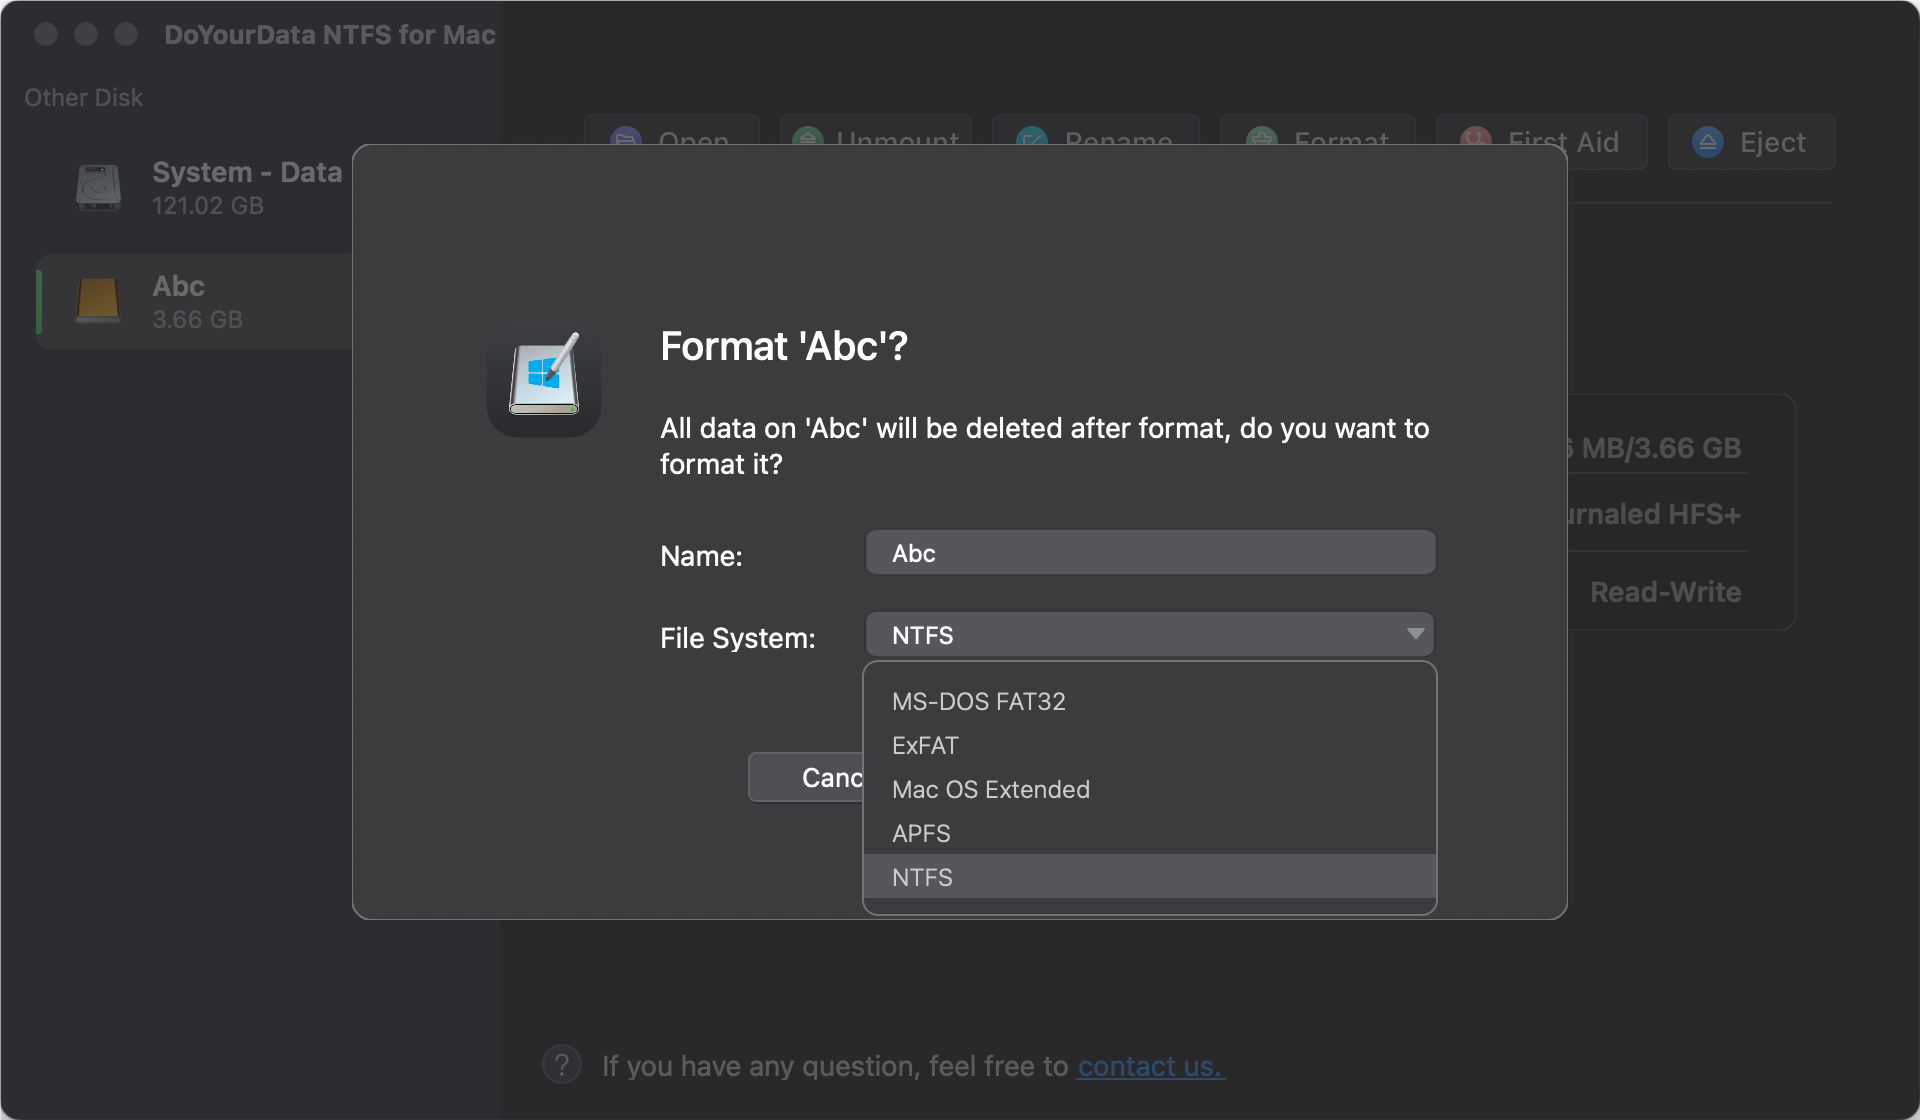
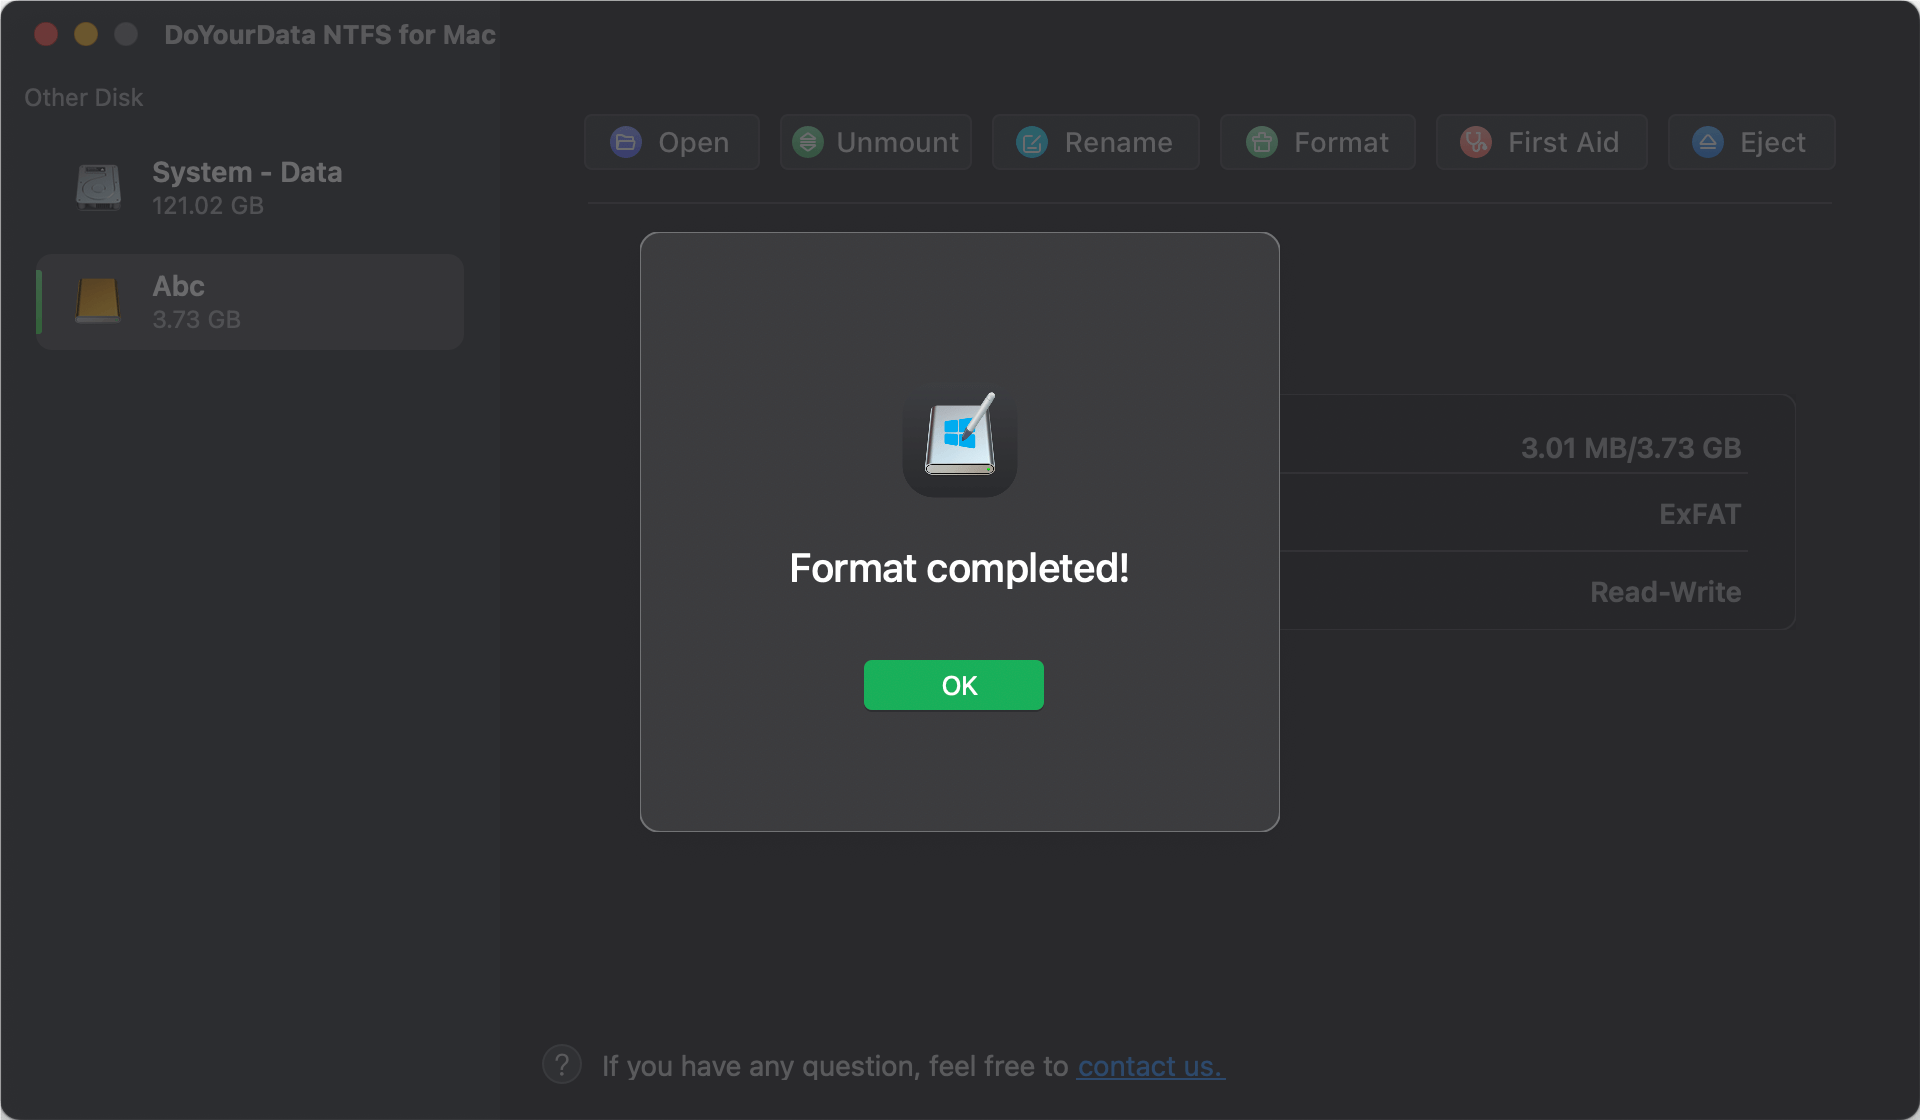
You can use Boot Camp to set up a Windows system on your Mac, then you can just boot the Mac into the Windows system to format the FAT32 drive to NTFS format with Disk Management. Here are the steps:
💡 Tips: If you are using an Apple Silicon Mac, the this method will not be applicable as Boot Camp is not supported on Apple Silicon Macs.
Step 1. Set Up Boot Camp:
Open Boot Camp Assistant from Applications > Utilities, then follow the onscreen instructions to configure and install Windows system on Mac. If you have Boot Camp installed, restart your Mac and boot into Windows.
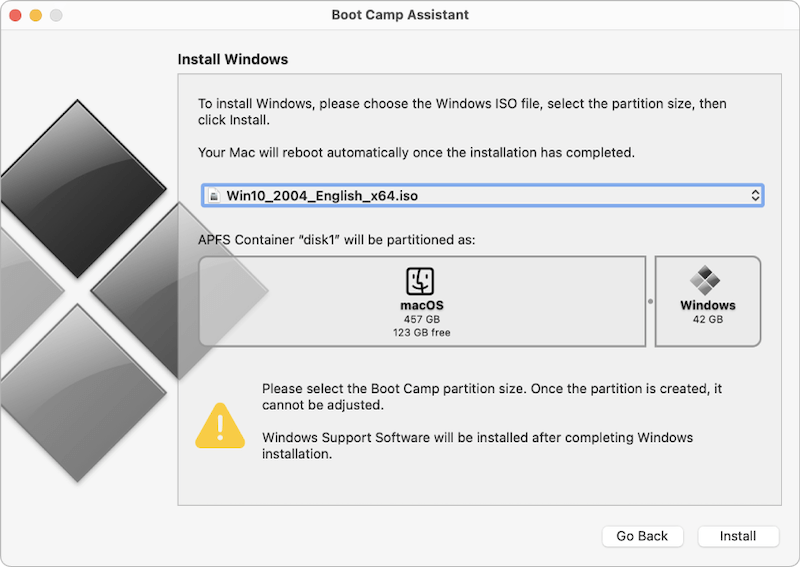
Step 2. Open Disk Management:
To access Disk Management in Windows, right-click on the Start button and choose "Disk Management."
Step 3. Locate the FAT32 Drive:
Find the FAT32 drive in the list of available disks.
Step 4. Format the Drive:
Right-click on the FAT32 drive and select Format.
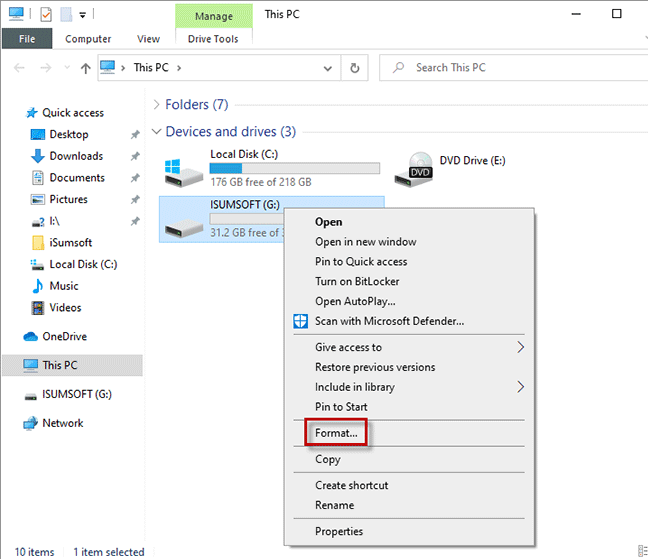
Choose NTFS as the file system and proceed with the format operation.
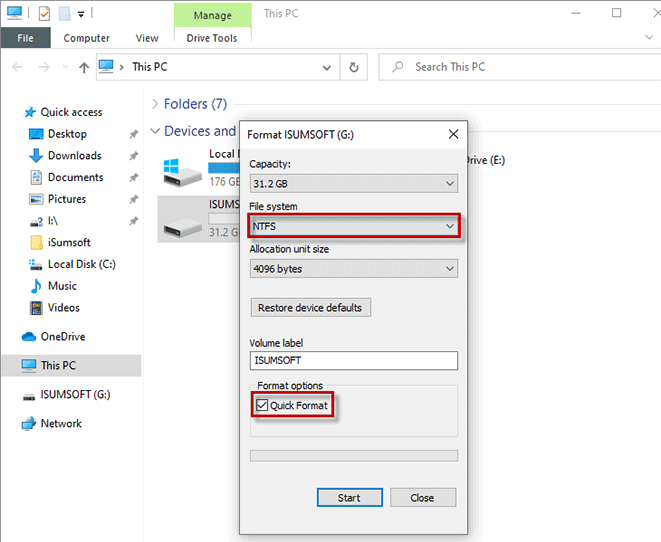
One way to convert FAT32 to NTFS on a Mac is by using a virtual machine (VM) running Windows. This method involves creating a virtual Windows environment on your Mac, where you can use Windows' native tools to convert the file system.
Step 1. Install a Virtual Machine Software:
Download and install a VM software like Parallels Desktop, VMware Fusion, or VirtualBox.
Step 2. Set Up Windows on the VM:
Install a copy of Windows on the virtual machine. You can use an existing Windows license or a trial version.
Step 3. Connect the FAT32 Drive:
Once Windows is running in the VM, connect your FAT32 drive to the Mac. The VM should detect the drive automatically.
Step 4. Convert FAT32 to NTFS:
In the Windows environment, you can format the drive to NTFS as the above method.
Step 5. Complete the Conversion:
After the conversion is complete, you can safely eject the drive from the VM and use it on your Mac.
This method effectively leverages Windows' native capabilities to handle the conversion process, but it does require setting up a virtual environment, which can be resource-intensive.
While converting FAT32 to NTFS on a Mac, you might encounter some issues. Here are common problems and solutions:
Drive Not Recognized:
Verify that the drive is connected correctly. If the drive is not detected, try a new port or cable.
Formatting Errors:
Double-check that you have backed up all data before formatting. Errors can occur if there is insufficient space or issues with the drive's partition table.
Software Compatibility:
Ensure that the third-party tool you are using is compatible with your macOS version. Update the software if needed.
Drive Still Appears as FAT32:
Verify that the formatting process was completed successfully. Reformat the drive if necessary.
Converting a FAT32 drive to NTFS on a Mac is a straightforward process, provided you use the right tools and follow the proper steps. Whether you opt for third-party software like DoYourData NTFS for Mac, or use Windows tools through Boot Camp or a third-party virtual machine software, the key is to ensure that your data is safely backed up before beginning the conversion. By understanding the reasons for conversion and the available tools, you can effectively manage your file systems and enhance compatibility with different operating systems.
DoYourData NTFS for Mac
DoYourData NTFS for Mac is a safe, powerful and easy-to-use NTFS for Mac tool. It allows macOS to read & write files on NTFS drives without any limitation. It is also a comprehensive disk management tool for Mac to mount/unmount disk, format disk, repair disk, read-write disk...on Mac.
