What Is Disk Image, How to Create Disk Image on Mac?
The quickest way to create a disk image for a HDD/SSD or external device on Mac is to use disk cloning app - such as DoYourClone for Mac. It will securely and quickly create a disk image (zip or dmg) for any disk and save the disk image file to another drive.
![]() Updated by Darren on February 10, 2025
Updated by Darren on February 10, 2025
Quick Navigation:
- Types of Disk Images
- Create DMG Disk Image File Using Disk Utility
- Create A Disk Image for A Disk Drive on Mac Using Disk Cloning App
- Conclusion
In the digital world, keeping our files safe is like caring for our favorite toys. You could have a magic box that holds all your games, images, and secrets and call it up whenever needed. That's kind of what a computer Disk Image is! A disk image is like a unique box holding your computer's games, photos, and other important files.
This article will help you understand this magical box and, even better, show you how to make one on your Mac. Hold tight because we'll learn about Disk Images and how to make them quickly!
Types of Disk Images:
On a Mac, there are various disk images, each with its function. These are the most popular types:
- Read-Only Disk Images (DMG): These are set images that can't be changed once made. DMG files are often used to send software on macOS. People can mount these images to access the files inside, but they can't save changes to the original image.
- Read/Write Disk Images: You can change read/write disk images, but not read-only images. People can add, remove, or modify files in a mounted image, and the changes can be saved back to the original image.
- Sparse Disk Images: These are space-efficient disk images. Sparse images only occupy a room on the disk for the data they hold; as more data is added, they get bigger. That means they can be used for material that changes in size over time.
Create DMG Disk Image File Using Disk Utility
In Disk Utility, you can mount an internal or external SSD or HDD and make a disk copy (.DMG) file in a different location than the source drive. The following steps will show you how to use Disk Utility to make a disk image of a drive:
Step 1: Open Disk Utility
Mac OS has a Disk Utility app that lets users make disk images and manage disks and other storage devices. Here's what you need to do to open Disk Utility:
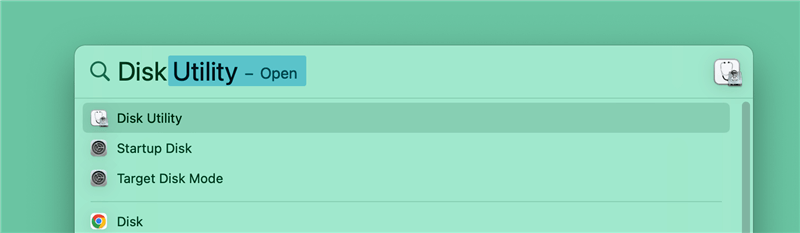
- The magnifying glass icon is in the upper right part of your screen. Click on it to start Spotlight Search.
- Just type "Disk Utility" and hit "Enter."
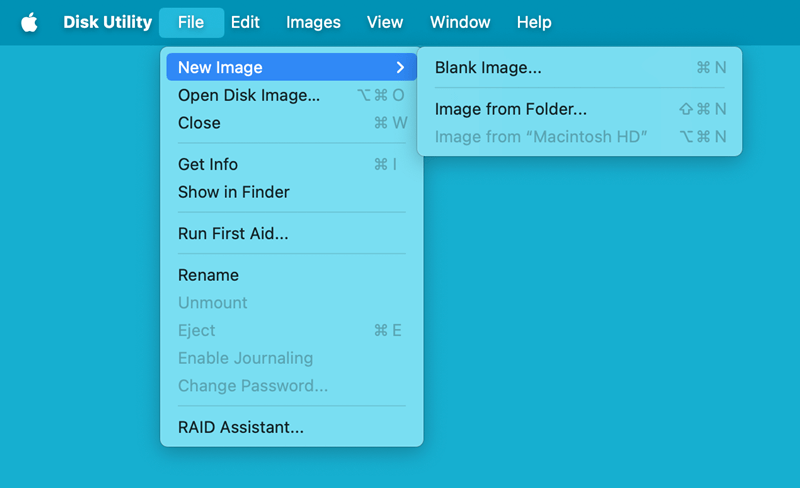
Step 2: Choose "File" and then "New Image."
Open Disk Utility, then go to the "File" menu and pick "New Image." A drop-down window will appear with different choices.
Step 3: Select Source and Destination.
Find the drop-down button that says "New Image" and select "Blank Image."
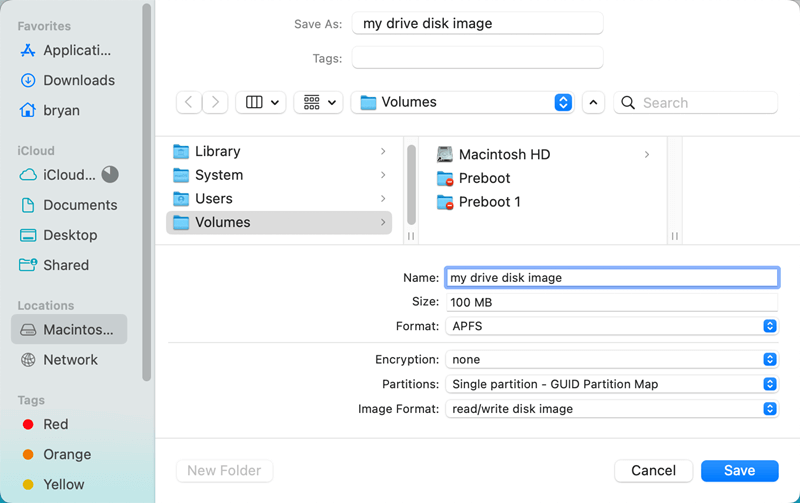
There will be a window where you can enter the image's information:
- Name: Give your disk image a name.
- Size: Tell it what size your disk image should be. Pick a size big enough to hold the information you want to save.
- File: Pick the correct file for your disk image. Select APFs or Mac OS Extended (Journaled) to check if it works with your system.
- Encryption: For extra safety, you can encrypt the disk image if you want to. Pick a type of encryption and then set a password.
- Partitions: If you want more than one, you can set the number and size of partitions in the disk image.
Step 4: Choose Image Format.
A drop-down choice is "Image Format" in the same window. You can pick from the following types of disk images, which we talked about earlier:
- Read/Write: This option lets you change the disk image.
- Read-Only: This option makes a disk copy that can't be changed.
- Sparse bundle: A sparse bundle is a sparse image that works better with big files.
You should pick the correct version based on your needs.
Step 5: Save the Disk Image.
At the end of your changes, click the "Save" button. You can choose where to save the disk image, and then Disk Utility will start making it.
Step 6: Mount and Use the Disk Image.
After making the disk copy, double-click on the file to mount it. The disk image will now appear on your desktop as a different volume. You can copy, paste, or change things inside this mounted image like other storage devices.
Step 7: Eject and Secure the Disk Image.
Properly ejecting the disk copy when you're done using it prevents the data from getting damaged. Press and hold the mounted disk image on your desktop for a moment, then click and choose "Eject." If you encrypted the disk image, don't forget the password. You'll need it later.
Create A Disk Image for A Disk Drive on Mac Using Disk Cloning App
What is Mac disk image? Disk Image is a file which contains all or partial data of a hard drive. Making a disk image of a hard drive is a good way for backing up data on Mac. Also, some users would like to create a disk image for data recovery when they don’t want to cause any damage to the data on the original hard drive.
How to create disk image for a disk drive on Mac? You can use disk cloning software - such as DoYourClone for Mac to help you quickly and securely create a zip or dmg disk image for a disk drive and save the disk image to another drive.
DoYourClone for Mac
- Create DMG or ZIP disk image on Mac.
- Clone HDD/SSD or external device on Mac.
- Create bootable clone backup for Mac.
Here, we will show the steps to create a disk image on Mac with DoYourClone for Mac:
Step 1: Run DoYourClone for Mac on your Mac computer.
First of all, just run DoYourClone for Mac from Launchpad. Choose the mode "Create Disk Image". If you want to copy a hard drive from one to another, just choose mode "Copy Disk". "Clone OS" mode can help you create a bootable clone for your Mac.
Step 2: Choose the source drive and destination drive.

DoYourClone for Mac will create a disk image of the source hard drive and save the disk image to the destination hard drive, here are some tips:
- Make sure the source drive and destination drive is connected to the Mac.
- It supports any hard drive, USB flash drive, memory card, etc.
- You can choose "Copy All Files" in the disk image or just "Copy Some Files" in the disk image.
- You can choose make a .zip disk image or a .dmg disk image.
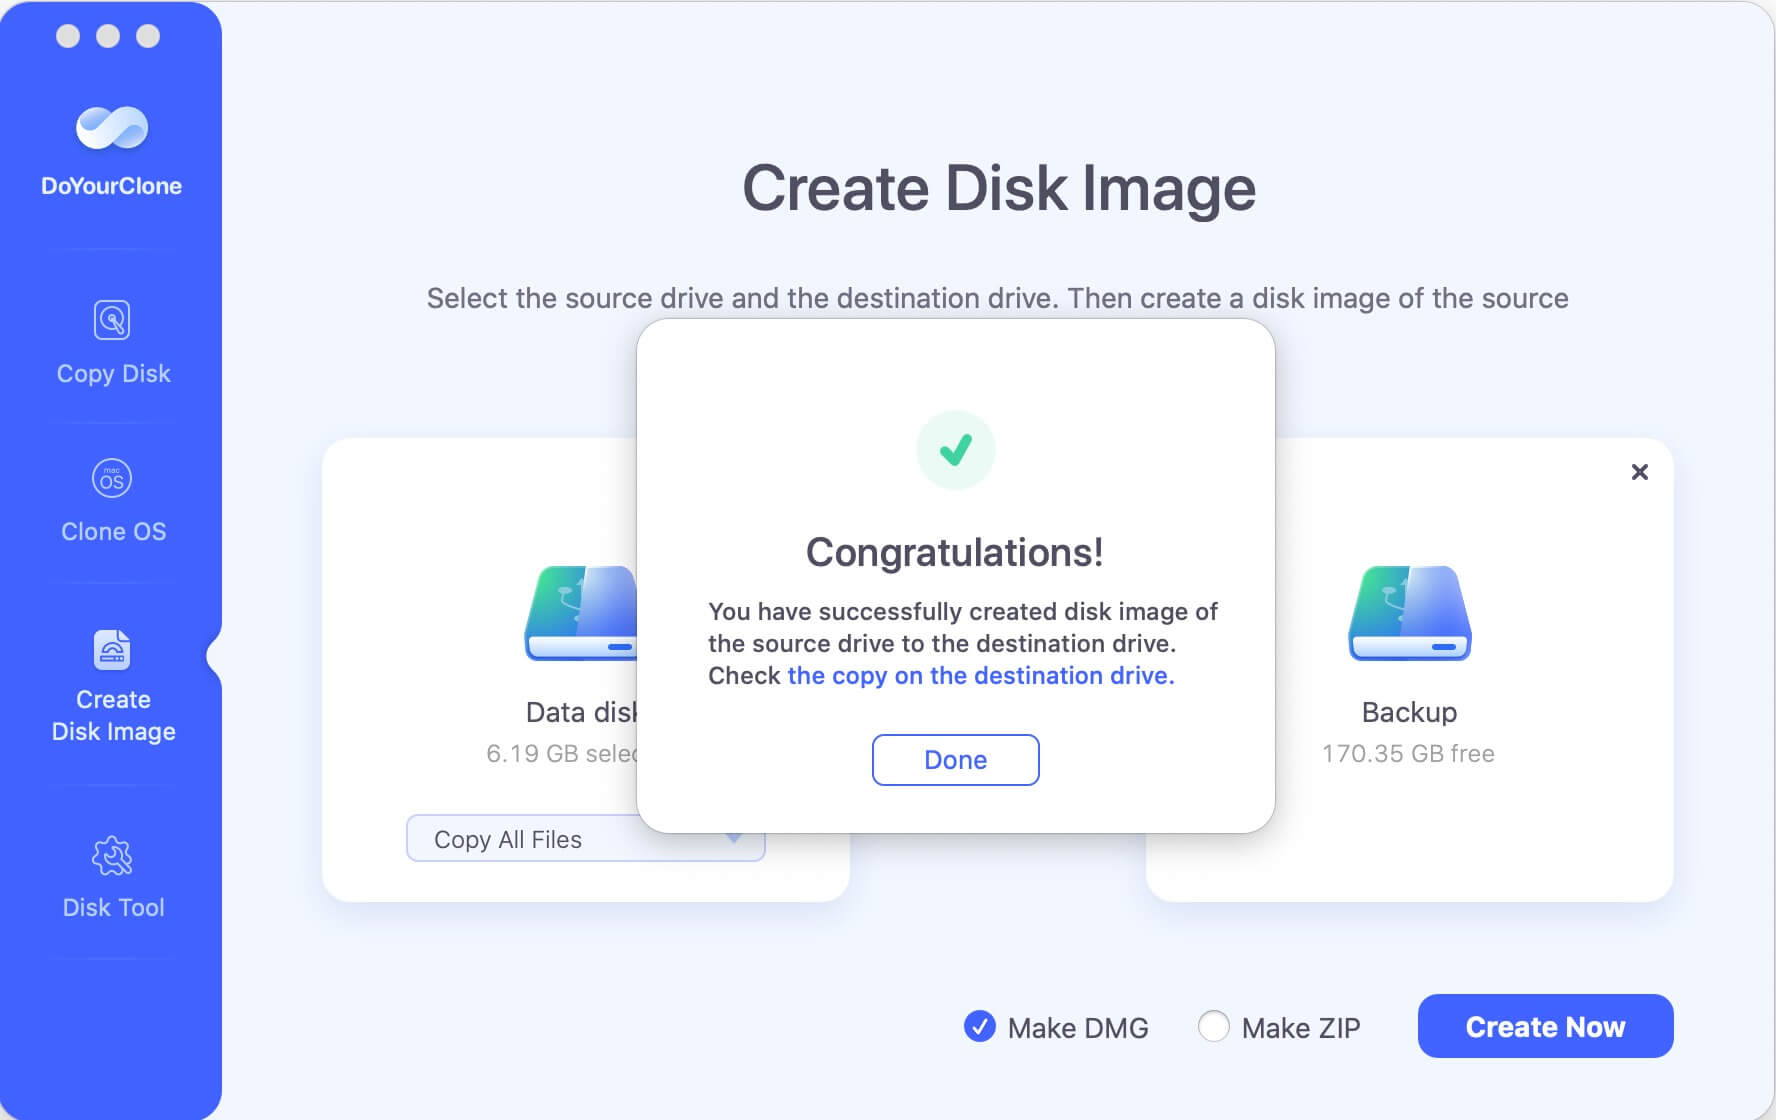
Step 3: Create the disk image or source hard drive.

Click on the button "Create Image". DoYourClone for Mac will quickly create a disk image of the source drive and save the disk image to the destination drive.
Step 4: Check the disk image.
When the process gets finished, you can check the disk image on the destination drive. You can copy the disk image to any other hard drive or Mac computer.
When you lose data on the original hard drive, you can restore the lost files from the disk image. Just open the disk image on any computer, then find the lost files. Then you can copy the files from the disk image to your computer or any other hard drive.
It is also the good way to duplicate a hard drive from one computer to another computers. Just copy the disk image to other computers. Then you can access the data on the original computer on any other computer.
It is possible to create disk image using Disk Utility, but it is a bit complicated...DoYourClone for Mac offers the reliable and easy way to create a ZIP or DMG disk image on your Mac. As you’ve seen, the steps are very simple. It can securely create a disk image for any HDD, SSD, SD card, USB drive, external disk, etc.
Conclusion:
Making disk images on a Mac is valuable for backing up, distributing, and preserving data. Whether you want to protect important files, copy the state of a system, or share software, disk images are a flexible and effective option. By following the steps in this guide, you can confidently make, manage, and use disk images on your Mac, keeping your important data safe and secure.
DoYourClone for Mac
DoYourClone for Mac, one of the best Mac disk cloning software, can help you clone HDD, SSD, external storage device on Mac, upgrade HDD to SSD, create full disk image backup, etc. It also can clone everything from your Mac to an external HDD/SSD and create a full bootable clone backup. 100% safe and easy-to-use.
Written & Updated by Darren
Darren is an senior editor at DoYourData. Since 2021, Darren has written 100+ articles about data recovery, Mac file recovery, disk management, disk clone, computer issue fixes, etc. He helps lost of users to recover important data, get the reliable data backup solution, find optimization for PCs and Macs.