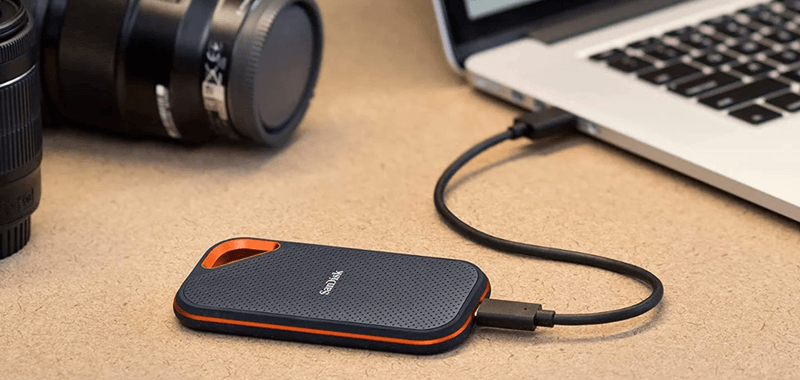
How to Move macOS to A SanDisk Extreme PRO Portable SSD?
With a reliable Mac disk cloning software, it's easy to move macOS to a SanDisk Extreme Pro portable SSD. By cloning the Mac drive to the SanDisk external SSD with DoYourClone for Mac, you will be a bootable copy of macOS along with the programs and personal files.
![]() Updated by Darren on February 18, 2025
Updated by Darren on February 18, 2025
Quick Navigation:
- Why Would You Need Software for SanDisk Data Migration?
- Before Attempting
- How To Transfer Everything from Mac Hard Drive to A SanDisk Extreme Pro Portable SSD?
- Clone macOS to SanDisk Portable SSD with Disk Utility
- How Do You Configure Your Mac to Boot from The SanDisk External SSD?
- Conclusion:
Backup is always essential for computers. For Mac users, there are different backup options available, including the macOS built-in tools and third-party software. Cloning the Mac drive to an external drive is one of the solutions. Clone a full and bootable copy of macOS to SanDisk Extreme Pro can help you save the data and boot Mac immediately in urgent cases.
Creating an identical replica, or duplicate, of all the data and file systems stored on the drive is referred to as making a hard drive clone. It's a sort of continuous file backup that begins as soon as your device boots up, or it may run on a schedule you define.
A copy may be made immediately on the SanDisk SSD using SanDisk's data migration software. This article will walk you through the process of cloning macOS onto a SanDisk Extreme PRO Portable SSD.
Why Would You Need Software for SanDisk Data Migration?
When upgrading a conventional hard disk drive (HDD) to a faster SanDisk solid-state drive (SSD), the first step is to transfer all of the data from the old drive to the new device. In certain cases, migration might be a sluggish process.
However, the SanDisk SSD backup program is available to those using SanDisk SSDs. Without losing any information in the process, you may clone your old drive and transfer its contents to the new one. It doesn't restore anything, and it doesn't even bother with the installation procedure.
All that is required is data backup software that is both dependable and quick. The device requires both the source disk and the target disk to be connected in order to transfer data. The SSD may be installed in your device with two disk bays.
The SSD may also be connected to the device externally by a USB or SATA connection. Once the device is linked to the SSD, the cloning software may be installed.
Before Attempting
When you swap out your disk, you alter your computer so that the programs you have installed may be recognized. Anti-piracy features in certain software indicate that it's installed on a new machine and needs reactivation.
If you have a maximum number of activations for the program and have already used up all of them, you may have trouble reactivating it. Before performing a clone, you should deauthorize any program that supports doing so. It should be noted that this is not a cloning-specific problem, and the same problem might arise when restoration from a Time Machine backup.
How To Transfer Everything from Mac Hard Drive to A SanDisk Extreme Pro Portable SSD?
Once you've established that cloning your HDD to a SanDisk SSD is necessary, you'll need to learn the specifics of the cloning process, such as how to copy the operating system and other data and file systems.
Even though SanDisk does not provide the disk management application required to channel the SSD, it is possible to transfer all data using the tried and true method of copying and pasting. In this case, the key is found in a piece of third-party application software - specifically, powerful disk cloning software. We recommend DoYourClone for Mac. With the software, it's able to clone Mac drive to SanDisk Extreme Pro portable SSD fully. By cloning the macOS drive, it's easy to create a bootable copy of your macOS.
DoYourClone for Mac
- Clone Mac OS to SanDisk Extreme Pro Portable SSD.
- Create bootable clone backup for Mac.
- Create disk image on Mac.
Download and install the software on your Mac first. Now, follow the steps below to move macOS to an SanDisk Extreme Pro portable SSD and make it be bootable.
Step 1. Connect the SanDisk Extreme Pro portable SSD to the Mac. Open DoYourClone for Mac, and select disk cloning mode - Clone OS. This mode is used to move macOS to another drive.
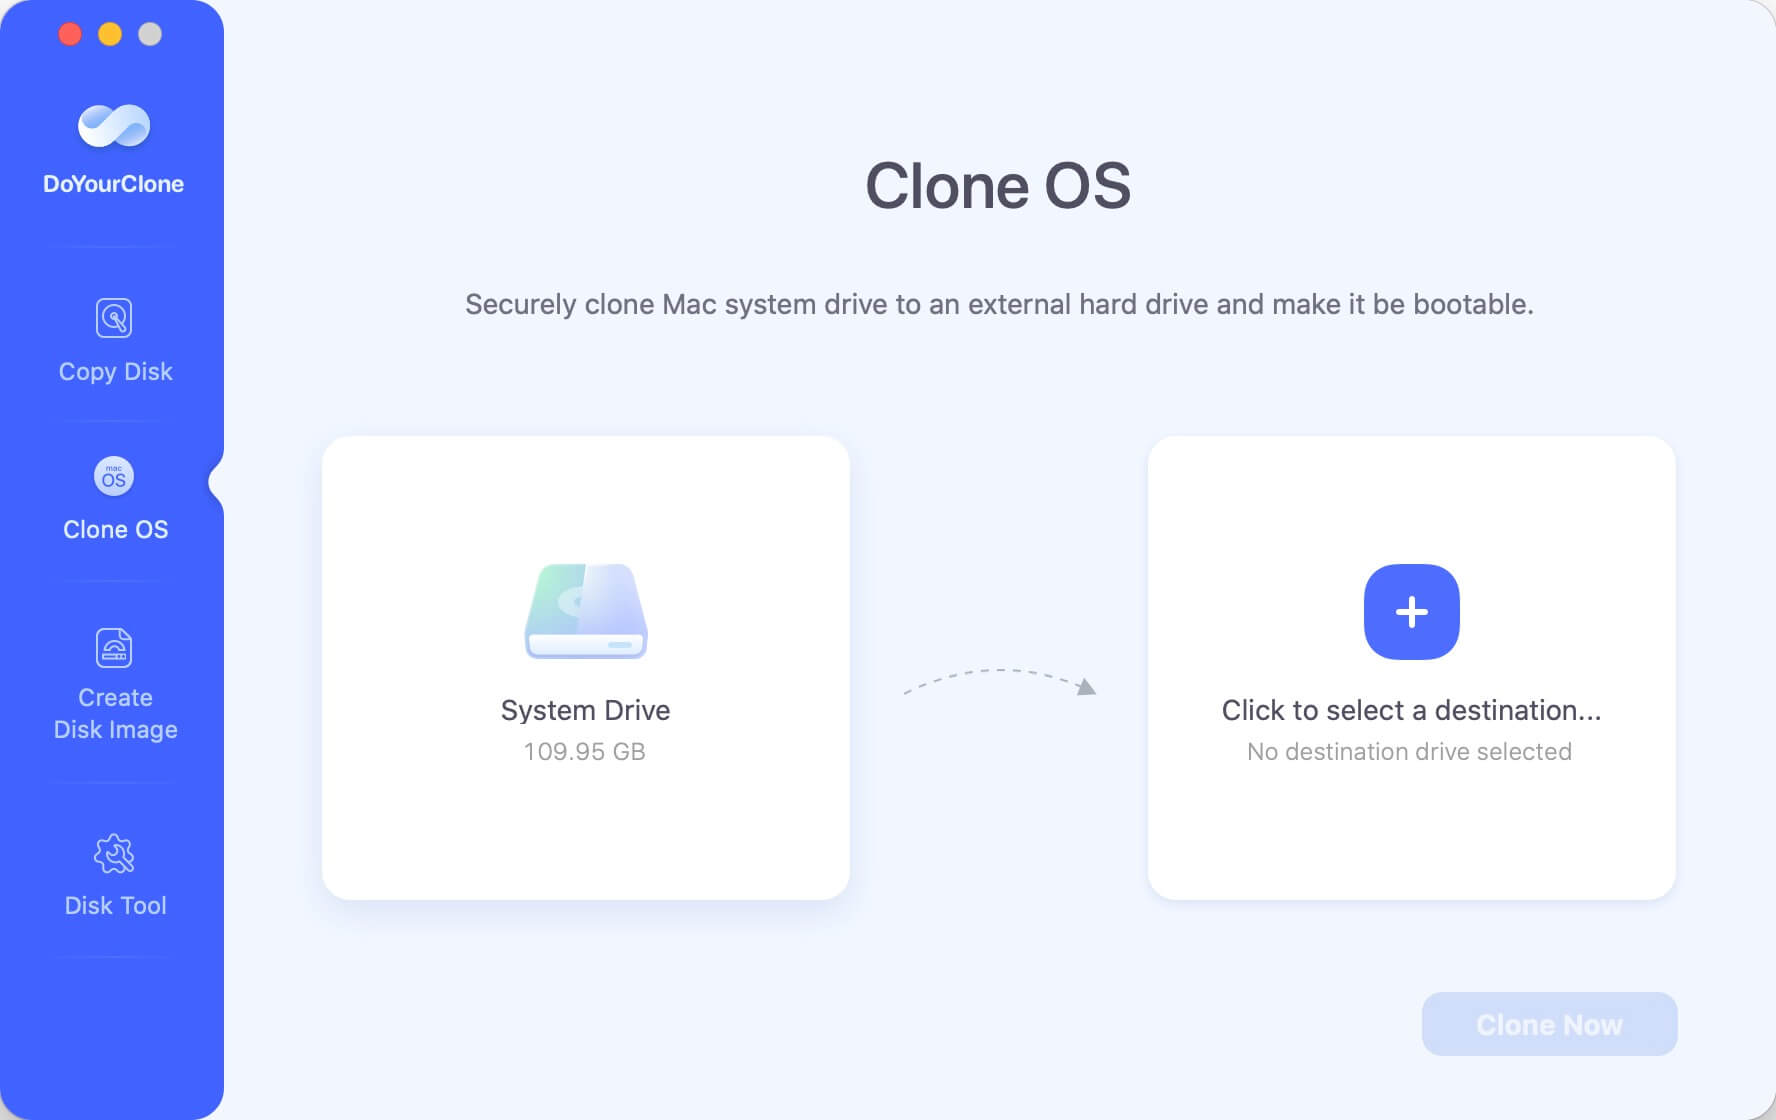
Step 3. The macOS drive will be selected as source by default and you don't need to change it. Just select the SanDisk Extreme Pro Portable SSD as the destination drive.
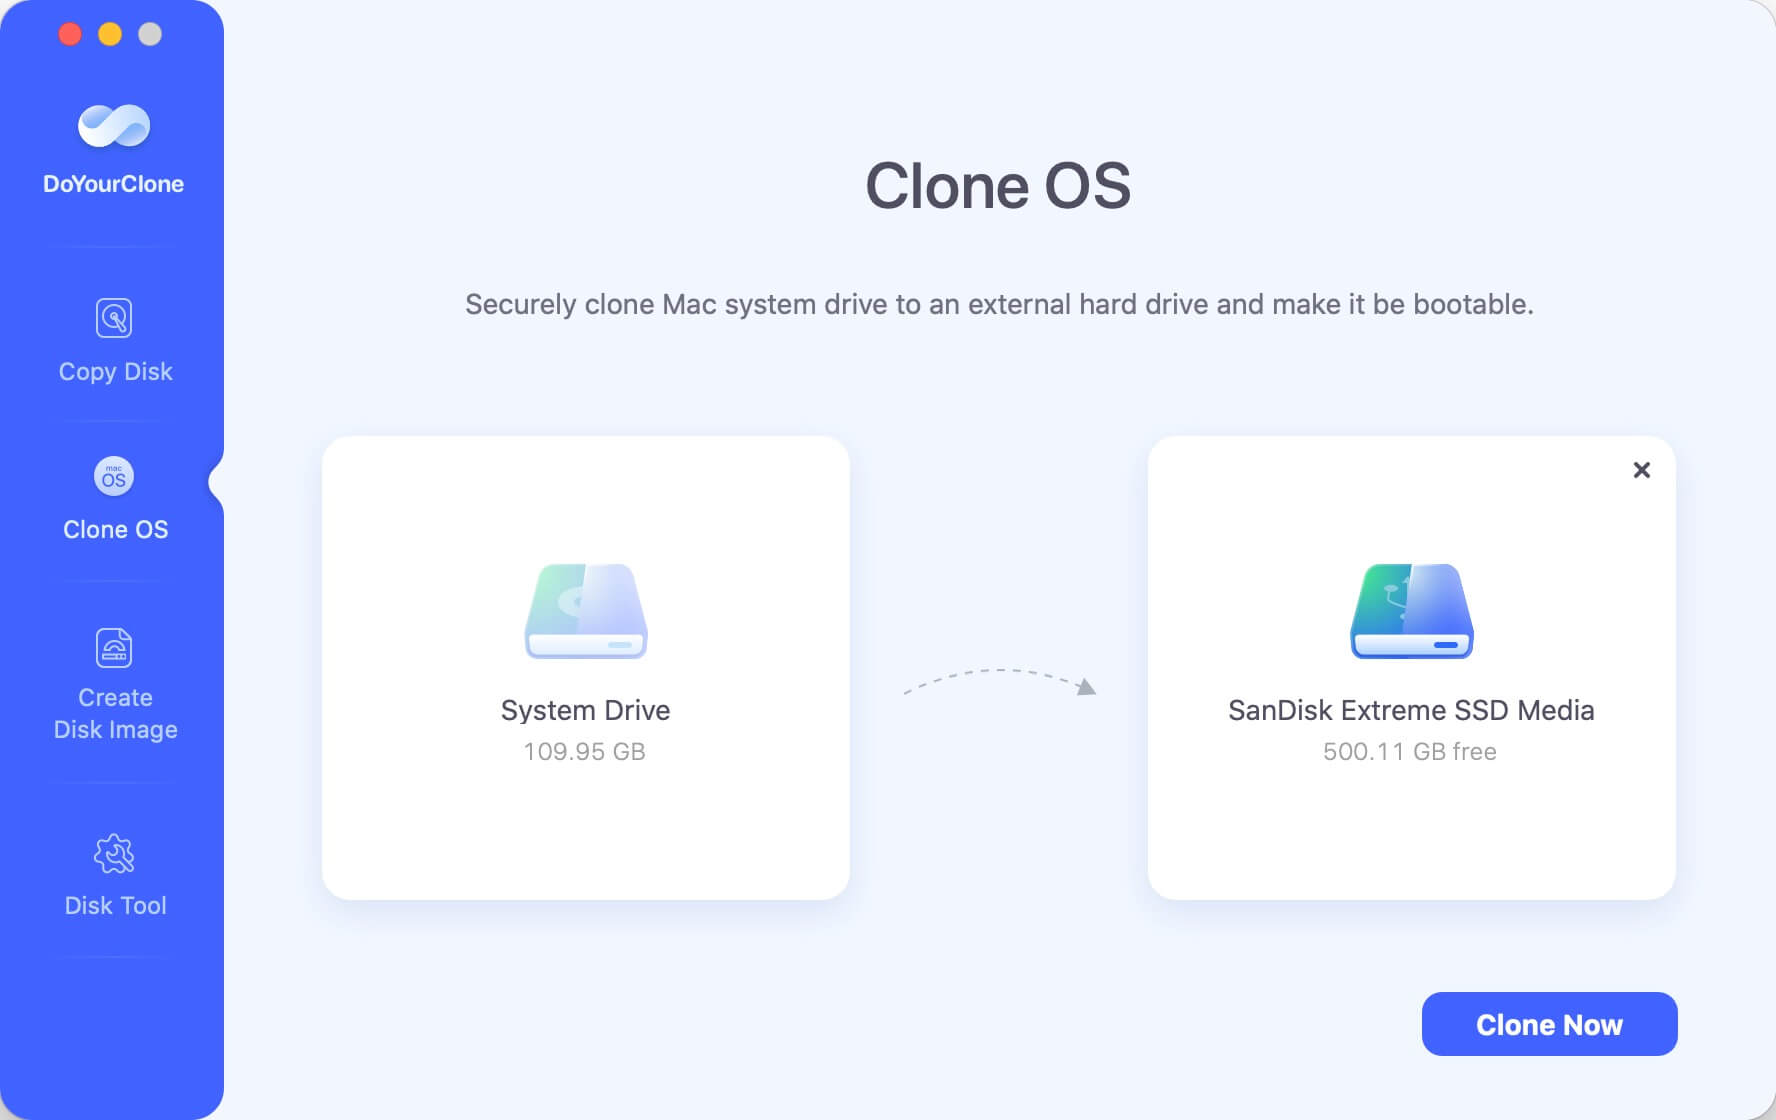
Step 3. Click on Clone Now button. It will quickly clone all data including macOS data, apps, settings, files to the SanDisk Extreme Pro portable SSD.

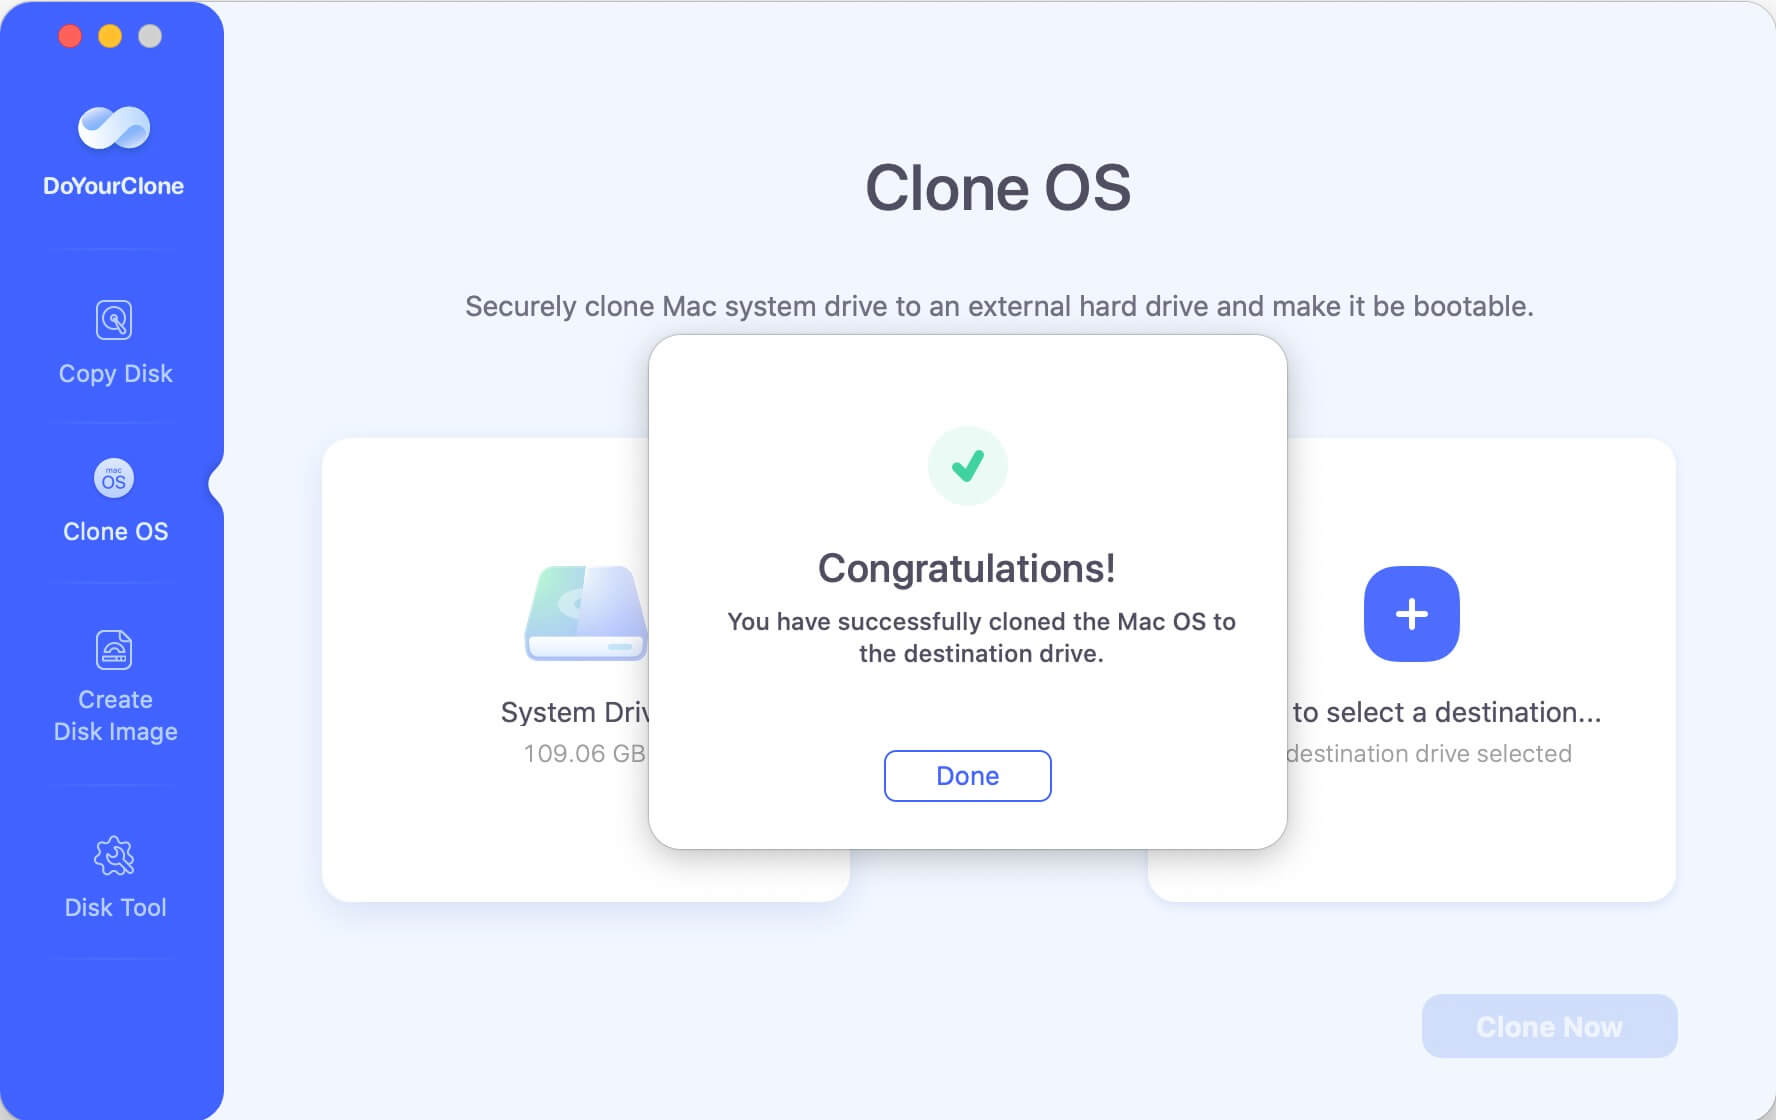
Once the disk cloning process gets finished, the macOS and personal data is moved to the external drive successfully. You can use the SanDisk Extreme Pro portable SSD as a bootable disk.
Clone macOS to SanDisk Portable SSD with Disk Utility
If you want to use a free solution, you can try Disk Utility. This macOS built-in tool can also help you move macOS to SanDisk Extreme Pro portable SSD or any other external drives.
Here are the detail procedures to move macOS to SanDisk Extreme Pro external SSD:
Step 1. Open "Finder" and go to "Applications", then "Utilities", find and open "Disk Utility."

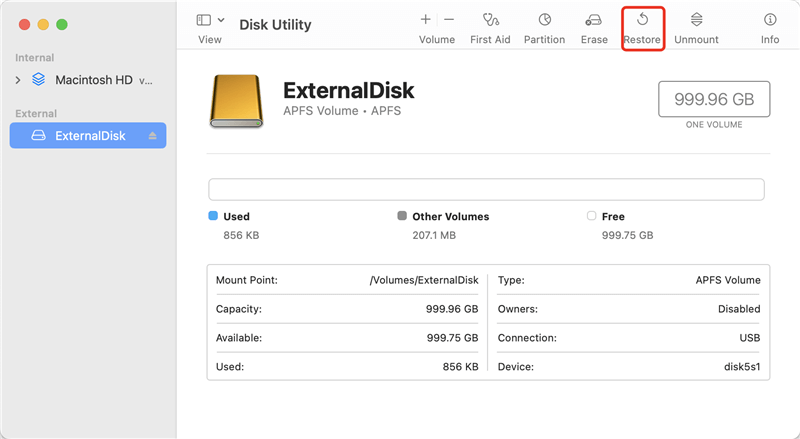
Step 2. Connection the SanDisk Extreme Pro portable SSD and you will see it in Disk Utility. Select the drive and click on the button Restore.
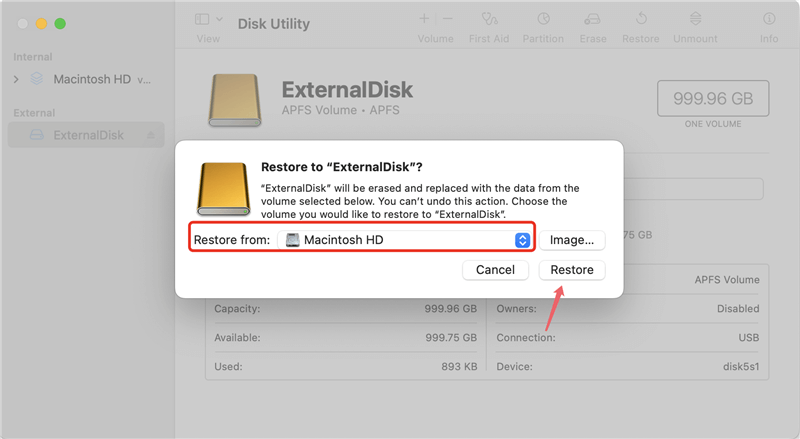
Step 3. In the popup, choose the Mac drive from the drop-down list of "Restore from" field. Click on Restore button and then the tool will clone all data from the Mac system drive to the SanDisk Extreme Pro portable SSD.
Step 4. It will take some time depending on the size of the Mac drive. Once it's done, you can then check if the data is intact and whether the cloned drive is bootable.

However, this methods is not very stable now with the new macOS. If you failed to clone the Mac drive to SanDisk or any other portable SSD or HDD, or the drive cloned in this way cannot boot up normally, it's highly suggested to try the software DoYourClone for Mac.
How Do You Configure Your Mac to Boot from The SanDisk External SSD?
After cloning macOS to SanDisk Extreme portable SSD, you need to check and confirm if the cloned SSD is bootable. To use the SanDisk external SSD as startup disk with your Mac, plug it in and then do as following steps:
To use the SanDisk external SSD with your Mac, plug it in.
When Using An Intel-Based Mac:
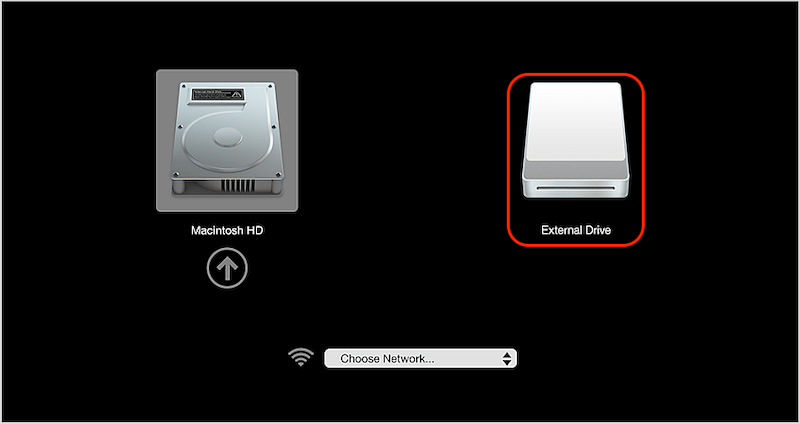
Start your Mac by either pressing the Power button or restarting it.
Keep your finger on the Option (Alt) key until the Apple logo appears.
Navigate to the boot device you wish to use using the left and right arrow keys (or the trackpad or mouse, if you have one). When you're ready, hit Enter or choose the Up arrow.
When Using An Apple Silicon Chip Mac:
Power down your Mac.
Hold down the Power button while doing so.
Hold until you hear a beep and see the message "Loading startup options."
Await the Startup Options page to appear.
Navigate to the boot device you wish to use using the left and right arrow keys (or the trackpad or mouse, if you have one). Then, to start with that, either hit Enter or choose Continue.
If the macOS was moved to SanDisk Extreme portable SSD, then the Mac should be able to boot from the cloned SSD without a problem. Then you can replace the original Mac drive with the cloned SSD, or just keep the cloned SSD drive offline in case you need to restore data or macOS in the future.
Conclusion:
Mostly, it's necessary to create a copy of macOS. It can help back up the data and keep your files safe. Also, the bootable copy of macOS will be very useful to boot up the Mac directly in case the Mac drive is failed due to any issue. And when you upgrading Mac drive to an SSD to speed up the computer, cloning the drive to SSD is easy and fast without reinstalling the macOS and applications.
There are different methods you can use to clone the macOS to an external drive, like SanDisk Extreme Pro portable SSD, or any other drives. The macOS built-in tool Disk Utility or the third-party disk cloning software DoYourClone for Mac are the popular choices.
DoYourClone for Mac
DoYourClone for Mac, one of the best Mac disk cloning software, can help you clone HDD, SSD, external storage device on Mac, upgrade HDD to SSD, create full disk image backup, etc. It also can clone everything from your Mac to an external HDD/SSD and create a full bootable clone backup. 100% safe and easy-to-use.
Written & Updated by Darren
Darren is an senior editor at DoYourData. Since 2021, Darren has written 100+ articles about data recovery, Mac file recovery, disk management, disk clone, computer issue fixes, etc. He helps lost of users to recover important data, get the reliable data backup solution, find optimization for PCs and Macs.