
Best solutions for APFS hard drive clone
With the disk copy tool DoYourClone for Mac, it's easy and fast to clone APFS hard drive on Mac.
Copying hard drive can be done with system built-in tool Disk Utility and the third-party disk cloning software DoYourClone for Mac. You can copy data, create disk image or make bootable clone for system drive on Mac.
![]() Updated by Darren on March 11, 2025
Updated by Darren on March 11, 2025
Quick Navigation:
Cloning HFS/HFS+ hard drive data is a commonly used backup solutions. In this way, it's safe to create a full backup for all data on a hard drive. It's easy to handle when comparing to other backup solutions.

Through this guide, we will explain how to clone HFS/HFS+ hard drive on Mac. People usually store data in diverse drives, but unexpected issues can make them lose these files and this may be an awful experience. To avoid dealing with uncomfortable situations like this, it is better to have a backup or additional copy in other drives. There are a lot of external hard drives people use to back up their files and so protect them.
It is possible to get them based on different features like for example: price, quality, durability, performance, capacity, and other aspects. Cloning is a good option to make a data backup and here we will recommend DoYourClone for Mac.
DoYourClone for Mac is one of the best programs targeted at cloning HFS/HFS+ hard drive on Mac. This software provides a series of features, which make it very reliable and used by many users. It is very safe, so we can copy data from one hard drive to another hard drive without having any data loss. It is compatible with diverse versions of Mac, including macOS Sierra, macOS High Sierra, macOS Catalina, and others.
DoYourClone for Mac is useful for creating a full disk image of the hard drive; we can clone hard drive on Mac; it is possible to copy only one part of the hard drive, or the entire one if we prefer this way. This cloning program is one of the best options to back up hard drive data. We can protect our photos, videos, notes, contacts, e-mails, recordings, documents, and other files. If you want to clone HFS/HFS+ hard drive, just download and install DoYourClone on the computer.
It's easy to handle the software as it's designed with user friendly interface. You can clone hard drive smoothly without complex skills. The software offers 3 modes to clone HFS/HFS+ hard drive data on Mac.
Copy Disk mode is able to help you copy HFS/HFS+ hard disk drive to any other hard drive including Mac-based hard drive, external hard drive, SSD, etc.
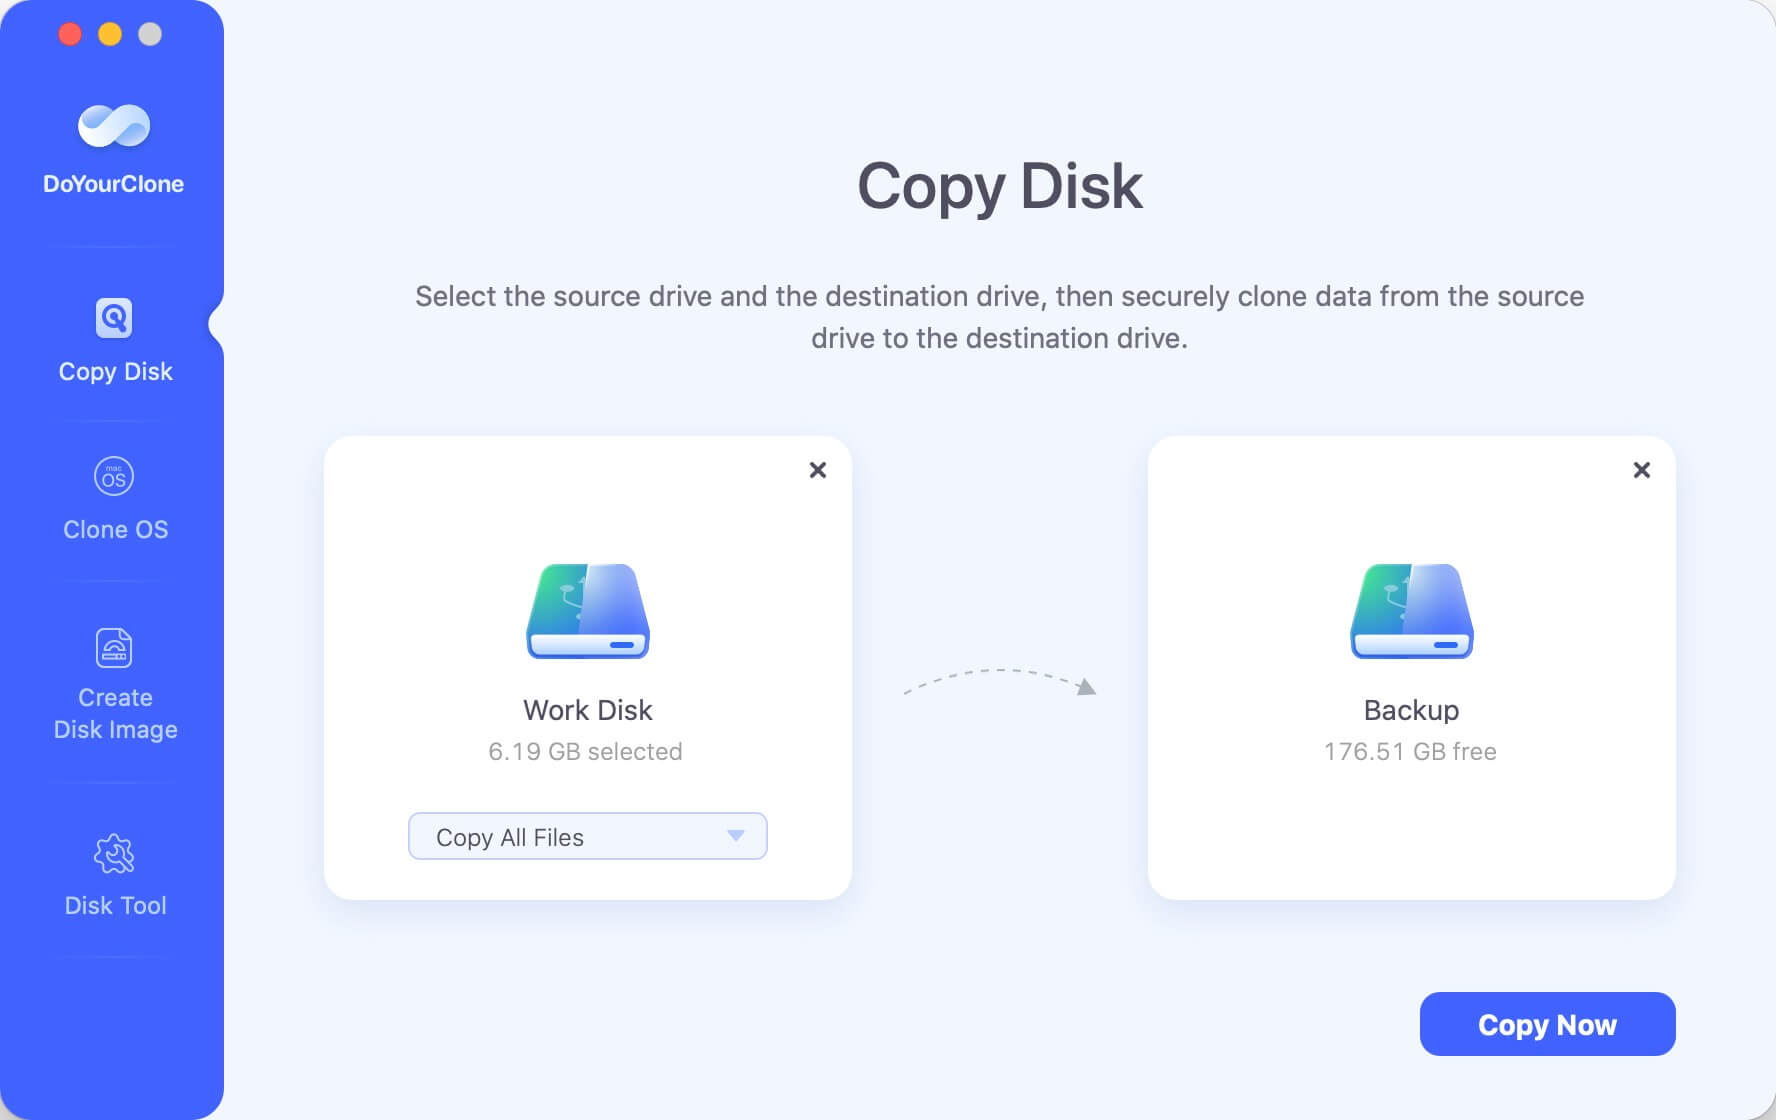
Step 1: Choose the source hard drive and the destination hard drive.
Now, just choose the HFS/HFS+ hard drive as the source drive and choose a destination drive to save the copy of the HFS/HFS+ hard drive.
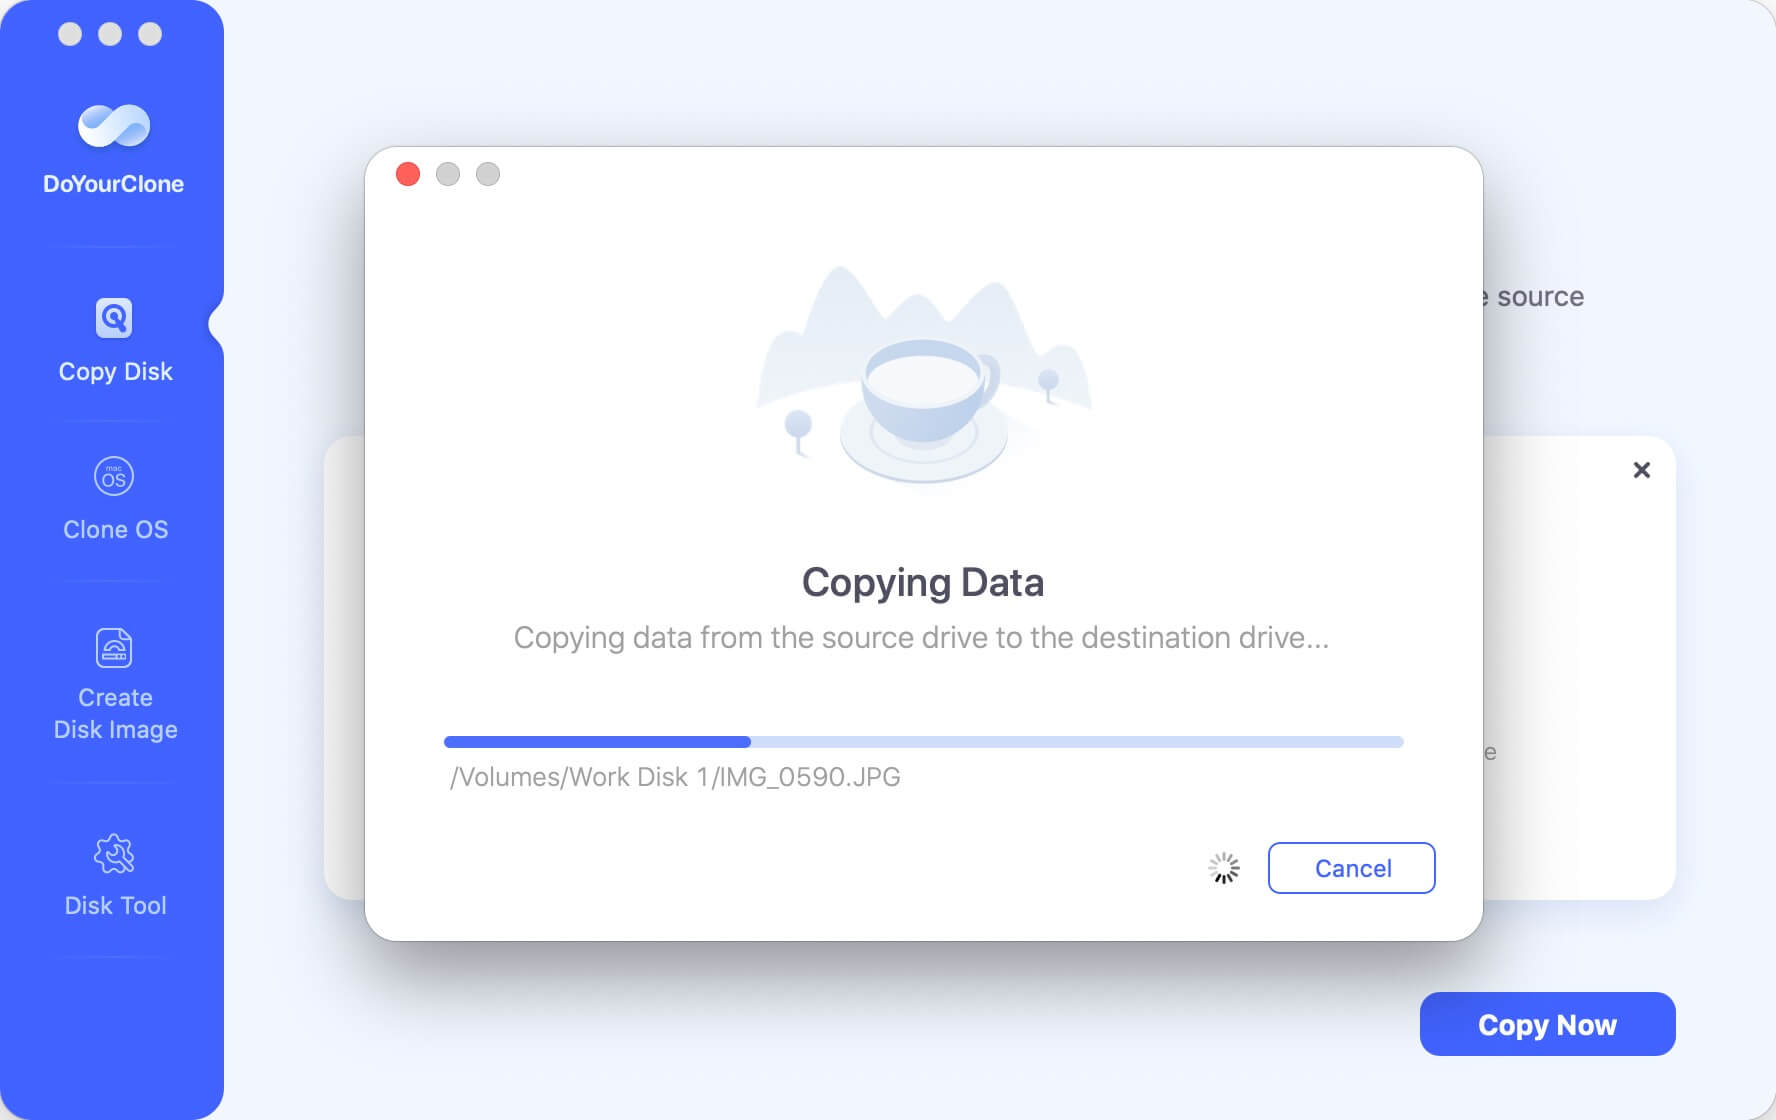
Step 2: Copy HFS/HFS+ hard drive to the destination hard drive.
After selecting the source hard drive and the destination one, we can proceed to copy data. We only have to click on the Copy Now button and wait until the process finishes.
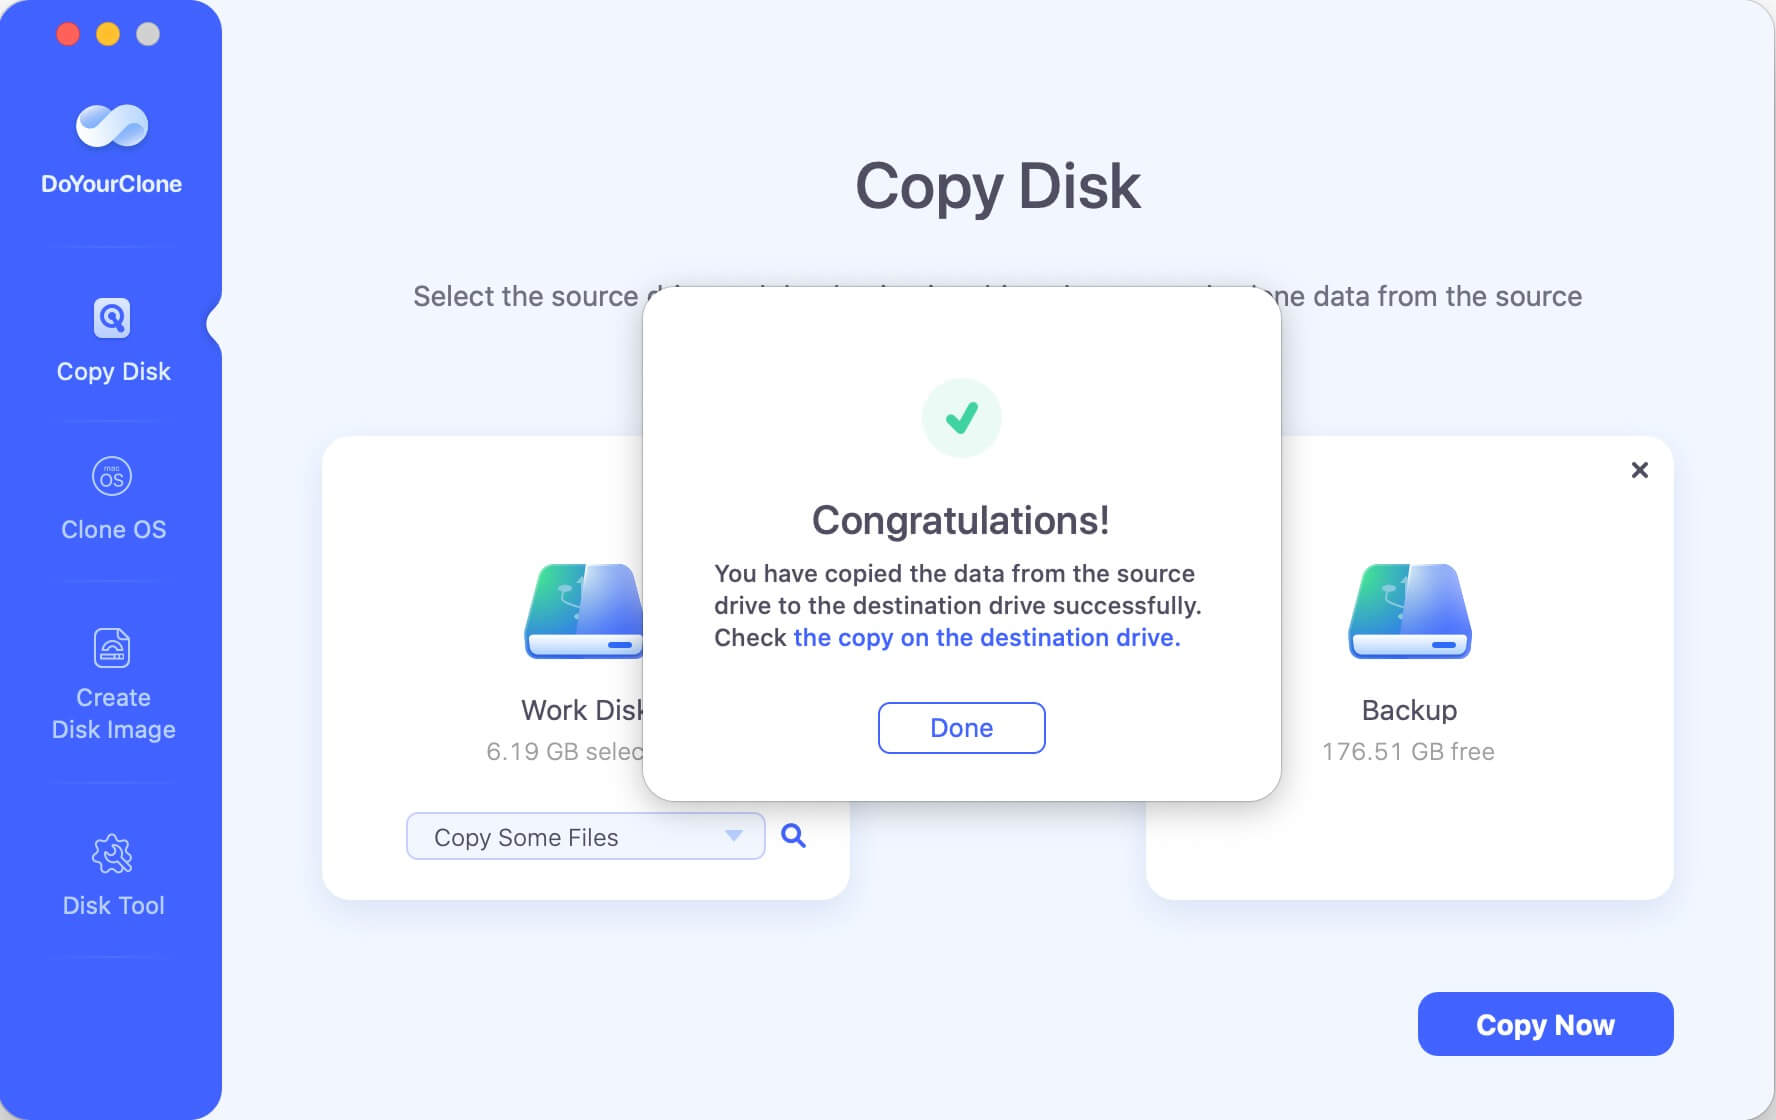
Step 3: Check the cloned data.
When the cloning process finishes, we need to verify the cloned data, just to be sure the cloning task was successful.
Just connect an external hard drive to your Mac, choose mode - Clone OS mode. It will securely clone Mac startup disk to the external hard drive and make it be bootable.
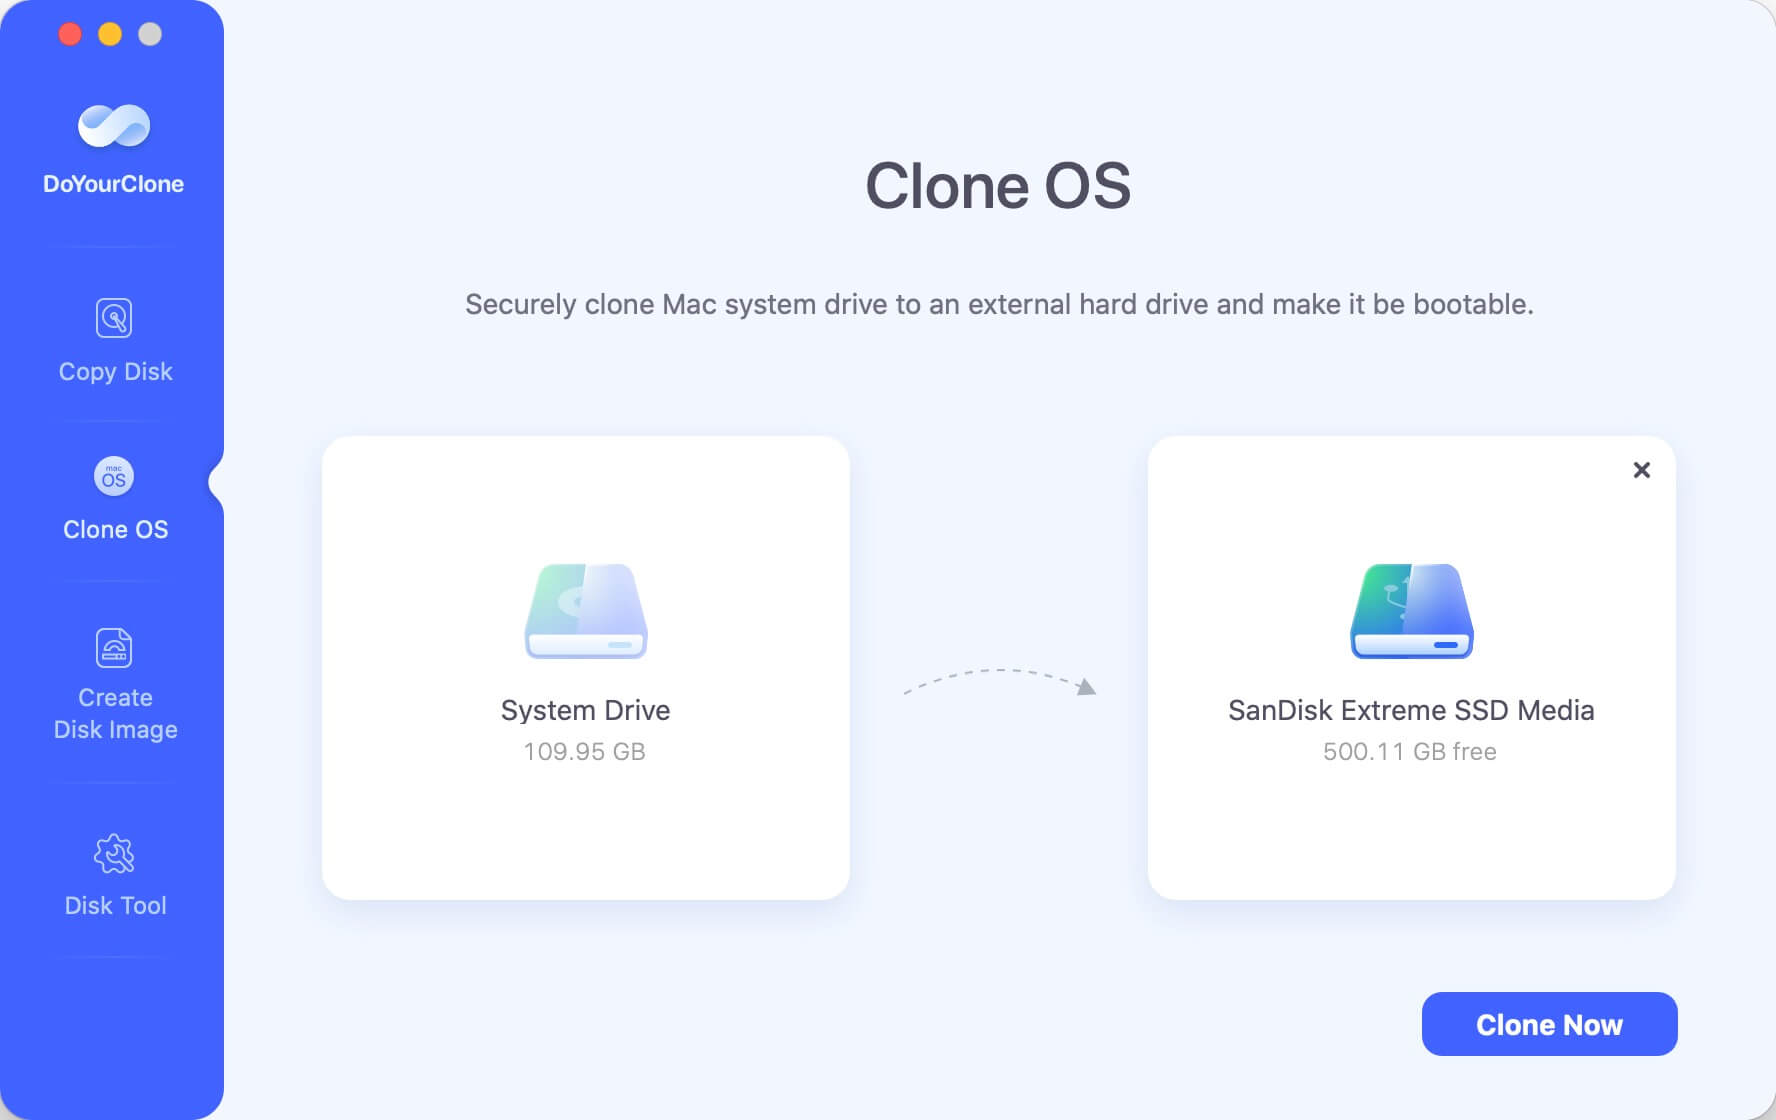
After the OS cloning is done, all the system data, boot information, installed programs, person files and personalize settings are all copied to the external hard drive. You can then go to the external hard drive to check and confirm all the data is copied successfully. Also, you can verify if the external hard drive is bootable by setting it as startup disk.
💡 Note: Ensure to use an external hard drive with enough space. Also, the process will overwrite the external hard drive, it's necessary to back up the important files on the external hard drive first to avoid data loss.
Step 1: Choose the source drive and destination drive.
Choose mode Create Disk Image, and choose the HFS/HFS+ hard drive as the source drive, choose a destination drive to save the disk image of the HFS/HFS+ hard drive. Also, you can choose the format of the disk image as you want. It offers 2 types of disk images: DMG and ZIP.

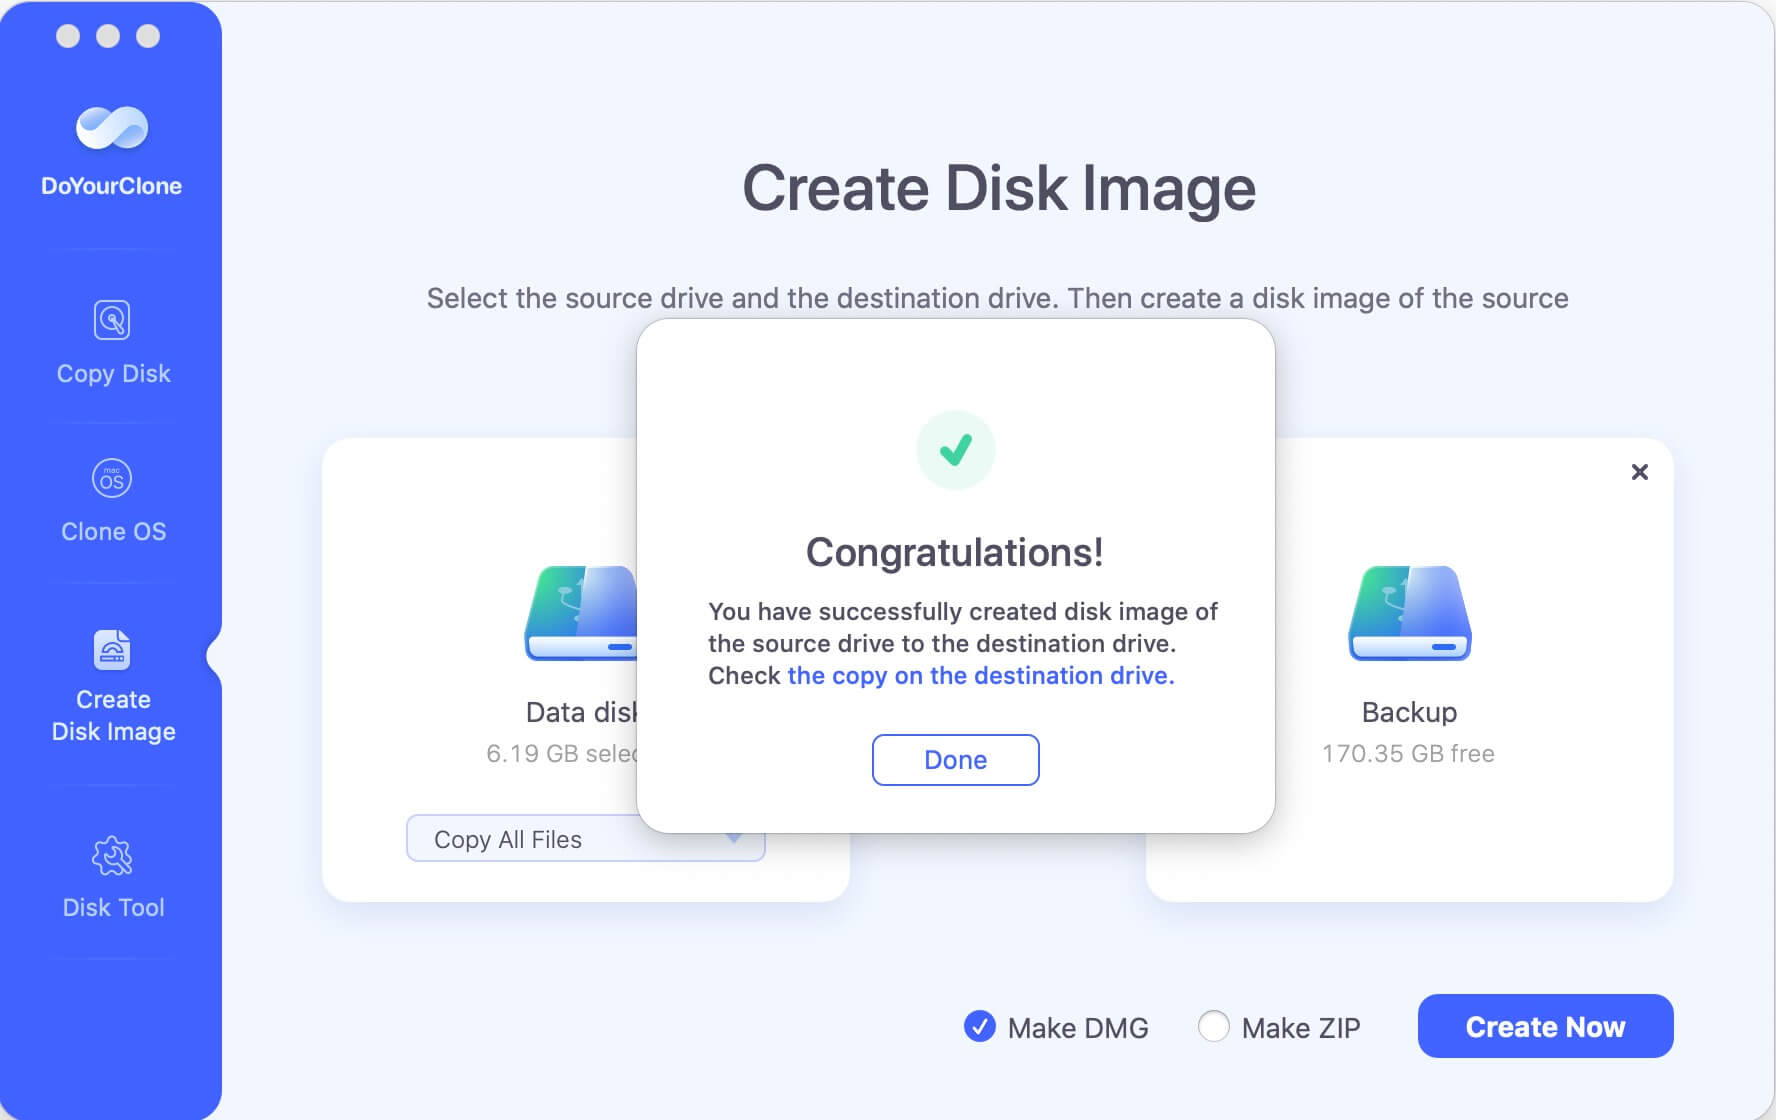
Step 2: Create Disk Image.
Create disk image of the HFS/HFS+ hard drive and save it to the destination drive.

Step 3: Check the disk image.
You can check the disk image on the destination drive.
It is a good idea to verify we have cloned data completely to be future inconveniences. Remember, it is possible to lose data any time due to diverse reasons like system crash, virus infection, damaged device, corrupted or inaccessible drives, formatted disks, and even human errors. DoYourClone for Mac is a great choice to back up hard drive data and protect them from unexpected problems like the ones mentioned previously. Just download, install, run and follow some simple steps and your copy will be ready.
Best solutions for APFS hard drive clone
With the disk copy tool DoYourClone for Mac, it's easy and fast to clone APFS hard drive on Mac.
To clone HFS/HFS+ hard drive data, you can also use another tool Disk Utility. This tool is integrated in macOS and it's totally free for any Mac user. Disk Utility offers full of features to manage hard drives on Mac, including disk cloning option.
Before you clone HFS/HFS+ hard drive, it's necessary to connect an empty external hard drive with enough space. Then do as follows to cone drive step by step:
Step 1. Open "Applications" in Finder, then find the "Utilities" folder. There you will find the Disk Utility. Double click it to run the tool.

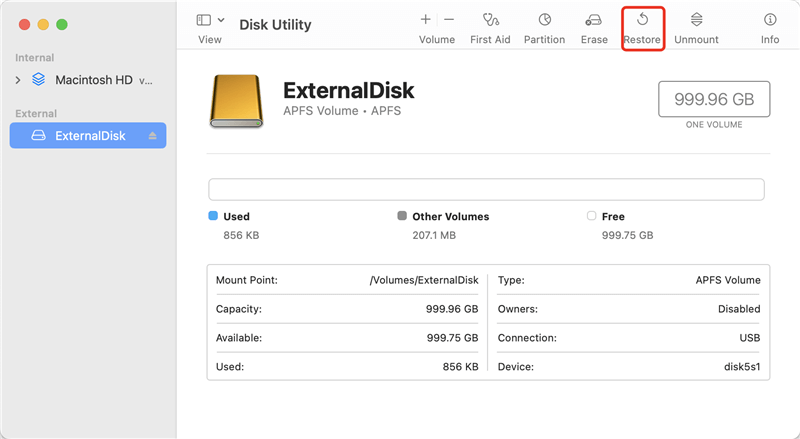
Step 2. Find the empty external hard drive from the drive list at the left side of Disk Utility window. Click to select it and then click on "Restore" button at the top of the interface of Disk Utility.
Step 3. There will be a popup window appears. Select the HFS/HFS+ hard drive from the drop-down list of "Restore from" field. Ensure the drives are selected rightly.
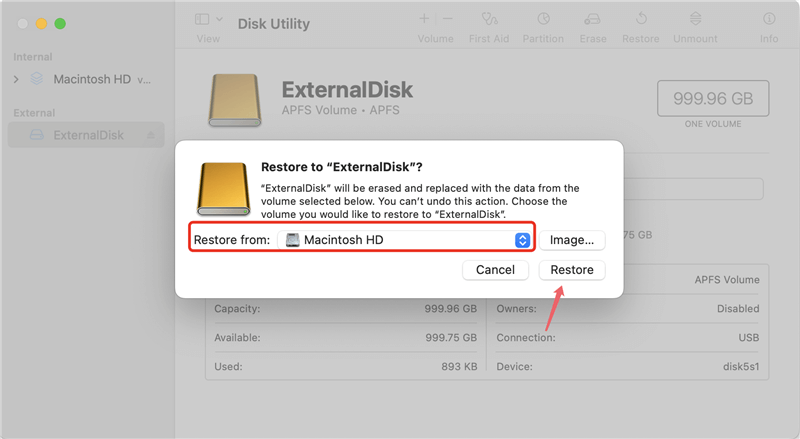
Step 4. After all information is confirmed, just click "Restore" button to start. The tool will clone the selected HFS/HFS+ hard drive data to the external hard drive.

It will take some time to finish the disk cloning process depending on the size of the HFS/HFS+ hard drive you want to clone. Once the process is done, it's time to check the cloned data on the external hard drive.
Cloning HFS/HFS+ hard drive is needed in some cases for data backup or macOS migration, etc. Get a big enough external hard drive first, then you can try to clone the HFS/HFS+ hard drive to the external hard drive. The clone drive will be useful to keep your data safe and restore data in the future.
With Disk Utility, you can cloned HFS/HFS+ drive easily. If you want advanced disk cloning solution, DoYourClone for Mac should be the best choice. It offers different disk cloning methods and it's securely to clone HFS/HFS+ or any other hard drives on Mac. Especially, it can make sure the cloned system drive bootable.

DoYourClone for Mac
DoYourClone for Mac, one of the best Mac disk cloning software, can help you clone HDD, SSD, external storage device on Mac, upgrade HDD to SSD, create full disk image backup, etc. It also can clone everything from your Mac to an external HDD/SSD and create a full bootable clone backup. 100% safe and easy-to-use.
Written & Updated by Darren
Darren is an senior editor at DoYourData. Since 2021, Darren has written 100+ articles about data recovery, Mac file recovery, disk management, disk clone, computer issue fixes, etc. He helps lost of users to recover important data, get the reliable data backup solution, find optimization for PCs and Macs.