Home > Storage Device Recovery
Why External Hard Drive Not Mounting on Mac & How to Recover Lost Data from Unmounted External Hard Drive on Mac
Do Your Data Recovery for Mac is a powerful data recovery software for Mac. It can help you quickly recover all lost data from an unmounted external hard drive on your Mac. It scans the external hard drive and find all existing files, deleted files, erased files, etc. Then just save the files to another drive. This Mac data recovery software also can help you fix damaged external hard drive, fix unmounted external hard drive on Mac, etc.
![]() Updated by Anderson on June 5, 2024
Updated by Anderson on June 5, 2024
Quick Navigation:
- Understanding the Issue: Common Reasons for External Hard Drive Not Mounting on Mac
- How to Recover Data from Unmounted External Hard Drive?
- How to Mount an External Hard Drive on Mac?
- Final Thoughts!
External hard drives are indispensable tools for Mac users, providing crucial additional storage space and a convenient means to back up important data. However, there are times when these drives may not mount correctly on a Mac, leading to significant frustration and concern. When an external hard drive fails to mount, it doesn't appear in Finder, making the data stored on it inaccessible. This issue can arise due to various reasons, including hardware malfunctions, software glitches, or system-related problems.
Addressing the issue of an unmounted external hard drive promptly is crucial. Delaying action can exacerbate the problem, potentially leading to permanent data loss. When a drive fails to mount, it could indicate underlying issues that, if left unresolved, might worsen. For instance, a minor file system corruption could escalate into a severe data corruption if not attended to in time. Therefore, understanding the reasons behind this issue and knowing how to resolve it is essential for every Mac user.
Understanding the Issue: Common Reasons for External Hard Drive Not Mounting on Mac
When an external hard drive fails to mount on a Mac, it can be due to several underlying causes. These can be broadly categorized into hardware issues, software issues, and system-related issues. Understanding these reasons can help in diagnosing the problem and finding an appropriate solution.
Hardware Issues
Faulty Cables and Ports:
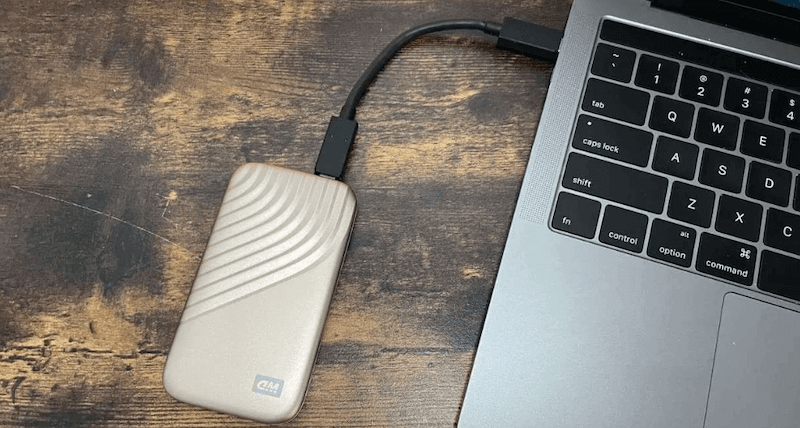
One of the most common hardware-related reasons for an external hard drive not mounting on a Mac is faulty cables or ports. The USB or Thunderbolt cable that connects the hard drive to the Mac can become damaged or worn out over time, leading to an unstable or non-existent connection. Similarly, the ports on either the Mac or the hard drive can become dirty or damaged.
How to Diagnose and Fix:
- Inspect the Cable: Check the cable for any visible signs of damage, such as fraying or bent connectors.
- Test with Another Cable: Use a different cable to connect the hard drive to the Mac. If the drive mounts with the new cable, the original cable is likely the issue.
- Check the Ports: Examine the ports on both the Mac and the hard drive for any debris or damage. Use a can of compressed air to gently clean the ports.
- Try Different Ports: Connect the hard drive to a different port on the Mac. Sometimes, specific ports may be faulty.
Power Supply Problems:
External hard drives, especially those with larger storage capacities, often require their own power source to function correctly. If the power supply is insufficient or faulty, the drive may not mount.
How to Diagnose and Fix:
- Check the Power Adapter: Ensure that the external hard drive's power adapter is plugged in securely and is functioning correctly. If possible, test the adapter with another compatible device.
- Try a Different Power Outlet: Sometimes, the issue might be with the power outlet itself. Plug the power adapter into a different outlet to see if it resolves the problem.
- Use a Powered USB Hub: If the external hard drive is drawing power from the Mac via a USB connection, consider using a powered USB hub. This can provide a more stable power supply to the drive.
Software Issues
Corrupted File System:
A corrupted file system is a common software-related reason why an external hard drive might not mount on a Mac. File system corruption can occur due to improper ejection of the drive, sudden power loss, malware, or simply wear and tear over time.
How to Diagnose and Fix:
#1 Use Disk Utility:
- Open Disk Utility: Go to Applications > Utilities > Disk Utility.
- Select the Drive: In Disk Utility, locate your external hard drive in the left sidebar.
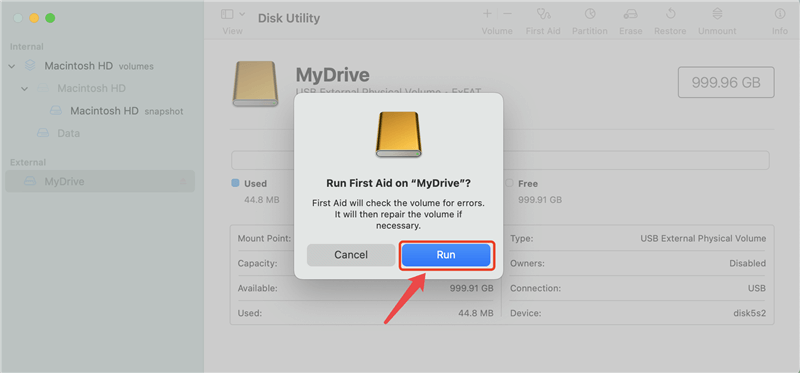
- Run First Aid: Click on "First Aid" and then "Run." Disk Utility will attempt to detect and repair any file system issues.
#2 Use Terminal Commands:
- Open Terminal: Go to Applications > Utilities > Terminal.
- List Disks: Type diskutil list and press Enter. This command lists all connected drives.
- Repair Disk: Identify the identifier of your external hard drive (e.g., disk2s1) and run diskutil repairDisk /dev/disk2s1.
#3 Reformat the Drive: If Disk Utility and Terminal cannot repair the drive, you might need to reformat it. Note that reformatting will erase all data on the drive, so consider data recovery options first if the data is important.
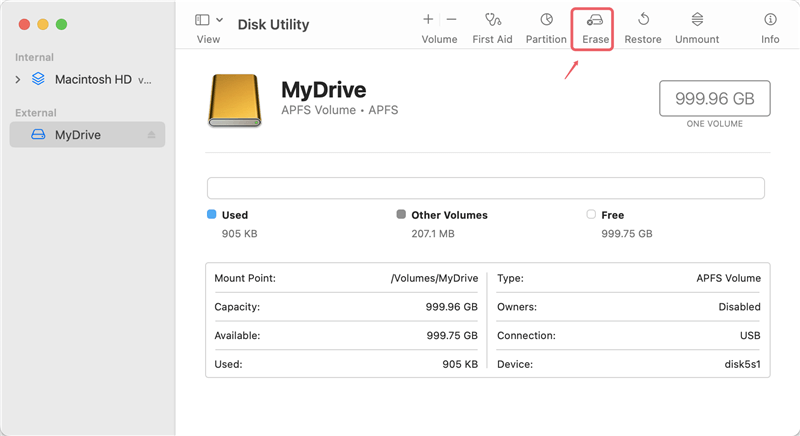
- Select the Drive: In Disk Utility, select the unmounted drive.
- Erase and Reformat: Click on "Erase," choose the desired file format (e.g., APFS, macOS Extended (Journaled)), and follow the prompts to reformat the drive.
Incompatible File System:
Sometimes, an external hard drive may not mount on a Mac due to an incompatible file system. Macs primarily use HFS+ (Mac OS Extended) or APFS file systems, while drives formatted with NTFS (commonly used by Windows) might not mount properly.
You can reformat the drive to APFS, Mac OS Extended or ExFAT. If you want to use an NTFS drive on Mac, you also can try NTFS for Mac tool, such as DoYourData NTFS for Mac. It can help you mount NTFS drive on Mac, add write-read support for NTFS drive on Mac.
How to Recover Data from Unmounted External Hard Drive?
To recover data from a hard drive that is not mounting on a Mac, we can use data recovery software to extract files directly from the file system. As long as your external hard drive shows up in Disk Utility but won't mount, this method will work – just make sure Disk Utility displays the correct size.
For this article, we'll be using Do Your Data Recovery for Mac. It's a well-known tool that's super easy-to-use, which is why we often feature it in our articles to demonstrate data recovery. Here's how to do it:
Step 1. Download and install Do Your Data Recovery for Mac on your Mac and connect the external hard drive to the Mac.
Step 2. Open Do Your Data Recovery for Mac, select the unmounted external hard drive to start data recovery.

Step 3. Once the drive is selected, just click on Scan button. Do Your Data Recovery for Mac will deeply scan the unmounted external hard drive and find all existing files, deleted files and formatted data, etc.

Step 4. When the scan is completed, you can preview all recoverable files. Then select the wanted files, click on Recover button. Choose a location to save the recovered files.

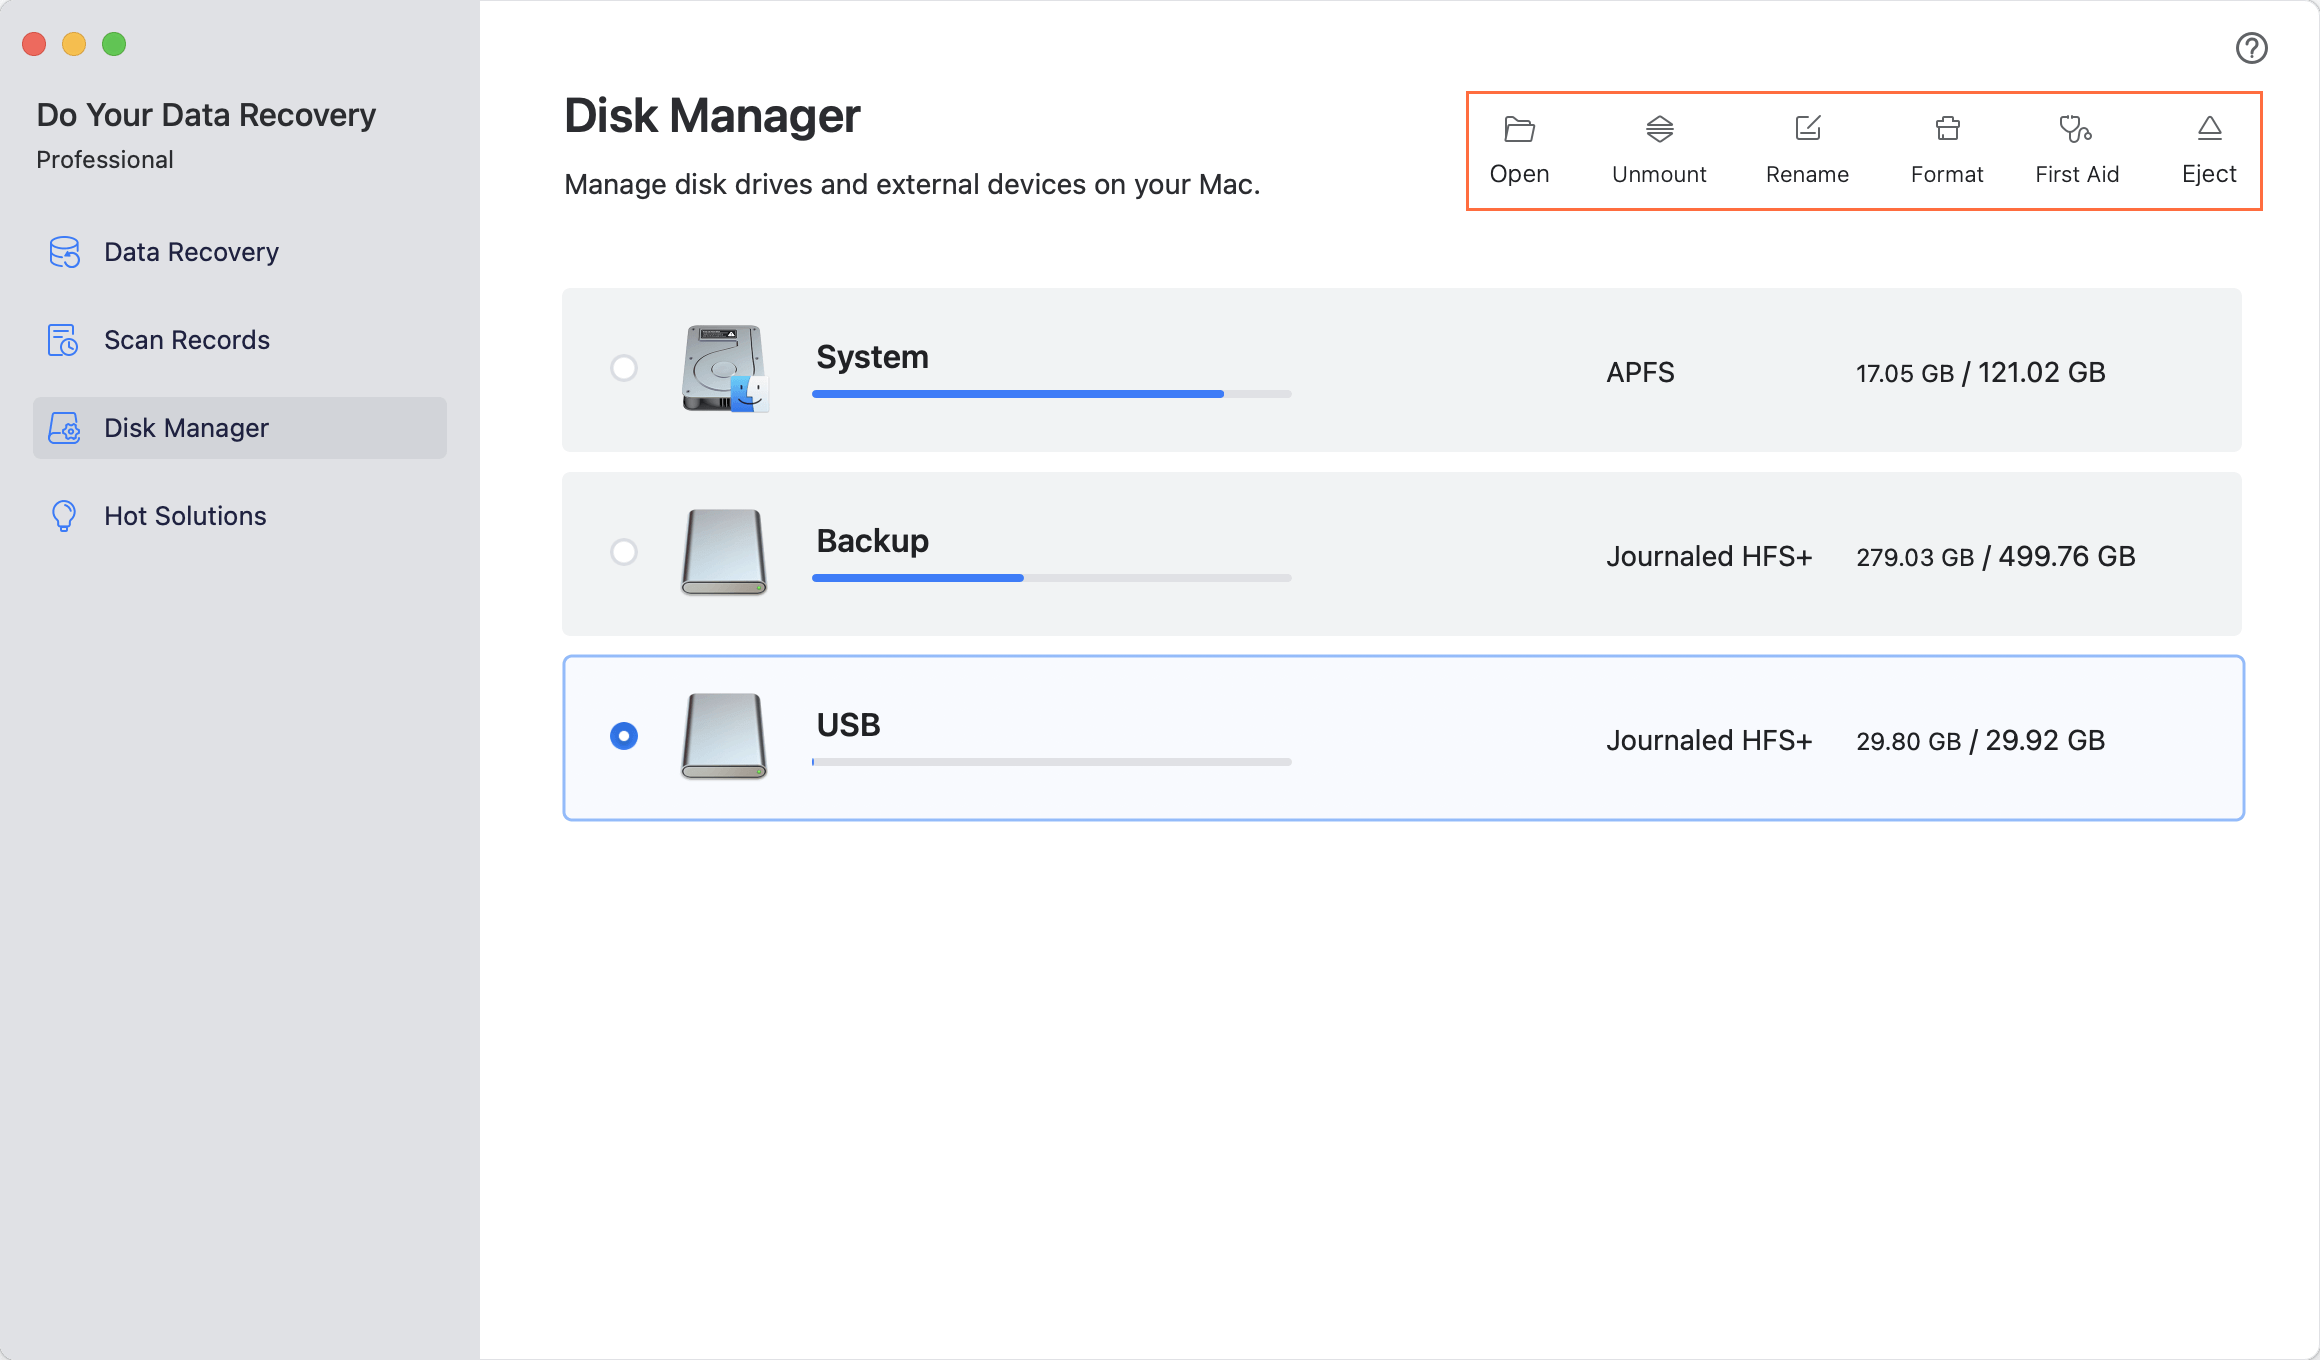
Do Your Data Recovery for Mac also can help you mount external hard drive on Mac, reformat external hard drive, repair damaged external hard drive on Mac, etc.
Just choose Disk Manager, then find and select the external hard drive, click on Mount button.
How to Mount an External Hard Drive on Mac?
Mounting an external hard drive on a Mac is a straightforward process that allows you to expand your storage capabilities, transfer files, or back up your data. Whether you're using a USB, Thunderbolt, or FireWire connection, macOS makes it easy to get your external drive up and running. This guide will walk you through the steps to successfully mount and use your external hard drive on a Mac.
Step 1: Connect the External Hard Drive
Use the Appropriate Cable
- USB Drives: Most external hard drives use USB-A or USB-C connectors. Ensure you have the correct cable for your Mac's ports.
- Thunderbolt Drives: If your drive uses Thunderbolt, use a Thunderbolt cable. Thunderbolt 3 and 4 use USB-C connectors, but ensure it's a Thunderbolt-certified cable.
- FireWire Drives: Older drives might use FireWire. Ensure your Mac has a compatible port, or use a FireWire-to-USB adapter.
Plug It In
- Connect the external hard drive to your Mac using the appropriate cable.
- If the drive requires external power, ensure it's plugged into a power source.
Step 2: Wait for the Drive to Appear
Automatic Mounting
- After connecting the drive, macOS should automatically detect and mount it.
- You should see the drive icon appear on your desktop and in the Finder sidebar under "Locations."
Manual Mounting (if necessary)
If the drive does not appear automatically, you might need to mount it manually:
- Open Disk Utility:
◎ Go to Applications > Utilities > Disk Utility, or search for "Disk Utility" using Spotlight. - Locate the Drive:
◎ In Disk Utility, you’ll see a list of internal and external drives on the left sidebar.
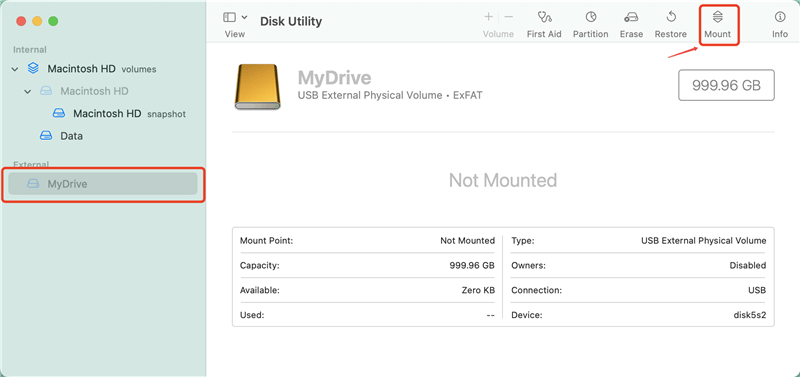
◎ Locate your external hard drive. It will usually be listed under the "External" section. - Mount the Drive:
◎ Select the external hard drive from the list.
◎ Click the "Mount" button in the toolbar if it’s not already mounted. This will make the drive accessible.
Step 3: Access and Use the Drive
Accessing the Drive:
- Once mounted, you can access the drive like any other storage device.
- Double-click the drive icon on your desktop or select it from the Finder sidebar to open it.
- You can now drag and drop files, create new folders, and organize your data as needed.
Using the Drive:
- File Transfers: Copy files between your Mac and the external drive by dragging and dropping.
- Backups: Use software like Time Machine to back up your Mac to the external drive. To set this up, go to System Preferences > Time Machine and select your external drive as the backup disk.
- Media Storage: Store large media files, such as photos, videos, and music, to free up space on your internal drive.
Step 4: Eject the Drive Safely
Before disconnecting your external hard drive, it’s crucial to eject it properly to avoid data corruption:
- Eject via Finder:
◎ Right-click the external hard drive icon on your desktop and select "Eject." - Eject via Finder Sidebar:
◎ Click the "Eject" button next to the drive's name in the Finder sidebar. - Eject via Disk Utility:
◎ Open Disk Utility, select your external hard drive, and click the "Unmount" button.
Wait for the drive’s icon to disappear from the desktop or Finder before physically disconnecting it.
Troubleshooting Tips
Drive Not Recognized:
- Check Connections: Ensure the cable is securely connected to both the drive and your Mac.
- Try Another Port: Use a different USB or Thunderbolt port on your Mac.
- Check Power Supply: If the drive requires external power, ensure it's plugged in and turned on.
- Update macOS: Make sure your Mac is running the latest version of macOS, as updates can resolve compatibility issues.
Drive Needs Formatting:
If the drive is not formatted for macOS, you may need to format it:
- Backup Data: Formatting will erase all data on the drive, so back up any important files first.
- Open Disk Utility: Go to Applications > Utilities > Disk Utility.
- Select the Drive: Choose your external hard drive from the list.
- Erase and Format:
◎ Click the "Erase" button.
◎ Choose a format. For general use, "Mac OS Extended (Journaled)" or "APFS" is recommended.
◎ Click "Erase" to format the drive.
Drive Still Not Mounting:
If your drive still doesn't mount, it might be a hardware issue. Try the drive on another computer to see if it's recognized. If not, the drive may need repair or replacement.
Final Thoughts!
External hard drives are essential tools for Mac users, providing additional storage and backup solutions. However, when an external hard drive fails to mount on a Mac, it can lead to significant frustration and concern over potential data loss. Understanding the common causes - whether hardware-related, software-related, or system-related - can help you diagnose and resolve the issue efficiently.
In this article, we covered various troubleshooting steps, including basic checks, using Disk Utility, Terminal commands, and third-party tools. Additionally, we discussed the importance of addressing file system corruption and file format compatibility issues. For those situations where data loss is a real threat, we also explored data recovery options and the potential need for professional services.
Taking preventive measures, such as regularly backing up your data with Time Machine, safely ejecting external drives, and maintaining your system's health, can help avoid future mounting issues. By following these guidelines, you can ensure that your external hard drive remains accessible and your valuable data is protected.
Remember, acting promptly when an external hard drive fails to mount can make a significant difference in preserving your data. With the right knowledge and tools, you can mitigate the risks and maintain the reliability of your storage solutions on your Mac.
Do Your Data Recovery for Mac
Do Your Data Recovery for Mac, one of the best Mac data recovery software, can help you easily and completely recover deleted, formatted or lost files from Mac HDD/SSD, external HDD/SDD, USB drive, memory card, digital camera, or other storage devices.
Written & Updated by Anderson
Anderson is a big fan of computer technology. He joined DoYourData in 2018 and has been writing 200+ articles about disk clone, data recovery, computer technology, data erasure, Mac system optimization, etc. He loves music, movie, and reading. In his spare time, he’s studying music and playing tennis.