How to Reset Mac SMC
Follow this guide to reset Mac SMC to fix issues and make get a new start with your Mac, no data loss.
Here are proven solutions to fix external hard drive not mounting on Mac issue. If the external hard drive is a NTFS drive and won’t mount on your Mac, just use DoYourData NTFS for Mac tool to help you quickly mount the drive and enable writable for the drive so you can use the NTFS drives on your Mac without any limitation.
![]() Updated by Nancy on February 13, 2026
Updated by Nancy on February 13, 2026
Quick Navigation:
Not seeing your external hard drive on your Mac is very frustrating. Don't let the problem with mounting get in the way of getting to your vital info! Imagine how much better it would be to quickly fix this problem and be able to view your files without any issues again.

When your external drive doesn't show up, this guide will walk you through the most common problems and give you valuable tips on how to fix them. We have easy-to-follow steps, from checking the physical links to looking into software updates. Therefore, if you want to eliminate the growing issue for good and use your Mac to its fullest, let's get started!
Ensure that both ends of the USB or Thunderbolt cord connecting the external hard drive to your Mac are securely plugged in. Use a different cable to ensure that the link is working. It would be helpful to test the portable hard drive on another computer.
Go to Applications > Utilities > Disk Utility to open Disk Utility. Select the external hard drive. Check the format of the file system. If the format doesn't work with macOS (like NTFS), you might need to change the drive to something that does, like exFAT or APFS, macOS Extended (Journaled). Back up critical files before erasing the drive because it will delete everything.
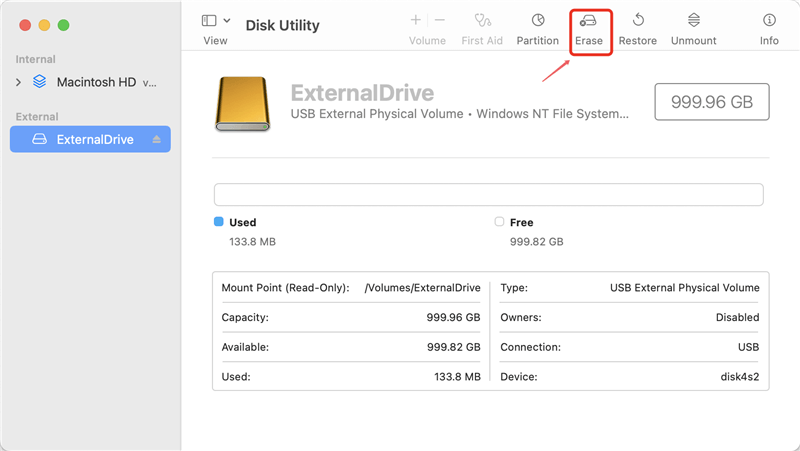
Step 1. Open Disk Utility and find the external hard drive on the left bar.
Step 2. Select the external hard drive, then click on Erase button.
Step 3. Select a file system, then click on Erase button again.
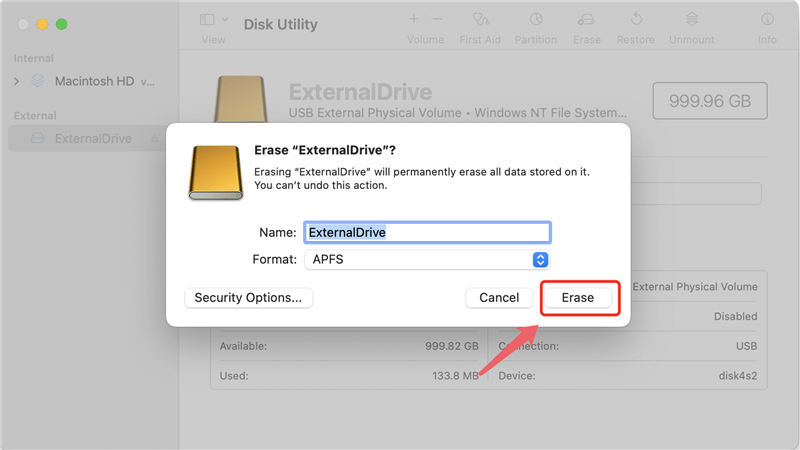
Step 4. Once the process gets finished, click on Done button.

If you want to mount and read-write a NTFS drive on Mac without formatting, you can use a third-party NTFS for Mac tool to help you. Follow the steps below:
Step 1. Download and install the best NTFS for Mac tool - DoYourData NTFS for Mac, then open it from Launchpad.
Step 2. Find the NTFS drive, select it, then click on Mount button.
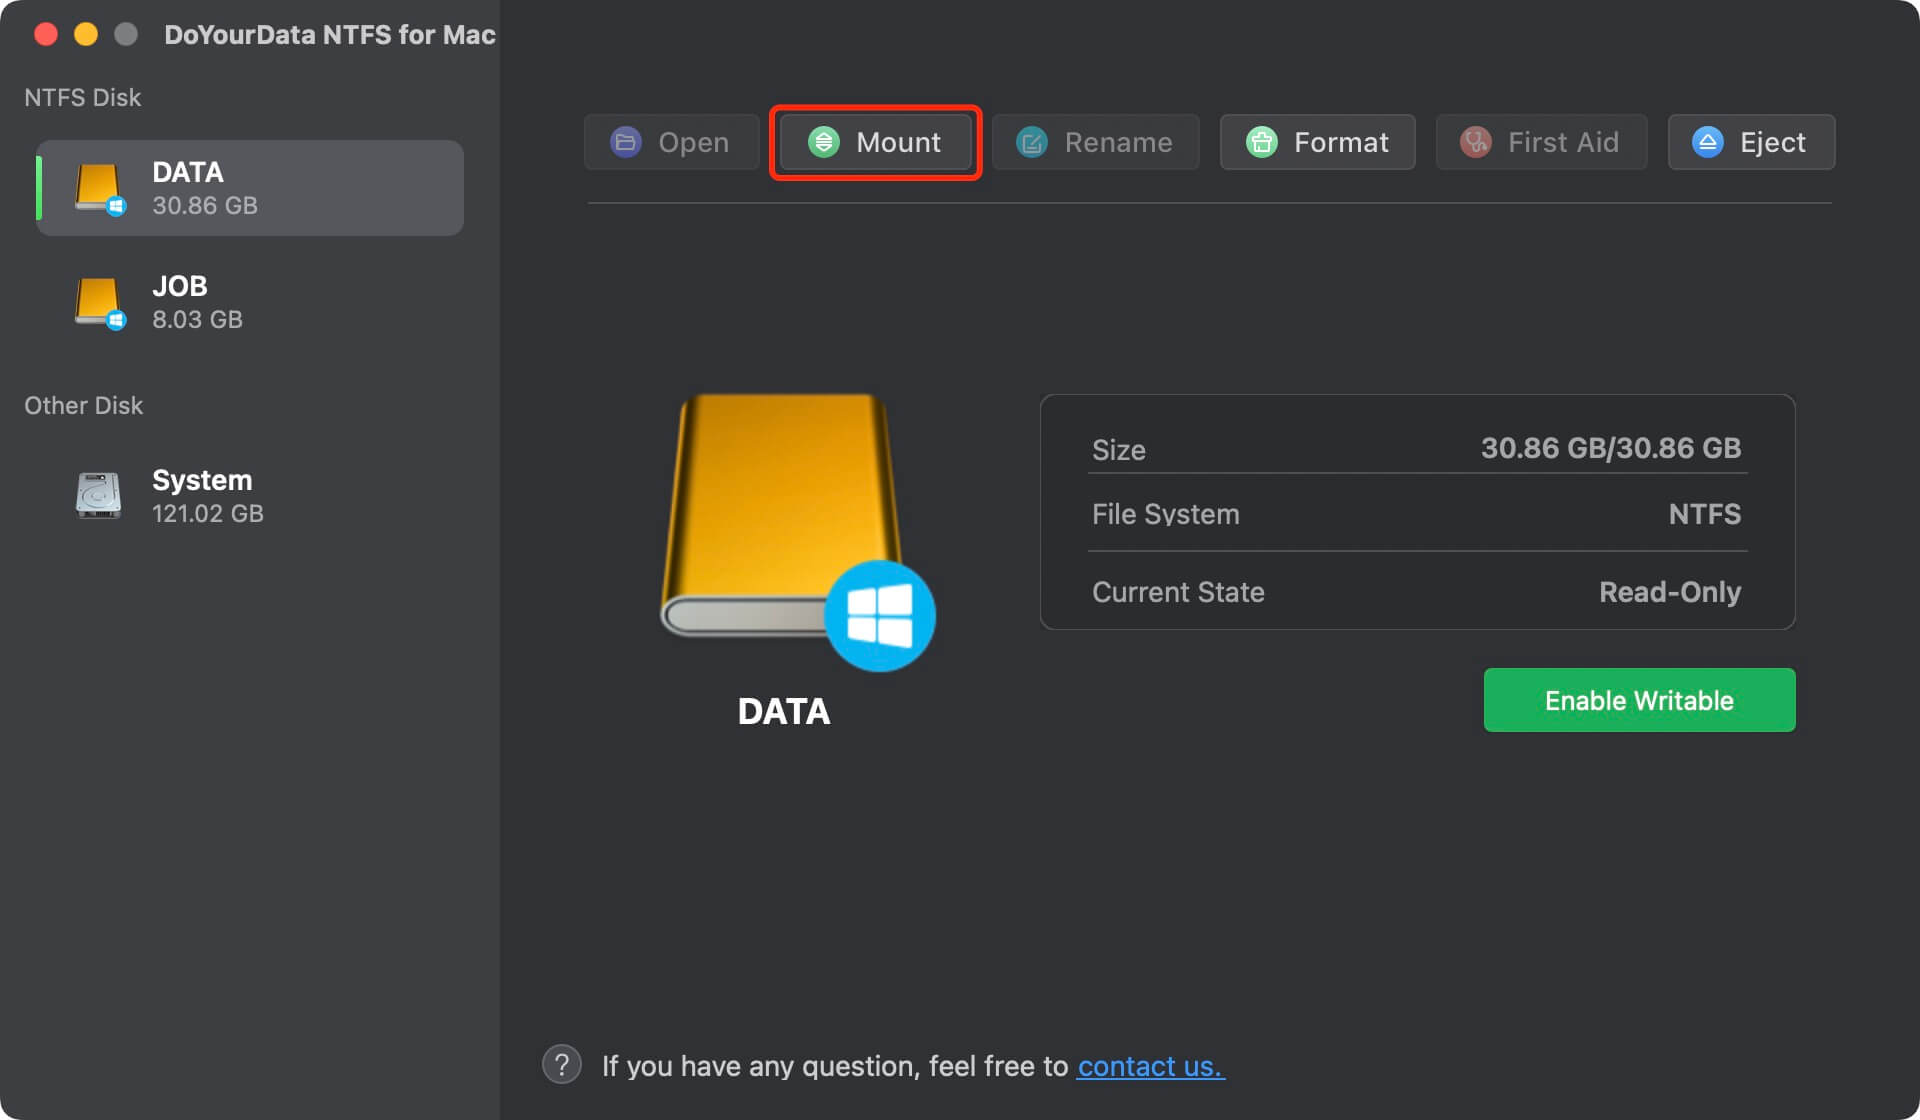
Step 3. To allow your Mac to read-write the NTFS drive, just click on Enable Writable button.

In Disk Utility, choose the external hard drive that is giving you trouble.
Click on Mount button to see if you could mount the external hard drive.
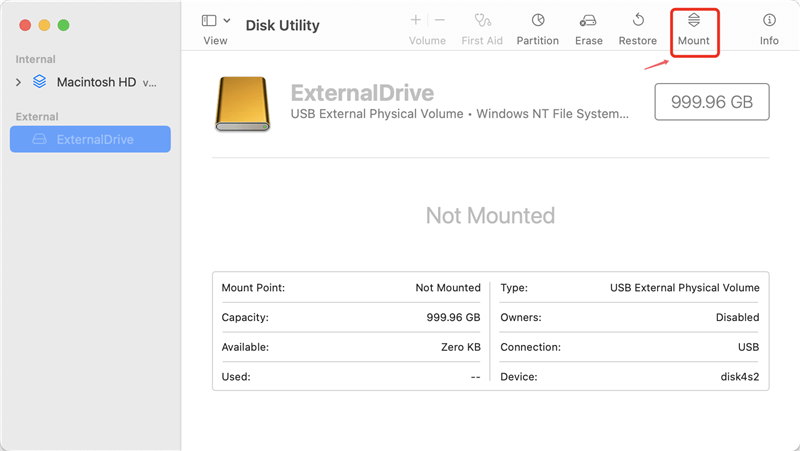
If the Mount button is grayed out, click on First Aid button.
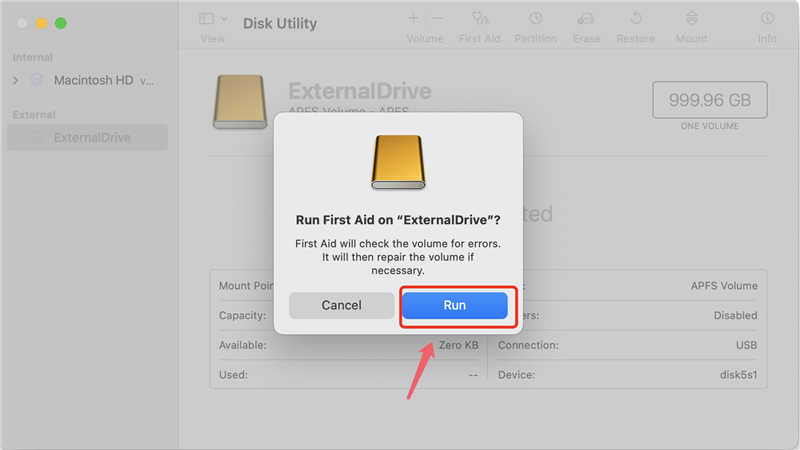
Follow the steps shown on the screen to run First Aid and fix any disk problems it finds.
Resetting the SMC, NVRAM, or Parameter RAM (PRAM) can fix system problems. Look at Apple's official documentation or support materials to reset the SMC and NVRAM/PRAM for your particular Mac model.
How to Reset Mac SMC
Follow this guide to reset Mac SMC to fix issues and make get a new start with your Mac, no data loss.
You should ensure that your macOS and any software you need, like Disk Utility or drivers, are current. If there are updates, install them and then restart your Mac for the changes to take effect.
Connect the portable hard drive to a different computer, like a Windows or Mac. You can use this to determine if the problem is only with your Mac or if the external hard drive is broken.
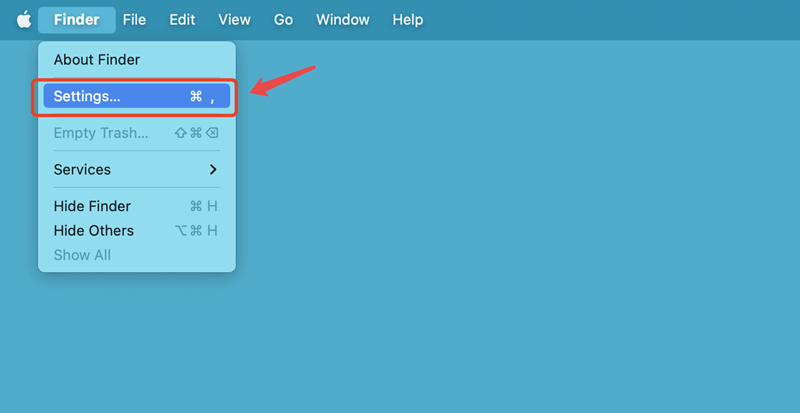
If the external hard drive is mounted in Disk Utility, but it is not showing up on desktop or Finder’s sidebar, open Finder Settings to check if you’ve selected External disks.
Step 1. Open a Finder, then click Finder on Apple menu, choose Settings.
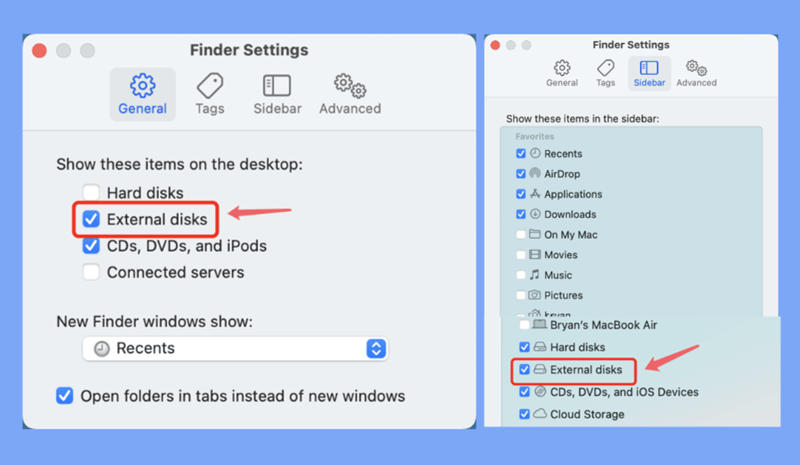
Step 2. Click General and Sidebar, make sure External disks is selected.
Don't freak out if your Mac won't recognize your external hard disk. The solutions listed above will help you repair this disk issue most of the time. You may also utilize Data Recovery if you are concerned about data loss when the drive is unmountable. No matter what kind of disk issue you run across, you should always attempt data recovery in the event of a data loss.
Getting back data from an external hard drive erased on your Mac might seem complicated, but if you follow the steps, you can get your important files back. To get back info from an external hard drive that has been formatted, do these things:
1. Choose trusted software that can recover lost data and works with macOS. Install the software on your Mac. (Here, yo can download Do Your Data Recovery for Mac)
2. Use the right cord or adapter to connect the formatted drive to your Mac. During the recovery process, make sure the link stays stable.
3. Open the data recovery tools that you have on your Mac. The software should be able to find the attached external hard drive. Choose the drive as the one you want to rescue.

4. Start a full or deep scan of the external hard drive that has been formatted. The time this takes may depend on how big and complicated the drive is.

5. Once the scan is done, the program will show a list of recoverable files and folders. Use the preview function to check that the files are correct and valuable before you start the recovery process.

6. Pick the files and folders you want to return from the formatted external hard drive. Pick a safe spot on your Mac or another storage device to save the data that you've retrieved.
7. Let the software finish recovering the files. Monitor the process and ensure all chosen files are retrieved without problems.
8. Once the recovery process is complete, check the restored data carefully to ensure it is correct and complete. Open files and folders to ensure they can be reached and are finished.
9. As a safety step, you should copy the recovered data to a different storage device or in the cloud to avoid losing it again.
Problems with an external hard drive not mounting on your Mac can be annoying. But if you follow the proper steps to fix the issue, you can return to your essential files. We've discussed several ways to resolve this problem, from checking the hardware connections to using data recovery software for formatted drives. By doing these things and regularly backing up your files, you can ensure that your external storage devices work better and get the most out of your Mac.
Method 1: Check The Connecting Cable
The first step is to make sure it's connected; however, the connection might be the problem. One of the most common reasons drives fail to mount is that the drive isn't receiving enough power.
Older Macs may need a USB power cord that separates into two USB ports to provide sufficient power to the disk. Try to connect the drive with an alternative cord to see if it resolves the problem. Make sure the port on your Mac isn't the problem, too. Try using a different port to connect.
Method 2: Restart Mac
Restarting your Mac is another easy cure. You should use this method instead to fix any system-related issues that prevent detachable disks from showing up on the desktop or Finder.
Method 3: View The Preferences or Settings
Is your external hard disk not showing up in the Finder or on the desktop? That's a simple problem to resolve.
Method 4: Using Disk Utility
Using Disk Utility to resolve a wide range of Mac issues, including those involving external drives, is often the most effective solution. This program may assist you in accessing and repairing various disk problems by examining partition Macs and doing further checks across the system. An external hard disk may be mounted using the following instructions:
Your external hard drive may not display in Disk Utility if you notice that the whole disk is missing. This indicates that physical damage has occurred to the hard drive. A local data retrieval service is needed in this instance. It's possible to use another method if the Mount option is grayed out yet the external hard disk is visible in Disk Utility.
DoYourData NTFS for Mac
DoYourData NTFS for Mac is a safe, powerful and easy-to-use NTFS for Mac tool. It allows macOS to read & write files on NTFS drives without any limitation. It is also a comprehensive disk management tool for Mac to mount/unmount disk, format disk, repair disk, read-write disk...on Mac.
Written & Updated by Nancy
Nancy works as a tech columnist at DoYourData. She is familiar with macOS and Windows OS and writes computer solution, data recovery, disk clone, data erasure articles for DoYourData. She is a big fan of Mac products and is fond of testing utilities software (such as cleaner, recovery, eraser, NTFS for Mac, video editor, etc) on Mac.