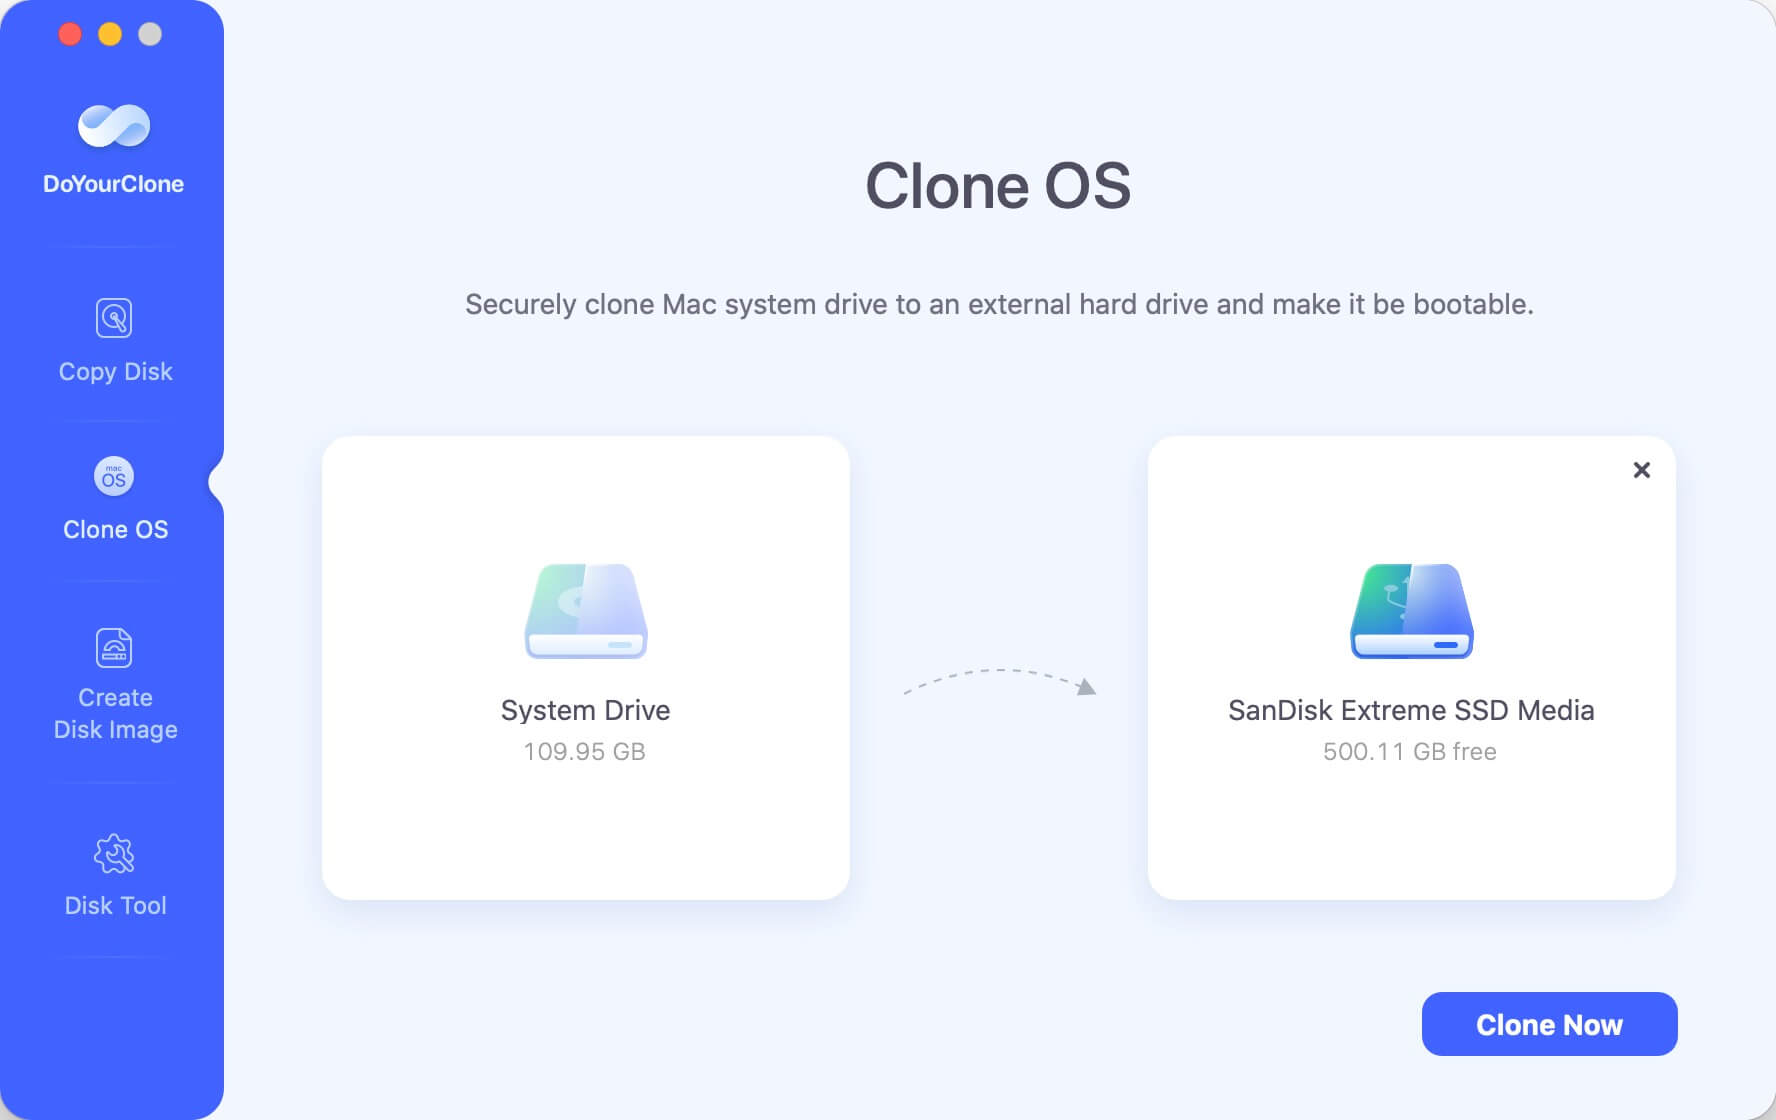
How to Create A Bootable Clone Backup for Mac
Follow this guide to make a full backup of your Mac. Clone Mac startup disk to an external hard drive and make it be a bootable drive. Read more >>
| Wipe Hard Drive on Mac | Disk Utility | Erase Assistant | DoYourData Super Eraser |
|---|---|---|---|
| Yes, in macOS Recovery mode | Yes | Yes | |
| NO | NO | Yes | |
| Yes | NO | Yes | |
| NO | NO | Yes, the erased data is gone forever, can’t be recovered by any method. |
Your Mac and any connected external hard drives could be storing sensitive information. Your private information, including emails, contacts, documents, and more, is stored on your Mac's hard drive. That isn't the case if you use an external hard drive solely for storage, as for your music and video library, but it is the case if you use an external hard drive solely for backups.
It is important to securely wipe any data stored on a Mac or external device (external SSD, HDD, memory card, digital camera, etc) before discarding it or selling it. All three types of storage media - hard drives, flash drives, and solid-state drives - will be addressed in this piece. In this article, we will introduce three methods to wipe a hard drive on macOS Tahoe, Sequoia, Sonoma, Ventura, Monterey, Big Sur, Catalina...
Before reinstalling macOS from scratch, you should always back up your system completely. You have the option to back up to iCloud from within the OS. Alternatively, you can manually back up your files, such as documents, photographs, and movies, to an external hard disk. If you start the reset procedure, you will lose all your information. The Erase Assistant in macOS allows you to restore the system to its original state easily.
A disk cloning program, such as DoYourClone for Mac, can be downloaded to create a bootable clone backup. With the aid of this program, you may generate a bootable copy of your Mac that is an exact clone of the original.
How to Create A Bootable Clone Backup for Mac
Follow this guide to make a full backup of your Mac. Clone Mac startup disk to an external hard drive and make it be a bootable drive. Read more >>
All your data can be transferred from your old Mac or an older Time Machine backup if you already have your new Mac. You shouldn't sell your old Mac just yet if you haven't received your new one. Make sure you back up your information in case something occurs to your old PC before you can transfer all you need to your new Mac.
Unless it's the operating system, the new owner of your Mac won't be able to access the programs you've installed on it because they are licensed to you. Be sure to sign out of all accounts where your personal information is stored to prevent any problems should the new owner try to download and install software for which you have a license.
Launch the Music app and log out of your account.
Launch the Mac's music player.
To access your account, select it from the menu on the left.
Choose to log out.
You should log out of any active iTunes and iCloud accounts before selling your Mac. The Mac App Store, iTunes, Apple Music, iCloud Photos, Mail, Calendar, and iMessages are all part of this category, as are Apple TV+ and Apple Arcade in more recent versions of macOS.
Sign out of all of these accounts before wiping your Mac. Despite its seeming simplicity, several users still don't know how to look under System Settings > Internet Accounts. Verify that every one of the accounts on this list is completely logged out.
Disk Utility is a built-in disk management tool in macOS Tahoe and other macOS versions. It can help you erase a hard drive on your Mac:
Press Command+Space key to open Spotlight Search. Enter Disk Utility, then you can quickly open Disk Utility on your Mac.

Connect the external hard drive to your Mac. Then find it in Disk Utility.
Select the external hard drive, and click on Erase button.
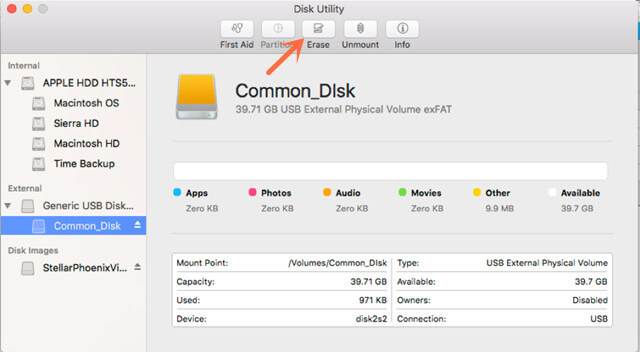
Give it a new name and select a file system. You also can click Security Options to choose a suitable data erasure level.
Then click on Erase button again. It will securely erase the selected external hard drive. When it gets finished, click on Done button.
Restart your Mac and continue press and hold the Power button. Until you see Loading startup options. Then the Mac will boot into macOS Recovery mode.
Select Options and click on Continue button.
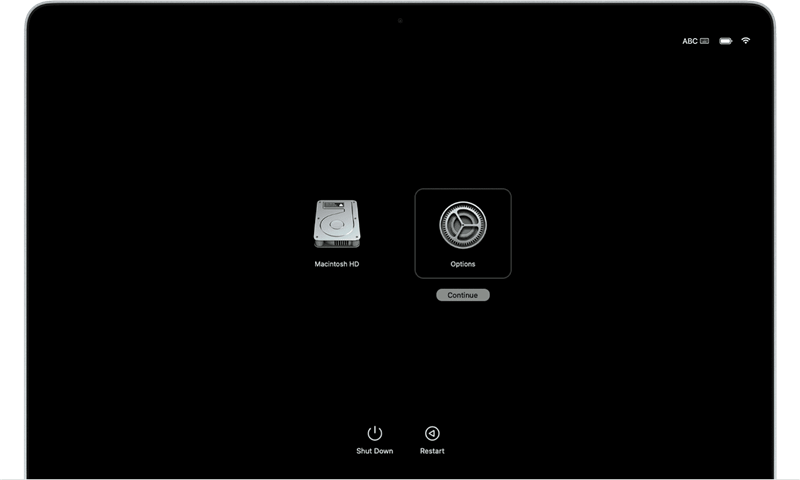
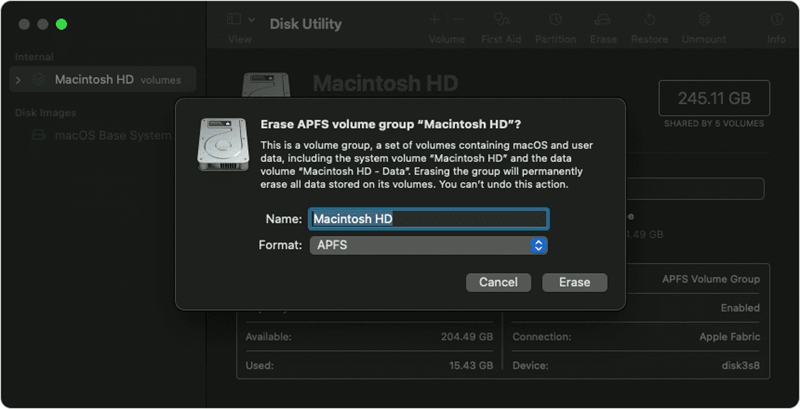
From the utilities window, select Disk Utility and click Continue.
Then select the Mac startup disk and select Erase. Follow the onscreen instructions to erase the startup disk. Then go back to Utilities window, you can reinstall macOS on your Mac.
These options provide a clean slate for your Mac without requiring you to reinstall the operating system. You'll need macOS Monterey or later (macOS Tahoe included) to follow these instructions. Macs equipped with Apple silicon or a T2 Security Chip are required for these methods to succeed. How to erase everything on macOS:
First, Go to your computer's System Settings by clicking the Apple menu.
Second, navigate to General and then Transfer & Reset.
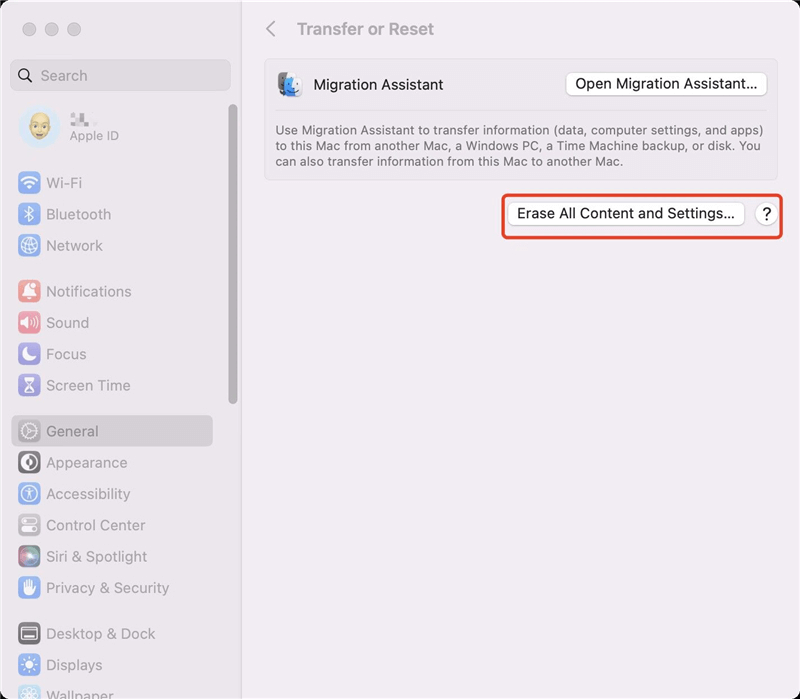
The third step is to select Erase All Contents and Settings and input your password.
Fourth, you can use Time Machine to make a copy of your files before erasing them.
Finally, follow the wizard to erase all data on the Mac and reinstall macOS after erasing data.
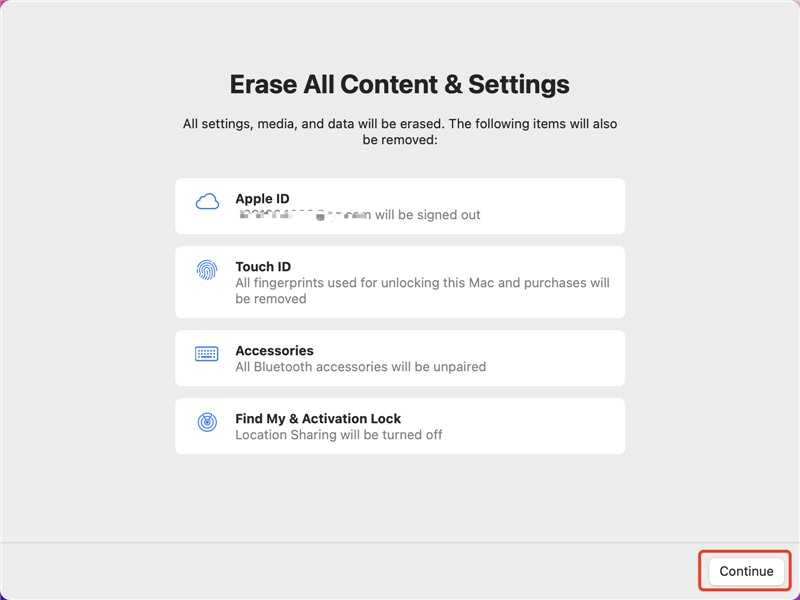
Note: With the two methods above, you can wipe startup disk or external hard drive after upgrading to macOS Tahoe. But, the erase data is not lost permanently and can be recovered by data recovery software - such as Do Your Data Recovery for Mac. If you want to permanently wipe all data from a hard drive in macOS Tahoe, just try the third method.
Before you sell or donate your Mac/external hard drive, you’d better permanently wipe all sensitive data off to prevent potential data recovery. DoYourData Super Eraser for Mac is a powerful, safe and easy-to-use data erasure application. It supports to permanently erase data from Mac local hard drive, external HDD/SSD, SD card, digital camera, USB flash drive, etc.
This powerful Mac data erasure software offers certified data erasure standards including U.S. Army AR380-19, DoD 5220.22-M ECE. Once the data on the hard drive is erased by DoYourData Super Eraser for Mac, the data is gone forever, can’t be recovered by any data recovery method.
It offers three flexible data erasure modes:
Follow the steps below to wipe a hard drive on Mac, please note that all data (existing data, deleted/lost data included) on the hard drive will be permanently erased. You’d better make a backup before you wipe the hard drive.
Step 1. Open DoYourData Super Eraser for Mac and choose data erasure mode - Wipe Hard Drive.

Step 2. Select the target hard drive, then click on Wipe Now button to securely and permanently wipe all data from it.
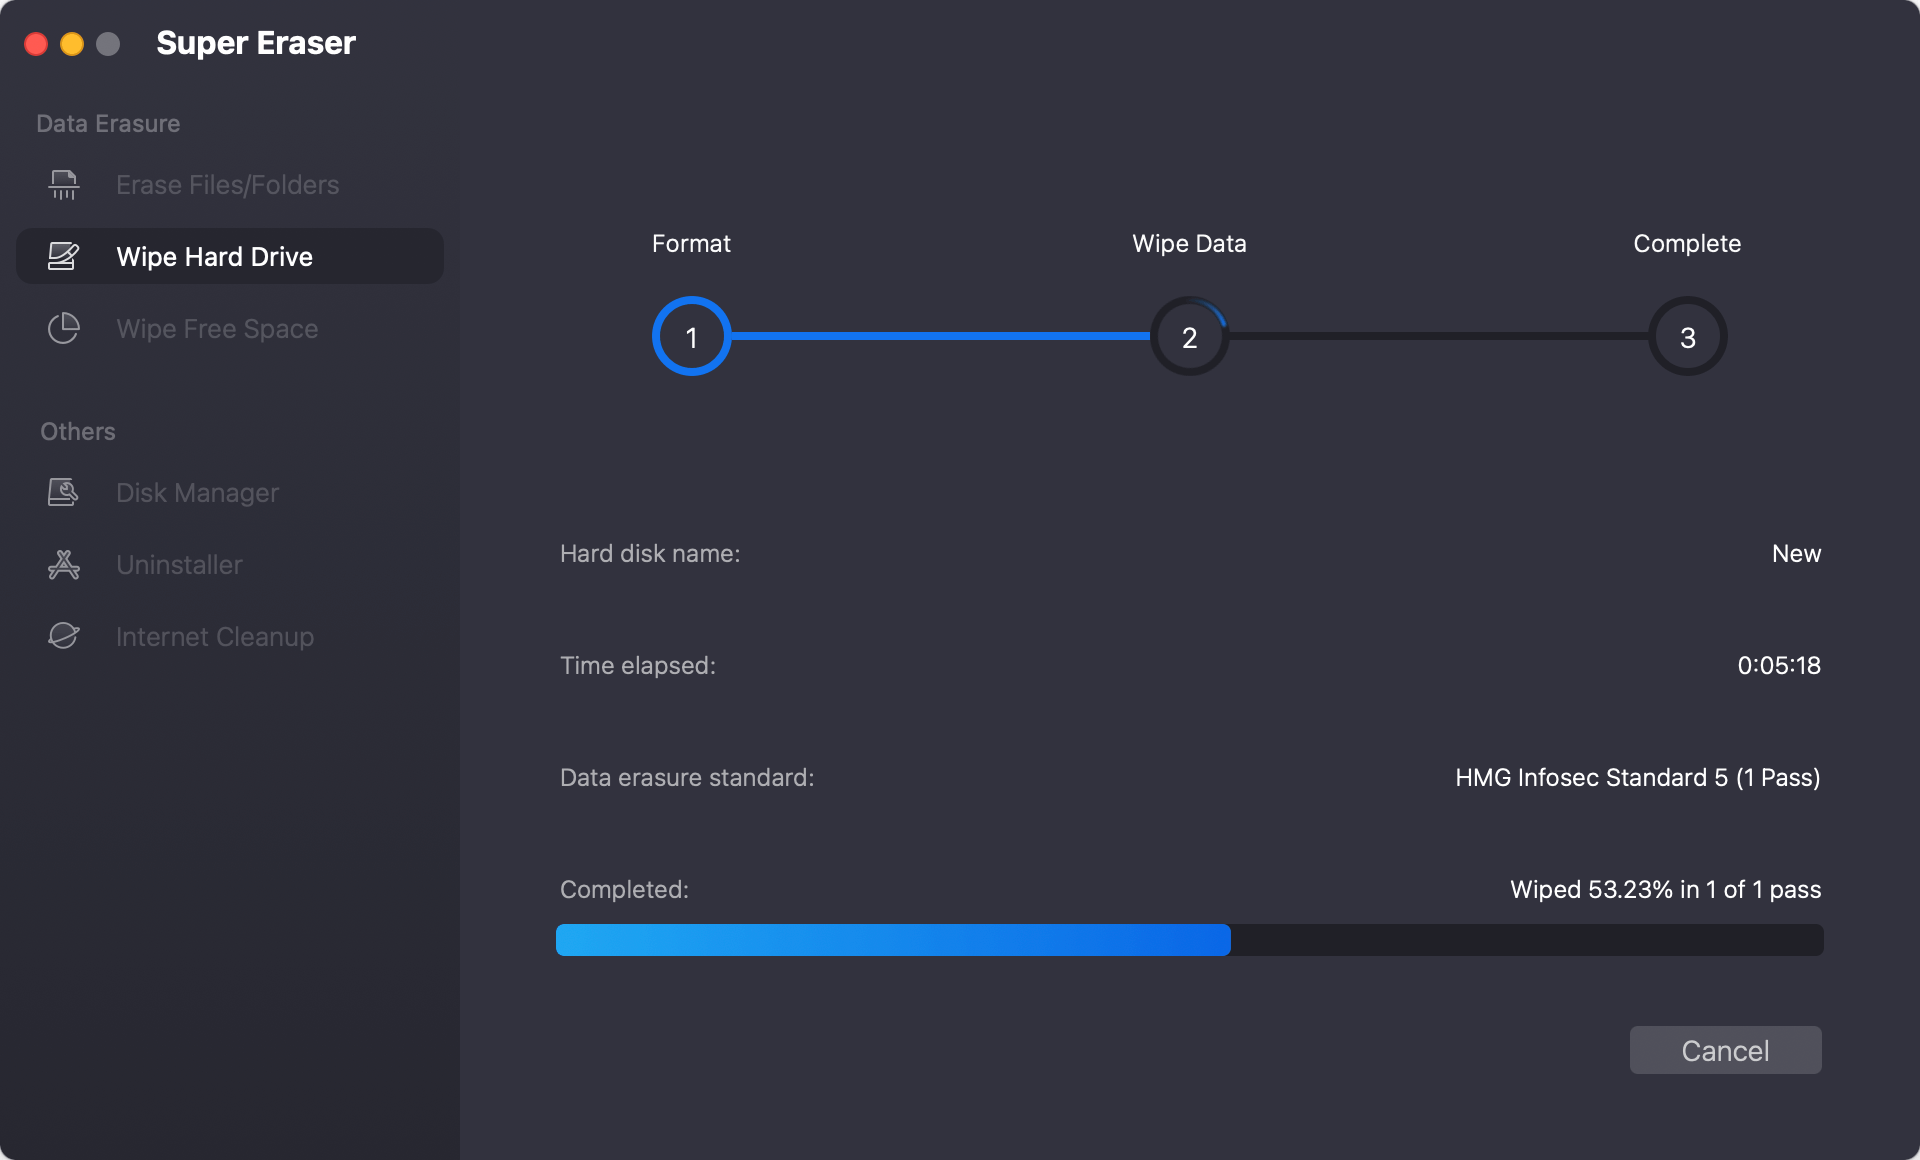
You’d better permanently destroy all data from the hard drive before you sell your Mac or external device. Disk Utility, Data Super Eraser and new Erase Assistant can help in wiping a hard drive on Mac.
Newly added to macOS Thaoe, Sequoia, Sonoma, and Ventura is the option to permanently delete all data and settings. Let's say you've been putting off erasing your Mac's content and Settings due to the time-consuming and inconvenient procedure required by earlier macOS versions. In such a case, you can relax and test the cutting-edge features introduced in macOS Tahoe, Sequoia, Sonoma, and Ventura. A data erasure tool can be downloaded to permanently delete all data from your Mac before selling it.
