Quick Navigation:
🟧🟨🟩 Summary: This article will show you how to securely erase SanDisk USB drive and wipe the data permanently. You can use the system built-in tools Disk Utility and Terminal to do the job. Also, another easy and flexible solution will be introduced to wipe SanDisk USB data permanently using DoYourData Super Eraser.

It is important to wipe a SanDisk USB drive on a Mac to protect data, keep the drive in good shape, and use it for something else. If you want to sell your drive, fix performance problems, or start over, erasing all the data ensures that all private information is gone for good and the drive is in perfect working order.
This detailed guide will show you several safe ways to delete everything from your SanDisk USB drive using both trusted third-party Mac disk wipe software and tools that come with macOS, such as Disk Utility and Terminal. Follow these steps to clean your USB drive so it's ready for new data or a new owner. You will be able to find a way that works for you, no matter how skilled you are.
Methods to Wipe SanDisk USB Drive on Mac
The first choice to wipe SanDisk USB drive is using the system built-in tool Disk Utility. It can erase the drive and offers the security options to wipe data from the drive. If you are comfortable with command lines, you can also choose to securely erase the USB drive with Terminal. At last, the professional and comprehensive third-party disk wiping tool is a better solution for most users.
👨🔧 Method 1. Erase SanDisk USB Drive in Disk Utility
If you can't delete the USB drive on a Mac, you need to know how to do this right. Disk Utility could erase the chosen disk across your whole Mac. Here are some easy steps you can take to do this:
Step 1: On your Mac, open Finder and go to the "Applications" tab. In the "Utilities" folder, find "Disk Utility" in the list of programs and open it in a new window.

Step 2: When it opens, look for the SanDisk USB drive on the left side of the window. Clicking on it takes you to the menu at the top of the other window. If you click the list's Erase button, a new window will appear.
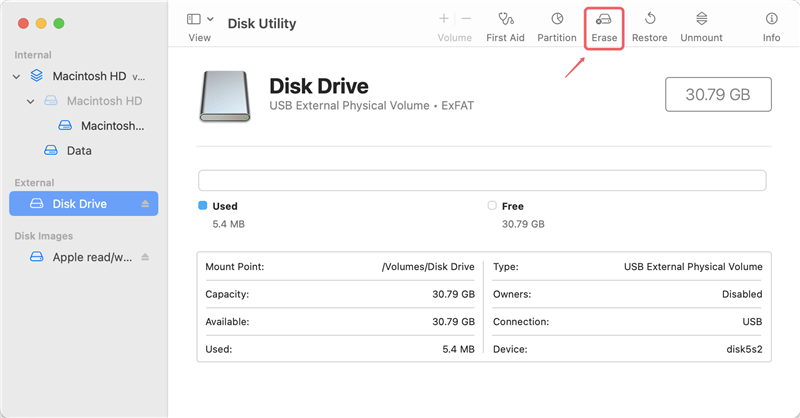
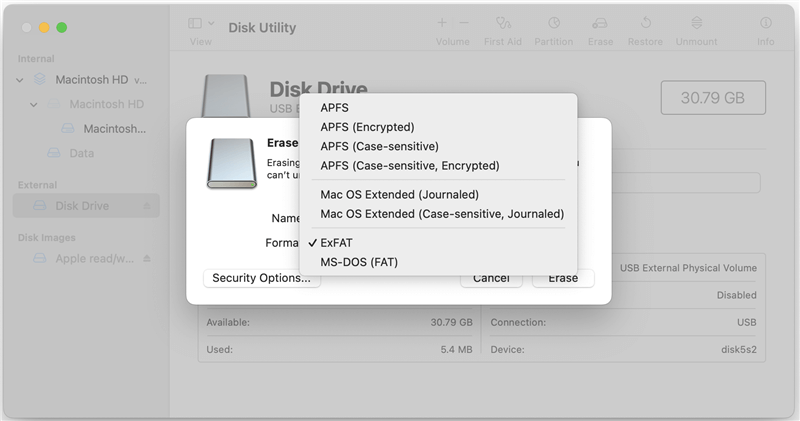
Step 3: Set the "Name" and "Format" for the drive after Mac erases it. You can choose a proper file system based on how you will use the USB drive.
Step 4. To wipe the data from the drive, you also need to choose the Security Options. From where you can choose to wipe the data while reformatting the drive.
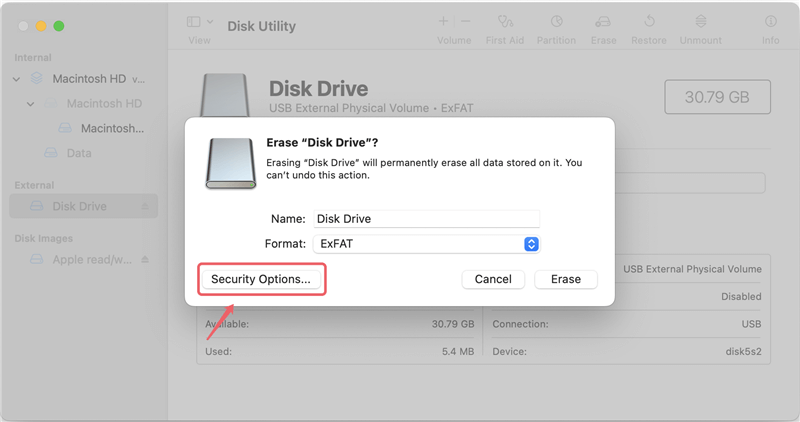
Then change the security level from "Fastest" to "Most Secure". Note that if you choose "Fastest" option, it will not wipe the data, but just reformat the drive.

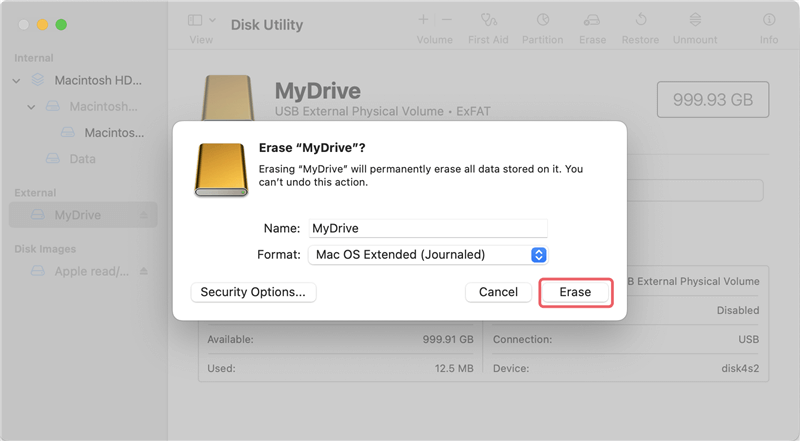
Step 5. After setting these values, click Erase to start the process. Then the SanDisk USB drive will be reformatted and the data will be wiped.
👨🔧 Method 2. Use Terminal Commands to Wipe SanDisk USB drive.
We've discussed problems that can happen when a drive isn't mounted, or a USB drive isn't working right with the Disk Utility. You can eliminate these issues by wiping the USB drive with Terminal instructions. Here are some easy ways to do this:
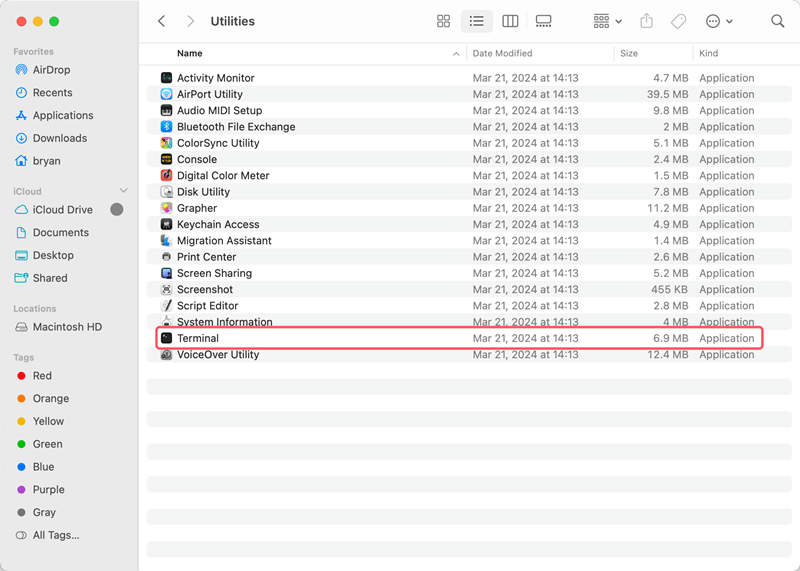
Step 1: Open the Finder on your Mac and go to the "Applications" folder. In the list of apps, find "Terminal" in the "Utilities" folder and open the command line on your computer.
Step 2: Type the following command to see a list of all the drives on your Mac and find the disk number of your SanDisk USB drive:
diskutil list
Step 3: Make sure you have written down the disk number for the SanDisk USB drive. After that, erase the disk with this code line. We will consider erasing the drive by overwriting with all "0".
diskutil secureEerase 0 /device/diskX
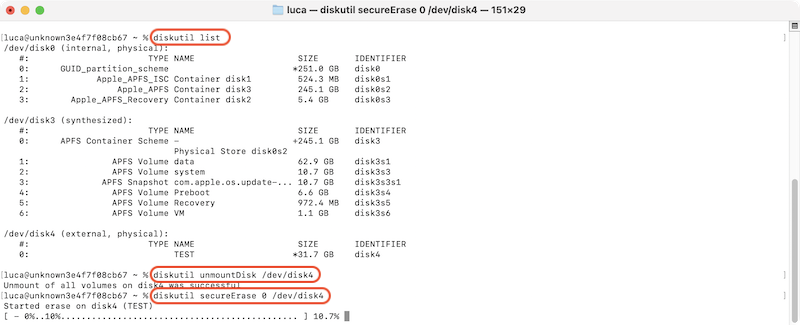
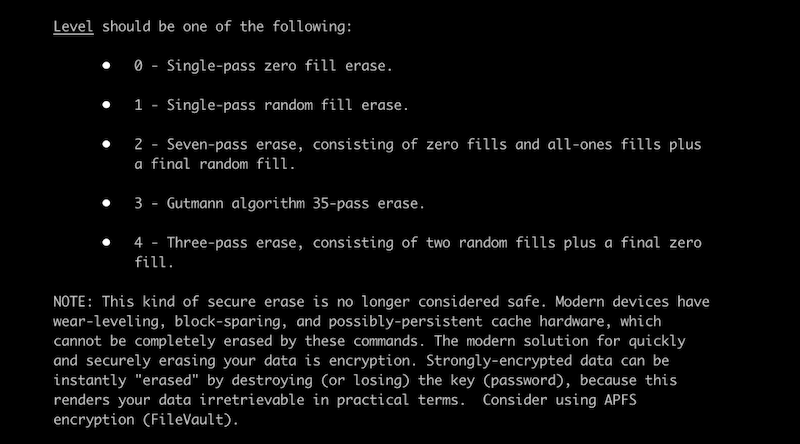
Tips: You can replace 0 with 1, 2, 3, 4 which offers higher security level for erasing data. Ensure to replace X with the correct number of the SanDisk USB drive on your Mac.
👨🔧 Method 3. Wipe SanDisk USB Drive with Third-party Software
If you want more secure and comprehensive, or easier data erasure features, you can try the third-party data erasure software. These tools often provide more data sanitation algorithms and advanced features.
Here we recommend the easy-to-use tool DoYourData Super Eraser for Mac to erase data permanently from SanDisk USB drive. The software provides 3 data wiping mode that can shred individual files or folder, wipe enter drive, or wipe free space of SanDisk USB drive.
DoYourData Super Eraser for Mac
- Secure and effective data wiping tool for macOS.
- Wipe data from SanDisk USB drive permanently.
- 3 data erasure modes for different requirements.
The tool is very simple and easy to handle. Just follow the wizard step by step, you can easily wipe the specified files or all data from a drive on Mac. To wipe a SanDisk USB drive with Super Eraser, you can follow the steps below:
Step 1. Connect your SanDisk USB drive to the Mac. Download and install the software to your computer. Run the software from launchpad and change to the mode Wipe Hard Drive and select the USB drive.

Step 2. Click Wipe Now to continue, then you can select a data sanitation algorithm from the list to wipe data in different security level.

Step 3. After selecting the data erasure standard, proceed the data wiping by clicking the Continue button.
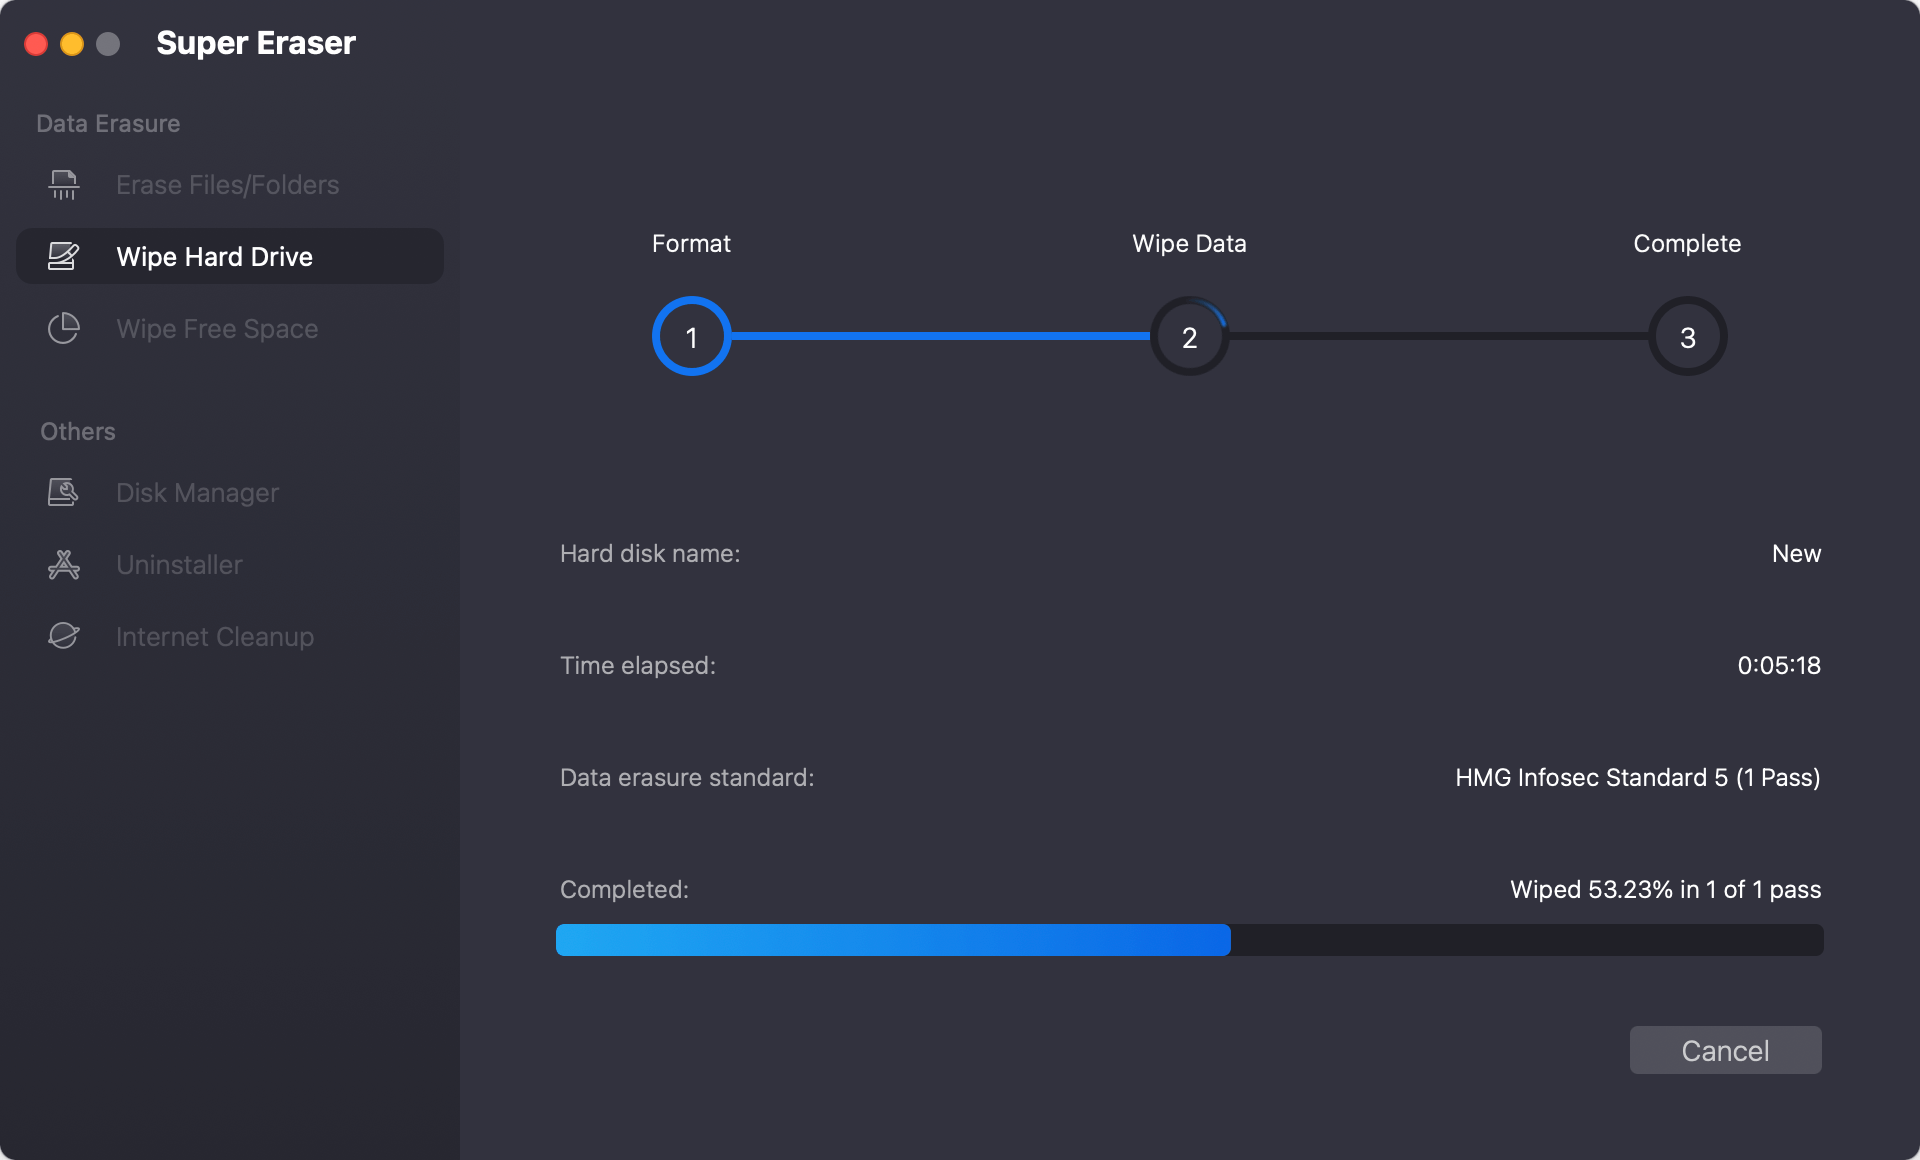
After the process is finished, all the data on the SanDisk USB drive is gone forever and no recovery tool can recover the data. Also, the drive is reformatted after wiping data and you can reuse the drive directly.
Tips for Successful Wiping
Ensure you have a backup of any important data on your USB drive before wiping it. The process can't be undone, and getting the info back may be impossible.
- Choose the Right File System: Pick a file system that works for you. APFS or Mac OS Extended is best for use on a Mac only. ExFAT is a good choice because it works on plenty of different platforms.
- Use Secure Erase Options: If data security is a concern, use secure erase options to ensure data can't be recovered.
- Verify After Erasing: After cleaning, you should always check the drive to ensure it's properly formatted and working.
If there are issues while wiping the SanDisk USB drive, there might be issues with the drive or the permissions for the drive is not configured properly. Here are the troubleshooting steps to wiping SanDisk USB drive:
🛠️ 1. Run Disk Utility First Aid
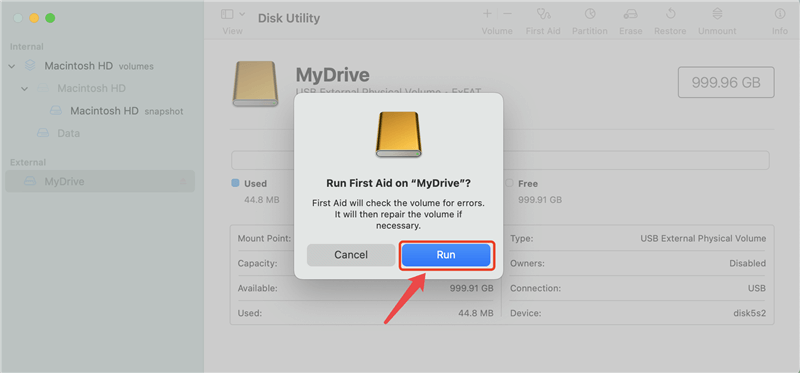
If the problems with SanDisk USB drive are caused by Disk Utility formatting it on a Mac, you should run the "First Aid" tool across the drive. Here are the steps you need to take to complete this task:
Step 1: In Finder on your Mac, move your mouse over "Applications" and look for "Disk Utility" in the list that appears next to the "Utilities" folder. Start it up and pick out the USB drive you want to delete. Find the "First Aid" button on the top menu as you choose the drive.

Step 2: A pop-up will ask for approval of the process. To find problems on the drive, click "Run" to start the first aid. Once it finds mistakes, it will fix them within a certain time, mostly based on the drive size.
🛠️ 2. Get permission to Wipe SanDisk USB
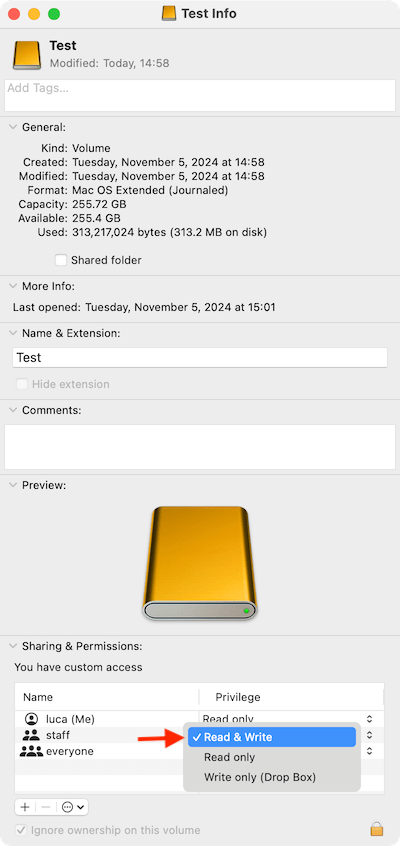
If you can't delete the USB drive on a Mac, you might not have the right access. If you do not have enough rights, you need to get them to delete a USB on a Mac. Here is an easy, step-by-step process.
Step 1: Right-click on the USB and pick "Get Info." Open "Sharing and Permissions" and lock it to confirm.
Step 2: Change the privilege to the drive for your account. Also pick the"Ignore ownership on this volume."
Conclusion
A SanDisk USB drive can be easily erased on a Mac using Disk Utility, Terminal, or other data erasure tools. Each method has its perks and can help you delete files safely and correctly. Following this guide, you can ensure your USB drive is properly erased, reset, and ready to be used again. These steps will make it easy to reach your goal, whether you're fixing speed problems, getting the drive ready to sell, or just starting over.

DoYourData Super Eraser for Mac
DoYourData Super Eraser for Mac is a 100% safe, powerful and easy-to-use data erasure program. It offers certified data erasure standards including Peter Gutmann, U.S. Army AR380-19, DoD 5220.22-M ECE to permanently erase data from Macs and external devices, making data recovery be impossible.