Quick Navigation:
- Recover Lost Data from a RAW Drive on Ma Before Formatting
- Format a RAW Drive on Mac Using Disk Utility
- Format a RAW Drive on Mac Using Terminal (Optional)
- Optimize the Drive and Fix Issues
- Conclusion
When a drive appears as RAW on a Mac, it indicates that the drive's file system is either corrupted or unrecognized by macOS. This can be frustrating, especially if you need to access important data or if you want to use the drive again. Formatting a RAW drive can resolve these issues by creating a new file system on the drive. In this guide, we will walk you through the process of formatting a RAW drive on a Mac, including preparation, step-by-step instructions, and troubleshooting tips.
A RAW drive is essentially a drive that macOS does not recognize because its file system is either missing or corrupted. This can happen for various reasons, such as sudden power failures, improper ejection, or drive malfunctions. The RAW status means that the drive is not formatted with a file system that macOS can understand, and as a result, you might see a prompt that asks you to format the drive when you try to access it.
Formatting a RAW drive can solve these issues by erasing the current file system and creating a new one. This process will remove all data on the drive, so it is crucial to back up any important information before proceeding. Let's dive into the steps required to format a RAW drive on your Mac.
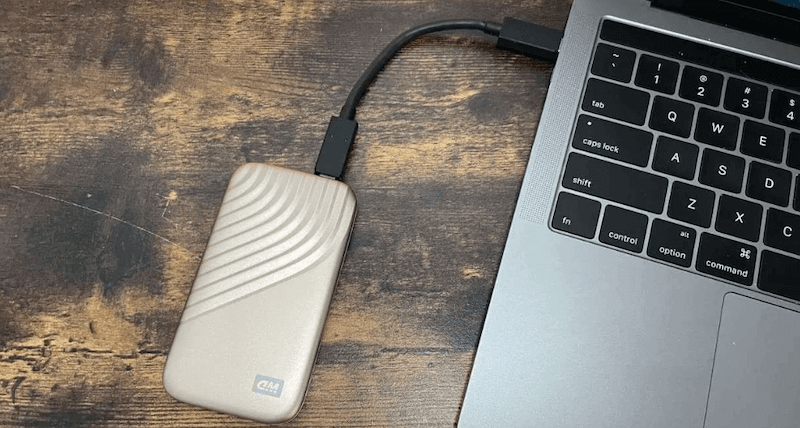
Recover Lost Data from a RAW Drive on Ma Before Formatting
Before you start formatting your RAW drive, it's essential to back up any data that you can. Formatting will erase all data on the drive, so if there is any recoverable data, you will need to save it elsewhere.
Mac data recovery software can help you deeply scan the RAW drive and export all existing files and lost files from the drive to your Mac or another drive.
Step 1. Download and install Do Your Data Recovery for Mac on your Mac, then connect the RAW drive to your Mac.
Do Your Data Recovery for Mac
- Recover deleted, formatted or lost data on Mac.
- Export data from RAW drive/inaccessible drive to Mac.
- Recover lost data from damaged drive on Mac.
Step 2. Open Do Your Data Recovery for Mac, from the disk list, find the RAW drive and select it.

Step 3. Click on Scan button to deeply scan the RAW drive and find all recoverable files including existing files, deleted/lost files, etc.

Step 4. Once the scan is completed, you can preview all recoverable files. Then select the wanted files, and click on Recover button to save them.

Even if you are planning to format the drive, it is a good practice to check its health before proceeding. macOS includes built-in tools that can help you assess the condition of your drive.
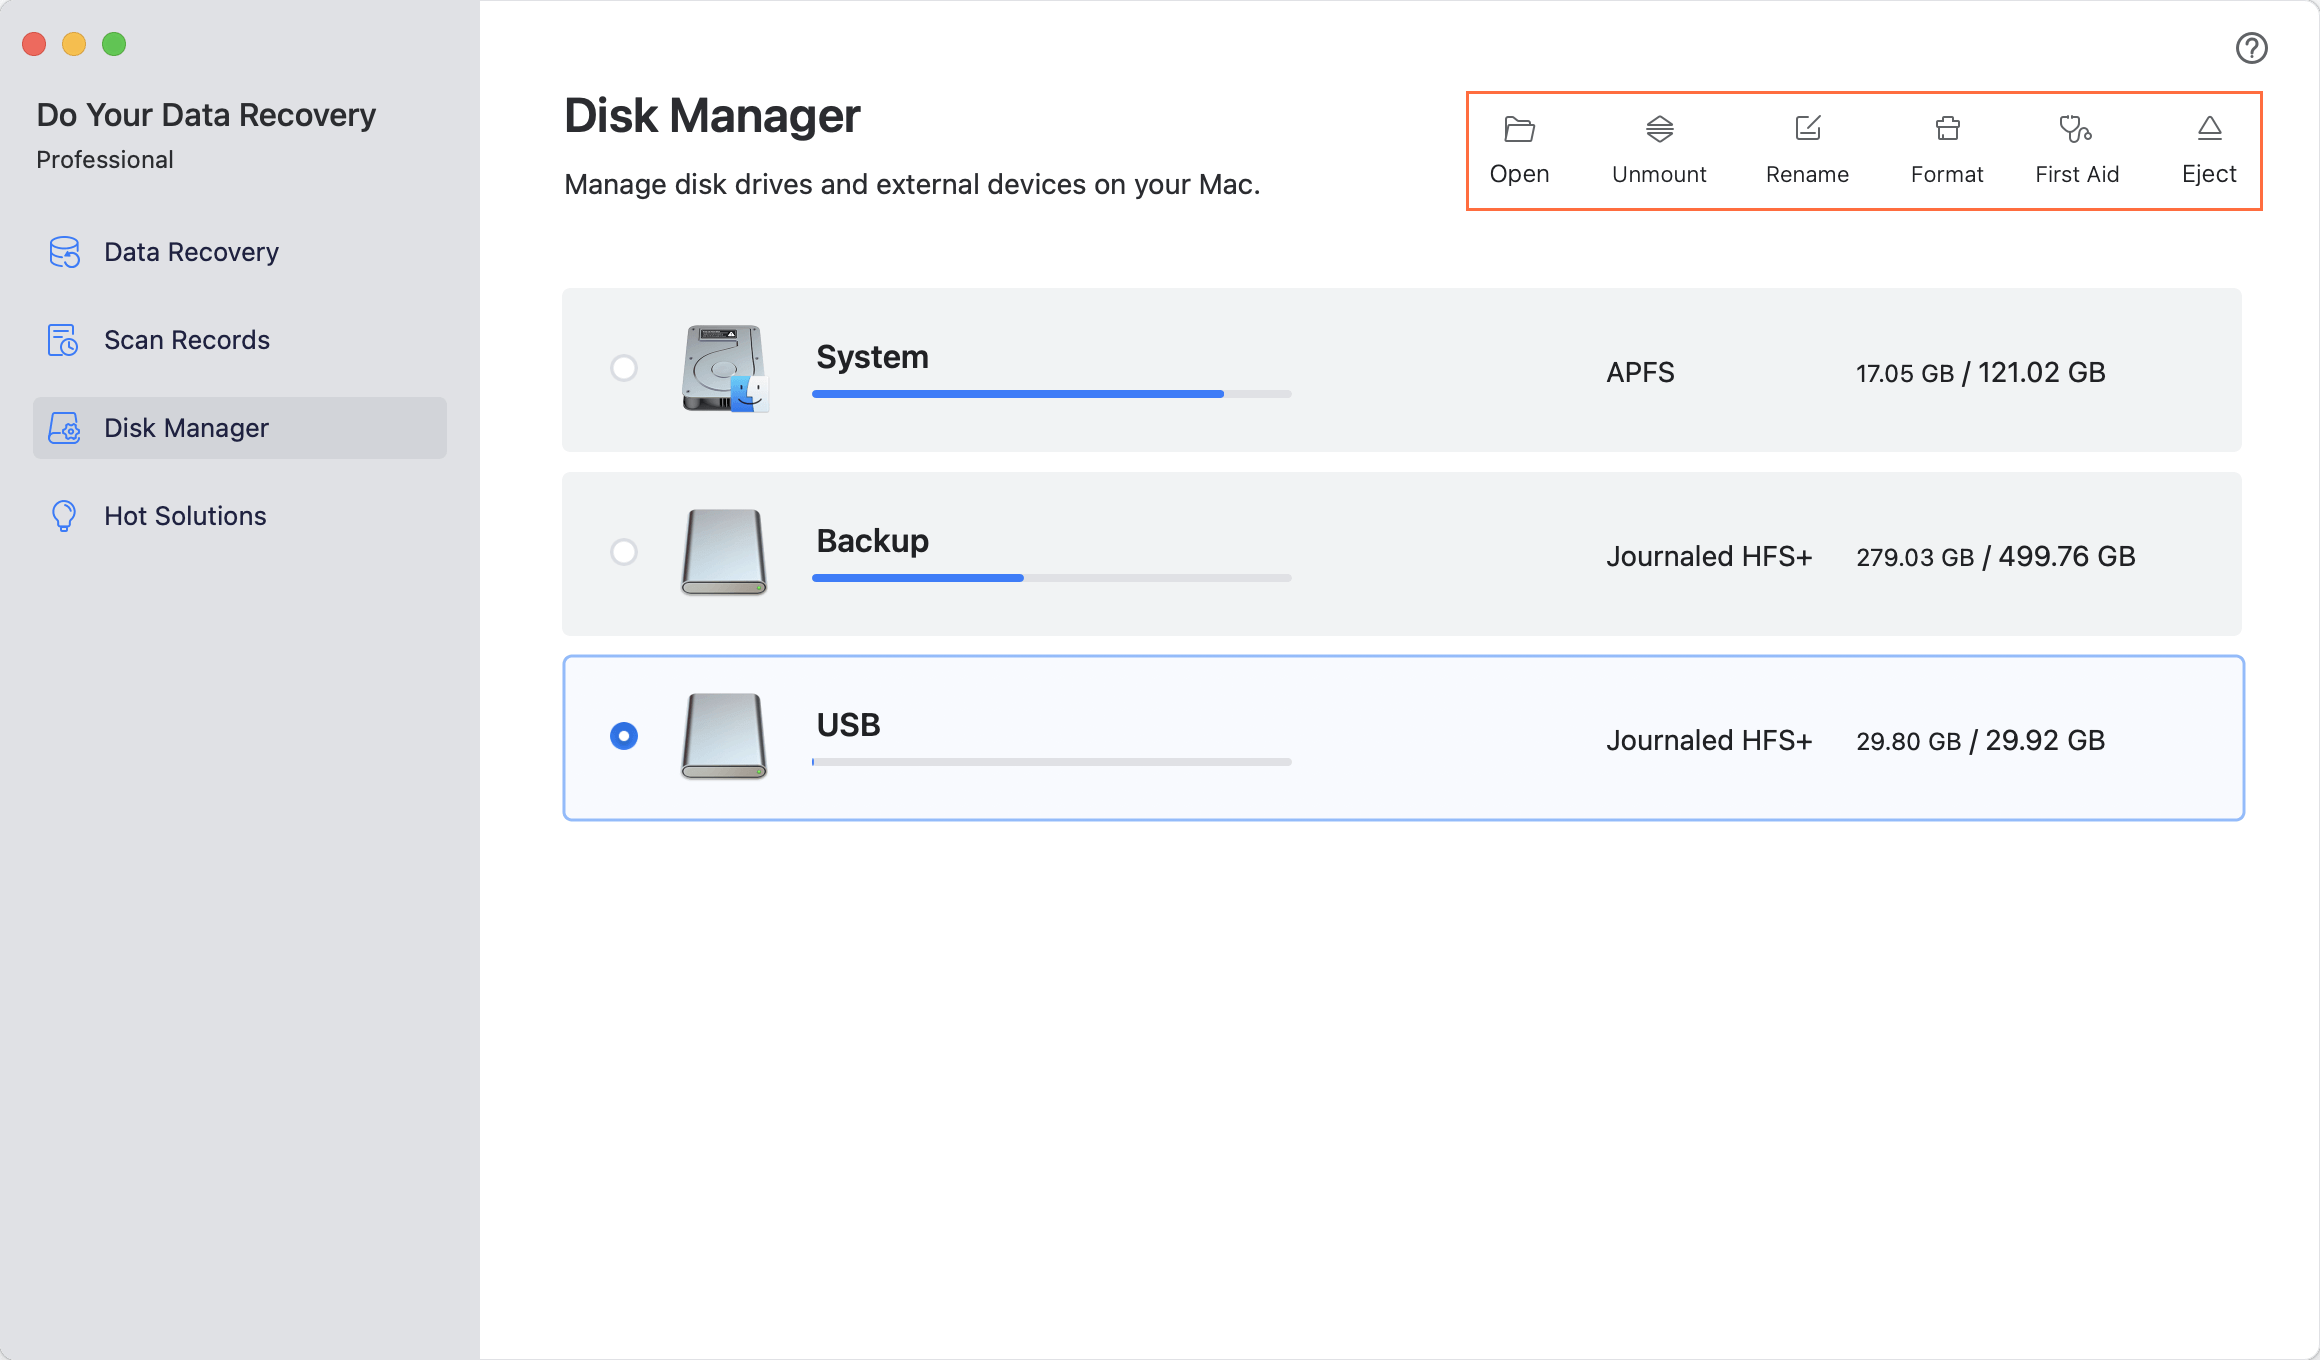
- Using Do Your Data Recovery for Mac: Choose Disk Manager, then select the RAW drive and click on First Aid button.
![Do Your Data Recovery for Mac]()
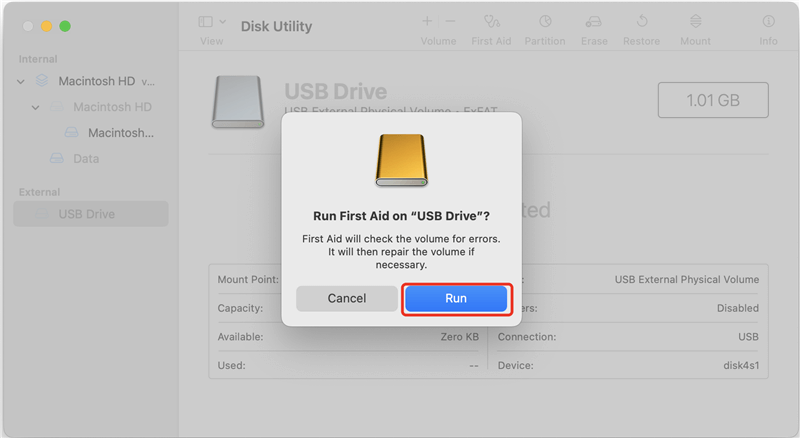
- Using Disk Utility: Open Disk Utility (found in Applications > Utilities) and select the RAW drive from the list. Click on "First Aid" and then "Run" to check for and repair any disk errors. If Disk Utility is unable to repair the drive, you might need to use other diagnostic tools or consider professional data recovery services.
![repair RAW drive on Mac]()
Format a RAW Drive on Mac Using Disk Utility
1. Open Disk Utility
Disk Utility is a built-in application in macOS (formerly OS X) that assists Mac users in managing their hard drives and storage devices. It provides an easy way to format a RAW hard drive or storage media. To use it, simply open the app, select the RAW drive or device you want to format, and click the "Erase" button. To begin formatting, you need to access Disk Utility, a macOS application used for managing disks and storage devices.
- How to Access Disk Utility: Click on the Finder icon in the Dock, select "Applications," then "Utilities," and double-click on "Disk Utility."
2. Select the RAW Drive
Once Disk Utility is open, you need to locate the RAW drive you wish to format.
- Identifying the RAW Drive: In the left sidebar, you will see a list of connected drives. Look for the drive labeled as RAW. It may not have a recognizable name or file system, so you might need to identify it based on its size and other characteristics.
3. Erase the Drive
With the RAW drive selected, you can now proceed to format it.
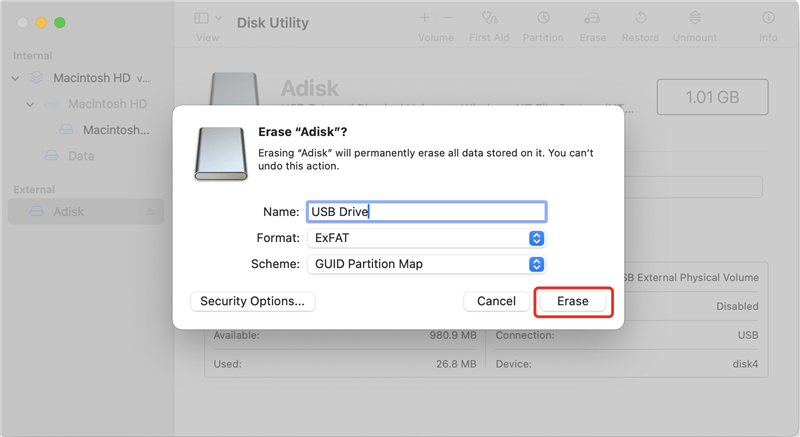
- Steps to Erase the Drive: Click on the "Erase" button at the top of the Disk Utility window. You will be prompted to provide information about the new file system and name for the drive.
- Selecting the Correct Format: Choose the appropriate format based on your needs:
- APFS (Apple File System): Recommended for macOS 10.13 or later, especially for SSDs.
- Mac OS Extended (Journaled): Suitable for older macOS versions or traditional HDDs.
- ExFAT: Ideal if you need to use the drive with both macOS and Windows systems.
- Confirm and Complete: After selecting the format and naming the drive, click "Erase" to begin the formatting process. Disk Utility will erase the drive and apply the new file system. This process can take a few minutes, depending on the size of the drive.
4. If Formatting Fails
If Disk Utility is unable to format the drive, you may encounter error messages. This could indicate that the drive is severely corrupted or has physical damage. In such cases, you may need to use alternative methods or seek professional help.
Format a RAW Drive on Mac Using Terminal (Optional)
For users comfortable with command-line interfaces, Terminal provides a powerful way to format a drive.
1. Open Terminal
- Accessing Terminal: Open Finder, go to "Applications," then "Utilities," and double-click on "Terminal."
2. List Disks
You need to identify the RAW drive using Terminal commands.
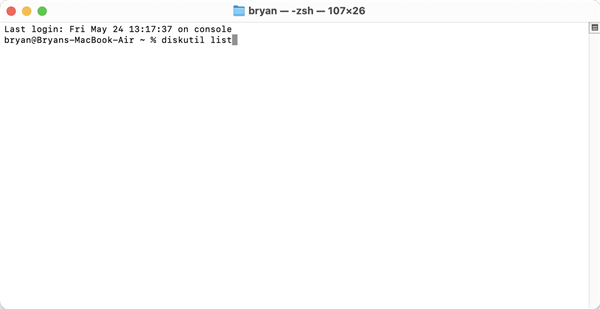
Command to List All Disks: Type the command diskutil list and press Enter. This will display a list of all connected disks and their partitions.
3. Format the Drive
Formatting Command: Use the diskutil eraseDisk command followed by the desired format and the disk identifier. For example:
diskutil eraseDisk [File System] [NewDriveName] /dev/diskX
Replace JHFS+ with your chosen format (e.g., APFS or ExFAT), "NewDriveName" with your preferred drive name, and /dev/diskX with the correct disk identifier from the previous command.
4. Explanation of Command Parameters
- eraseDisk: The command used to format the entire disk.
- File System: The file system format (e.g., APFS for newer macOS versions).
- "NewDriveName": The name you want to assign to the formatted drive.
- /dev/diskX: The identifier of the disk you want to format.
Optimize the Drive and Fix Issues
Post-Formatting Steps
1. Verify the Drive
Once the formatting process is complete, it's important to check that the drive is functioning correctly.- How to Check: Open Finder and look for the newly formatted drive under "Locations." Try creating and deleting a test file to ensure the drive is working properly.
2. Reinstall Necessary Software
If the drive contained any software or applications before formatting, you will need to reinstall them. Follow the same installation procedures you used initially.
Troubleshooting
1. Common Issues and Solutions
Drive Still Appears as RAW
If, after formatting, the drive continues to display as RAW, it could be a sign of underlying physical damage or severe corruption that formatting alone cannot fix. Here are some steps to address this issue:
- Run Disk Utility's "First Aid": To use it, open Disk Utility, select the problematic drive, and click on the "First Aid" tab. Click "Run" to start the repair process. If Disk Utility identifies and fixes errors, attempt formatting the drive again.
- Use Specialized Recovery Tools: If "First Aid" does not resolve the issue, consider using advanced data recovery or disk repair tools. Some of these tools also offer features to fix file system errors or reformat drives.
- Check Physical Connections: Ensure that the drive is properly connected to your Mac. Loose or damaged cables can cause connectivity issues. Try using a different cable or port to rule out connection problems.
- Consult Professional Help: If the drive is still unresponsive, it may have significant hardware damage. In such cases, consult a professional data recovery service to assess and potentially repair the drive.
Formatting Errors
Encountering errors during the formatting process can be frustrating, but there are several steps you can take to resolve these issues:
- Verify Disk Identifier: Use the diskutil list command in Terminal to double-check the correct identifier for the drive you want to format.
- Check Format Type: Make sure you are selecting the appropriate file system format for your needs. For example, APFS is suitable for newer macOS versions and SSDs, while Mac OS Extended (Journaled) is better for older systems and HDDs. Choosing an incompatible format can cause errors during the formatting process.
- Verify Drive Health: If the drive has bad sectors or physical damage, it might cause formatting errors. Use Disk Utility's "First Aid" or third-party diagnostic tools to check the drive's health. If errors are found, you might need to replace the drive.
- Ensure Proper Drive Connection: Try connecting the drive to a different port or using another cable to eliminate connection issues.
- Restart Your Mac: Restart your Mac and attempt the formatting process again.
- Check for System Updates: Go to "System Preferences" > "Software Update" to check for and install any available updates.
2. When to Seek Professional Help
If you are unable to resolve the issues on your own, it might be time to seek help from data recovery professionals or technicians. They have specialized tools and expertise to handle complex drive problems.
Conclusion
Formatting a RAW drive on a Mac involves several steps, from preparing the drive and backing up data to using Disk Utility or Terminal for the actual formatting. By following this guide, you can successfully format a RAW drive and restore its usability. Remember to back up your data regularly and perform routine checks to maintain your drives' health.
With these steps, you should be well-equipped to handle a RAW drive and get it back to working condition. Whether you use Disk Utility for a graphical approach or Terminal for a command-line method, you can resolve drive issues and regain access to your storage devices.
If you have lost data, you can use a Mac data recovery app - such as Do Your Data Recovery for Mac to help you unformat the drive and get all lost data back.
Do Your Data Recovery for Mac
Do Your Data Recovery for Mac, one of the best Mac data recovery software, can help you easily and completely recover deleted, formatted or lost files from Mac HDD/SSD, external HDD/SDD, USB drive, memory card, digital camera, or other storage devices.
